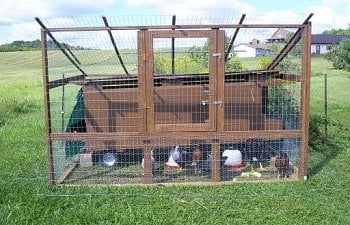
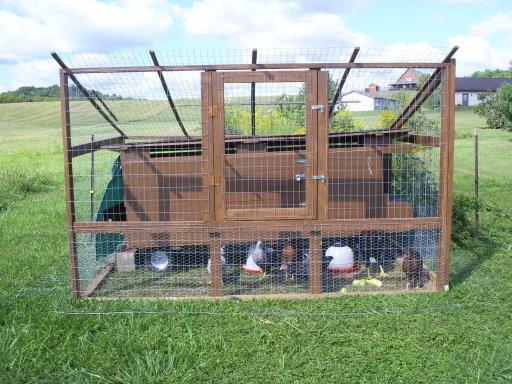
Uzuri's Chicken Tractor-Trailer
A work in progress. (Both the page, and the tractor!)
While farming runs in the family, this is my first time with chickens (or really, any livestock) of my own. We won't count the ducks I had when I was two")
This, in combination with the fact that I like to make easy things difficult, resulted in what I like to call the "chicken tractor trailer" or the "chicken double-wide".
The Problem
In real life I'm a computer programmer, and that means I solve problems. So it's no surprise that I looked at my chicken housing as a "problem" to be solved.
The problem: build a home for chickens that fits all these parameters:

So when're you gonna stop jawin' and build my house, you lazy human?Planning
I went through a long planning stage before the chicks even came (so long and involved, in fact, that I almost forgot to plan my brooder!). I wasted a ton of graph paper on plans including a gargantuan traditional A-frame tractor, tractors that looked like exceptionally large wheel-barrows, tractors on sledges, and a tractor with a low-profile detachable run. Each one presented its own issues, one of the -- pardon the pun -- largest being weight. Anything made to both house 7 chickens AND be strong enough to keep out a coon starts to get a little heavy.
Enter the garden cart. While pricing wheels, I discovered that it was far cheaper to purchase an entire half-ton rated cart and cannibalize the wheels and hitch. Cart in hand (well, in truck bed, anyway), the idea came to create a two piece mobile structure, with one half being basically a box on wheels and the other being a relatively lightweight (emphasis on "relatively") cage that went over the coop. Though the coop would weigh about 500 lbs, it was still possible for me to move it alone; the cage was a bit trickier, being awkward, but I'd since decided to allow the lawn tractor into the picture, which laughed at what to it was a puny couple hundred pounds.
I had my design; my vacation was 3 weekends away and my chicks were peeping in the garage. Crunch time.
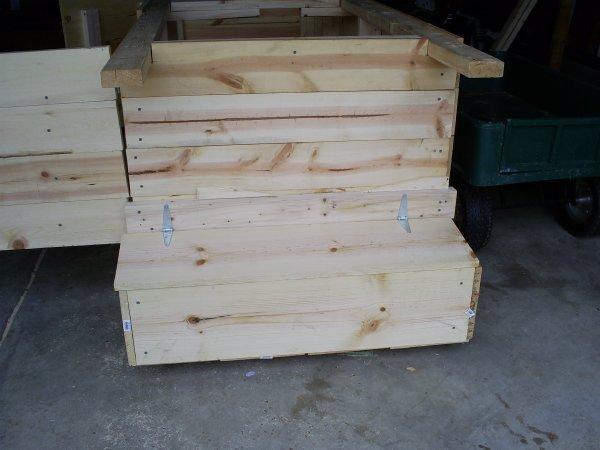
Coop before painting and general finishing. Note the following:
Building
So the next Saturday morning I grabbed my Dad and took the truck out for supplies. Naturally we redesigned the whole mess while in the lumber aisle at Lowes, because, you know, flying by the seat of your pants is so much better than sticking to what you'd originally planned.
All in all, the coop itself is simply a box on wheels. We built the floor out first by screwing 4 10" x 1" x 9' boards to supporting 2" x 4" boards -- these 2 bys were to be the supports for the wheel-bases from the cart set, 2 near one end, 2 near the other, and one in the middle for good luck. The wheels were set on top of these supports and bolt-holes drilled.
On top of this floor we built a frame for the coop -- 8 2" x 4"s set about equal distances apart starting at one end and ending 1' from the other end. Why the extra foot of floor? For the nesting box, of course! The "coop" is 8' long, with 1' of "extra" that's about 11" high and lidded.
Topping these wall studs are what started out as 2 10' 2" x 4". I say started out because originally these boards overhung the nesting box and also a foot out the pop-door side -- that side got sawn off (after rethinking my roofing; we'll get to that later), partly because I kept cracking my back on it. Ow. Cross-supports at both ends and in the middle round out the roof supports. Basic framing was done at the end of the nesting box as well.
The coop was sided with 1 by lumber, cut to fit the frame. Across the front the board were cut to allow for two doors, fitted to close just short of the wall studs. 2" x 4"s sized to the height of the coop were added on the door sides of the wall studs to prevent the doors from swinging inwards. The left door opens all the way to the floor, the right door was made to not include the lowest siding board. This allowed for the lowest board on that side to run all the way from the left door through the nesting box to avoid having a tiny 10" x 11" siding board at that spot. The chickens, especially Miss Bossy Beak, like to sit on this board when I come to check for eggs.
The nesting box lid is made from the same material as the siding. A 2" x 4" set atop the bottom siding board is just the right size to allow the lid to have a bit of a slope. The lid-supports were cut by hand (a nightmare) to block holes and hopefully keep out rats and mice.
At this point the coop got rolled on its side and the bottom primed and painted. The wheels were then bolted on with carriage bolts and nuts with locking washers (this was modified later; look for the section below on "design changes on the fly"!). Then the whole thing was turned back upright primed, and painted.
Once the paint dried, hardware cloth was rolled out across the entire top of the coop and secured with a double roll of poultry staples (the "bent nail thingies" for those of you who aren't sure what I'm talking about.) The idea here was that I could build a roof over this without having to worry about filling angled areas with wire or wood. Squares are nice. On the two long sides additional 10' two-by-fours were screwed down tightly over the hardware cloth for extra reinforcement. I stapled cardboard over the inside entrance to the nesting box to keep the chicks from sleeping in there, and was done... for the time being.
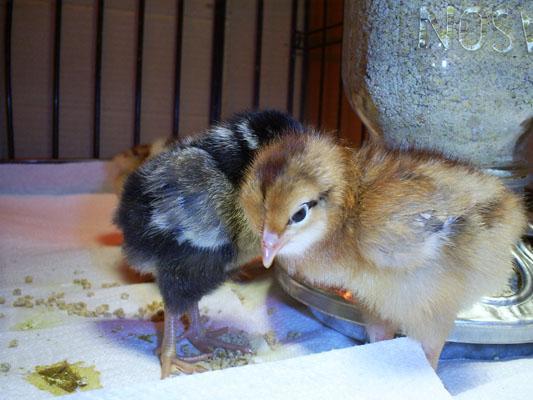
At this point I threw in two bags of horse-pellets and the chickens and went on vacation for a weekend. I needed it.
The Run
If the coop was simply a box on wheels, the run is nothing more than a large cage.
Built 6' x 10' with a 4' back elevation and 6' front (it was initially supposed to have a solid roof; discovering that our leftover roofing paper was about as effective as tissue paper shot that in the rump), the run was nothing but hacking together 2 x 4s and poultry-stapling on welded wire (both on the sides and as a hinged apron). The door is a half door, built 24" from the ground -- this is something of a feature and a disaster. I never, ever have to shoe chickens out of my way or chase them loose around the yard, but I've ended up with a wet crotch more than once. 18" or a foot might have given me the chicken-retention properties without requiring amazing body contortions to get inside.
Initially the idea with this run was to place the coop then tip the run over the coop and flat on the ground. to move to a new spot, tip the run up, move the coop, move the run, tip it down. A bit of effort. Ha! Too much effort! But it worked, sort of.
10 weeks after getting the chicks, I was ready to go. The coop still didn't have a roof, but a tarp and bungies was good enough for the moment, and out we went.
After two weeks of the tarp I was able to purchase enough boards to make a solid roof. Initially this was roofing-papered, but that was removed in favor of a tarp, which leaks less. Come spring, it's going to be tarped and papered, and if that doesn't work it's getting a dose of shingles as well. The roof is unattached, so that it can be jettisoned for weight reason while moving. To avoid blowing away, it's tied down to the coop with rope and eye-bolts.
Perhaps my favorite part of the whole tractor is the tarp "awnings" made to hang down from the roof. They can be dropped or raised in any number of ways depending on the weather, and are very useful.
Design changes on the fly!
Almost immediately my lack in engineering skills began to show.
The first difficulty was that the tip-over method of placing the run just wasn't working. It took three people to do it. So I locked up the chickens, got out the saw and claw hammer and hacked up a frame that looked like a cross-section of one of the short ends of the run. I removed the wire and one of the 2 x 4s from that end (the other 2 x 4, the bottom one, will come to haunt me later; read on) and bolted on the this new frame with carriage bolts and wing nuts. Remove the bolts and off comes the whole side of the run, allowing the coop to be pulled out sideways.
This actually turned out to be oddly effective, right up until a jolt over that bottom board ripped the rear wheels right off the coop.
Whoops.
I put up with this twice, then it was time to fix thing properly. The bottom board came off, and an extra 2 x 4 was called into temporary use while moving the run (it gets bolted into the upper two bolt holes on the open side when the "door" is off to hold the run in shape -- without it, the run would try to buckle and bend as it was moved). This 2 x 4 also acts as a nice handle -- with a person on either end, the run can actually be lifted up and quite easily dragged over the coop -- no more backing the coop into the run to park it.
This is where my tractor stands now. It works, but it's weird, and was something of an exercise in insanity
Things to come
Having exhausted my patience for wallowing in the mud while reattaching wheels, the chickens will be moving to a stationary lifestyle starting in April. I'll be building a piecemeal chicken moat -- the house stays, there's a lot I love about it, but the wheels are coming off and going back on the cart where they belong.
A work in progress. (Both the page, and the tractor!)
While farming runs in the family, this is my first time with chickens (or really, any livestock) of my own. We won't count the ducks I had when I was two
This, in combination with the fact that I like to make easy things difficult, resulted in what I like to call the "chicken tractor trailer" or the "chicken double-wide".
The Problem
In real life I'm a computer programmer, and that means I solve problems. So it's no surprise that I looked at my chicken housing as a "problem" to be solved.
The problem: build a home for chickens that fits all these parameters:
- Houses 7 chickens comfortably
- Is mobile (so we can take the sod off various parts of the yard)
- Can be moved by one person
- Allows for egg collection from the outside (for when Mom has to collect eggs for whatever reason)
- Protects against one of nature's smartest little predators, the raccoon
- Has access to all portions of the run and coop without requiring one to crawl through chicken manure on one's stomach
- Could be built in a short enough time so as to have the chicks in the coop for easy babysitting while I went on vacation
So when're you gonna stop jawin' and build my house, you lazy human?
I went through a long planning stage before the chicks even came (so long and involved, in fact, that I almost forgot to plan my brooder!). I wasted a ton of graph paper on plans including a gargantuan traditional A-frame tractor, tractors that looked like exceptionally large wheel-barrows, tractors on sledges, and a tractor with a low-profile detachable run. Each one presented its own issues, one of the -- pardon the pun -- largest being weight. Anything made to both house 7 chickens AND be strong enough to keep out a coon starts to get a little heavy.
Enter the garden cart. While pricing wheels, I discovered that it was far cheaper to purchase an entire half-ton rated cart and cannibalize the wheels and hitch. Cart in hand (well, in truck bed, anyway), the idea came to create a two piece mobile structure, with one half being basically a box on wheels and the other being a relatively lightweight (emphasis on "relatively") cage that went over the coop. Though the coop would weigh about 500 lbs, it was still possible for me to move it alone; the cage was a bit trickier, being awkward, but I'd since decided to allow the lawn tractor into the picture, which laughed at what to it was a puny couple hundred pounds.
I had my design; my vacation was 3 weekends away and my chicks were peeping in the garage. Crunch time.

Coop before painting and general finishing. Note the following:
- Floor supports at bottom, showing just under the flooring
- Wall studs visible through the open doors
- Full-length roof supports at top, before trimming
- Door-stops visible on either side of the stationary middle section
- Nest box and lid at right; angled lid supports not yet added.
So the next Saturday morning I grabbed my Dad and took the truck out for supplies. Naturally we redesigned the whole mess while in the lumber aisle at Lowes, because, you know, flying by the seat of your pants is so much better than sticking to what you'd originally planned.
All in all, the coop itself is simply a box on wheels. We built the floor out first by screwing 4 10" x 1" x 9' boards to supporting 2" x 4" boards -- these 2 bys were to be the supports for the wheel-bases from the cart set, 2 near one end, 2 near the other, and one in the middle for good luck. The wheels were set on top of these supports and bolt-holes drilled.
On top of this floor we built a frame for the coop -- 8 2" x 4"s set about equal distances apart starting at one end and ending 1' from the other end. Why the extra foot of floor? For the nesting box, of course! The "coop" is 8' long, with 1' of "extra" that's about 11" high and lidded.
Topping these wall studs are what started out as 2 10' 2" x 4". I say started out because originally these boards overhung the nesting box and also a foot out the pop-door side -- that side got sawn off (after rethinking my roofing; we'll get to that later), partly because I kept cracking my back on it. Ow. Cross-supports at both ends and in the middle round out the roof supports. Basic framing was done at the end of the nesting box as well.
The coop was sided with 1 by lumber, cut to fit the frame. Across the front the board were cut to allow for two doors, fitted to close just short of the wall studs. 2" x 4"s sized to the height of the coop were added on the door sides of the wall studs to prevent the doors from swinging inwards. The left door opens all the way to the floor, the right door was made to not include the lowest siding board. This allowed for the lowest board on that side to run all the way from the left door through the nesting box to avoid having a tiny 10" x 11" siding board at that spot. The chickens, especially Miss Bossy Beak, like to sit on this board when I come to check for eggs.
At this point the coop got rolled on its side and the bottom primed and painted. The wheels were then bolted on with carriage bolts and nuts with locking washers (this was modified later; look for the section below on "design changes on the fly"!). Then the whole thing was turned back upright primed, and painted.
Once the paint dried, hardware cloth was rolled out across the entire top of the coop and secured with a double roll of poultry staples (the "bent nail thingies" for those of you who aren't sure what I'm talking about.) The idea here was that I could build a roof over this without having to worry about filling angled areas with wire or wood. Squares are nice. On the two long sides additional 10' two-by-fours were screwed down tightly over the hardware cloth for extra reinforcement. I stapled cardboard over the inside entrance to the nesting box to keep the chicks from sleeping in there, and was done... for the time being.
At this point I threw in two bags of horse-pellets and the chickens and went on vacation for a weekend. I needed it.
The Run
If the coop was simply a box on wheels, the run is nothing more than a large cage.
Built 6' x 10' with a 4' back elevation and 6' front (it was initially supposed to have a solid roof; discovering that our leftover roofing paper was about as effective as tissue paper shot that in the rump), the run was nothing but hacking together 2 x 4s and poultry-stapling on welded wire (both on the sides and as a hinged apron). The door is a half door, built 24" from the ground -- this is something of a feature and a disaster. I never, ever have to shoe chickens out of my way or chase them loose around the yard, but I've ended up with a wet crotch more than once. 18" or a foot might have given me the chicken-retention properties without requiring amazing body contortions to get inside.
Initially the idea with this run was to place the coop then tip the run over the coop and flat on the ground. to move to a new spot, tip the run up, move the coop, move the run, tip it down. A bit of effort. Ha! Too much effort! But it worked, sort of.
10 weeks after getting the chicks, I was ready to go. The coop still didn't have a roof, but a tarp and bungies was good enough for the moment, and out we went.
After two weeks of the tarp I was able to purchase enough boards to make a solid roof. Initially this was roofing-papered, but that was removed in favor of a tarp, which leaks less. Come spring, it's going to be tarped and papered, and if that doesn't work it's getting a dose of shingles as well. The roof is unattached, so that it can be jettisoned for weight reason while moving. To avoid blowing away, it's tied down to the coop with rope and eye-bolts.
Perhaps my favorite part of the whole tractor is the tarp "awnings" made to hang down from the roof. They can be dropped or raised in any number of ways depending on the weather, and are very useful.
Design changes on the fly!
The first difficulty was that the tip-over method of placing the run just wasn't working. It took three people to do it. So I locked up the chickens, got out the saw and claw hammer and hacked up a frame that looked like a cross-section of one of the short ends of the run. I removed the wire and one of the 2 x 4s from that end (the other 2 x 4, the bottom one, will come to haunt me later; read on) and bolted on the this new frame with carriage bolts and wing nuts. Remove the bolts and off comes the whole side of the run, allowing the coop to be pulled out sideways.
This actually turned out to be oddly effective, right up until a jolt over that bottom board ripped the rear wheels right off the coop.
Whoops.
I put up with this twice, then it was time to fix thing properly. The bottom board came off, and an extra 2 x 4 was called into temporary use while moving the run (it gets bolted into the upper two bolt holes on the open side when the "door" is off to hold the run in shape -- without it, the run would try to buckle and bend as it was moved). This 2 x 4 also acts as a nice handle -- with a person on either end, the run can actually be lifted up and quite easily dragged over the coop -- no more backing the coop into the run to park it.
This is where my tractor stands now. It works, but it's weird, and was something of an exercise in insanity
Things to come
Having exhausted my patience for wallowing in the mud while reattaching wheels, the chickens will be moving to a stationary lifestyle starting in April. I'll be building a piecemeal chicken moat -- the house stays, there's a lot I love about it, but the wheels are coming off and going back on the cart where they belong.