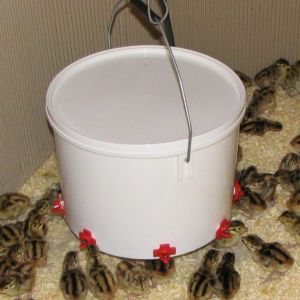
1. Get yourself a good plastic bucket. For women flock keepers I recommend getting a 2-1/2 gallon bucket (they're easier to bring back to the coop/run when you do rinse them out and refill).
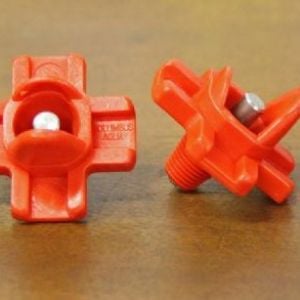
2. Purchase a set of horizontal water nipples...they look like these in the picture. You can get them online at many locations. HINT: Don't get the 'cup' style if you have freezing weather in winter months OR the 'vertical' ones...they freeze up on you.
3. Use a drill with a 3/8" bit (important..only use a 3/8" bit) and drill holes in your bucket about 1-1/2-2" up from the bottom, spacing them out. The ones I bought came in a pack of 5 so I just evenly spaced them around.
4. Then all you do is screw them in. HINT: be careful you screw them into the bucket straight-on. These are "self-tapping" water nipples and they DO make a water-tight seal. Keep the nipples good and straight (you'll see an indentation of sorts on each nipple where any drips could go..make sure they are straight and level.
5. Guess wha? After about 20 minutes you are DONE!
6. After filling your bucket put the bucket lid on the top but only 'snap' 1 or 2 snaps-worth...you have to have air or they won't work properly.
7. If your girls have never used water nipples before it is EASY to teach them. I sat in the coop and kept "clicking" the little stainless steel thingie. Out of curiosity one of my girls came up to it and tapped it herself and figured out "hey! There's water here girls!" It didn't take but 30 minutes or so and they were all using them. IMPORTANT: YOU MUST REMOVE all OTHER WATER SOURCES...all of them. That's the trick to it. Don't give in if your girls are timid to switch over, they will switch.
8. Now aren't you proud of yourself?