Ok so here is my Chicken Coop. Like most people I had never built one before and I was really limited on money, so I went ahead and picked up a whole bunch of pallets that I was able to get for free. This cut my costs down dramatically and put me at less then $100.00 dollars. The biggest cost was the wire and the roof. Ok so let's get into the fun part.
Before I built this coop, my wife and I spent countless hours pouring over different designs found here on BYC. We liked many of the different designs and wanted to incorporate several of them, like the storage space under the Hen House (which we later abandoned explained below), and the ability to open the Hen House doors completely to allow for easy cleaning. There are several other things as well. In the end I changed our plans last minute, because what my wife and I agreed upon, I was not able to build, so I changed it to what you will see below. However still was able to keep the general plans intact. Anyway here we go!
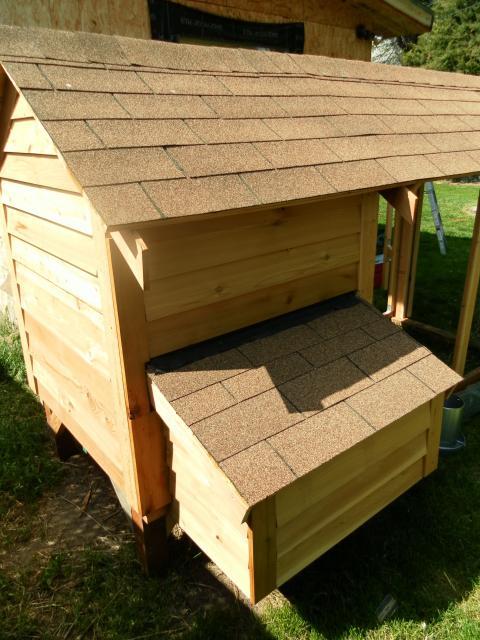
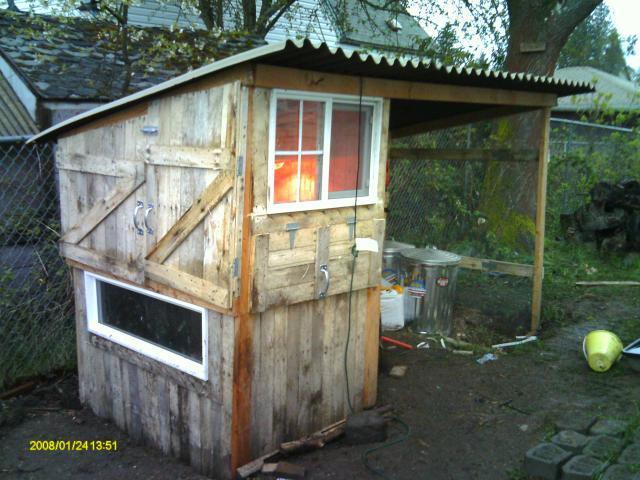
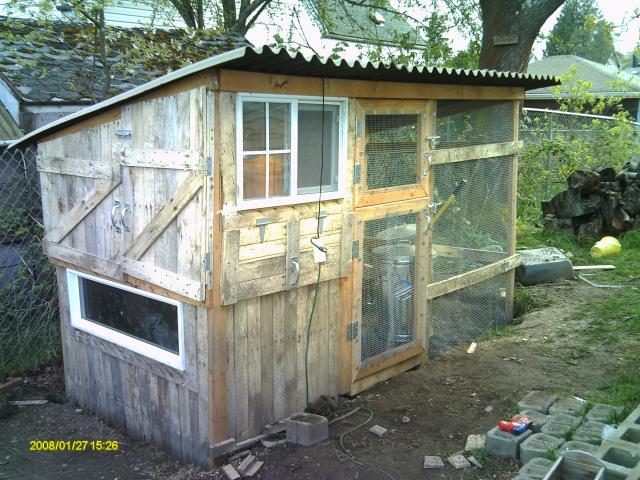
This image shows the Hen House basically complete. It is roughly 5'x4' The Run is 5'X10'.
The window in this image is an new double hung window I got for free from a friend and just turned it on it's side for added ventilation during the summer. (It is funny because if I am late to open the pop door all five of our ladies are looking out the window waiting for someone to set them free.)
One the wall facing the camera I added a set of double doors (my buddy helped me with them and kinda messed em up a bit, they work fine, but they are not centered properly. I had to give him a hard time about that, and will eventually fix them, but for now they work just fine. LOL). I did this for easy access to the Hen House, without having to go into the run to clean it. I have one side, latched closed from the inside and the other side latched to it from the exterior. The reason for this is so I have a bit more control of the chickens if I need to clean the Hen House while they are inside it. But I still have the ability to open both doors for easy cleaning.
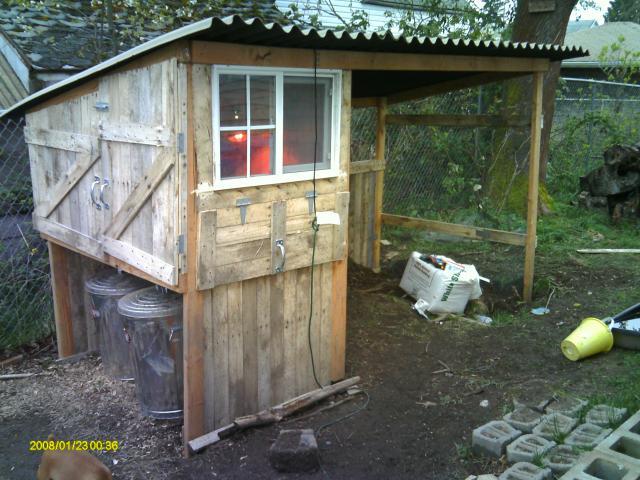
I used corrugated roofing for the entire coop, as it was fairly cheap and mostly maintenance free. This Image also shows the Garbage Cans, which we house our Pellets and Cracked Corn in. We were going to use that space as storage, but decided against it, because there was not really enough room on top, so we changed our plans.
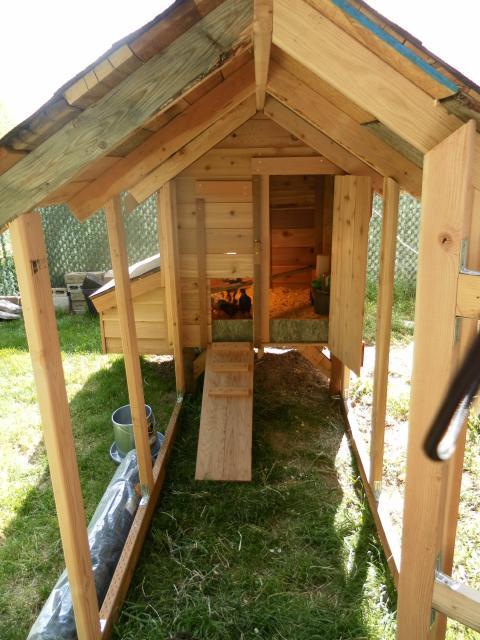
In this picture you can see the inside of the Hen House. This is looking at the same window as you can see in the first picture.
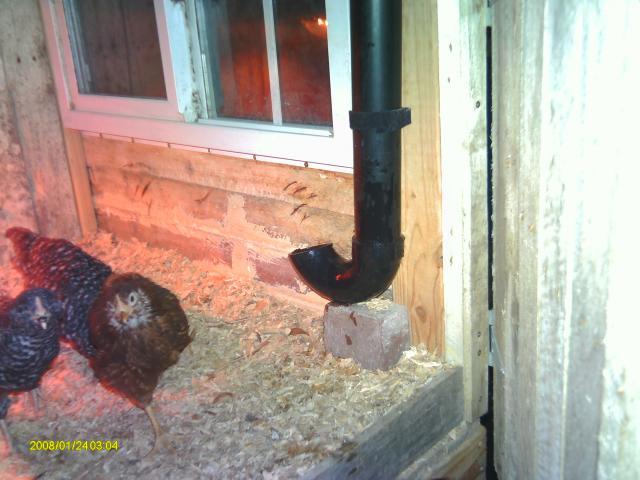
I have an Auto Waterer inside the Hen House as well as a waterer in the Run. No food in the Hen House, but I wanted to make sure they have access to water whenever they need it.
I have not added the nesting boxes yet, which I am still debating on location. I originally wanted to place the nesting boxes inside the coop under the window, (You can see a handle and a couple of hinges for a door in the first picture) where we could reach in and pull out the eggs without opening the main doors, but I was told by a good friend of mine that the chickens like it dark so that may not work. If I close up the boxes then of course they will roost on top and I will have a large mess on my hands, I can't slope the roof because then it will hide the window, so I may add the boxes to the run side of the hen house where I have the door to the run so I just have to open the door and reach into to the nesting boxes, but I am not sure if I like that or not. I may just deal with the mess so I can put the boxes where I want them.
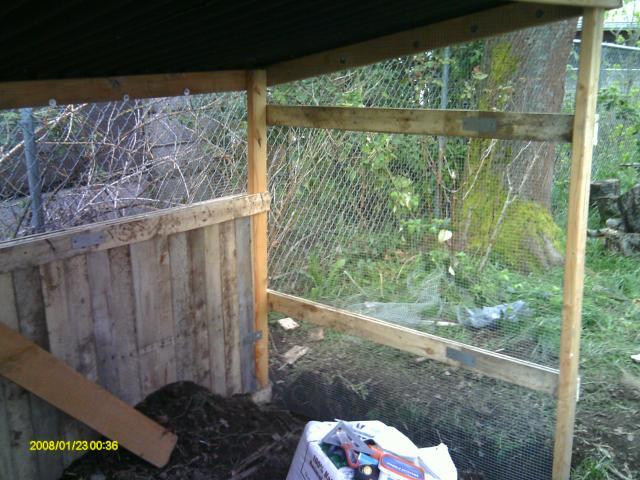
This Image shows a bit of the back of the run and the wall I built out of the Pallets. The wall was because our property line ends just on the other side and we don't really have any control over what goes on there so we wanted to protect the ladies from any potential issues, that and I think it looks really nice actually.
Also in this picture you will notice that the wall on the left has two rows of pallets, these were placed here, because my wire was not tall enough to cover the entire wall with one pass, so I pinched the wire between two panels at both ends of the wire, to protect from snags and to lock it into place. Also it seems to add a nice touch to the walls of the run.
Here you can see the refurbished storage space into what we like to call, "The Cave". I added another window (which I got for free from the same friend) to shed some light into the cave and to discourage egg laying within it. Again used the pallets to close in the cave.
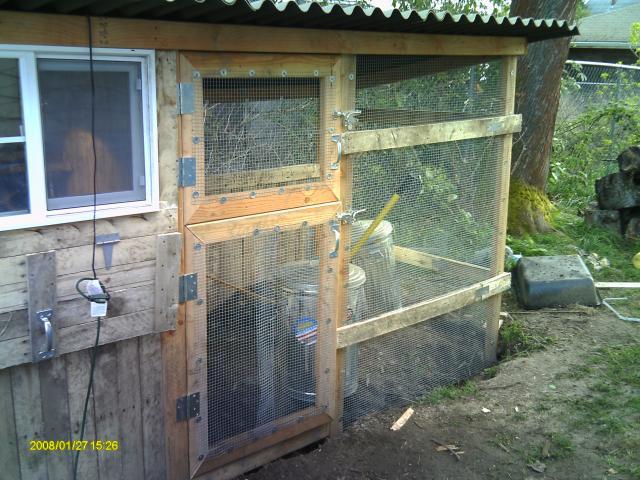
Here you can see the run is pretty much done. Again used the pallets to pinch the wire and to give it a nice even cosmetic look to the wire walls of the run. I will explain the door in the next picture. Because the next picture will explain it all. LOL
In this picture you can see the door I built to get into the run. I decided on the French door look because I have some wonderful dogs who would like to "Play" with the Chickens and I don't want to run the risk of them getting into the run when I toss in goodies. Also it seems to fit nicely with the look of the Wire Walls.
Here is the mostly finished coop. I buried the Wire and pallets about a foot into the ground, because my dogs like to dig sometimes, and if it turns out that they are digging a lot I will then lay down a layer of the wire mesh under the ground about 6" deep and cover it with dirt, that will eliminate any further problems of digging.
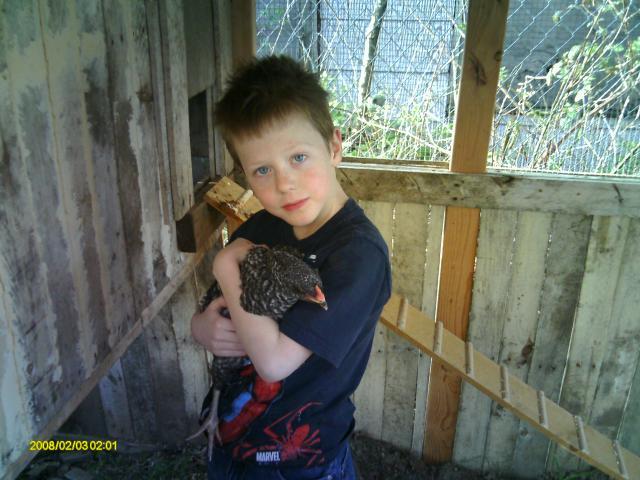
And here is one of the Ladies, a Plymouth Barred Rock, and my boy inside the run you can see the pop door just to the left and rear of them. My ramp is a bit steep but the chickens seem to navigate it just fine.
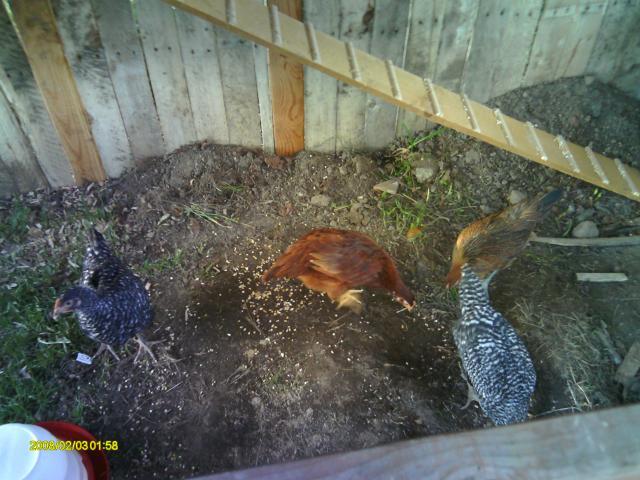
And here are 4 of the 5 ladies enjoying a little Cracked Corn and for the first time their new Run. The only Chicken not shown is another Road Island Red, she was hesitant about coming out of the Hen House.
So that is it. I have been thinking a lot about what I would do differently and the only thing I can come up with is having done a bit more research on the Nesting boxes and light, but really other then that everything turned out really nice and I am very happy with the design and the cost. I spent roughly $100.00 dollars because of the Roof and wire mesh mostly, otherwise I used a lot of pallets and only bought new 2x4's for the actually supporting structures and the roof. Heck I even used the pallets for the floor of the Hen House. Anyway I hope you like it.
Before I built this coop, my wife and I spent countless hours pouring over different designs found here on BYC. We liked many of the different designs and wanted to incorporate several of them, like the storage space under the Hen House (which we later abandoned explained below), and the ability to open the Hen House doors completely to allow for easy cleaning. There are several other things as well. In the end I changed our plans last minute, because what my wife and I agreed upon, I was not able to build, so I changed it to what you will see below. However still was able to keep the general plans intact. Anyway here we go!
This image shows the Hen House basically complete. It is roughly 5'x4' The Run is 5'X10'.
The window in this image is an new double hung window I got for free from a friend and just turned it on it's side for added ventilation during the summer. (It is funny because if I am late to open the pop door all five of our ladies are looking out the window waiting for someone to set them free.)
One the wall facing the camera I added a set of double doors (my buddy helped me with them and kinda messed em up a bit, they work fine, but they are not centered properly. I had to give him a hard time about that, and will eventually fix them, but for now they work just fine. LOL). I did this for easy access to the Hen House, without having to go into the run to clean it. I have one side, latched closed from the inside and the other side latched to it from the exterior. The reason for this is so I have a bit more control of the chickens if I need to clean the Hen House while they are inside it. But I still have the ability to open both doors for easy cleaning.
I used corrugated roofing for the entire coop, as it was fairly cheap and mostly maintenance free. This Image also shows the Garbage Cans, which we house our Pellets and Cracked Corn in. We were going to use that space as storage, but decided against it, because there was not really enough room on top, so we changed our plans.
In this picture you can see the inside of the Hen House. This is looking at the same window as you can see in the first picture.
I have an Auto Waterer inside the Hen House as well as a waterer in the Run. No food in the Hen House, but I wanted to make sure they have access to water whenever they need it.
I have not added the nesting boxes yet, which I am still debating on location. I originally wanted to place the nesting boxes inside the coop under the window, (You can see a handle and a couple of hinges for a door in the first picture) where we could reach in and pull out the eggs without opening the main doors, but I was told by a good friend of mine that the chickens like it dark so that may not work. If I close up the boxes then of course they will roost on top and I will have a large mess on my hands, I can't slope the roof because then it will hide the window, so I may add the boxes to the run side of the hen house where I have the door to the run so I just have to open the door and reach into to the nesting boxes, but I am not sure if I like that or not. I may just deal with the mess so I can put the boxes where I want them.
This Image shows a bit of the back of the run and the wall I built out of the Pallets. The wall was because our property line ends just on the other side and we don't really have any control over what goes on there so we wanted to protect the ladies from any potential issues, that and I think it looks really nice actually.
Also in this picture you will notice that the wall on the left has two rows of pallets, these were placed here, because my wire was not tall enough to cover the entire wall with one pass, so I pinched the wire between two panels at both ends of the wire, to protect from snags and to lock it into place. Also it seems to add a nice touch to the walls of the run.
Here you can see the refurbished storage space into what we like to call, "The Cave". I added another window (which I got for free from the same friend) to shed some light into the cave and to discourage egg laying within it. Again used the pallets to close in the cave.
Here you can see the run is pretty much done. Again used the pallets to pinch the wire and to give it a nice even cosmetic look to the wire walls of the run. I will explain the door in the next picture. Because the next picture will explain it all. LOL
In this picture you can see the door I built to get into the run. I decided on the French door look because I have some wonderful dogs who would like to "Play" with the Chickens and I don't want to run the risk of them getting into the run when I toss in goodies. Also it seems to fit nicely with the look of the Wire Walls.
Here is the mostly finished coop. I buried the Wire and pallets about a foot into the ground, because my dogs like to dig sometimes, and if it turns out that they are digging a lot I will then lay down a layer of the wire mesh under the ground about 6" deep and cover it with dirt, that will eliminate any further problems of digging.
And here is one of the Ladies, a Plymouth Barred Rock, and my boy inside the run you can see the pop door just to the left and rear of them. My ramp is a bit steep but the chickens seem to navigate it just fine.
And here are 4 of the 5 ladies enjoying a little Cracked Corn and for the first time their new Run. The only Chicken not shown is another Road Island Red, she was hesitant about coming out of the Hen House.
So that is it. I have been thinking a lot about what I would do differently and the only thing I can come up with is having done a bit more research on the Nesting boxes and light, but really other then that everything turned out really nice and I am very happy with the design and the cost. I spent roughly $100.00 dollars because of the Roof and wire mesh mostly, otherwise I used a lot of pallets and only bought new 2x4's for the actually supporting structures and the roof. Heck I even used the pallets for the floor of the Hen House. Anyway I hope you like it.
Last edited: