Baumshell28
Songster
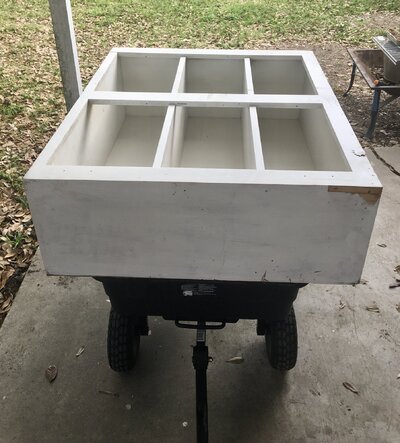
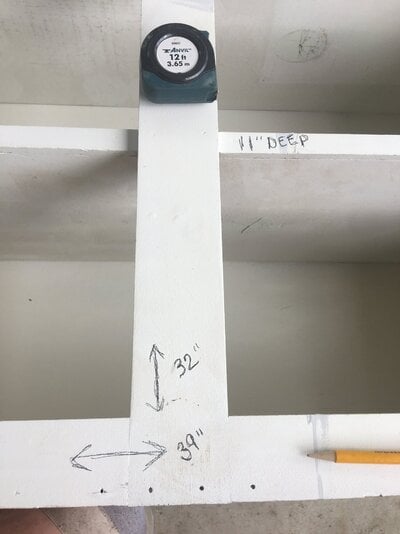
I want a raised planter box for an herb garden. I’ve been stressing over how I would go about building one myself. Some things get hard & complicated since I’m wheelchair bound. I can’t afford anything online...even used ones! As I was internet surfing for ANY way to do this, I realized that when we bought the house, the first room we stripped down for remodel was the kitchen. I had wayyy too much cabinetry on every single wall, so...I pulled the uppers off one wall & have been passively using them in my art studio as canvas storage & drying areas! What do y’all think? Each corner, and the middle will be supported by cinder block “legs”.
I’m catching any advice y’all are throwing! GO!!
I’m catching any advice y’all are throwing! GO!!

") I’m looking forward to seeing the finished product!
I’m looking forward to seeing the finished product!
