- Jul 4, 2008
- 2
- 0
- 7
Having finally finished my backyard chook shed I thought I would post some pictures. I got lots of tips from this site, thanks for the inspiration. Overall I am pretty happy with the result although the real test will be in two weeks when the chooks arrive! My number one tip is to do lots of planning before building. I think it took me twice as long to plan the shed as it did to build it. I did not have alot of experience in building things but common sense seemed to work out.
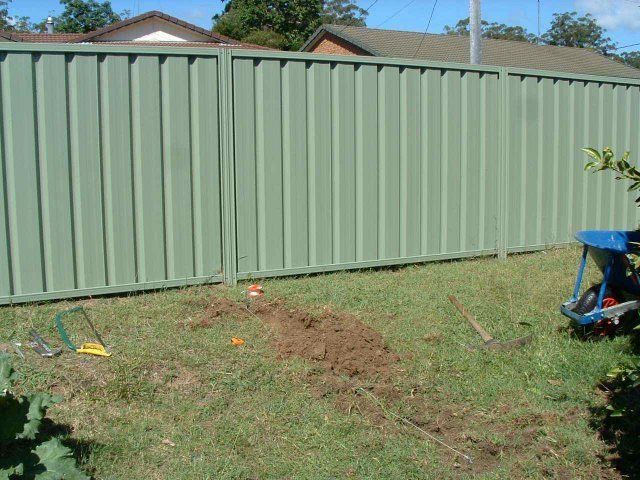
Here is the site just as I began to dig the footings. It is a bit close to the back fence (at least the council regs thinks so!) but we back onto a lane so should not be a problem. I wanted to put the shed in this location as it tucked behind an orange tree.
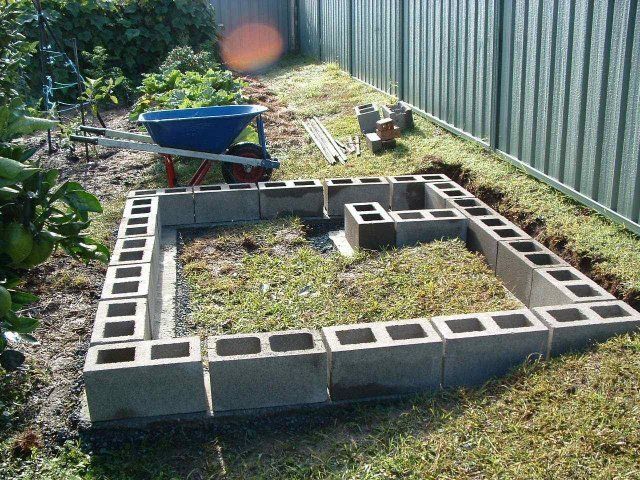
After digging a level trench I put down a concrete footing. Once dry I laid a layer of concrete blocks and filled them with concrete. Its a bit of overkill for a chook shed but I wanted to do it once, and do it properly. I don't expect to have problems with foxes anyway! To anchor the frame I sunk some coach bolts head end down into the concrete fill leaving about 3 inches of thread sticking out.
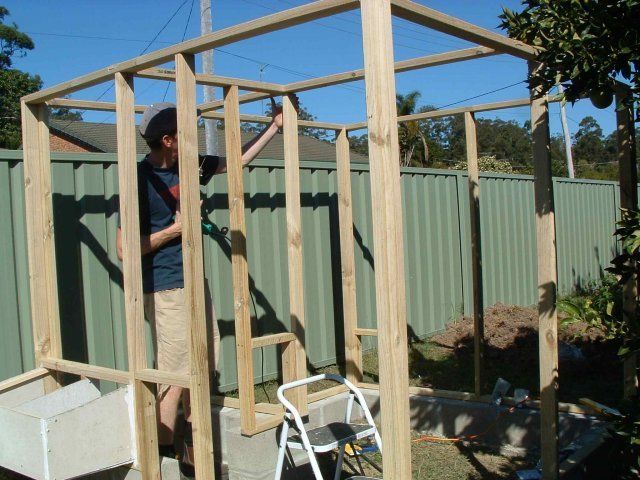
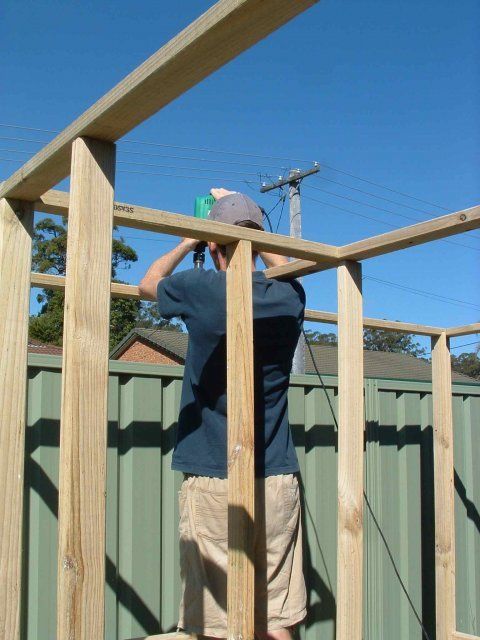
Next part was the frame which I made out of 35 x 70mm treated pine. I prefabricated all the frames in my garage and put it together with screws. Again, its all a bit overdone.
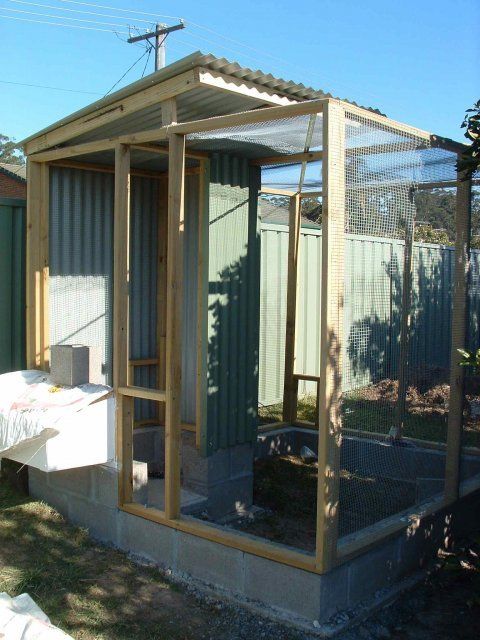
Next was the colourbond panels to cover in the roosting area. The climate here is mild all year round so no need for doors on this area. Roof is on a slant as I will eventually get a gutter and hook it up to the tank for the auto waterer. Colourbond matches the fence which helps to make the shed less intrusive.
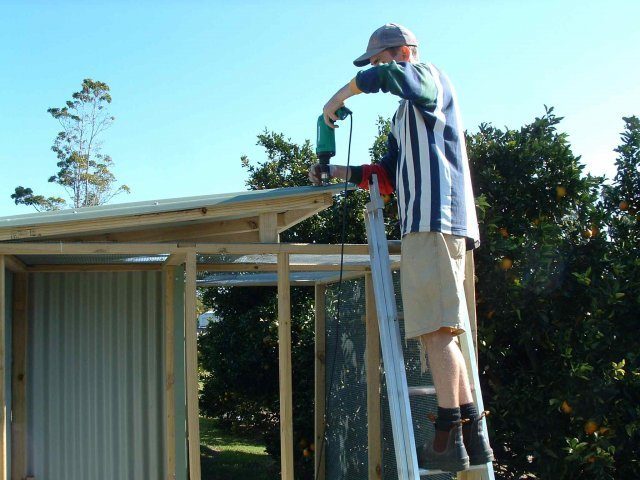
Next was the wire, I used medium aviary mesh fixed with galvanised staples. I had use two widths on all sides, I just joined them with gal wire twists and a single run of wire weaved through both bits. Its not perfectly smooth but no holes.
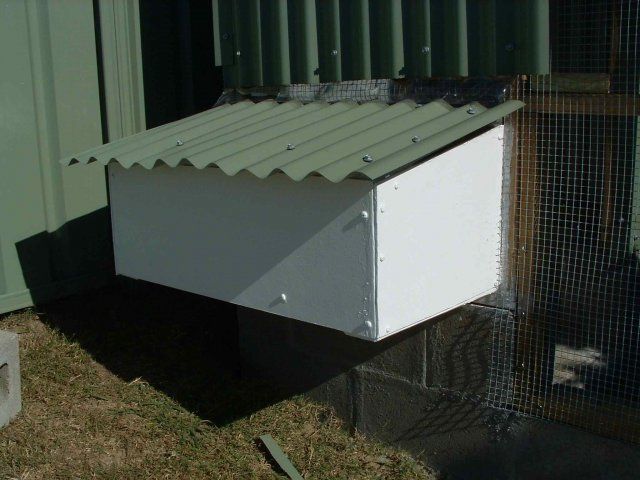
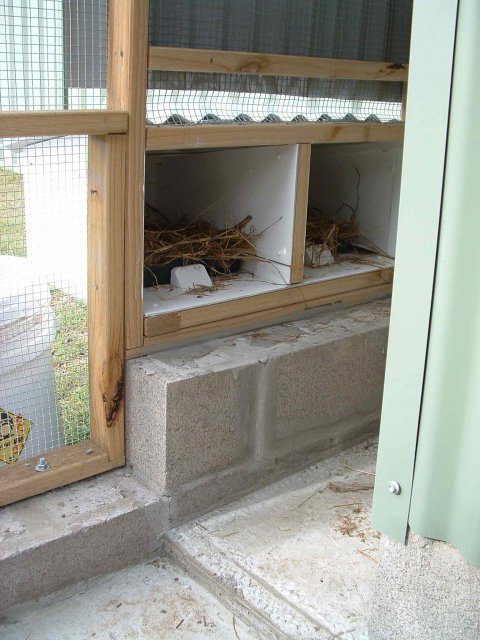
Nesting box was built out of TP frame covered with Hardiboard (used as sheeting for eaves in Aussie houses). The lid is colourbond with a plastic apron that covers the hinge area. I did not plan including external access originally but I am now glad I did. Should save going into the shed everyday.
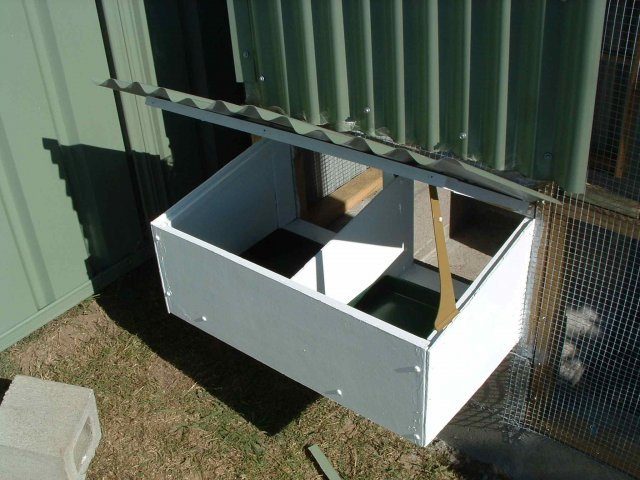
To line the nesting boxes I bought two plastic trays that are designed as flower pot saucers. I plan to pull them out every couple of weeks and hose them off.
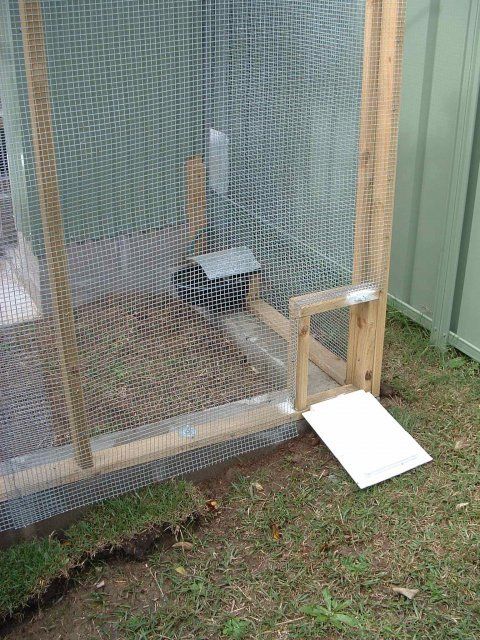
I plan to let the chooks free range on weekends around our yard. I included this small door off the run to make it easier to let them in and out.
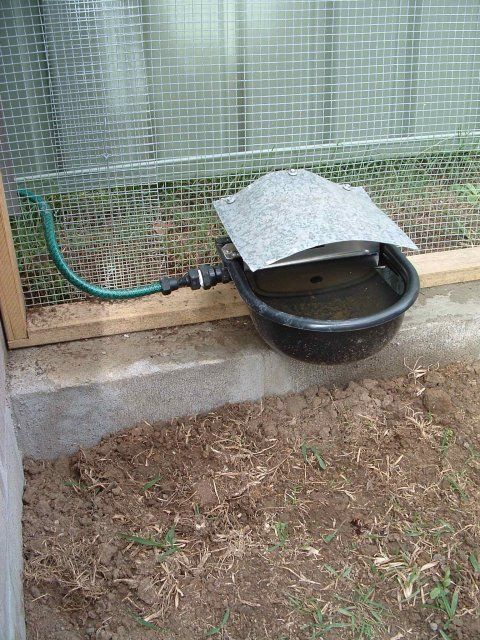
I wanted to make the shed easy to care for. We go away from time to time and I don't want the neighbours having to feed and water if possible, just collect eggs. The waterer is a commercially available system, $60 AU for a bowl with integrated float. I just mounted it to the frame and hooked it up to a 20L drum (got it for free from the farm supplies place, had horse supplement in it). In the next month I plan to hook it up to the roof via guttering as well. Seems to be quite sturdy. I covered most of the bowl with gal iron to avoid the chooks roosting on the bowl and fouling the water
In terms of food I plan to hand feed them pellets when I am home. For when i am away I am in the process of making a jumbo feeder out of 3 inch diam PVC pipe. I got the idea off one of the posts on here. Is two lengths with a 90 degree angle in the middle. Drill big holes in the horizontal piece to feed out of. It should easily fit a 20kg bag of feed. I will mount it to the outside of the roost shed.
So here is a pic of the completed shed.

Overall I am pretty pleased with the result. I only plan to have about 3-4 chooks so it should be large enough. If I want more in the future there is room to expand the run, just repeat the design. Thanks again to those unamed posts who provided inspiration. I will post some more pics once the chooks arrive.
Specs
Build Time: About 2 months of weekends (on and off and weather disrupted)
Cost: $1000 AU as all materials were new
Size: 2m x 2.4m footprint, 2m tall
Here is the site just as I began to dig the footings. It is a bit close to the back fence (at least the council regs thinks so!) but we back onto a lane so should not be a problem. I wanted to put the shed in this location as it tucked behind an orange tree.
After digging a level trench I put down a concrete footing. Once dry I laid a layer of concrete blocks and filled them with concrete. Its a bit of overkill for a chook shed but I wanted to do it once, and do it properly. I don't expect to have problems with foxes anyway! To anchor the frame I sunk some coach bolts head end down into the concrete fill leaving about 3 inches of thread sticking out.
Next part was the frame which I made out of 35 x 70mm treated pine. I prefabricated all the frames in my garage and put it together with screws. Again, its all a bit overdone.
Next was the colourbond panels to cover in the roosting area. The climate here is mild all year round so no need for doors on this area. Roof is on a slant as I will eventually get a gutter and hook it up to the tank for the auto waterer. Colourbond matches the fence which helps to make the shed less intrusive.
Next was the wire, I used medium aviary mesh fixed with galvanised staples. I had use two widths on all sides, I just joined them with gal wire twists and a single run of wire weaved through both bits. Its not perfectly smooth but no holes.
Nesting box was built out of TP frame covered with Hardiboard (used as sheeting for eaves in Aussie houses). The lid is colourbond with a plastic apron that covers the hinge area. I did not plan including external access originally but I am now glad I did. Should save going into the shed everyday.
To line the nesting boxes I bought two plastic trays that are designed as flower pot saucers. I plan to pull them out every couple of weeks and hose them off.
I plan to let the chooks free range on weekends around our yard. I included this small door off the run to make it easier to let them in and out.
I wanted to make the shed easy to care for. We go away from time to time and I don't want the neighbours having to feed and water if possible, just collect eggs. The waterer is a commercially available system, $60 AU for a bowl with integrated float. I just mounted it to the frame and hooked it up to a 20L drum (got it for free from the farm supplies place, had horse supplement in it). In the next month I plan to hook it up to the roof via guttering as well. Seems to be quite sturdy. I covered most of the bowl with gal iron to avoid the chooks roosting on the bowl and fouling the water
In terms of food I plan to hand feed them pellets when I am home. For when i am away I am in the process of making a jumbo feeder out of 3 inch diam PVC pipe. I got the idea off one of the posts on here. Is two lengths with a 90 degree angle in the middle. Drill big holes in the horizontal piece to feed out of. It should easily fit a 20kg bag of feed. I will mount it to the outside of the roost shed.
So here is a pic of the completed shed.
Overall I am pretty pleased with the result. I only plan to have about 3-4 chooks so it should be large enough. If I want more in the future there is room to expand the run, just repeat the design. Thanks again to those unamed posts who provided inspiration. I will post some more pics once the chooks arrive.
Specs
Build Time: About 2 months of weekends (on and off and weather disrupted)
Cost: $1000 AU as all materials were new
Size: 2m x 2.4m footprint, 2m tall


