We have 50 chickens, most of them are larger breeds. and we have the plastic 3 gallon waterer that we are not so satisfied with anymore. it leaks, and it gets pretty heavy once it's filled up to the rim with water. then they run out bfore the day is over. we really needed to figure something else out before the weather got to warm and they started going thru more water than they are now. so we started looking into the drinker cups or nipples, but they can get expensive! so we had to brain storm. and between the two of us we came up with this idea! the best part is that all of this costs around $20!
here is what we have now

materials needed(all found in the plumbing section of LOWES):
1 1/2in-90 degree elbows (we decided 5 was enough for everyone)
1 1/2in pvc pipe (a 5 ft piece was plenty for us)
1 1/2in T's(one for every elbow)
all purpose cement good for pvc
red spray paint
bucket(in our case 5 gallon size should work perfectly)
1/2 in pvc and 1/2 in elbows
flexible pipe hanger to mount it in the coop
we haven't mounted it in the coop yet, but will this weekend when it stops raining and everyone can go outside. here is what we have so far. this should work with the same concept as the waterer that probably most of us have, gravity fed, and replenishes the water when low. no pumps needed.
these are the elbows that we painted red to attract the girls to the drinkers
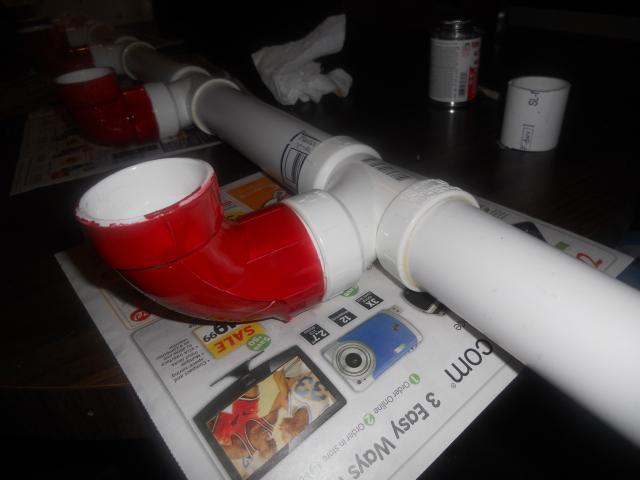
here are the T's already glued to the pipe pieces. we decided 10 inches between them would be a good space to let two chickens at each drinker if they want

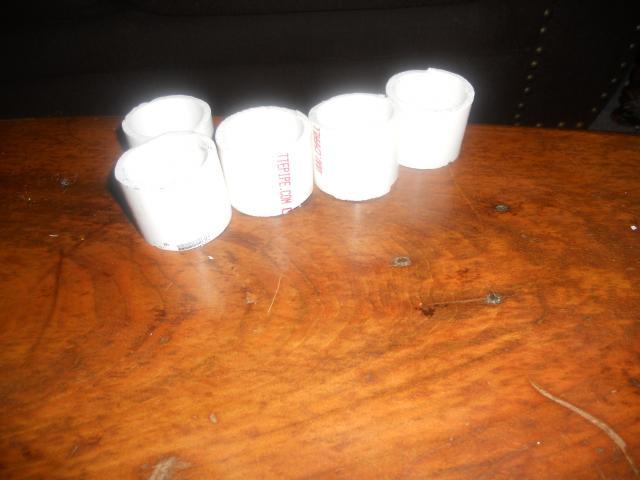
you will need 1 1/2 long spacers to get the T's and the elbows to glue together
here is what it looks like glued together. you can't even see the spacer
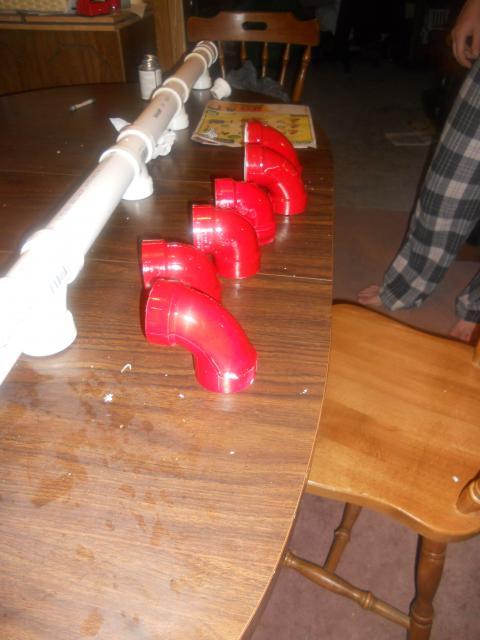
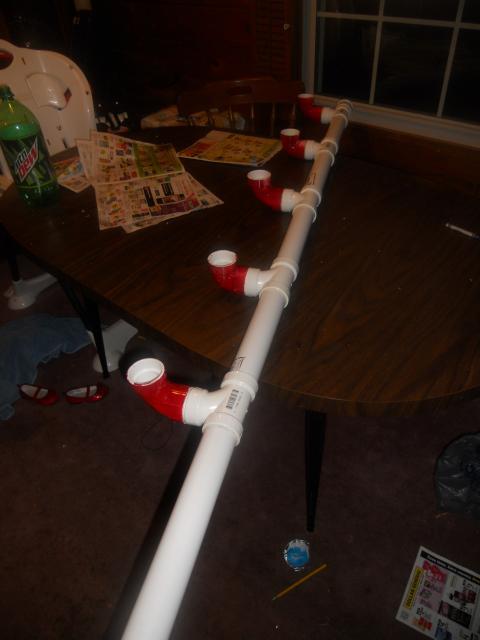
here is the whole thing!
on one end you can cap off but we decided to put a clean out valve so i can clean it as needed. also on the other end you will need a piece that will reduce the 1 1/2 inch pvc to 1/2 in pvc that will run to the bucket(s). we figure this will refill the water slower and have less "gluggs" as they drink up. we will also need to make a "step stool" for the bantams to get up to the waterer....that way they don't jump on the pipe.
I will update this post as we get more done.
what do y'all think?!(we are super excited to put this in the coop)
here is what we have now
materials needed(all found in the plumbing section of LOWES):
1 1/2in-90 degree elbows (we decided 5 was enough for everyone)
1 1/2in pvc pipe (a 5 ft piece was plenty for us)
1 1/2in T's(one for every elbow)
all purpose cement good for pvc
red spray paint
bucket(in our case 5 gallon size should work perfectly)
1/2 in pvc and 1/2 in elbows
flexible pipe hanger to mount it in the coop
we haven't mounted it in the coop yet, but will this weekend when it stops raining and everyone can go outside. here is what we have so far. this should work with the same concept as the waterer that probably most of us have, gravity fed, and replenishes the water when low. no pumps needed.
these are the elbows that we painted red to attract the girls to the drinkers
here are the T's already glued to the pipe pieces. we decided 10 inches between them would be a good space to let two chickens at each drinker if they want
you will need 1 1/2 long spacers to get the T's and the elbows to glue together
here is what it looks like glued together. you can't even see the spacer
here is the whole thing!
on one end you can cap off but we decided to put a clean out valve so i can clean it as needed. also on the other end you will need a piece that will reduce the 1 1/2 inch pvc to 1/2 in pvc that will run to the bucket(s). we figure this will refill the water slower and have less "gluggs" as they drink up. we will also need to make a "step stool" for the bantams to get up to the waterer....that way they don't jump on the pipe.
I will update this post as we get more done.
what do y'all think?!(we are super excited to put this in the coop)
Last edited:


