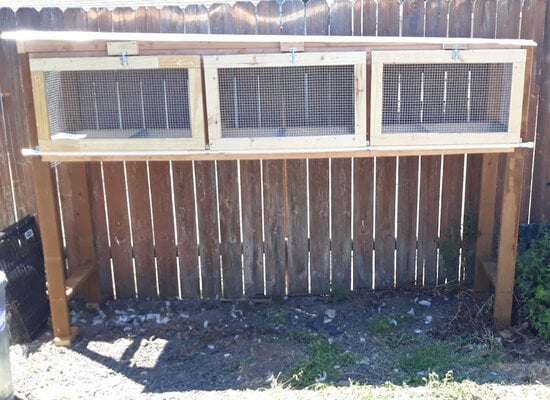
For anyone interested in a very simple and inexpensive feeder, I thought I'd share one I recently made, similar to the larger version I made for my chickens. First, I'm just getting started with quail and I'm keeping my adults in a hutch like cage. The feeders sit on the floor of each cage taking up minimal floor space. Here's my hutch so you can see what I'm trying to describe.

To start, I found these 16 cup Rubbermaid food storage containers at a local department store for about $7 each. I was looking for something that would hold enough food so I wouldn't have to refill it every day, something I could see how much food was inside without removing a lid or having to open it up to see, and something that would fit inside each of the three sections in my hutch.

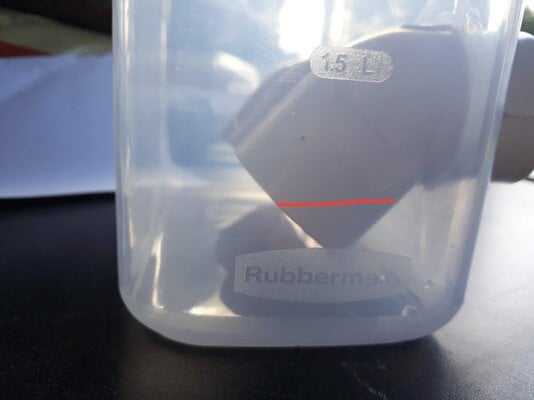
Beyond that, the price didn't break the bank. I bought three. I also picked up 9 PVC elbows. I used 1.5 inch diameter 45 degree elbows. I noticed they were selling two types of the 45 degree elbows, one being longer than the other. I bought the shorter ones. My plan is to prevent the quail from throwing the food out of the feeder. Sticking their head in the elbow to reach the food will accomplish that goal. This container stands at just over 10 inches tall and about 8 inches wide at the center. It tapers a little to a smaller base.

Using scientific techniques I developed in my lab, I carefully positioned one of my quail (Jumbo Coturnix) next to the container and measured to position the PVC elbows at the proper height. In this case, the center of the PVC elbow was secured at 2.5 inches from the bottom. The elbows are positioned facing down inside the container as shown in the pictures.

The base of the container is only about 3 inches deep (front to back) where the elbows are located. This will help to direct the food to the bottom of the elbows where the quail can reach it. I used a hole saw to drill (or cut) the holes for the elbows. The elbows are held in place by a silicone kitchen caulk. The silicone is white when applied but is clear when it has dried. After applying the silicone, I allowed the feeders to rest overnight to ensure they were completely dry. Also, one of my goals was to be able to see the food inside without having to open it up. As you can see in this picture, you can easily see inside.

I wanted to add this picture to show the quail can see the food as they approach the feeder and using the shorter PVC elbows, it is not too far for them to reach through. To introduce the feeder the first time, I put a pinch of food on each of the PVC elbows at the front lip. The quail had this thing figured out in a matter of seconds. I'm keeping 1 rooster and 3 hens in each cage. This feeder allows 3 quail to dine at one time. I've never seen more than 2 eating at a time so it seems to be working as I had hoped.

Here's a shot of one quail eating. The food inside is quite visible. Since introducing these feeders, there is no food falling to the ground through the hardware cloth floor. I am filling the feeders once each week and they have been about half full at that point. All things considered, this feeder is perfect for my hutch. My residents appreciate the fine dining experience as is evident by the fact that they continue coming back for more. And the price was right. I already had the silicone. The Rubbermaid containers were $7 each, and the PVC elbows were $1.50 (rounded up) each. Each feeder costs less than $12 to make.
Last weekend, the quail in the picture above was actually taking a nap in front of the feeder and was resting his head on the lip of the PVC elbow. I tried to get a picture but by the time I had my phone camera ready, he woke up and started eating again. Anyway, I am happy with this feeder and if anyone might be looking for something similar, I highly recommend it. I even put one of these in the brooder for my last batch of quail chicks at 3 weeks of age. They loved it and figured out how to get to the food as quickly as their parents did. Good luck!
To start, I found these 16 cup Rubbermaid food storage containers at a local department store for about $7 each. I was looking for something that would hold enough food so I wouldn't have to refill it every day, something I could see how much food was inside without removing a lid or having to open it up to see, and something that would fit inside each of the three sections in my hutch.
Beyond that, the price didn't break the bank. I bought three. I also picked up 9 PVC elbows. I used 1.5 inch diameter 45 degree elbows. I noticed they were selling two types of the 45 degree elbows, one being longer than the other. I bought the shorter ones. My plan is to prevent the quail from throwing the food out of the feeder. Sticking their head in the elbow to reach the food will accomplish that goal. This container stands at just over 10 inches tall and about 8 inches wide at the center. It tapers a little to a smaller base.
Using scientific techniques I developed in my lab, I carefully positioned one of my quail (Jumbo Coturnix) next to the container and measured to position the PVC elbows at the proper height. In this case, the center of the PVC elbow was secured at 2.5 inches from the bottom. The elbows are positioned facing down inside the container as shown in the pictures.
The base of the container is only about 3 inches deep (front to back) where the elbows are located. This will help to direct the food to the bottom of the elbows where the quail can reach it. I used a hole saw to drill (or cut) the holes for the elbows. The elbows are held in place by a silicone kitchen caulk. The silicone is white when applied but is clear when it has dried. After applying the silicone, I allowed the feeders to rest overnight to ensure they were completely dry. Also, one of my goals was to be able to see the food inside without having to open it up. As you can see in this picture, you can easily see inside.
I wanted to add this picture to show the quail can see the food as they approach the feeder and using the shorter PVC elbows, it is not too far for them to reach through. To introduce the feeder the first time, I put a pinch of food on each of the PVC elbows at the front lip. The quail had this thing figured out in a matter of seconds. I'm keeping 1 rooster and 3 hens in each cage. This feeder allows 3 quail to dine at one time. I've never seen more than 2 eating at a time so it seems to be working as I had hoped.
Here's a shot of one quail eating. The food inside is quite visible. Since introducing these feeders, there is no food falling to the ground through the hardware cloth floor. I am filling the feeders once each week and they have been about half full at that point. All things considered, this feeder is perfect for my hutch. My residents appreciate the fine dining experience as is evident by the fact that they continue coming back for more. And the price was right. I already had the silicone. The Rubbermaid containers were $7 each, and the PVC elbows were $1.50 (rounded up) each. Each feeder costs less than $12 to make.
Last weekend, the quail in the picture above was actually taking a nap in front of the feeder and was resting his head on the lip of the PVC elbow. I tried to get a picture but by the time I had my phone camera ready, he woke up and started eating again. Anyway, I am happy with this feeder and if anyone might be looking for something similar, I highly recommend it. I even put one of these in the brooder for my last batch of quail chicks at 3 weeks of age. They loved it and figured out how to get to the food as quickly as their parents did. Good luck!