Small Monitor Roof Coop

Nov 26, 2020
26
66
59
Minnesota - Zone 4b
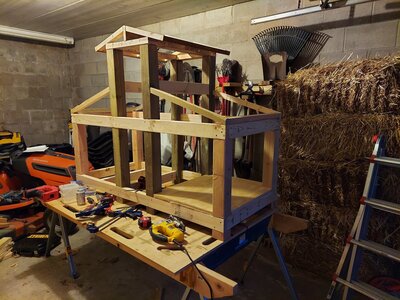
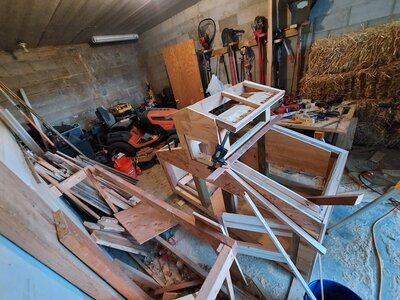
So one of our little coops is leaning in two different directions and it's some cheap-ish one, so it's not fixable, nor worth it, so I gathered together some scrap lumber and started building a new one that's about 6x2.5. It ain't much, but it's what scrap I had. Lesson learned, I should have bought more lumber to make it longer so I could have made the center monitor roof wider. Oh well. Anyways, the clutter in that garage stall also made me build a shelf along the rear wall.

I started building it on the table, but then moved it to the floor before it got beyond my ability to do so on my own.
20201113_171031.jpg

20201122_161833.jpg


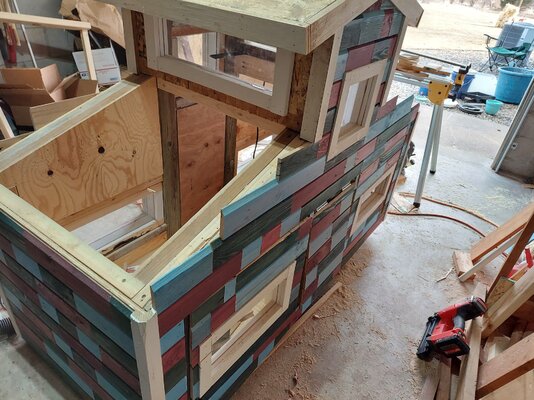
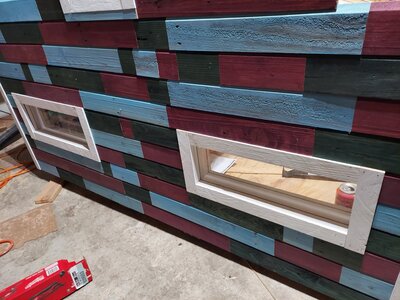
The plan is to make the siding three different colors. I have been sourcing local pallets for free, pulling them apart, planing the wood and now staining. I also have some plexiglass I will make windows from
20201208_121518.jpg
 
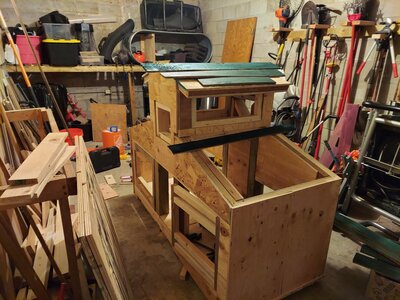
On the underside of the roof I drilled 5 or 6 3/4" holes on each side, so there will be some ventilation.

It'll be tall enough for me to put a few roosting bars across the thin way down low and I think I'll even be able to put one bar up higher in the monitor area and maybe an adventurous clucker will jump up there. I think it measures 22 or 24" or so on the lower end of the slanted sides.

The windows I have already framed and will cut the plexiglass when I get a few extra bucks for a vinyl blade for my circular saw. Then I can screw the frames together, slide the panes in and put a little caulking in there to help seal them up.

I'm excited for this, but if I built it bigger it would have been easier :). I can technically fit inside this thing :)
Then I'll build some roof panels and put those on once I get it out in the run

You might like to read my thread about renovating my Monitor coop this past June: https://www.backyardchickens.com/threads/renovating-the-little-monitor-roof-coop.1382615/
 
**some** plexi can be cut with the circular saw blade installed backward, finest tooth you have - like a plywood or veneer blade, instead of a ripping blade. You can also use a cut off wheel on a rotozip or similar tool.

But in any case, try it with scrap first, AND great looking build! Tempting to take inspiration from that for my next coop (though I'll have to up the size some). I like the way you framed that out.
 
Covered by plywood inside and out. We have about 20 birds and they can pick the coops they want to crash in at night. Right now we have 3 - well, 4, but the 4th is just for food and hanging out, so they don't sleep in it - and this will replace one of those as that one is leaning in two different directions.

I'm up in Minnesota. I thought I had entered that in, but maybe not.
Do they ever all try to cram into one small coop?
I see in your intro thread that you have a nice big run, is it divided to separate groups?
Do you 'winterize' the run to keep snow and wind out?
1607473745943.png
 
Nice you can open the tops.

Do you get any condensation on the roof inside?
(might not see if you only go in once a month)

Any frostbite?
I haven't noticed any frost inside nor moisture buildup when I've peeked inside, but that doesn't mean it doesn't happen on occasion when they all have a big sleepover. I take a look inside when I'm out there on occasion.

I think we had a little frostbite the first winter, but if I recall we also had some crazy cold going on. I don't know if we noticed any last year
 
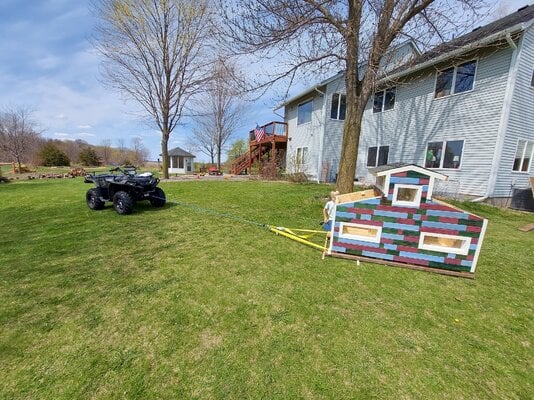
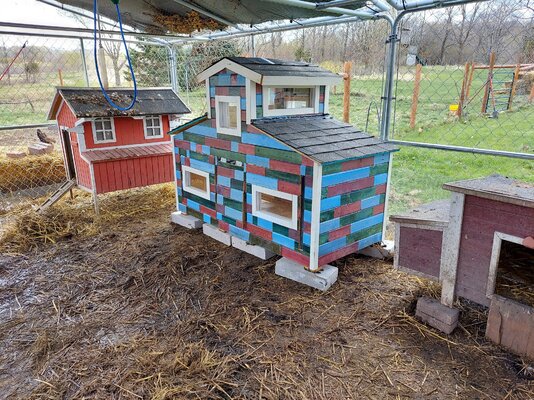
Well, today was moving day and this coop is really heavy. The move went well and I utilized a few 2x6s with braces as skis. The only tough point was getting it through the cyclone gate. I had measured and built this thing to have just enough room to get through that gate and that's basically how it ended up, but the lip, hardwire cloth and then the chicken crap soaked straw and dirt created a fun end challenge as I had the winch for getting it across the yard, but once inside the run I had to turn it around and get it into its final spot on blocks by hand.

I still have to install some roosting bars, but I'm done for today and happy with the end product


20210418_121350.jpg
20210418_151928.jpg
 

New posts New threads Active threads

Back
Top Bottom