Started my coop today!

oldchickenlady

Songster
9 Years
May 9, 2010
1,285
9
151
Cabot, AR
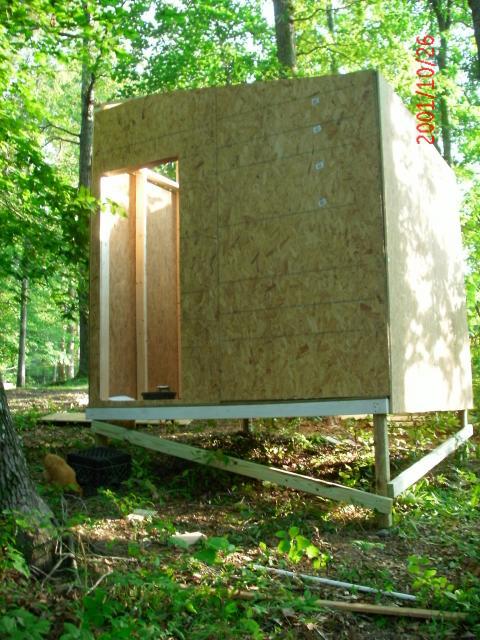
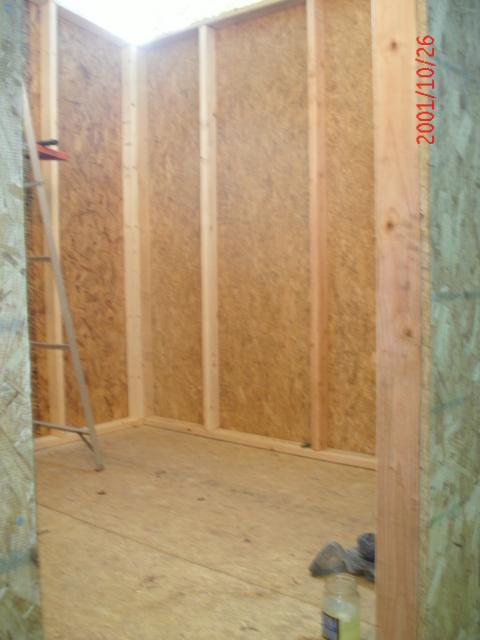
I started my chicken coop today. Initially I was going to make it 4x8, but I realized that would be exactly the right space for the chickens I have now, with no room for growth. Since I ended up with a roo in my group of 12 sexed chicks, I know sooner or later someone is gonna get broody and I want to let them raise a few babies, so 4x8 wont work. Then I thought 6x8 (mostly to appease DH, he was concerned about cost of wood, etc). However, we already had the plywood I needed from a project he never did, so all I had to do was buy the 2x4's, nails, linoleum, roofing, and paint. So then I said to myself 'Since I am building this thing with minimal help from him, I am going to build it as big as I want...8x8.' So, I started with the floor, did my 8x8 square, then put the other 2x4's on 24" centers. I realized at that point I forgot to buy the landscape timbers I had planned to use for legs, so I painted my frame for the floor with Kilz, then went to Lowes while that dried. I also needed some tall stakes to use where I planned to put the coop, because the gound slopes in 2 directions. The back side and the right side will be off the ground a lot higher that the front and left hand side. I knew I needed to use a string level to figure out how long to cut each leg, so I got my landscape timbers (cheaper than 4x4's) and some 42" tall stakes. Came home and measured off, drove the stakes and tied my string with the string level. Each leg was a different length, with the shortest being 12" and the longest being 31". DH helped me cut them and screw/nail them on, then we moved it to the actual site where it will stand. Put the level on each side, expecting to have to do some adjusting with a shovel...every side was perfectly level!
celebrate.gif
I couldn't believe it! I had to come in and cool off a little (and brag here) so now I am going back outside and put a few more nails into the legs and maybe put the plywood floor on before dark. I will take some pictures as I go along, maybe someday I will figure out how to do more than just download my pics to the site. I am so excited!
 
Doing the foundation is the major pain in the rear IMHO!
sad.png


We had to do some ground clearing since ours is sloped to recess the dirt on the high end so the cinder blocks we had would be at the level of the dirt.. Hard to explain but that chore ran over several days with the help of the string level it was done much better and more evenly..

When you buy the wood make sure you use it ASAP.. I left some sitting in the back of my truck and many of them warped or twisted (over the course of a week) in the heat to the point of being unusable...
 
Last edited:
Woo hoo!! Dang, woman! LEVEL first try??? I am impressed.

The two coops and the duck house I build are NOT level. They're not SIDEWAYS or really slanted or anything, but they're not level. Just a tad off. I got as close as I could get, then said, "That's it. Chickens won't mind!" (And they don't.)

lau.gif
 
Yeah, DH was helping before he went to work...we measured for all the legs, then I said, 'Let's measure again.' He was not pleased! I said 'Measure twice, cut once.' Still not pleased! But he was pretty impressed when we put the level on all 4 sides and all 4 sides were perfectly level! BUT...when I set the plywood on the frame...there is an extra 2" on 2 sides (I bragged too soon)! I didn't cut any off my 2x4's so somehow 2 sides are longer (wider?) than the 2 sheets of OSB. I used 2 pressure treated 2x4's to brace the 2 tallest legs so it is very sturdy now. I guess tomorrow I will figure out how to handle the extra space I have. Oh well, it is a carpentry adventure!
 
If you did not cut any of your 2x4's for the foundation then you have an extra 3 inches to deal with (width of a 2x4 is 1.5" x 2 = 3"). Also if you measure corner to corner each way they should be the same. If your 2 corner to corner measurements are not the same then your foundation "box" is not square.
 
Ok, we are on day 2 now. My son Lucas said last night that the father of a friend of his is out of work and is very handy. I sort of nodded and mumbled something about not being able to afford help. He said the man probably would do it for $150.00. I perked up considerably! Since I had already had a lesson in what your ignorance can cost you, I decided I could afford that. So he came over today and we figured out how to handle the little boo boo I did yesterday, built 4 walls and cut out for the door. I had to go buy the windows I found at a salvage place and more 2x4's and nails and plywood. Tomorrow he will frame in the windows (trailer windows, I paid $10.00 each) and the chicken and people doors and put on the roof. I have to work the next 3 days, but Monday will start the painting and putting on the hardware cloth on the ventilation holes. While the actual construction was going on, the chickens were not to be found, but once it was over they had to come check it out. Nosy chickens! After all the painting etc. we'll move the run to the front of the coop, cut the hole in the wire for the chicken plank, put in the shavings, etc. and put in some temporary nest boxes of some sort. I have to figure out how to make the nest boxes but right now it is too dang hot and humid to worry about that now. I am soooo tired, sore, nasty, and I am starving to death! I have been so busy I forgot to eat all day! I had a couple of rolls on the fly and that is it! I did manage to download some pics but I am too tired to try to figure out how to attach them to this post right now. I am going now to shut the chickens up and take a much needed shower. Hopefully next week when it is completed, I can figure out how to post pictures.
 
Yesterday was day 3 on coop construction. It is complete except for painting, putting down linoleum, putting hardware cloth over the windows, making the roosts, cutting the pop door, and moving the pvc hoop run next to it. :weeeMy son's idea of hiring an unemployed handyman was the BEST idea!
lol.png
I had to work yesterday so I didn't get home till right at dark, but I quickly shut the gate on the run for the night, then went and checked out what I could in the dark. I am so happy with it! I need to trim a few limbs from a nearby tree, add a handle to the door, rig up some sort of steps up into it, and build some nest boxes. My initial plan was to paint it some version of brown as our house is covered in brown stained cedar siding, or a brownish green (olive or moss?) to blend with the trees it is sitting under, but when I went to Tractor Supply for more nails, they had 5 gallons of barn red paint on sale for $49.00, savings of $20. Sooo, it is gonna be barn red. I may put up some 1x4 for trim and paint it white, later when it isn't soooo hot and humid! I am not off again until Tuesday so pics will have to wait until then. I can't wait to get them into their new home with everything complete! They have been in that wire run since they came out of the brooder, and I am past ready to get them into something with real walls! Thanks to everyone who posted pics and descriptions of their coops and runs, it really helped to have sooo many designs to look at (but not easy to decide:lol:).
 
Ok, trying to add a picture now...
56972_20100715_58.jpg
Well, what do ya know...I did it! Ok this is the left hand side where the door will be. This is from the second day of construction.
56972_20100715_60.jpg
56972_20100715_61.jpg
Here are the girls and Rudy Roo checking out the new construction.
 
Last edited:
Nice work. It's good to know I'm not the only person who decided to use the much cheaper OSB for my walls.
 

New posts New threads Active threads

Back
Top Bottom