I need to add this to my coop article (as well as all the other modifications I've done since building the coop), but figured I'll start by posting it here, in case it can help somebody else protect their vents.
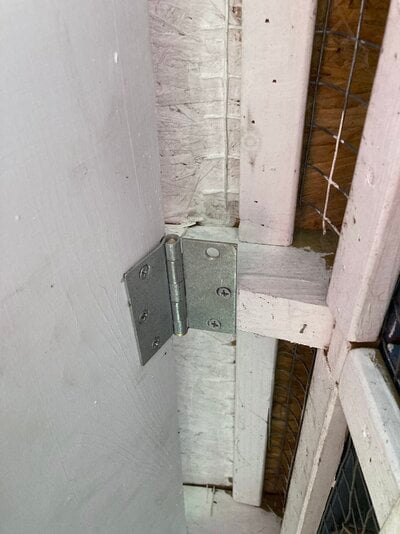
So, I was extra generous with the ventilation when building my coop, because ventilation is extremely important. The tops of my walls don't meet the roof and there's a gap about 6" tall that wraps around on all sides, for ventilation, which is open year-round, in all weather. This all works fine except for the front side, where the vent is more like 8" tall and because the coop is a lean-to, that side is less protected than the others, despite the overhang. This is fine for rain, but snow, being lighter, gets blown around a lot more, and blows into the coop through that one vent (but not the others). So I built an awning for it to protect it, while still leaving it open for ventilation. I didn't feel like measuring angles and cutting precise pieces, so I did it as simply and easily as I could. It's just a board the width of the coop, attached at the top via two heavy duty hinges, with two triangles on the sides to keep it propped open. The triangles are not attached to the coop, they just rest against it. They also provide protection on the sides. I had leftover shingles from when I built the coop's roof, so I nailed those to the top of the awning to protect the wood. With the shingles, the awning is quite heavy and stays in place without flapping or banging at all, even though it's only attached with hinges at the top. Straightforward and easy, and does the job great. We've had one significant snowstorm since I added the awning at the beginning of this winter, and there has been zero snow in the coop this time.
There is just one aesthetic thing that will bug me about the awning... I didn't feel like cutting the bottom edge of the awning at an angle so that the overhanging shingle ends (which I scalloped, for a nicer look) would hang perpendicular to the ground. They are bent and nailed to the edge of the board, and because the board is at an angle, the overhanging shingle ends now point slightly in towards the coop, not straight down. I'm a perfectionist and this is going to bother me, but I was too busy and tired to angle the edge, so I'll just have to live with it It still looks nice, and it does the job, which is what matters.
Here's what the vents looked like before the modification (the vent on the left, above the door, is the one in question):

And here's the awning:


So, I was extra generous with the ventilation when building my coop, because ventilation is extremely important. The tops of my walls don't meet the roof and there's a gap about 6" tall that wraps around on all sides, for ventilation, which is open year-round, in all weather. This all works fine except for the front side, where the vent is more like 8" tall and because the coop is a lean-to, that side is less protected than the others, despite the overhang. This is fine for rain, but snow, being lighter, gets blown around a lot more, and blows into the coop through that one vent (but not the others). So I built an awning for it to protect it, while still leaving it open for ventilation. I didn't feel like measuring angles and cutting precise pieces, so I did it as simply and easily as I could. It's just a board the width of the coop, attached at the top via two heavy duty hinges, with two triangles on the sides to keep it propped open. The triangles are not attached to the coop, they just rest against it. They also provide protection on the sides. I had leftover shingles from when I built the coop's roof, so I nailed those to the top of the awning to protect the wood. With the shingles, the awning is quite heavy and stays in place without flapping or banging at all, even though it's only attached with hinges at the top. Straightforward and easy, and does the job great. We've had one significant snowstorm since I added the awning at the beginning of this winter, and there has been zero snow in the coop this time.
There is just one aesthetic thing that will bug me about the awning... I didn't feel like cutting the bottom edge of the awning at an angle so that the overhanging shingle ends (which I scalloped, for a nicer look) would hang perpendicular to the ground. They are bent and nailed to the edge of the board, and because the board is at an angle, the overhanging shingle ends now point slightly in towards the coop, not straight down. I'm a perfectionist and this is going to bother me, but I was too busy and tired to angle the edge, so I'll just have to live with it
 It still looks nice, and it does the job, which is what matters.
Here's what the vents looked like before the modification (the vent on the left, above the door, is the one in question):
And here's the awning:


