Related Forum Threads
- My E-Z Chicken Feeder and Waterer Last post on 7/9/12 at 6:27am in Feeding & Watering Your Flock
Related Articles
-
Frugal Que's Automatic Waterer
Edited on 9/8/10
- Neils Feeder - made from Metal Air Duct and a Flower Pot
Edited on 8/25/10- Nipple Waterer for my Brooder
Edited on 9/10/10- Automatic Waterins System
Edited on 7/2/10- Automated Feeding System With Dosage Control
Edited on 6/19/10 More ›Topics Discussed
- topicWater Feeders
Alphabetical Article List
Bsf Larvae Operation Under 5
By: grandfatherjwvTo make the item discribed below an automatic feeder, just remove collection cup after construction. This will feed your chickens directly by allowing the larvae drop to the ground.
Grandfatherjwv's Black Soldier Fly Larvae Operation for under $5.00.
1. Can buy bucket with lid for under $5.00 at Home Depot.
2. Find or make a small strip of plastic, metal, or wood approximately 1/4" x 1" x 10" long.
3. Find 2 to 3 foot of bailing wire.
4. Cut top off a 2 liter soft drink bottle.
5. Cut the lid as shown. (the upper horizontal hole allows adult female black soldier flys to locate and enter the bucket)
6. Make a 1/2" hole approximately 1 1/2" below the center of the bucket bottom located as the bucket is suspended at a 45 degree angle. (this allows maintaining water level maximum easily, and yet keeps compost moist above the water line)
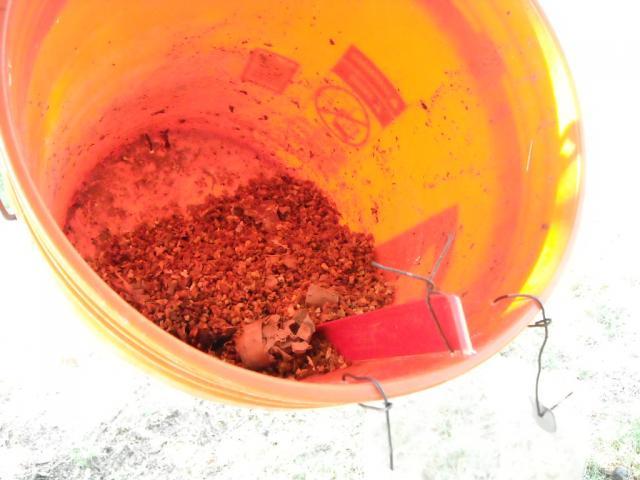
7. Also, small holes are needed to keep the center partition (small strip of plastic, metal, or wood approximately 1/4" x 1" x 10" long) in place, that is center bottom of the 45 degree positioned bucket) (keep holes above water line)
8. Use stiff wire for this, as well as, the connection of the holes placed to hold the collection cup (2 liter soft drink bottle) to the bottom lip of the bucket.
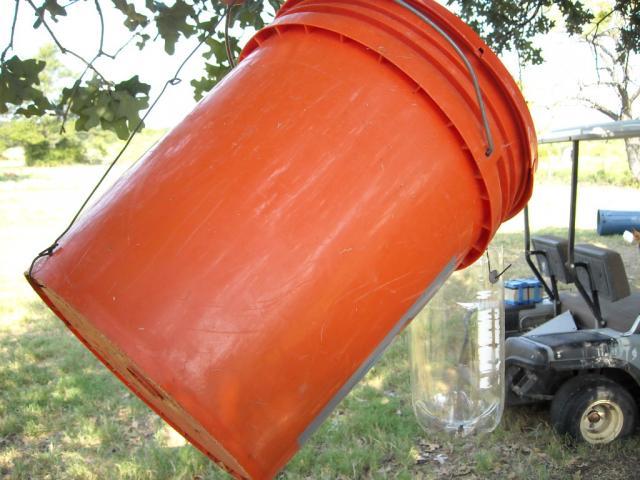
9. A wire placed from center of the bucket handle to the bottom lip of the bucket adjusted to allow the bucket to rest at 45 degrees as it is suspended. (best suspended from 2 points along the bucket handle) ("S" hooks can be used for ease of removal of bucket)
SEE OPERATIONAL INFORMATION and CONSTRUCTION PICTURES BELOW


HOW TO START UP THE OPERATION
1. With the bucket in position and the lid off, fill with water (the 1/2" hole will drain any over fill)
2. With appropriate compost starter, fill to above water level. (Black Soldier Fly eat almost anything biological as you will read elsewhere, however, getting started I suggest grain with syrup pour in the mix) (I used chicken scratch)
3. Add thin strips or rolls corrugated of cardboard not in but near moist compost. (BSF females will lay eggs in the corrugation)
4. Replace the lid and let the compost ferment.
5. Black Soldier Fly females are attracted to the smell and will lay eggs.
6. Wait a week or so and watch your collection cup.
7. Add compost as needed, as larvae mature, they self harvest by climbing to the open lip and fall into the collection cup.
8. Feed your chickens. (Or frogs or turtles or fish...etc. ..etc.)
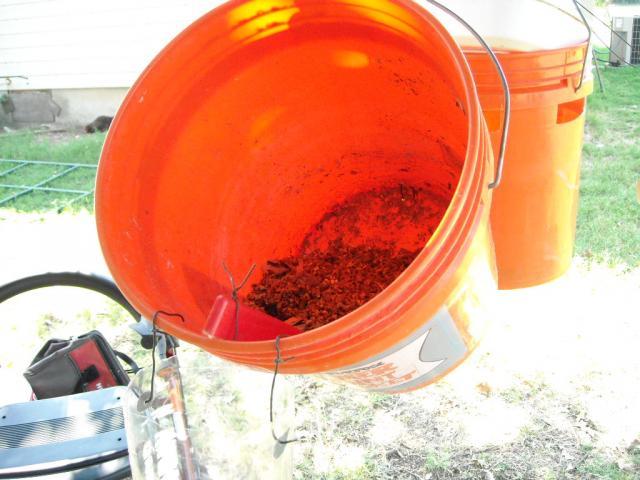
NOTES: I placed my bucket under a shade tree. My location is in central Texas. Look closely, the horizontal hole in lid is hard to see. You may choose to add holes for more air flow as my first BSF eggs came from the bucket you see in the background of one of the above pictures; it had more holes.
- Neils Feeder - made from Metal Air Duct and a Flower Pot
Recent Discussions
- › ***Describe that chicken*** 1 second ago
- › Show off your Old English Game Bantams!! 3 seconds ago
- › ☆☮★ *~Babydoo and Bluebee's Chat thread!~* ★☮☆ 7 seconds ago
- › Norwegian Jaerhon 16 seconds ago
- › California - Northern 19 seconds ago
- › @Monsters@ rp (anyone invited!) 32 seconds ago
- › Free young hen - Palo Alto, CA 53 seconds ago
- › Hatching Eggs / Paypal CHAT Thread 1 minute ago
- › egg peritonitus (internal laying) photos (warning graphic) 1 minute ago
- › The Last Wolves RP 1 minute ago
Recent Reviews
- › Bantam-Cochin by ChickenRaiser95
- › Cream Legbar originally bred by R. C. Punnett by KPenley
- › Silkie by Chickie Mama
- › Brahma by Chickie Mama
- › Leghorn by Lisasfeathers
- › Andalusian by nova022
- › Mini Cup Automatic Waterers by KPenley
- › Barred Rock by applefalls
- › Australorp by applefalls
- › Star by applefalls
New Articles
- › My foray into chicken ownership by Katcynth
- › My six chicks!!!!! So cute by My Six Chicks
- › Hatching<3 by Nike
- › Blue and Whie Delight by 12chickenlover3
- › Coop La Fiesta by jpruett86
- › The Truth About Insuring Hatching Eggs by Poultry Friend
- › Gabe's "budget coop" by GabeStalker
- › Burnsville Minnesota by sn0wwhite
- › ♥♥♥♥A chicken... by OnceInALifeTime
- › Where Chicks Rule by woodsygal
About BackYard Chickens | Join the Community | Advertise | Chicken Supplies | SufficientSelf.com | BackYardHerds.com | TheEasyGarden.com
© 2013 BackYard Chickens is powered by Huddler Families | FAQ | Support | Privacy/TOS | Site Map
Thanks for taking the time to write this.
1. Relocate the hole where the larvae exit to below where it is now (with the bucket hanging as shown) - just below the lip of the bucket (on the curved area, high up on the bucket). That will allow most of the rain to flow off of the lid and onto the ground. The exit only needs to be about 1/4 inches high, and it can be a few inches wide. Moving the collection cup under the bucket will help keep it drier.
2. Replace the ventilation hole with a pvc "T" fitting aligned horizontally, or you could use an elbow fitting (45 or 90º) faced downward.
3. If you process high moisture waste you will probably have flooding issues which can be fixed with a simple hole at the lowest point and maybe some fibrous material to line the bottom.
The first DIY composter I published was similar to this simple and elegant design. My most recent composter design is complicated and it was meant to mimic a BioPod for those who wanted one but couldn't/wouldn't spend the money for one. I salute you for sharing a cheap and simple design and it seems like you've been successful in inspiring others to try working with BSF. :)