The Non-Alcoholic Wine Cooler Incubator
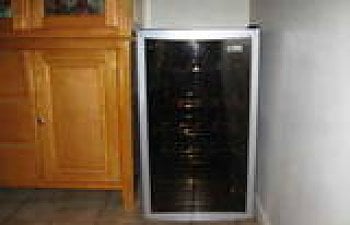
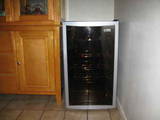
My first incubator I made about 2 years ago. It was a Walmart worm box incubator and I spent a total of about $15 total on it, not including the gas money I spent driving all over to pick up "free" parts for it! It worked great, but the way I had it set up the dimmer was on the inside and I had to open it to change the temperature. Not hard, but frustrating sometimes. I really wanted to put a thermostat in it, but the wiring part scared me and my hubby wasn't to keen on my chicken/chick obsession so I didn't want to pester him for help. So, a few weeks ago I started seriously looking for a mini refrigerator to convert into an incubator. Well, what I found on Craig's List was exactly what I wanted. I don't drink, so I felt a little silly looking for a Wine Cooler/Refrigerator, but I loved the design of them with the glass front door. It would be perfect. I eventually found one that was only $15 (plus the gas money to pick it up 45 minutes away!). It was the perfect size with a capacity of 26 bottles. Here is what I found (actual images from ad):

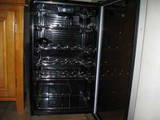
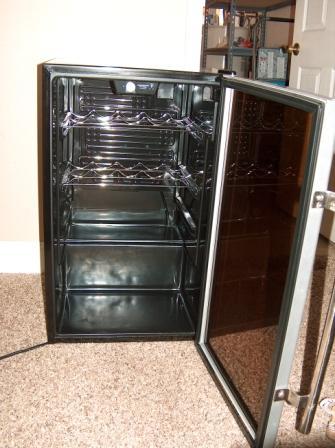
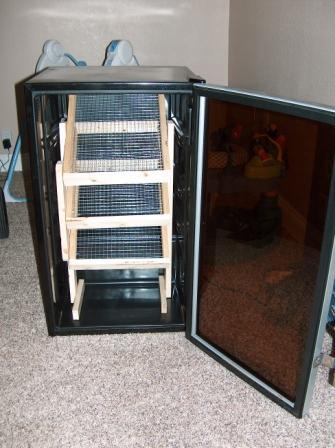
I started with taking apart the motor and getting rid of the freon. It was pretty easy to take it apart and get it ready for construction. Here it is all ready to go:
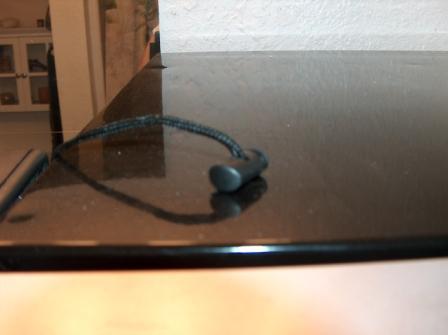
First I built the wood racks that I built using "chicks for better health's" design from the Homemade Incubator pages. By the way, thanks Chicks For Better Health! I added my own little idea to the design. I attached a shoe string to the top rack. Then I ran it through a hole I drilled in the top that I lined with a straw so it wouldn't snag. I put a clip from an old backpack on it so that it would hold the side up that it was attached to when tightened all the way down. Then as luck had it the rack is naturally heavy on one side, so when I release the string it rotates to the opposite position. Here is what I mean:
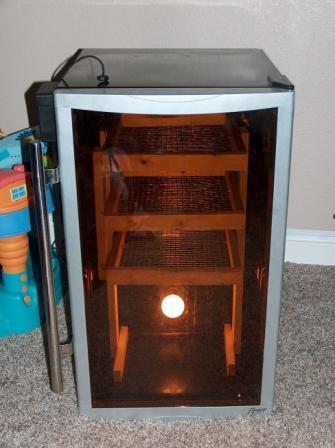
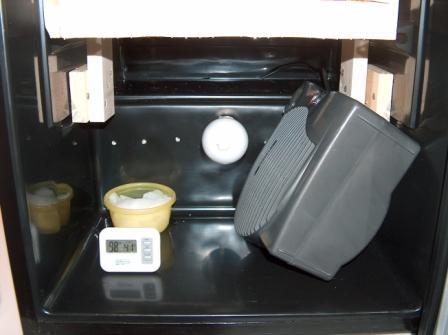
The second thing I did was to install my heating device which is just a plain old lamp kit that I bought for $10 at Lowes. I drilled a hole in the middle of the bottom section as close to the ledge as I could get. Then I inserted pulled the cord through and hooked up the lamp fixture. I slid the shaft of the fixture back through the hole and the insulation in the wall of the cooler held it in place. I may add some spray foam to make it more secure. I then plugged it into a ReptiTemp 500r that I bought online for $33 including shipping. It is a "plug and play" thermostat that has a dial you set to the desired temperature. It works great! So much easier than the dimmer switch I was using. I attached the thermostat to the side of the incubator, then plugged it in. I put a thermometer at the top and bottom of the incubator so I could tell if it was getting too hot in either side. I also put a small electric fan at the bottom to circulate the air and keep hot spots from occuring. There are 12 3/8" holes across the back for air vents. Here is my finished project!
You can see from the picture above that I originally put feet on the rack, but it was too wobbly. I decided to make it more permanent in the incubator by screwing a spacer board on each side, then attaching the rack to them as you can see in the picture below.
I will probably install my computer fan in the top for circulation instead of the big fan, but the computer fan was in use when I put the new one together. I will also have a large plastic tub at the bottom for hatching eggs and chicks to fluff up in, where they will be safe. My first incubator I made about 2 years ago. It was a Walmart worm box incubator and I spent a total of about $15 total on it, not including the gas money I spent driving all over to pick up "free" parts for it! It worked great, but the way I had it set up the dimmer was on the inside and I had to open it to change the temperature. Not hard, but frustrating sometimes. I really wanted to put a thermostat in it, but the wiring part scared me and my hubby wasn't to keen on my chicken/chick obsession so I didn't want to pester him for help. So, a few weeks ago I started seriously looking for a mini refrigerator to convert into an incubator. Well, what I found on Craig's List was exactly what I wanted. I don't drink, so I felt a little silly looking for a Wine Cooler/Refrigerator, but I loved the design of them with the glass front door. It would be perfect. I eventually found one that was only $15 (plus the gas money to pick it up 45 minutes away!). It was the perfect size with a capacity of 26 bottles. Here is what I found (actual images from ad):
I started with taking apart the motor and getting rid of the freon. It was pretty easy to take it apart and get it ready for construction. Here it is all ready to go:
First I built the wood racks that I built using "chicks for better health's" design from the Homemade Incubator pages. By the way, thanks Chicks For Better Health! I added my own little idea to the design. I attached a shoe string to the top rack. Then I ran it through a hole I drilled in the top that I lined with a straw so it wouldn't snag. I put a clip from an old backpack on it so that it would hold the side up that it was attached to when tightened all the way down. Then as luck had it the rack is naturally heavy on one side, so when I release the string it rotates to the opposite position. Here is what I mean:
The second thing I did was to install my heating device which is just a plain old lamp kit that I bought for $10 at Lowes. I drilled a hole in the middle of the bottom section as close to the ledge as I could get. Then I inserted pulled the cord through and hooked up the lamp fixture. I slid the shaft of the fixture back through the hole and the insulation in the wall of the cooler held it in place. I may add some spray foam to make it more secure. I then plugged it into a ReptiTemp 500r that I bought online for $33 including shipping. It is a "plug and play" thermostat that has a dial you set to the desired temperature. It works great! So much easier than the dimmer switch I was using. I attached the thermostat to the side of the incubator, then plugged it in. I put a thermometer at the top and bottom of the incubator so I could tell if it was getting too hot in either side. I also put a small electric fan at the bottom to circulate the air and keep hot spots from occuring. There are 12 3/8" holes across the back for air vents. Here is my finished project!
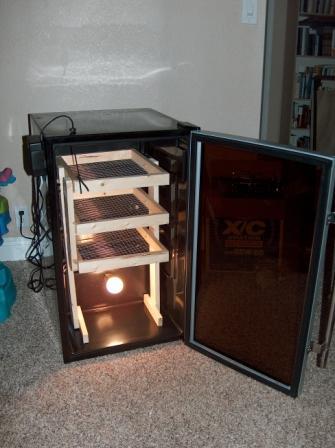
You can see from the picture above that I originally put feet on the rack, but it was too wobbly. I decided to make it more permanent in the incubator by screwing a spacer board on each side, then attaching the rack to them as you can see in the picture below.
With the total cost of this project at $58, I am very pleased with the outcome!
Update
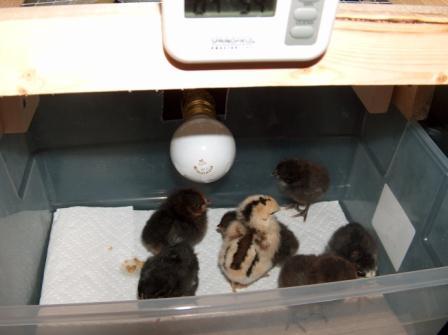
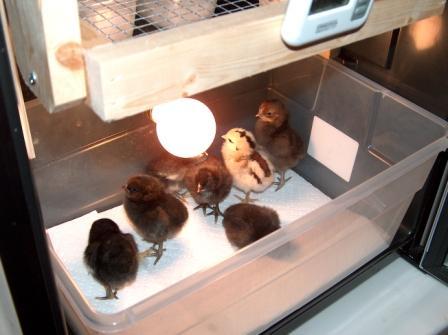
We have a successful hatch!!!! You can't get much better than a 100% hatch rate, especially on a homemade incubator! I'm super pleased with how this one has worked and turned out. I also added the tub that I mentioned before to hold the chicks where they will be safe. Here are some pictures of the babies....
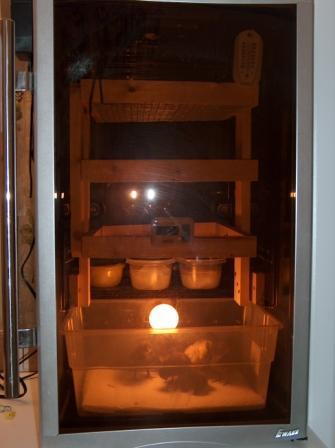
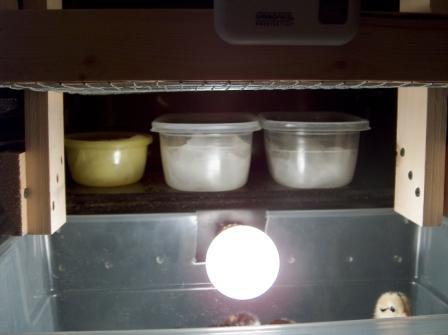
Here is what it looks like from the outside with the light on and the babies inside. You can see what I mean by the back ledge of the incubator with the water tubs on it. I also took a close up of it below...
I have 4 small children that are 5 years old and under, so the see through tub and front have been wonderful for them to watch the action without causing any problems with the incubator or giving Mommy a heart attack!
I love the little chickie head in this picture! LOL.....Update
We have a successful hatch!!!! You can't get much better than a 100% hatch rate, especially on a homemade incubator! I'm super pleased with how this one has worked and turned out. I also added the tub that I mentioned before to hold the chicks where they will be safe. Here are some pictures of the babies....
Here is what it looks like from the outside with the light on and the babies inside. You can see what I mean by the back ledge of the incubator with the water tubs on it. I also took a close up of it below...
I have 4 small children that are 5 years old and under, so the see through tub and front have been wonderful for them to watch the action without causing any problems with the incubator or giving Mommy a heart attack!
It has been a breeze to clean since all the surfaces are plastic and I can just wipe them down and move on. That was one of the main reasons for wanting a mini fridge incubator. As most of you know, cleaning styrofoam is a major drag (my first incubator is styrofoam)!
Well, I hope you enjoyed my pictures and the outcome of this incubator. If you have any questions or suggestions don't hesitate to PM me!
Thank you
Well, I hope you enjoyed my pictures and the outcome of this incubator. If you have any questions or suggestions don't hesitate to PM me!
Thank you