Cottage Retreat

We took inspiration from 2 coops we saw on BYCs' home page.
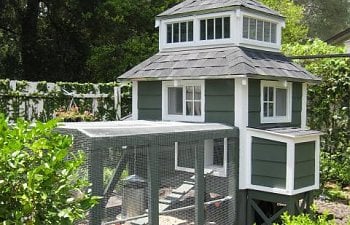
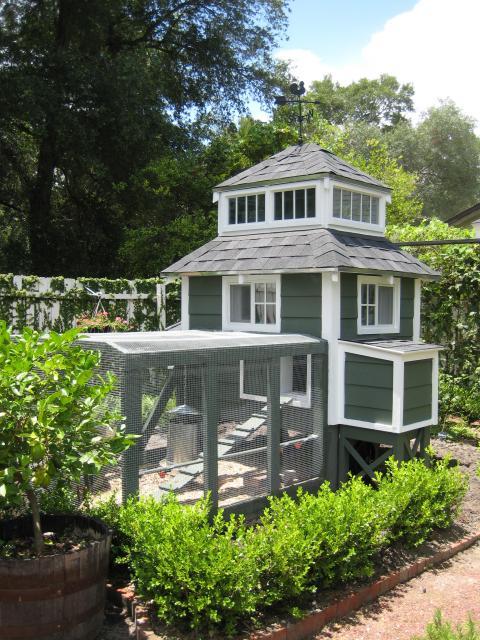
This is what we came up with.
Coop 5'x4' Run 5'x10' Cost $1,200.00 3 weeks to build
I had a basic idea of what I wanted. I warned my husband that I was designing on the go, and to expect changes mid stream.
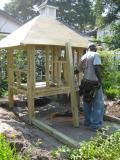
We started by digging a 12" deep foot print of the coop and run. We laid hard cloth using cable-ties to connect the seams, insuring no preditors will be able to get into the coop from below. We set the footings for the raised coop and cemented them in. Followed by the platform/base for the coop.
I needed to decide on windows and locate a source before they could frame. I ordered shed windows on line from shedwindowsandmore.com The company is great the windows arrived really fast!
Sheathing for roof, base for chicken run
Framed the run, sheathing on walls, felt paper on roof
Here is where I had a big ah ha moment! I read that chickens like alot of light to optimize egg production. I searched BYC for inspiration and came up with a new roof line. Of course my husband and our handy man friend, were not surprised at my mid construction design change, as I had alerted them of the possibility before we started. I showed them pictures of my idea from a coop on BYC and said can we make it happen? Of course they said. They cut off a portion of the sheathing on the peak to accomodate the new roof line. We kept the roof beams in place to make it easier and for the integrity of the roof. Could have cut them and framed the peak differently but would have been more involved and didn't seem necessary for unused space in the coop. Took this time to prime the beams and run while we had access.
Big changes today, cut out the openings for doors and windows, built top cupola, shingled the roof. This is the first time I have been able to really see where we are going with this coop.
We covered the walls of the coop with shower wall covering. It comes in 4x8 sheets and is waterproof for easy cleaning, installing it with liquid nails.
framed the nesting boxes
Had extra felt paper, so we used it to cover the sides of the coop. Shingled the roof and installed the transome windows from shedwindowsandmore.
New view of roof line from inside
We took inspiration from 2 coops we saw on BYCs' home page.
This is what we came up with.
Coop 5'x4' Run 5'x10' Cost $1,200.00 3 weeks to build
I had a basic idea of what I wanted. I warned my husband that I was designing on the go, and to expect changes mid stream.
We started by digging a 12" deep foot print of the coop and run. We laid hard cloth using cable-ties to connect the seams, insuring no preditors will be able to get into the coop from below. We set the footings for the raised coop and cemented them in. Followed by the platform/base for the coop.

I needed to decide on windows and locate a source before they could frame. I ordered shed windows on line from shedwindowsandmore.com The company is great the windows arrived really fast!

Sheathing for roof, base for chicken run
Framed the run, sheathing on walls, felt paper on roof

Here is where I had a big ah ha moment! I read that chickens like alot of light to optimize egg production. I searched BYC for inspiration and came up with a new roof line. Of course my husband and our handy man friend, were not surprised at my mid construction design change, as I had alerted them of the possibility before we started. I showed them pictures of my idea from a coop on BYC and said can we make it happen? Of course they said. They cut off a portion of the sheathing on the peak to accomodate the new roof line. We kept the roof beams in place to make it easier and for the integrity of the roof. Could have cut them and framed the peak differently but would have been more involved and didn't seem necessary for unused space in the coop. Took this time to prime the beams and run while we had access.

Big changes today, cut out the openings for doors and windows, built top cupola, shingled the roof. This is the first time I have been able to really see where we are going with this coop.

We covered the walls of the coop with shower wall covering. It comes in 4x8 sheets and is waterproof for easy cleaning, installing it with liquid nails.

framed the nesting boxes

Had extra felt paper, so we used it to cover the sides of the coop. Shingled the roof and installed the transome windows from shedwindowsandmore.

New view of roof line from inside

 installed sideing donated by our handyman
  painted the run and trim
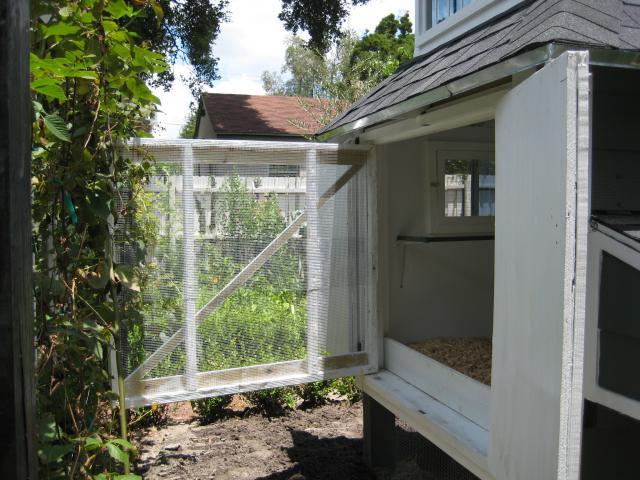
Finishing touches, put hardwire cloth on run, finished painting, made ramp, installed back doors, including a screen door for ventallation. I put UV film on the windows to try and keep out alittle of the hot Florida sun!
poles 24" up 12" from wall
removeable screens on windows
painted nesting box black
Nesting box
lid held with gate latch
dust bath, grit in rabbit feeder
run
drink cups
box on side of coop houses 5 gallon bucket for automatic poultry drink cups, ordered from Randalls Poultry Supply. Love them, I put pieces of grass in the cups to get my 2 month old pullets to notice the cups. It worked! They were using them within minutes. We installed the cup at a height of 12" correct for adult hens. Pullets couldn't reach them so I placed bricks below the cups for them to stand on.
view of finished coop from entrance of garden. Street lamp from our home town.


 poles 24" up 12" from wall
 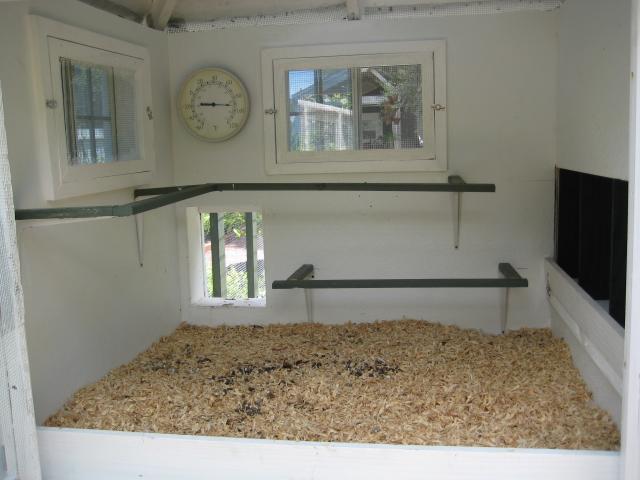 removeable screens on windows
 painted nesting box black
  Nesting box
  lid held with gate latch
  dust bath, grit in rabbit feeder
  run
run drink cups
 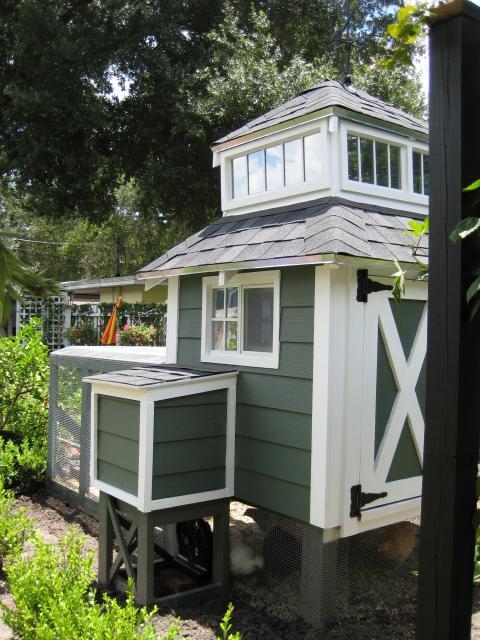 box on side of coop houses 5 gallon bucket for automatic poultry drink cups, ordered from Randalls Poultry Supply. Love them, I put pieces of grass in the cups to get my 2 month old pullets to notice the cups. It worked! They were using them within minutes. We installed the cup at a height of 12" correct for adult hens. Pullets couldn't reach them so I placed bricks below the cups for them to stand on.
  view of finished coop from entrance of garden. Street lamp from our home town.
:Things I would do differently Biggest change... I would make the run tall enough to walk in. It is really hard on the back to stoop over every time we want to enter the coop. My husband would have made the coop square (5x5) instead of (4x5) it would have made the roof framing much easier!
Future additions: I ordered awning fabric and sailboat snap fasteners from a company called Sailrite. I am going to make an awning cover for the run. The snap fasteners screw into the wood of the run, and I will be able to remove the awning if desired. Feel the girls need more protection from the Florida sun. Also we are going to install fans, one in the coop and one under the run. I have a battery operated fan from Home Depot we are using now. The girls hang out under the coop all day, the awning will give them the whole run access during the day.
Future additions: I ordered awning fabric and sailboat snap fasteners from a company called Sailrite. I am going to make an awning cover for the run. The snap fasteners screw into the wood of the run, and I will be able to remove the awning if desired. Feel the girls need more protection from the Florida sun. Also we are going to install fans, one in the coop and one under the run. I have a battery operated fan from Home Depot we are using now. The girls hang out under the coop all day, the awning will give them the whole run access during the day.

 my baby girls!

link to BYC