Articles by GopherBoyFarms
This is where it all began....from a garage we tore down for materials
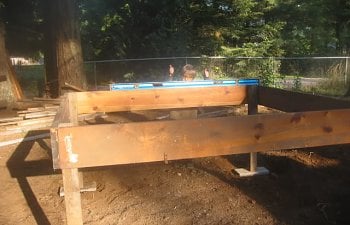
Preasure treated wood on cinder blocks (all from garage tear down)
made the floor 8X12
Raising the fist wall (5 foot walls)
2nd Wall (wall w/4 windows)
Back wall (2 windows)
And the man that made it all...
GopherBoy Farms
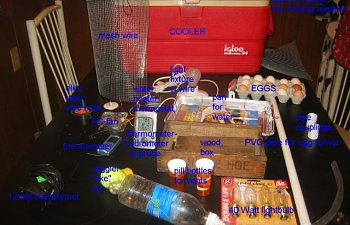
Gopher-Bator
SUPPLY LIST
Cooler
Mesh wire
Water heater thermostat
Plug with about 2-3 ft wire
Light fixture
40-watt light bulb
PC fan
12 Volt transformer
2-3 feet of PVC pipe
2 pipe couplings
2, ½ inch plastic clamps
Wooden Box
Shallow pan
A couple sponges...
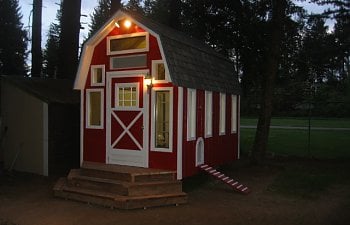
Today I started Signature Series Coop 006. After discussion some details with the client two things stood out in importance.....old barn and portable. So after a couple weeks of looking I picked up the right trailer to build the coop on. I stopped by the steel yard on the way hope just to get a...
GopherBoy got up early this morning to start work on the coop.
We had a little mole problem on the farm....
so something had to be done.................
After that commercial break......we found the area in the yard we wanted the coop
maybe the chickens picked the spot....
the spot was...