LaVonne's San Diego Mini Coop
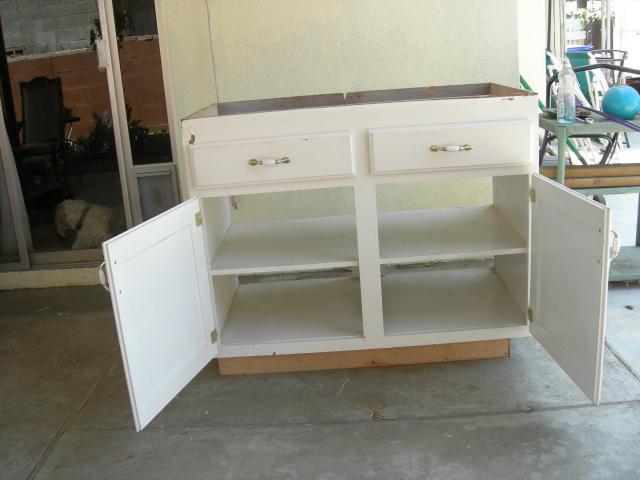
Hi, Fellow BYC fans. I thought I'd share my recent experience building my first ever major project, a coop for my hens. After spending way too much time looking at designs, coop pages and how to articles, I decided it was time to just leap in and see what I could actually do. I bought a used bathroom vanity at the local Habitat Restore, thinking this would be the basic size and shape needed for a coop, with doors already functional.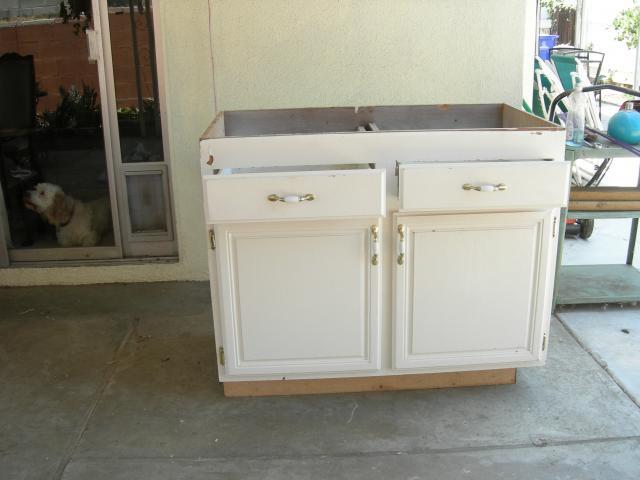
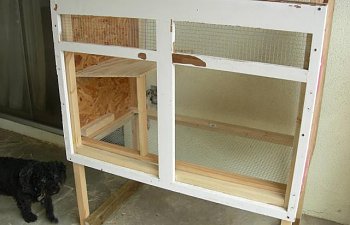
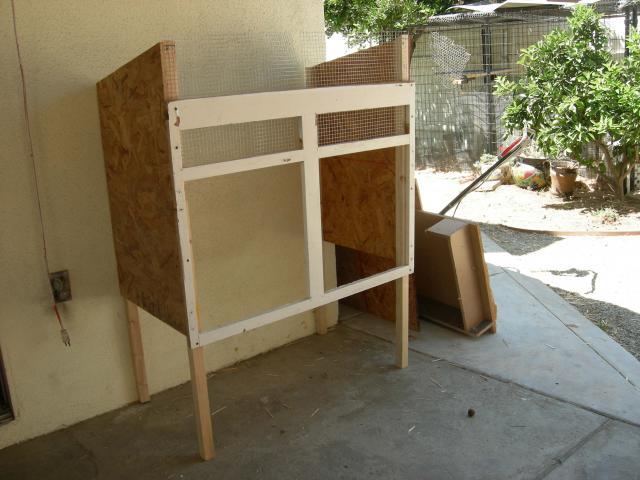
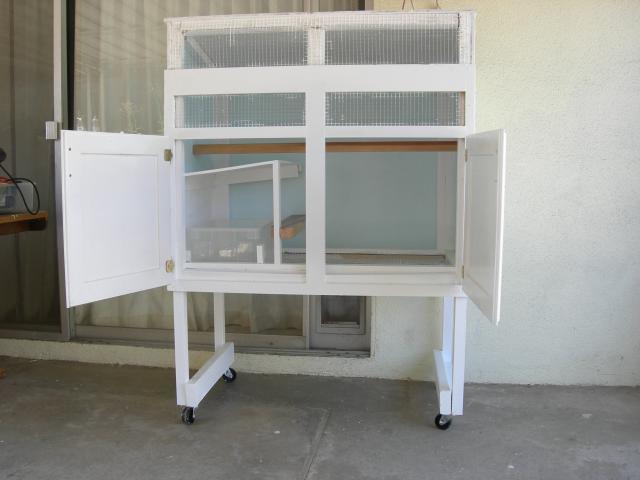
So, I wanted my cab/coop off the ground, and this meant putting it on legs, so I cut 2x2's long enough to raise my coop 17" from the ground, and allow the roof to be 5" above the original top of the cabinet (to make a sloped roof). I cut 2 front legs this length, and two back legs 5” shorter. I also cut out the right and left walls for my coop, using oriented strand board, with the slope I had chosen for the roof. I screwed the legs to the OSB creating the two side units, then struggled around getting the front attached to the sides. With that done I had a wobbly 3 sided structure that would stand up while I figured out how to make the rest of the coop.
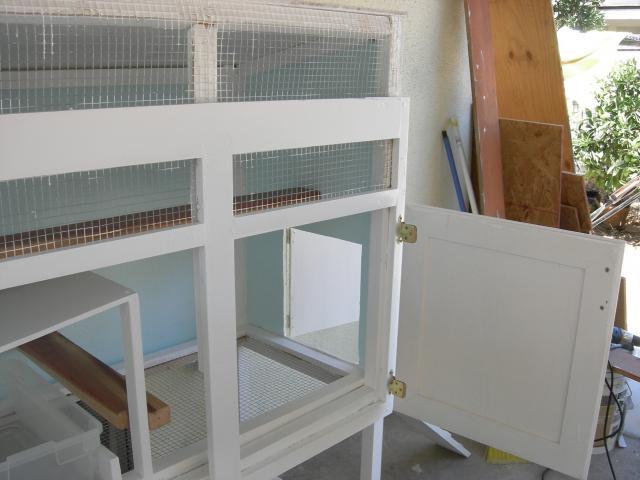
My next segment was the floor. I had become convinced that a wire floor would be the most versatile, allowing life saving ventilation in the summer, which I could block with plywood for the cooler months to improve warmth inside the coop. It was important to me to completely cover all the wire ends, to improve safety for the birds. I also wanted to leave no exposed screw points, for the same reason.
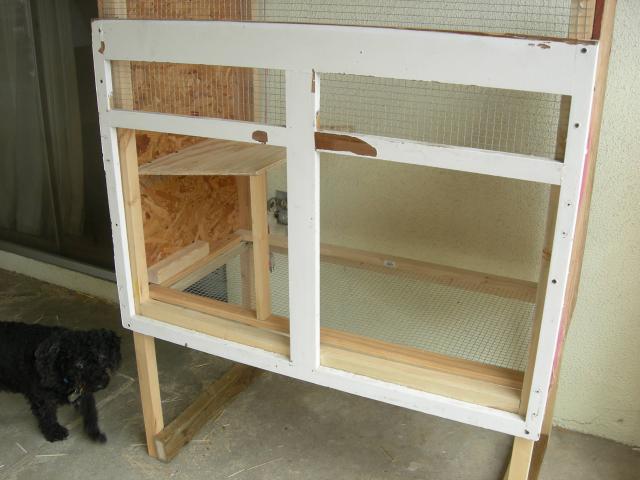
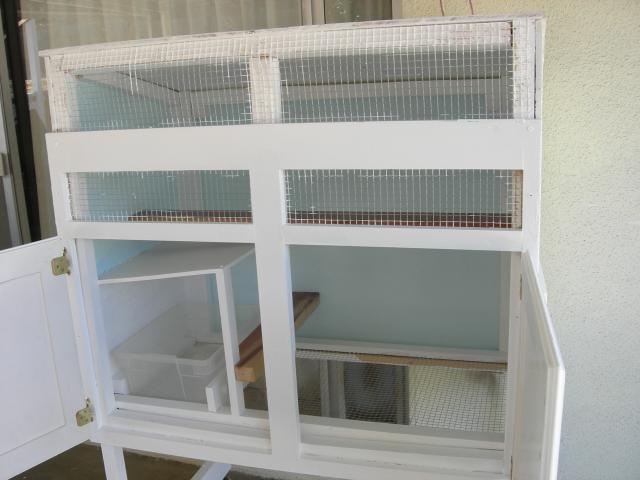
he back was next, with a cleat to help support the cover to the nest box. This is when I realized that I had skipped making a pop door, and was it ever fun cutting out that hole! I made the little door from some ½ inch plywood, and used 2 little hinges and a hook for closure.
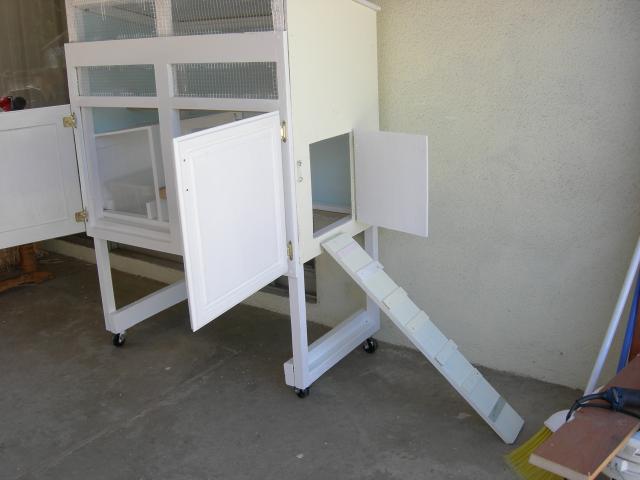
Anyway, I now have 4 hens and they have spent the last few nights in the coop, with no problem. Each morning they are out of the coop when I get up, since I don't latch any of the doors, There’s no easy way to expand this coop, and I’m trying to decide how to add another nest box. It’s pretty tight already.
Now I know that it would have been a great idea to go with a modular building plan, putting it all together inside of the run, so the coop could be a little deeper, and maybe a bit wider. My cost for this coop (very rough estimate) was around $200, including the vanity. Though I consider my coop a success, it would have taken much less work and worry, and fewer trips to the supply store, to work from a great plan. Maybe next time! One thing I did that I would recommend to everyone is to use two drills, one to make pilot holes, the other to put the screws in to the wood. Sounds obvious, but this is a real time saver. I did have fun with my project, and I’m considering making another coop. It’s a real accomplishment to be able to say “I did it all myself!”
January 8, 2011
Hello again,
Here we are several months later and I have a much better understanding of life with chickens. There are a few modifications that would improve my coop. The first change I will make, someday, will be to add a two story nest box addition. One nest box has been adequate for my 4 girls, but the arrangement in my coop turned out to be difficult to clean. The top on my nest box is too close to the roost above it, creating a tight area that is their favorite place to poo. I daily scrape the stuff off with a long piece of baseboard trim, and it's amazing how much "dirt" the girls generate. I then cover this with newspaper to improve the cleanability, and most days it stays in place and works somewhat. My next change would be to eliminate the nest area in the main coop, and lower the roost to maybe a few inches above the floor. This would keep the chics a bit warmer (since they would be below the drawer openings) and allow an easier hop in and out for the girls. It would be even better if this roost were removable to aid in cleaning of the roost and the floor below it. I have found that it works for us to not bother securing the doors at night, since they are in a very secure enclosure. This way they let themselves out in the morning, so they are usually already out and eating when I get up. I know this wouldn't work for everyone, and I didn't do this routinely until a friend donated some metal roofing to cover the run, making my birds much more secure. On a positive note, the girls seem to enjoy the elevated coop, and they really enjoy being under the coop. I frequently see them roosting on the cross supports between the front and back vertical legs, and Bonnie, my comet hen, created a "chicken spa" under the coop, where all the girls take turns having dust baths!
Another small challenge I will "someday" tackle is getting the water blocks level. They started out level, or nearly, but they seem to have shifted a bit, and now the waterers leak a bit. We've had record breaking rains here this last month or so, and between that and the fact that chickens never stop digging the floor of the enclosure is pretty uneven. My expected answer to this challange is the use of paving blocks, but I don't think it would be best for the girls to land on the blocks hoping out of the coop, or off the other raised roost in the enclosure. I don't go into the enclosure at night to close their doors without taking the flashlight. I tried wiring a light into the coop, which worked great for me, but it had the unfortunate effect of making the chics hop out of the coop, thinking it's time to get up, I guess.
My last suggestion, today, is to just get going and try whatever you think will work. Chickens need protection from predators, and you want to make it easy to take care of the daily necessities of feeding, watering and cleaning, while allowing comfortable space to move around. Good luck and have some fun while you're working on your own chicken adventure.