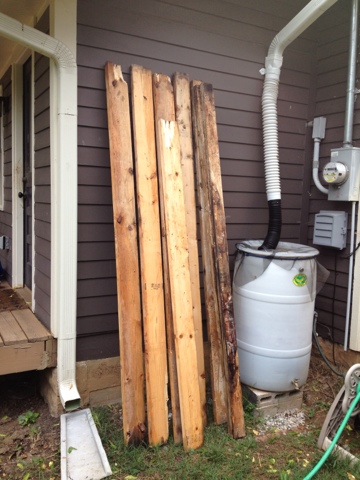
Step 1: Get a bunch of free wood from a Craig's List ad. 5 2x6s, 3 2x4s and some other scraps scavenged from the alley by your house.

I also got a pallet from a guy whose cabinets were delivered on pallets.
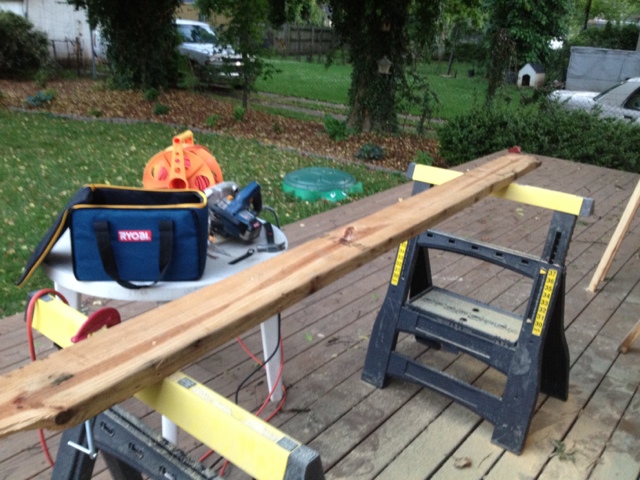
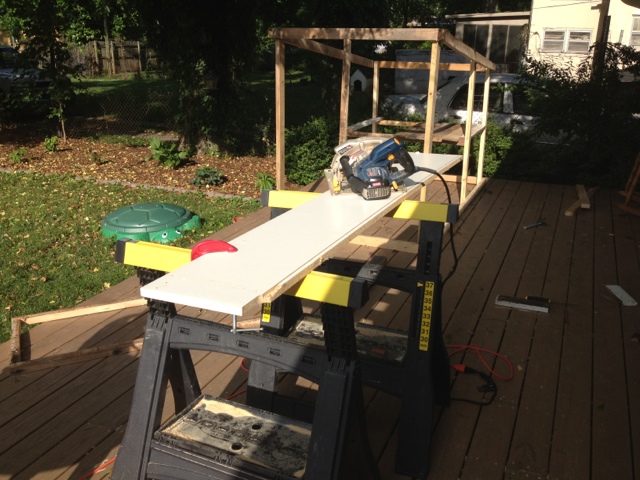
Step 2: Rip all the boards in half (2x6s and 2x4s become 2x3s and 2x2s). Watch a bunch of YouTube videos and don't be scared. Use the guiding attachment on the circular saw. It isn't as hard as it looks.
Be safe! Wear goggles, a mask and ear buds if you don't have ear plugs like me. That saw is loud.
Note: Make sure you know the correct direction to put the blade on (we had it on backwards at first.) Also, get a good blade that matches the wood you have. The school had a hardwood blade that was very good.
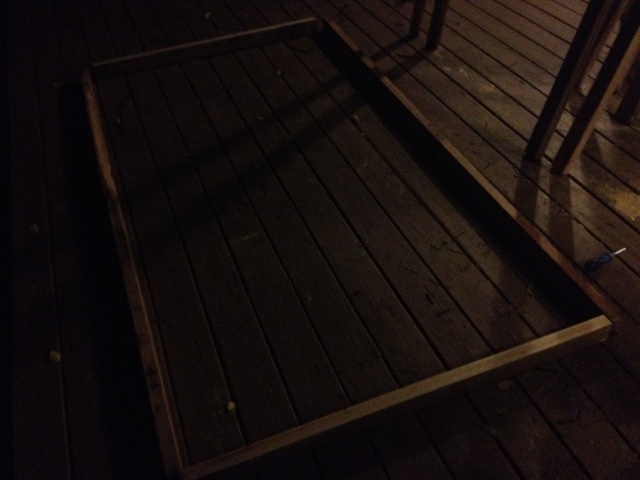
Step 3: Build the base. 2 8 foot pieces and 2 4 foot pieces made from cutting an 8 foot piece in half. See? Simple. Use 3.5 inch exterior screws and use two at each joint for stability. Drill pilot holes and then use a drill to drive the screws in. (Don't be me and use a screw driver. Use your drill's clutch or speed settings.)
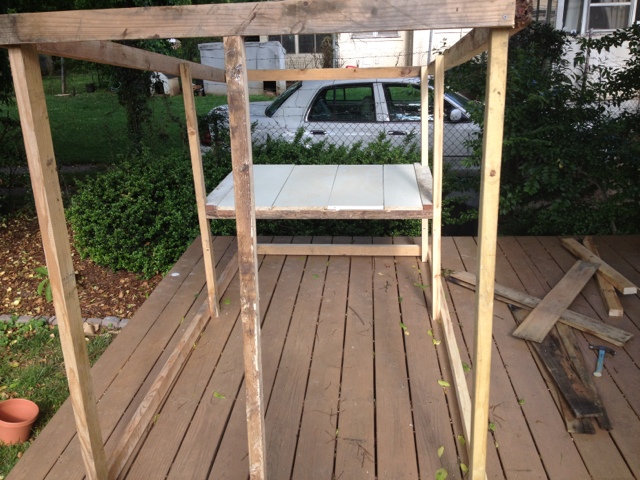
Step 4: After many a false start, get your frame together. I recommend attaching the uprights to the base and then screw in the top frame. It's a little tricky, but not impossible. The center verticals are 5 feet from the front. The front uprights are 5 ft tall and the back ones are 4 feet. This creates a slope so that rain runs off the hen house.
Step 5: Between the back and middle verticals, attach a cross beam with screws. The two boards along the sides happened to already have 2x4 notches cut out.
Step 6: Take the old Ikea Billy bookshelf out of the basement and dismantle it ungracefully and cut it into piece to use as the floor of the henhouse.
Nail down the Ikea Billy parts with galvanized nails.
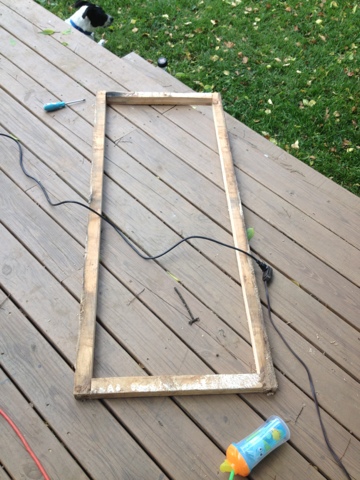
Step 7: Build a door half the size of the front. As you can see from the picture above, I put a beam down the middle of the front for the door to latch to. I used corner braces on the back of the door to keep it stable. I would recommend not screwing in the upright next to the door until you have hung the door and gotten everything in place. Things tend to shift slightly, as I learned. I screwed the middle upright into the top beam and put a mending brace on the back of the bottom for support.
Attach the door with two hinges and secure it with a barrel bolt.
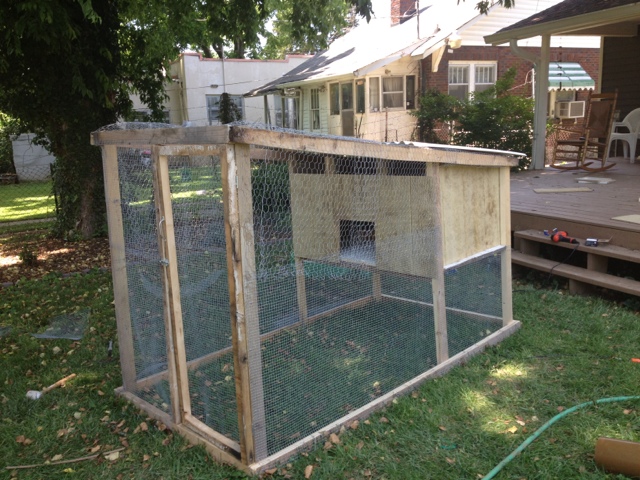
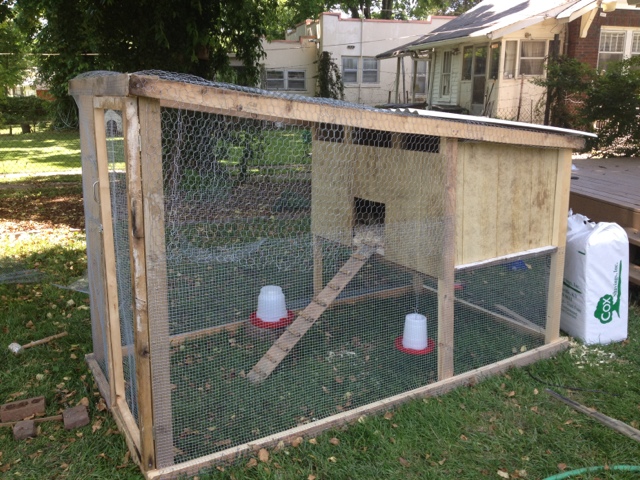
Step 8: Take an 8x4 panel of siding for the walls of the hen house. Lowe's sells this one for under $20 and is made to look like a "knotty barn." The henhouse is only 3 feet deep so I shaved a foot or so off of the side pieces and nailed those on. On the front piece I cut out a 12 inch square door. On the back, I sawed it in half and hinged the bottom part. We will open this and collect eggs from the nesting boxes once they are laying. I added 2 hook and eye latches and a barrel bolt for safety.
Step 9: Build nesting boxes and roosting bar.
Nesting boxes: I used a 2x2 in front and two of the Billy bookshelf pieces for uprights. You only need 1 nesting box for every 3 laying hens, and we won't have more than six, but I had the space and the materials, so I made three. I saw a recommendation to put a slanted roof over the nesting boxes to keep the birds from roosting on it. I cut a slant out of the upright pieces and used pieces of pallet (which happened to be the perfect size) as the roof panels. The nesting boxes are about 13 x13 x13
Roosting bar: I put a 2x2 on 2 risers about 8-10 inches high in the hen house. (This was my roosting bar 2.0. At first I just put a 2x2 on the bedding. Some people online said that would work fine. Well, on the first night, the hens roosted up on top of the nesting boxes. Because the roof wasn't smooth, they could grab onto the pieces. Since they aren't laying yet, I just took the nesting box out and raised up the roosting bar and voila! They roosted on the roosting bar. When they start laying, I will put the nesting boxes back in. Read more about our first day here.)
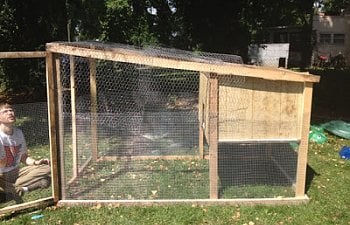
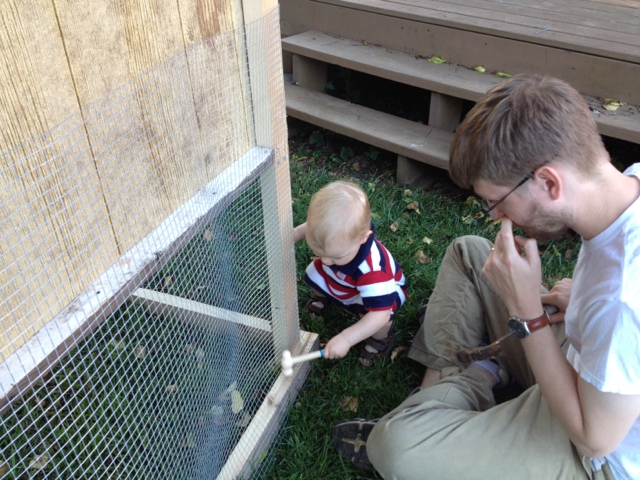
Step 10: Put hardware cloth on the bottom half of the coop and run. Hardware cloth is actually metal mesh. I used 1/2 inch openings. The hardware cloth was 36 inches wide and I used 25 feet of it to go all around the bottom.
We attached it with galvanized poultry staples, which are really just a U shaped two pointed nail. It takes a hammer and was sort of a pain, but much more secure than our light duty staple gun.
Step 11: Attach hex chicken wire to the top of the coop. I went up and over with three strips, rather than around.
I attached the chicken wire with a staple gun. More safety on the bottom to protect from snakes, raccoons and other dangerous predators. The top is less vulnerable, so you can be slightly lazier. Once it was all attached, I "sewed" the chicken wire strips to each other and the hardware cloth below. I used 19 gauge wire and I stood inside David and I threaded the wire through every few holes and wound it tight on the ends.
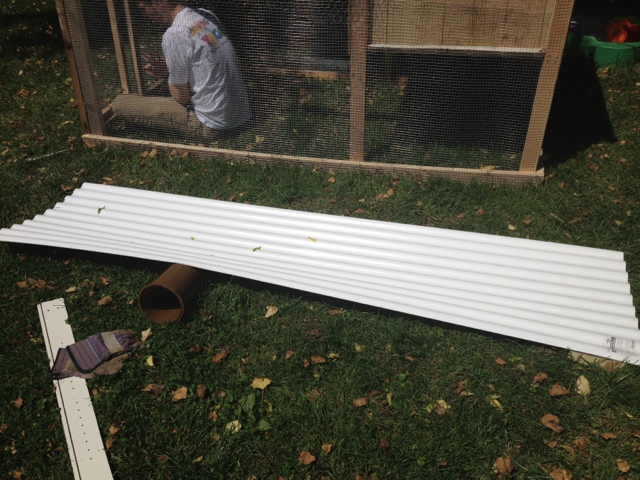
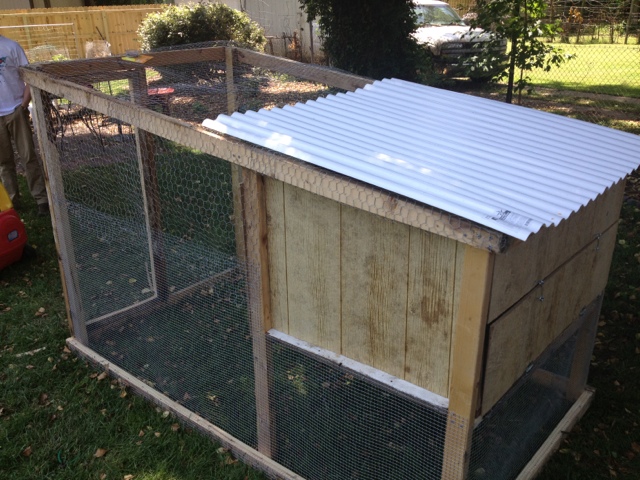
Step 12: Take a 8 ft by 26 in panel of corrugated PVC roofing and cut it in half.
Then attach it to the top of the hen house, on top of the chicken wire. They recommend drilling a bigger pilot hole than your screw in the roof material. This allows the material to expand and contract without cracking. I made mine about 50% bigger than the screw shaft. Make sure the roofing extends past the house so that rain doesn't drain into the hen house. I sprayed the hose on the roof and watched the water slide off before I screwed it in.
We may put translucent roofing panels over the rest of the coop come winter, but we'll see.
Step 13: Build a ladder to the henhouse. I took a piece of the pallet (uncut) and then cut another piece of the pallet into 1 inch wide strips. I glued the strips on every 3-4 inches.
Calvin watched me make the ladder and about an hour later, with no prompting, he started to pretend to make his own.
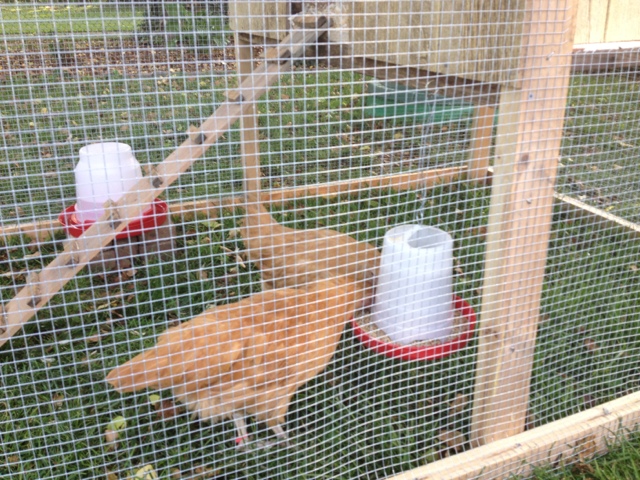
Step 14: Feeder, fount and bedding. We hung the feeder as you can see. This keeps the chickens from scratching in the food and wasting it and getting poop in it. The fount is up on two layers of bricks to keep the poop and debris out. We bought a big bale of pine shavings and put a 2 inch layer in the hen house. That big thing of pine shavings is from a local company and was only $5. We are going to do the deep litter method (rather than cleaning out the litter completely, you just add more on top and the bottom composts.)
And voila! The chickens like it!
I tallied up all the expenses associated with my DIY chicken coop and it came to $142.08. From my research, a coop with 32 square feet will cost you between $350 and $500 new. You may be able to get a used coop for less, but the 8x3 used coop I found was $250. This was lots of fun and totally worth the work! I worked on this for a half day on Wednesday, all day Thursday and Friday and then a half day on Saturday--a total of 3 days. David helped on Friday afternoon and Saturday morning, so if you are working alone, it would probably take 4 days.
Is anything left? Well, this is a tractor coop, meaning it can be moved around the yard. It is pretty heavy, though, so we need to attach some axles so that we can add wheels on when we want to move it. For now, we are fine lifting it and carrying it. We will probably only move it 4 feet to the side anyways. I am going to paint the hen house with some left over paint from the shed and stain the wood--what I can at least. I probably should have stained it before the hardware cloth and chicken wire went on, but oh well. Perhaps one day this week we can let the chickens roam and I will stain the coop.

I also got a pallet from a guy whose cabinets were delivered on pallets.

Step 2: Rip all the boards in half (2x6s and 2x4s become 2x3s and 2x2s). Watch a bunch of YouTube videos and don't be scared. Use the guiding attachment on the circular saw. It isn't as hard as it looks.

Be safe! Wear goggles, a mask and ear buds if you don't have ear plugs like me. That saw is loud.
Note: Make sure you know the correct direction to put the blade on (we had it on backwards at first.) Also, get a good blade that matches the wood you have. The school had a hardwood blade that was very good.

Step 3: Build the base. 2 8 foot pieces and 2 4 foot pieces made from cutting an 8 foot piece in half. See? Simple. Use 3.5 inch exterior screws and use two at each joint for stability. Drill pilot holes and then use a drill to drive the screws in. (Don't be me and use a screw driver. Use your drill's clutch or speed settings.)
Step 4: After many a false start, get your frame together. I recommend attaching the uprights to the base and then screw in the top frame. It's a little tricky, but not impossible. The center verticals are 5 feet from the front. The front uprights are 5 ft tall and the back ones are 4 feet. This creates a slope so that rain runs off the hen house.


Step 5: Between the back and middle verticals, attach a cross beam with screws. The two boards along the sides happened to already have 2x4 notches cut out.

Step 6: Take the old Ikea Billy bookshelf out of the basement and dismantle it ungracefully and cut it into piece to use as the floor of the henhouse.
Nail down the Ikea Billy parts with galvanized nails.
Attach the door with two hinges and secure it with a barrel bolt.
|
Calvin had come home from day care at this point and was "helping," hence the abandoned sippy cup. |


Nesting boxes: I used a 2x2 in front and two of the Billy bookshelf pieces for uprights. You only need 1 nesting box for every 3 laying hens, and we won't have more than six, but I had the space and the materials, so I made three. I saw a recommendation to put a slanted roof over the nesting boxes to keep the birds from roosting on it. I cut a slant out of the upright pieces and used pieces of pallet (which happened to be the perfect size) as the roof panels. The nesting boxes are about 13 x13 x13

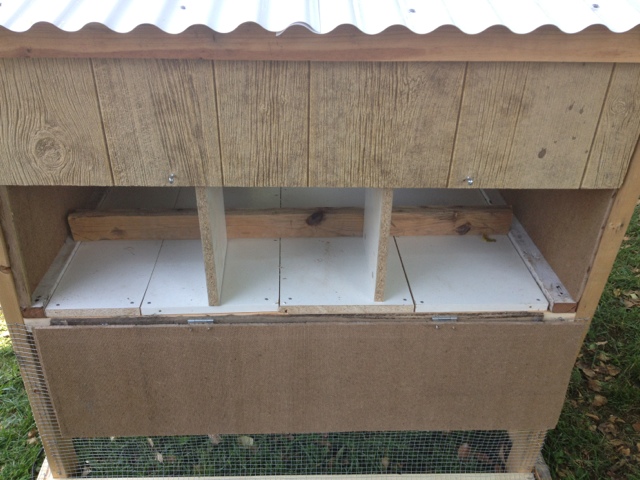
|
This is how we will access the nesting boxes. I think we made need to put some hardware cloth on the back to keep the bedding from falling out when we open the back door. |
Roosting bar: I put a 2x2 on 2 risers about 8-10 inches high in the hen house. (This was my roosting bar 2.0. At first I just put a 2x2 on the bedding. Some people online said that would work fine. Well, on the first night, the hens roosted up on top of the nesting boxes. Because the roof wasn't smooth, they could grab onto the pieces. Since they aren't laying yet, I just took the nesting box out and raised up the roosting bar and voila! They roosted on the roosting bar. When they start laying, I will put the nesting boxes back in. Read more about our first day here.)
Step 10: Put hardware cloth on the bottom half of the coop and run. Hardware cloth is actually metal mesh. I used 1/2 inch openings. The hardware cloth was 36 inches wide and I used 25 feet of it to go all around the bottom.
We attached it with galvanized poultry staples, which are really just a U shaped two pointed nail. It takes a hammer and was sort of a pain, but much more secure than our light duty staple gun.
Step 11: Attach hex chicken wire to the top of the coop. I went up and over with three strips, rather than around.

I attached the chicken wire with a staple gun. More safety on the bottom to protect from snakes, raccoons and other dangerous predators. The top is less vulnerable, so you can be slightly lazier. Once it was all attached, I "sewed" the chicken wire strips to each other and the hardware cloth below. I used 19 gauge wire and I stood inside David and I threaded the wire through every few holes and wound it tight on the ends.
Step 12: Take a 8 ft by 26 in panel of corrugated PVC roofing and cut it in half.
We may put translucent roofing panels over the rest of the coop come winter, but we'll see.
Step 13: Build a ladder to the henhouse. I took a piece of the pallet (uncut) and then cut another piece of the pallet into 1 inch wide strips. I glued the strips on every 3-4 inches.


|
I just leaned the ladder up to the house, I didn't attach it. |
Calvin watched me make the ladder and about an hour later, with no prompting, he started to pretend to make his own.
Step 14: Feeder, fount and bedding. We hung the feeder as you can see. This keeps the chickens from scratching in the food and wasting it and getting poop in it. The fount is up on two layers of bricks to keep the poop and debris out. We bought a big bale of pine shavings and put a 2 inch layer in the hen house. That big thing of pine shavings is from a local company and was only $5. We are going to do the deep litter method (rather than cleaning out the litter completely, you just add more on top and the bottom composts.)
And voila! The chickens like it!
Is anything left? Well, this is a tractor coop, meaning it can be moved around the yard. It is pretty heavy, though, so we need to attach some axles so that we can add wheels on when we want to move it. For now, we are fine lifting it and carrying it. We will probably only move it 4 feet to the side anyways. I am going to paint the hen house with some left over paint from the shed and stain the wood--what I can at least. I probably should have stained it before the hardware cloth and chicken wire went on, but oh well. Perhaps one day this week we can let the chickens roam and I will stain the coop.