Heres a few quick pictures of my coop progress over the weekend.
Posts in it's 12' x 8'

Perlins up!
Showing my skills! I wear that nail bag like I was born with it") .
.
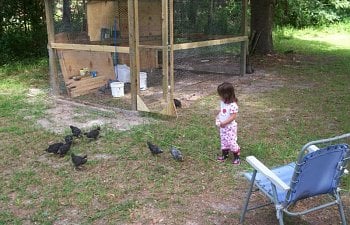
My little helper
Wire up. The picture doesn't do it justice, it has more bubbles in it than a hot tub full of burrito eating beer drinkers. I hate chicken wire!!!
Setting the foundation for the coop.
Initial framing of the coop.
This taken months later but it is being lived in now. That is the start of some nest boxes you see on the ground.
Shot of the sliding door between the coop and run.
The side window and the pull for raising the sliding door.
Back door of the coop.
roosts inside... it is a little small. didn't plan very well. at least this is just their overnight location.
Shot of the sliding door from inside.
Little lady watching over the flock.
Relish tray feeder on the bottom of my free bucket!!
The waterer is a free bucket also that has a rubber seal around the top and a twist valve on the top to provide the vapor lock.
Pictures of the nest boxes
Slide open panel to access the eggs from outside.
From Inside.
Posts in it's 12' x 8'

Perlins up!

Showing my skills! I wear that nail bag like I was born with it
.
My little helper

Wire up. The picture doesn't do it justice, it has more bubbles in it than a hot tub full of burrito eating beer drinkers. I hate chicken wire!!!

Setting the foundation for the coop.

Initial framing of the coop.


This taken months later but it is being lived in now. That is the start of some nest boxes you see on the ground.

Shot of the sliding door between the coop and run.

The side window and the pull for raising the sliding door.

Back door of the coop.

roosts inside... it is a little small. didn't plan very well. at least this is just their overnight location.

Shot of the sliding door from inside.

Little lady watching over the flock.

Relish tray feeder on the bottom of my free bucket!!
The waterer is a free bucket also that has a rubber seal around the top and a twist valve on the top to provide the vapor lock.

Pictures of the nest boxes


Slide open panel to access the eggs from outside.


From Inside.