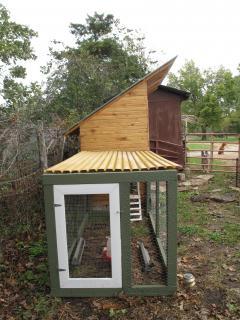
Cedarcreek Farm Coop and Run

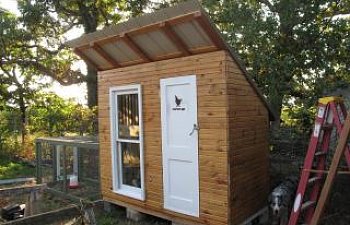
(The almost completed coop)
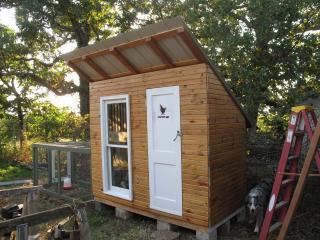
(The almost completed coop)
Coop Design:
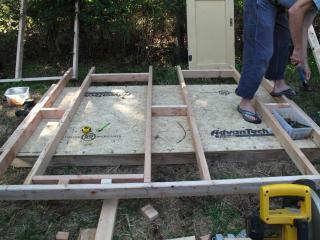
Step 1: Framed the floor with 8 foot long 2x4s and weather resistant plywood.
Step 2: Frame all walls. From this point forward the back end will be referred to as the "north" end, te front will be the "south" end and the side without the run will be the "east" end and the side with run will be the "west" side:
North end: 2x4s used. Basically created a box with the top studs cut at a 30 degree angle. Length 8 feet and height 5 feet.
South end: 2x4s used. Created another box with the top studs cut at a 30 degree angle and framed in a spot for the door and window. Length 8 feet and height 7 feet. I created such a steep slope for the roof so it would match the barn which is directly beside the chicken area.
(South frame with door and window frame)
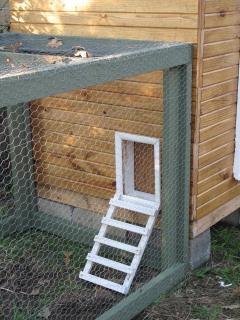
East and West ends: 2x4s used. Created a box here with all the top ends of the studs at a 30 degree angle and braced the top with an 8 foot long 2x4 for support for the time being. The inly difference between the two ends is the 12x12 frame in the west end for the chicken door.
Step 3: Next, I put down some scrap linoleum that I got at the hardware store for ~$6.00 and set up the roost. I made the roost from 2x4s and mounted it with hinges so I could easily lift it up for cleaning.

(Frame with roost and linoluem flooring)

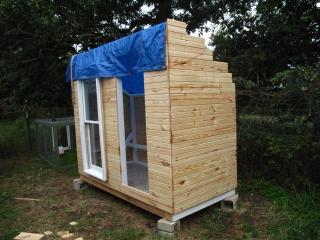
Step 4: Now there was the siding to mull over. This was by far the hardest part for me. There were too many options at drastically varying prices. There was the cheapest and by far the least aesthetically pleasing plywood. Then, there was T1-11 siding, which wasn’t as cheap as I thought it would be. Finally, there were the local lumber store guys who sold me on some pine car siding. It was a little more expensive than T1-11, but not as much as one might think and a lot easier to work with. I spent ~70 for the siding. Basically, all you have to do is cut the pieces to the size needed and insert the "tongue" in the groove and nail down. Very easy to work and looks nice. I used some extra stain we had leftover from when we put down pine flooring in our house and polyurethane to seal the siding. For the top roof angle I just used an electric saw to rough cut the top instead of trying to cut the angles using a miter saw. As you can see from the pictures I cut the door after all the siding was put up.
Step 5: 2x4s and 1x4s and 3 pieces of green metal roofing. Roofing sheets were about ~$10 each. Used the 2x4s to for support vertically (north to south) and 1x4s for supprt horizonatlly (east to west). I also left about a ~ 1 foot overhang on the back with the last 1x4 directly screwed to the end of the 2x4 so I could mount a gutter and put a rain barrel at the east end. The front has ~2 foot overhang to act as an awning.
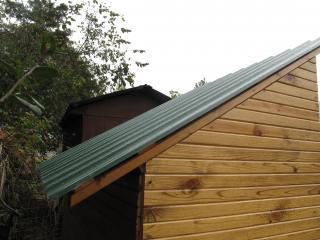
(Gutter will be attached at back)
Step 6: Details, details and more details. I am still detailing the coop. I framed the outside of the chicken opening with some scrap crown molding I found, as well as the front door. I also nailed in a community nest box tothe studs - we will see if it works. I am also building a rock predator barrier along side the the coop (image below).
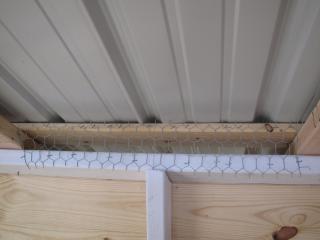
(Chicken wire on roof gaps to keep rodents out)
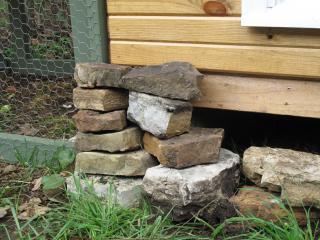
(Rock barrier around coop for extra predator protection - I am paranoid)
Step 7: Attach the run
(Plastic roof on run to keep girls dry)
Total footprint is 4x16.
Things I like:
I like the looks a lot.
Easy to get in and out of.
I really like the linoluem floor and hinged roost. Makes cleaning very easy.
The window is great!
The girls seem to be very happy!!!
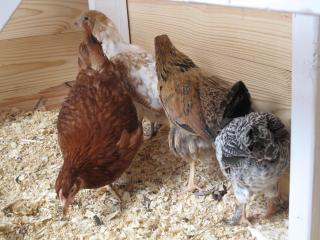
Barred Rock (Ethel) not pictured
Things I would do differently.
Build an attached nest box for more coop space. (I still may do this on the east end of the coop).
I would not slope the roof so steep. It does match the barn but I would like more height in the north end.
Make the run tall enough for me to get in and out of.
Advice:
Start out with a rough sketch, but be willing and ready to change things on the fly. I was very surprised by the lack of plans on the internet, but I think I understand why now. People just don't use them for chicken coops. All they really amount to is a sketch of what you want the coop to look like and incorporate. I know very few people (myself included) that created a real plan. Backyard Chickens was my plan. I looked at every coop page on here and incorporated things from many of them.