Budget Florida Coops for 3-10 chickens
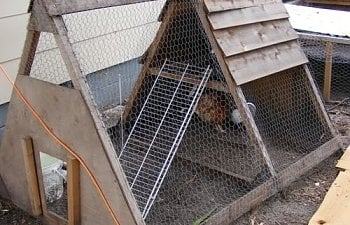
We're definitely budget folks. And luckily for us, the right (free) materials materialized at just the right time to get us going. First off, we had three chickens in a small A-frame tractor type coop we built in an evening. Most was made out of scrap...we spent about $50 out of pocket (mainly chicken wire, hardware, and screws).

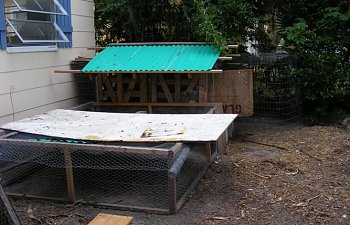
Then we wanted more chickens, had very little time, or money, so put together a larger coop made from packing crates up on concrete blocks, covered in chicken wire. We did spend some money on the wire and the roof materials, but the crates were free and we already had the blocks. Oh, and I made a nest box out of a plywood shipping box someone was throwing out (the thing marked "glass" upside down in the picture. We also used swung it out as our "door"). So actual investment was about $60. The front run was made with 1x2s and chicken wire, and then the back run area under the trees was made with some rabbit wire someone gave us covered by leftover chicken wire. This coop/run is perfect for up to 7 chickens. And it has great ventilation for a Florida coop, important to keep those chickies cool. It is not secure against predators, mostly because we never blocked in around all the concrete blocks, which is part of why we are building a new coop from scratch.

Now we have ten chickens, and we need something large enough for all of them. Along came a great find: a lone 1x12x16 board was sitting by the dumpster behind a local independent fabric shop, and I called to ask if we could have it. They said they had a lot more, and did they mean a lot! We've gotton probably 30 boards (not all 16 feet, some have nails or are painted, but all in great re-usable shape!). We also had a neighbor drop off a "bird cage" made of a metal screens tied together, we took that apart to use for windows/ventilation (again, keeping the birds cool is very important). We're making the coop the dimensions of our green roof off the second coop, about 6' by 7', and we'll transfer over the nest box and small run as well. Finally, to keep costs down, we're framing with 2x3's instead of 2x4's, saving about a dollar a board. And we're stepping up from the chicken wire, putting hardware cloth around the ground level of the coop, so actual added expense is $100 (since we're reusing the roof from coop#2). This time around, we have some pictures of the constrution. Unfortunately, we aren't very good about making plans ahead of time, mostly just winging it with what we have, but this coop should be a lot more asthetically pleasing as well.
 Here's the basic frame of the coop, with DH Briggs (in tie-dye) and our good friend John.
 These are the screens from a bird cage we took apart.
 Cutest helper in the world!
 John measuring out one side. We made the frame, then each side fits in and is screwed in place. This way, since we'll be moving soon, it'll be easier to disassemble and take with us.
 Our stopping point for the first day. So far we've put about 7 hours into it.
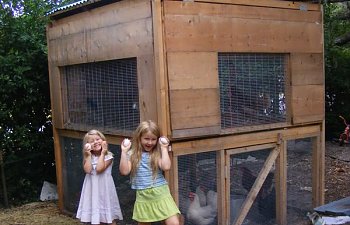
 Chickens enjoying the coop: room to stretch and climb! Notice that the front wall swings up completely to clean and enter. The bottom front will have a door that swings out, making it somewhat easy for us to get inside when we need to.

Getting close! All we have to finish is the front bottom panel and the roof. And tomorrow, our ten chickens will enjoy each others company at night!
Here's the end result:

We're definitely budget folks. And luckily for us, the right (free) materials materialized at just the right time to get us going. First off, we had three chickens in a small A-frame tractor type coop we built in an evening. Most was made out of scrap...we spent about $50 out of pocket (mainly chicken wire, hardware, and screws).
Then we wanted more chickens, had very little time, or money, so put together a larger coop made from packing crates up on concrete blocks, covered in chicken wire. We did spend some money on the wire and the roof materials, but the crates were free and we already had the blocks. Oh, and I made a nest box out of a plywood shipping box someone was throwing out (the thing marked "glass" upside down in the picture. We also used swung it out as our "door"). So actual investment was about $60. The front run was made with 1x2s and chicken wire, and then the back run area under the trees was made with some rabbit wire someone gave us covered by leftover chicken wire. This coop/run is perfect for up to 7 chickens. And it has great ventilation for a Florida coop, important to keep those chickies cool. It is not secure against predators, mostly because we never blocked in around all the concrete blocks, which is part of why we are building a new coop from scratch.
Now we have ten chickens, and we need something large enough for all of them. Along came a great find: a lone 1x12x16 board was sitting by the dumpster behind a local independent fabric shop, and I called to ask if we could have it. They said they had a lot more, and did they mean a lot! We've gotton probably 30 boards (not all 16 feet, some have nails or are painted, but all in great re-usable shape!). We also had a neighbor drop off a "bird cage" made of a metal screens tied together, we took that apart to use for windows/ventilation (again, keeping the birds cool is very important). We're making the coop the dimensions of our green roof off the second coop, about 6' by 7', and we'll transfer over the nest box and small run as well. Finally, to keep costs down, we're framing with 2x3's instead of 2x4's, saving about a dollar a board. And we're stepping up from the chicken wire, putting hardware cloth around the ground level of the coop, so actual added expense is $100 (since we're reusing the roof from coop#2). This time around, we have some pictures of the constrution. Unfortunately, we aren't very good about making plans ahead of time, mostly just winging it with what we have, but this coop should be a lot more asthetically pleasing as well.
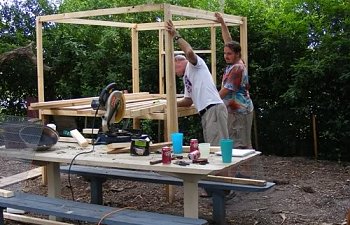 Here's the basic frame of the coop, with DH Briggs (in tie-dye) and our good friend John.
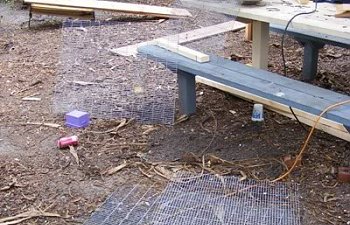 These are the screens from a bird cage we took apart.
 Cutest helper in the world!
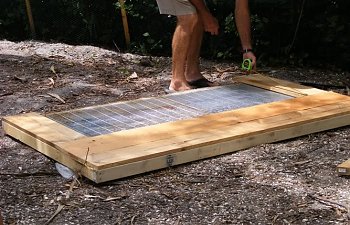 John measuring out one side. We made the frame, then each side fits in and is screwed in place. This way, since we'll be moving soon, it'll be easier to disassemble and take with us.
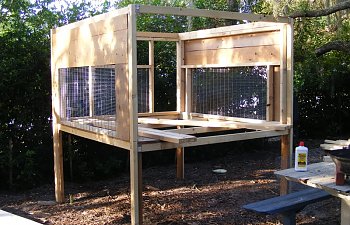 Our stopping point for the first day. So far we've put about 7 hours into it.
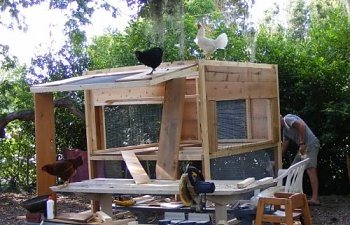 Chickens enjoying the coop: room to stretch and climb! Notice that the front wall swings up completely to clean and enter. The bottom front will have a door that swings out, making it somewhat easy for us to get inside when we need to.
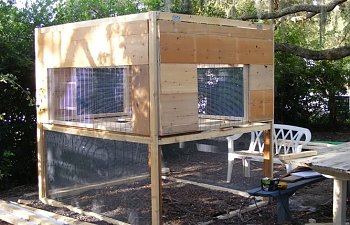
Getting close! All we have to finish is the front bottom panel and the roof. And tomorrow, our ten chickens will enjoy each others company at night!
Here's the end result:
