Our (First
 ) Incubator
So this is our first incubator...
Nothing particularly startling here...it's a bog standard polystyrene (styrofoam) box incubator, but hopefully with some useful info and new ideas here which you might not find on other similar pages. I'm assuming at least some knowledge about how to put one of these together and focusing mostly on what i did differently to most other bators i've seen. If you need more detailed instructions, see here or PM me.
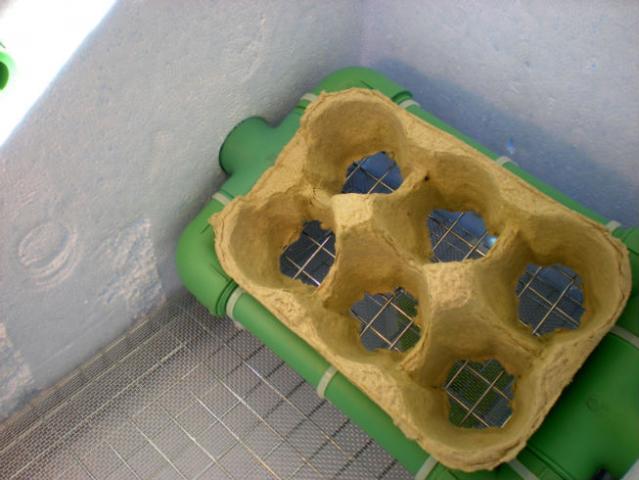
| Floor The first thing i did differently to most of the bators i've seen so far was the floor. When we bought a cage for our baby pullets, it came with a welded wire floor which we don't need. I used that for the raised floor in the bator, but the holes are a bit on the large side, and having just seen (very) newly hatched ducks in someone elses bator, struggling to stand up on welded wire which was too big (the poor bugger's foot kept falling through one of the holes) i decided to cover the welded wire with fly screen. It's great. It doesn't need "attaching"...you just fold it over the edges of the welded wire and it stays put, it's going to provide plenty of support for them to walk around on with their tiny little toesy-woesies but still have plenty of air flow, and 1 sq m cost me €4...i can throw it away after each hatch instead of trying to clean it and 1 sq m should do at least 4 hatches. NB: since you can no longer get hold of the welded wire properly once you've done this, i put a cable tie loop at each end to help me lift it out again. Fan Standard PC fan, ignore or remove the yellow wire, attach the red and black to a universal transformer or an old 12V DC transformer you have kicking around. I've seen people threading wires through wine corks and then putting the cork into a hole in the bator. I shoved a thin screwdriver through the side of the box and then shoved the wire through the hole. NB: some DC motors are reversible, ie: if you get the wires connected the wrong way around the fan will run backwards, some will not run reversed at all. If your fan won't move, switch the wires around, if it moves first time, make sure it's actually blowing! I chopped the end off of some rawlplugs to use as spacers to hold the fan away from the wall. Thermostat I was going to get a reasonably cheap one, long story short, the electrical shop didn't have one(!) but our plumber (who does our building sites) did so i got a good one and a bunch of PVC pipe and connectors for the egg turner for free (when i asked him "how much?" he smiled and told me to get out of his shop). This is relevant, honest...the cheap t-stats most people seem to be using have 2 terminals on them, in and out. Mine has 3. Labeling varies a lot on t-stats but on this type you'll normally find 1 terminal marked C or COM for COMMON (this is IN). The other 2 could be labeled a number of different things (mine were very helpfully labeled 1 and 2) and one of these will always be live. One of them is for heating and the other is for ventilation/air conditioning, ie: ambient temp is 50 degrees, when you set your t-stat to 60, you need heat to get up to that temp and pin 1 (for example) will be live. If you set the t-stat to 40, you need cooling to get down to that temp and the other pin will be live. Make sure you get the right pin and make sure the cooling pin is insulated as well as the others or it'll be capable of killing a chick when the light is off. Light Get one. Wire it to your t-stat. i used a 25W and i'm getting very stable wiggler temps (99.5 to 99.7). I've seen so many people getting big temp swings just because they're using a higher watt bulb. Egg Turner I made mine out of PVC pipe and connectors, then cable (zip) tied some more welded wire to the bottom of it. You can see the outside handle for turning in the top pic. The back has a small length of pipe with an end cap to hold it in place. I also used a couple of those (small lengths of pipe with end caps) for humidity plugs. Ventilation I struggled to find any useful and consistent info about exactly how much ventilation i needed. The only consistent info i found around the net for foam bators (being dished out by poultry nerds in various american universities) was this: 16 pencil holes. On each long side make 4 holes 2" from the bottom and 4 holes 3" from the top. All holes should be 4" apart. After you've made the holes, sear them with a hot nail so that bits of foam don't flake off and block the holes. ETC I stuck a hole in the side for a tube to feed water to the humidity tray (totally ripped the idea off from gopher-boy)...aquarium air-line fits nicely through a pencil hole and a syringe fits nicely into the air-line. Then i made a water wiggler out of zip-lock bags (ripped off from daisychick) which still leaked even after tripple bagging so i shoved it into a pot and let it be, for now anyway. Now i just need some eggs... Update I underestimated how much it would take to get the humidity up inside the bator by quite a lot. The little humidity tray got replaced with a larger one for incubation and i added a second one to get it up further for hatch. I've now got 2 tubes feeding water to the 2 trays and a 60ml syringe instead of 5ml (doh!). I'll update the pics later... |