Kid's Playhouse Coop Conversion
This all started as a casual conversion with friends about a year back. We recently brought the subject up again and turns out their chickens are doing very well and are providing them with more eggs then they know what to do with! The more I thought about it, the more I was liking the idea. So I decided to just do it. Here's my breakdown of my progress on our coop.
Any of the photos below can be clicked on for a larger image.
Planning Stage This is a digital layout of the yard space we plan on dedicating to the chickens. I wanted to be able visualize everything with exact measurements. Created in Illustrator. Each square is 1 square yard. The interior of the coop should be enough space for 6 hens at 24 square feet. The run area is around 783 square feet, which should be more than enough for 6 hens. | 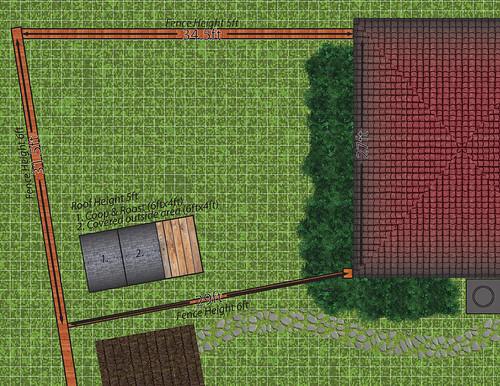
|
Day 1 This is the kid's playhouse we've decided to convert into our first coop. The building part is 4'x6'. The covered porch is another 4'x6' feet. | 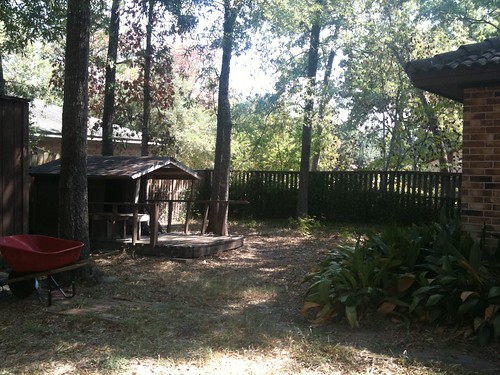
|
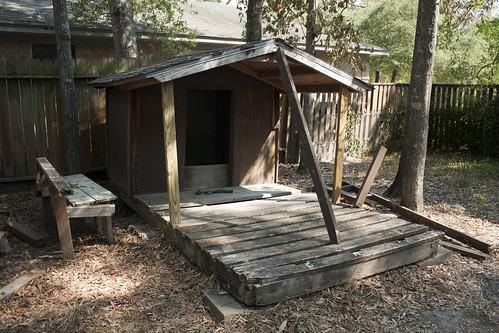
Day 3 The playhouse needed a little more work than I thought. I decided to close the 1 inch gaps on the deck by pulling up the boards. I also removed the bench and handrails since I was afraid the hens would use the elevated positions to get over the fence. The roof is now being temporarily supported by some 2x4's until the deck is finished. Here's another view. Something to note: I think the previous homeowners were using it as a coop! Notice the kickboard in place in the doorway. Also inside was a boxed in corner that could have been used as a nest. 
| 
|
Day 6 Over the course of the past few days I've been working nonstop in the yard. All the post holes for the new fence have been dug, 2 of the 4 posts are cemented in, the deck is finished and shortened and the roof is secured. Removing those old boards from the deck was far harder than I thought and took a majority of the 3 days to do. | 
|
Day 10 I installed windows on both sides of the house! I had to knock out a center stud on each wall and install 2 new studs to frame up the windows. I also closed the roof off from inside with some scrap lumber. I made small wooden frames and placed window screen down before nailing them down. Here's a before picture. | 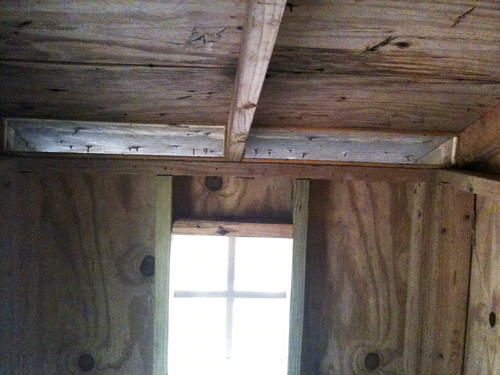
|
Day 11 Things are starting to come together and I can see almost see the end! I got all the posts cemented, the fence gate is hung and the newly made coop doors are ready for installation. | 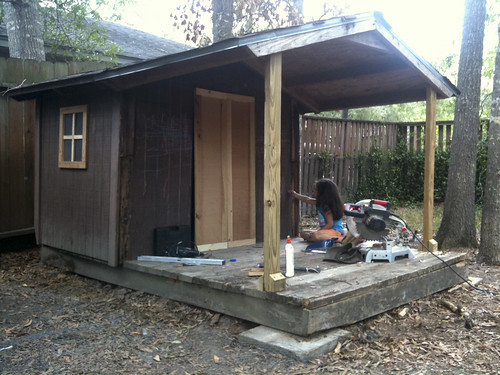
|
Day 18 The doors are framed out and attached. I found a great rooster dinner bell on eBay for $10. The fence is framed up and finished. The gate had to be squared up with some diagonal beams and started to attach the chicken wire but I ran out of chicken wire. Next on the attack list is the nesting boxes, auto food dispenser and auto watering. Almost there! | 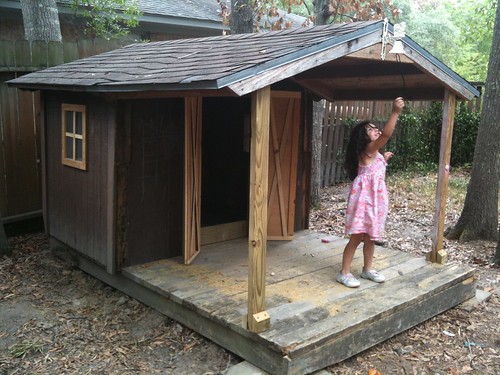
|
Day 20 The nesting boxes are done and ready to be installed! If I measured everything out right, there should be 12.5 inches underneath the nesting box and the bedding. | 
|
Day 21 Here there are installed. They are 18 inches off the floor. I plan on using the deep bedding method with 5.5 inch deep bedding for a total of 12.5 inches from the bedding floor. The top sits flush with the top beam of the wall frame. It's attached to the wall with a 2x4 frame. Once it was attached I cut out the access holes roughly with a jig saw. I then cleaned it up with a router and a flush trim bit. The doors are cut (in the bottom left of the picture) and waiting on hardware (hinges). Here's my little chicken girl explaning to me how chickens fly and how much work it is to fly.  | 
|
Day 31 A little bit slacking around but I did manage to get the nesting box doors installed and the locks in place. Here's my auto watering system. Using an old Tidy Cats bucket I had laying around. I drilled a hole at the bottom and put in a PVC water hose adaptor. It's water tight with O rings. I used a lightweight water hose and to cut up for the water supply lines to the poultry nipples I purchased through eBay from this guy (who I do recommend). Here's the inside watering nipples and the outside. The wall mount is just PVC and water hose adaptors. The next part is for anyone who has trouble installing these poultry nipples onto PVC. I broke one of my nipples until I found a way to install that that worked for me and was very easy. Poultry Nipple Installation Drill your 11/32 holes. They will fit but first you should disassemble the poultry nipples using a pair of pliers and a socket wrench. Twist off the metal bottom part. Be careful not to break the plastic or lose the ball bearing and nipples when they fall out. Now you can take your drill (choked down really low!) and socket it to fit the plastic part and slowly thread it in the hole. I recommend wrapping the threads with teflon tape. STOP when it's threaded in and finish by hand with a socket wrench. Now reinstall the nipples and ball bearing. The long nipple tip should be on the outside (the drinking nipple). Also, the nipples should point straight down otherwise they will leak. | 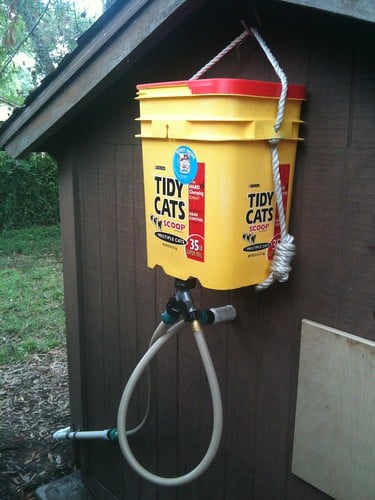
|
| Day 34 Today I installed the roosts finally! The bottom roost is 26 inches from the bedding and the top 2 corner roosts are 10.5 inches from the bottom roost. Here's another angle. Roost Diminisions: bottom roost is 42x4x1 inches long and the top are 27x4x1 inches long I also fixed the fence gate. I had to shorten the width by .25 inch since I didn't keep in mind that wood would swell slightly after a rain and it jammed a bit. Now it opens and closes cleanly even after a heavy rain. ") In the next few days I'll be putting up the last of the chicken wire, adding a cover for the auto water and installing the PVC auto feeder. | 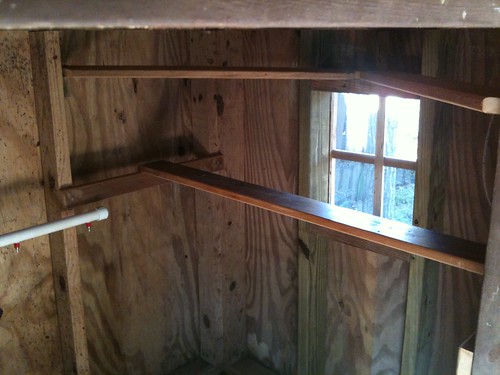
|
Day 57 Chicks were ordered from Meyer's Hatchery on 12 October 2011 and arrived on 1 November 2011. All were in good health and were quickly put in my makeshift brooder. 2 Rhode Island Reds, 2 Ameraucanas, 1 Black Australorp and 1 Barred Rock. | 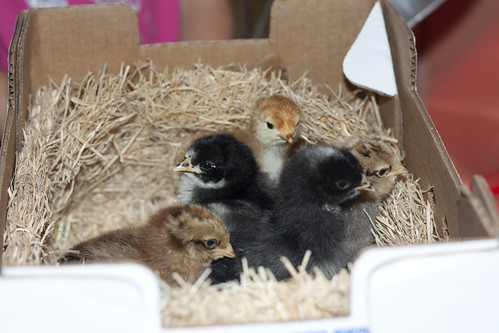
|
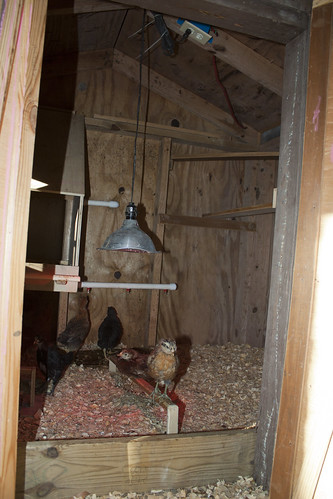
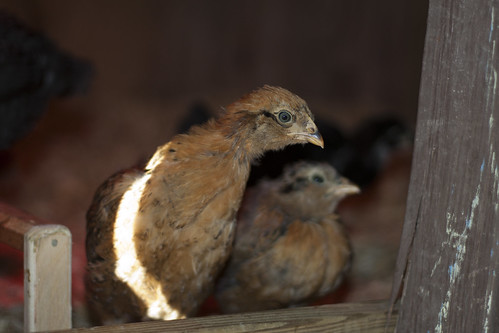
Day 76 After a few weeks in the house, nestled in a hallway closet, we decided they were big enough to move out to the coop. Plus the wife's preggo nose had enough. They've settled in and seem to really like their new home. They've taken to the watering nipples and the PVC auto feeder is installed (pics later). The last of the chicken coop conversion was I added a plug to the inside and ran a heavy duty extention cord outside from it for power. I'll eventually install a light bulb fixture and a automatic door. 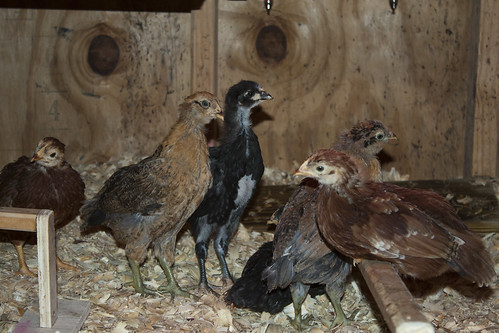
| 
|

| 
|