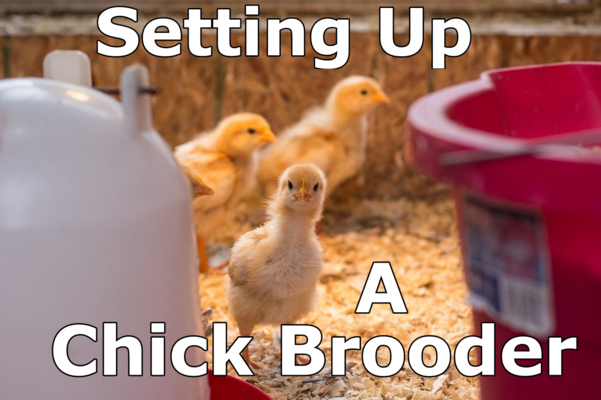
Setting Up A Chick Brooder

••••••••••••••••••••••••••••••••••••••••••••••••
When setting up a chick brooder, you might be surprised to discover how complicated the process can become. There are many items required to fill the needs of such young birds. Some of these things like, waterers and feeders, come in so many varieties that it’s hard to know which is best! Luckily, I have a few tips that may come in handy. I’ve only raised chicks and ducklings a few times over the past years, but every time I’ve experimented with different setups that I’ve learned a lot from trying. I want to share what I’ve learned here and hopefully give you a few new ideas as we enter Chick Season!
Brooders
The first few weeks of a chick’s life will be spent in something called a brooder. A brooder is a small pen or enclosure in which young birds are raised inside. Your brooder needs to have enough room for your little ones to grow but must also be easy to keep clean and dry. Throughout the years I’ve used many different kinds of brooders, and I am not done experimenting with them. I enjoy trying new things, and the process has taught me a lot. I figure that sharing this knowledge with others would be helpful, and I’ve come here to generate a list of information on four of those brooders and the pros and cons that come with them.
………………………
Kiddie Pool

Kiddie Pool brooders are great for very young chicks. A kiddie pool, or wading pool, is a small plastic pool sold in most stores during the summer. The space they offer is appreciated but I find them much harder to clean, as they have no tray that can be removed and easily cleaned. To combat this issue, line the pool with an old towel or blanket, and fill it with shavings. When the shavings are old and it’s time to clean them out, simply wrap them up in the towel and dump them out. Kiddie Pool Brooders are pretty cheap, pricing at just under 10 dollars. Because kiddie pools are meant for human children they are fairly large but, the sides on these pools are only a few inches tall for the same reason. Once they are a few weeks old, your chicks will have no trouble jumping out of this short-sided brooder. In my experience, I’ve had chicks jump out once or twice a day. It’s a stressful experience for both of you. To combat this problem, can buy a ‘chick corral’ (this will be mentioned again later in the article) to wrap around it, but be aware that this will only work if it is placed inside the brooder, not outside. An alternative option to that would be to wrap hardwire cloth (with absolutely no gaps between it and the pool's edge) onto your pool. This will stop the babies from jumping out and make this brooder usable for the whole six weeks that they will live in it. If you happen to be raising ducklings, this brooder can be reused as a pond once the ducklings have grown. One issue with reusing it though is that Kiddie Pools are not made to last. Sharp rocks puncture them far too easily and only last a few months when used as duck ponds.
Pros of this Brooder:
Large- Great for growing chicks
Can be reused as a duck pond
Cheap
Easy to set up
Cons of this Brooder:
Hard to clean
Breaks easily
Short sides. Chicks can jump out
How To Set It Up
Purchase A Kiddie Pool from Walmart (Click) or from any store you know of that carries them. Find an old towel, and buy a bag of pine shavings from TSC or your local feed store. Line the pool with the towel, and dump it in the bag of wood chips. Spread them out evenly, and make sure they cover the entire surface. Line your brooder with a chick corral, or attach a piece of hardwire cloth to the outside to prevent the chicks from jumping out. Set up food and water on the opposite end from the Heat source, and clean once daily.
-----------------------------------------------
Plastic Tub Brooder

*Image by @rebeccaH86
If you are seeking a brooder set up that lacks complications and offers new chicken owners an easy beginning, then this brooder is perfect for you. Simply purchase, or find a large storage tub with a lid and drop it in the bedding of your choice. To keep the babies from flying out, while also maintaining adequate ventilation, cut a large hole in the lid of your bin, allowing a few inches of the frame to attach hardwire cloth to. This brooder is easy to set up, but your babies will probably outgrow it quite quickly. Given its small size, you will have to clean it daily to prevent the buildup of ammonia and droppings. When doing this daily cleaning, I find that this brooder is extremely simple to fix up, and is just perfect for those with a tight schedule.
Pros of this Brooder-
Contains Chicks
Easy to clean
Cheap, easy to setup
Cons of this Brooder-
Small, Will be quickly outgrown
How to Setup
Purchase a storage tub, from Target, Walmart, or any store near you. Remove the lid and cut a hole in the center, leaving about a 3-inch frame to which hardwire cloth will be attached too. This offers great ventilation while also containing your chicks without a struggle. Most of these bins include patches that hold on the lid, and this prevents it from being knocked off, as well as making it easy to remove. Drop in bedding last, with food, water, and a heat source.
-----------------------------------------------
Dog Crate Brooder

Of all the ones I chose to review, this brooder certainly was my favorite to write about. When raising my chicks in a dog crate, I found that it was like a mini chicken coop. Safe, well-ventilated, and easy to clean. The tray included makes removing old shavings a breeze, and the latched door and enclosed structure make sure no one is getting out. The metal bars are too closely spaced for your babies to squeeze through, but they still allow for easy interaction. Of course, all Brooders have at least one con, and what I found with this brooder is that when using shavings, you will need to create a barrier on the sides to prevent shavings from spilling out. However, the bars are perfect for inserting a mini roost which your chicks will certainly enjoy spending time on. I highly recommend this brooder to everyone.
Pros of this Brooder-
Large, Room to grow
Ventilated
Contains chicks
Easy to clean
Cons of this Brooder-
Expensive
Does not contain shavings well
How To Setup
Purchase or recycle a dog crate (preferably of the largest size) with a pullout tray. Attach a barrier to prevent shavings from spilling out of the sides, by zip-tying cardboard or a chick corral to the lower metal bars. Drop in shavings, water, food, and a heat source.
------------------------------------------------
Chick Corral Brooder
*image needed*
The Chick Corral brooder is a popular brooder, that takes only seconds to put together. It's also very easy to clean and provides lots of space for growing chicks or ducklings. A Chick Corral can be ordered offline at around 35 dollars or less. They come with a heat lamp hook (although further in the article I will touch on a better alternative to heat lamps) and can be positioned in any way you desire. Place the corral on a piece of plywood, or cardboard, and drop in some bedding. When it comes time to clean out, sweep the shavings off the plywood into a trash bag and dump fresh ones in. It's as simple as that! The corral, however, does not contain chicks very well with its shorter sides. A chick can easily fly over after a few weeks spent inside. You can cover the corral with hardwire cloth, or chicken wire if you find that to be a problem.
Pros of this Brooder-
Easy to set up
Easy to clean
Gives good amount of space
Cons of this Brooder-
Not the cheapest
does not contain chicks
flimsy, may not last very long
How to Setup
A Chick Corral can be purchased from TSC or any farm store. The plastic, the bendable structure can be positioned to fit your birds' needs and can be added onto if you purchase multiple of the item. I prefer to set it up on a piece of plywood, so when it comes time to clean it out, you can remove the plastic barrier and sweep off all the old shavings in a few moments.
---------------------------------------------------
Brooder Accessories
Chicks require so much more than you think! They need a feeder, waterer, and heat source. I'd like to share here which items i think work best, along with a few bonus items that really help out while you raise you new chicks.
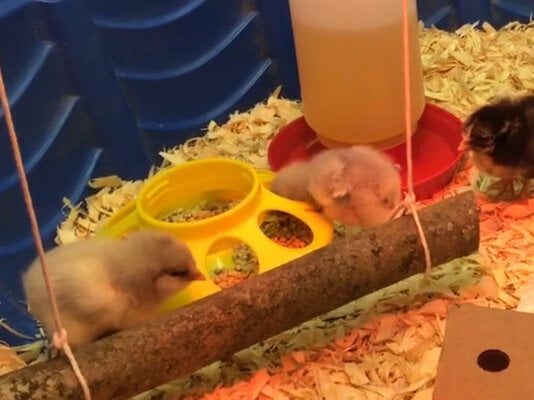
Feeder
My favorite feeder is quite simply the one we're all used to. The 'UFO' feeder, as I like to call it. This thing is pretty easy to clean. Plastic deals with poop well, and unlike metal and wooden feeders, the sticky baby droppings come off in a flash. This feeder can also be found at pretty much every feed store, and barely cost a cent. However, your little babies will want to sit in the middle of their feed, so you'll have to screw on a mason jar lid in the center to prevent that issue!
Waterer
The Rent-a-coop waterer is by far the best one around. It eliminates the problems you find in those feed store waterers, which must be flipped upside down, and are a pain to refill. This one doesn't even need to be removed! (except for occasional washing). It is also a really easy way to add electrolytes to your chicks' water. Some waterers can cause your chick to drown, as they are too deep, but this one makes sure that cant happen. It also comes in several different tips, including nipples.
Feed Station Cookie Sheet
When using shavings in the brooder, chicks are notorious for kicking them in their feed. I, however, have a way to stop this! Grab an old baking sheet and put your feeder and waterer on it. This method is really handy as the sheet is an area without shavings, so it's impossible for your babies to kick them into their food! This also keeps all shavings dry, which in turn, keeps your chicks healthy and happy. When you clean the brooder, scrub off all the poop and place it back in. This trick is super helpful, and it's something I think everyone should try!
Heat Plate


*Image By @EmmaRainboe
Heat lamps are constantly the cause of many fires. The constant light they emit is also unnatural. Recently, I raised my chicks on one for a week before I got a heat plate set up. Once I got rid of it they had become so used to the light, that they would screech until I turned on a nightlight. There are many other reasons why you should avoid heat lamps, but that is not my point. Instead, I’d like to share an alternative that many chicken keepers have turned to. (Chick) Heat Plates are incredible. They act like a mother hen, in which the chicks can snuggle underneath it, but also can escape the heat if needed, which is not possible when using a Heatlamp. As the chicks grow, you can raise the plate so they never outgrow it. The price of these items can range from $50-$100, but even with such prices, they are worth everything. I highly suggest you try one, and many others will say the same!
………………………………………………………………………………………………………………
This article is still a work in progress as I continue to experiment with different things. If you have any feedback or suggestions you would like to give, please do! This was somewhat rushed and I may have missed a few things while writing it.