There is always interest it seems in building your own Cabinet Incubator. I made this one 40+ years ago and it is running and hatching today.

I took more pictures of the internal workings today if anyone is interested, and will take more of the workings in the rear portion next week. The Cabinet was based on the size and type of the Leahys available in the early 60s and the turning unit was a reduced version of a larger one I upgraded an old Buckeye with.
I got all my parts primarily from WW Grainger to make my turning units, but after researching the prices for all the little motors etc. I feel it would be more economical to just get a complete turning unit from GQF
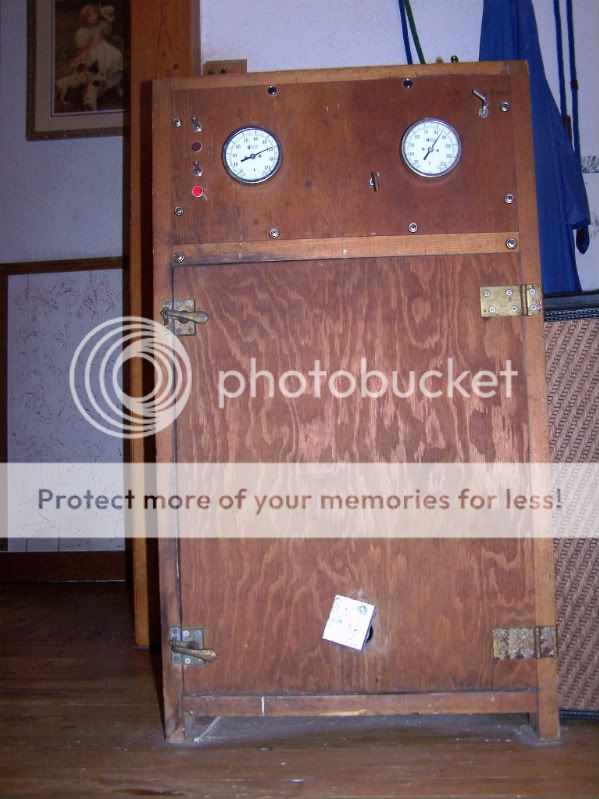
All of the controls should be front mounted and readable at a glance. The air intake for the humidity control is directly over th humidity pans. The humidity pans cover the entire width of the incubator shelf. The thermostat shown in the picture is the Secondary one, the Primary is mounted on a rear wall. The air flow from the fan is to the rear. This pulls fresh air down directly to the surface of the water pans and over the heating coil. Humidity is super easy to control with the vent openings and can tweaked to a solid reading of + or - 2%
I just looked at the pictures and this incubator looks kind of beat up. Please take into account that this was built about 1964.
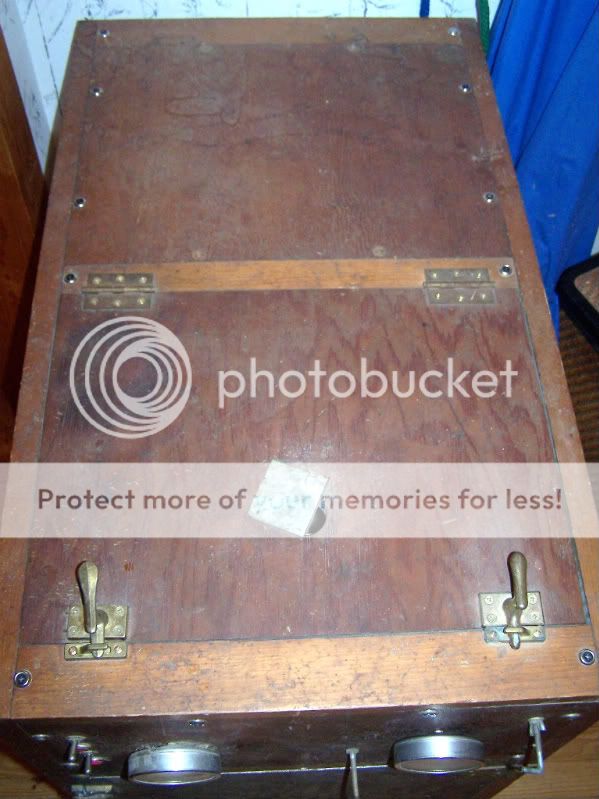
I'll try to answer some questions. The air flow is from front to back. I use an air over configured fan blade and a counter clockwise motor rotation. This allows for the fresh air to intake directly on the humidity pans and with the greater distance the air travels from the heating coils to the the primary thermostat makes for more ccurate control of the temperature. There are no rear vents. The only vents is the one on the top, and the one in the door. My thermostats are all wafer. A wafer thermostat is no better than the microswitch it controls. I use the most sensitive microswitches that I can find. When I designed this unit I did not want any of the thermostat controls on the side, but since the design necessitated that I do just that. Take a look at the photos of the top open. See that cord on the far wall That's a length of speedometer cable controling the rear thermostat from the front panel. My therometers were Weksler 3" dial also used by Humidaire. The one on the right side of the incubator was set up as a wet bulb which I no longer use.
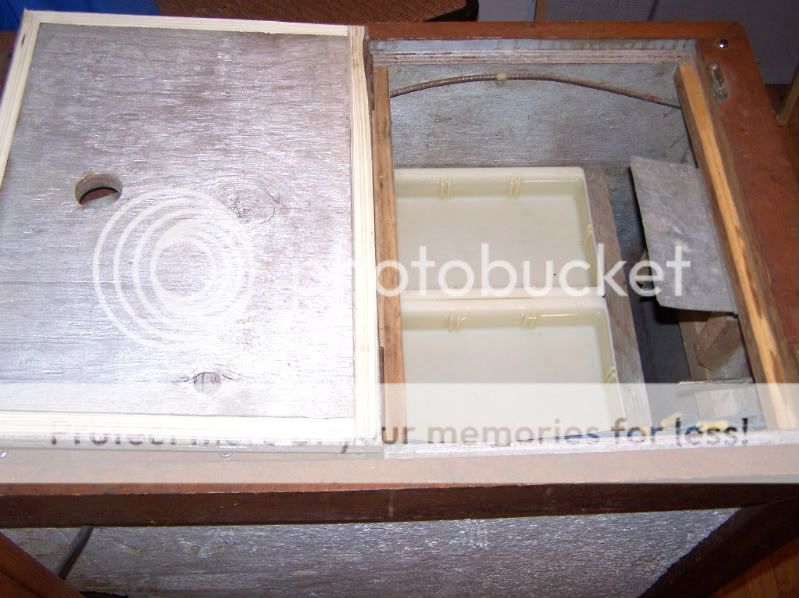
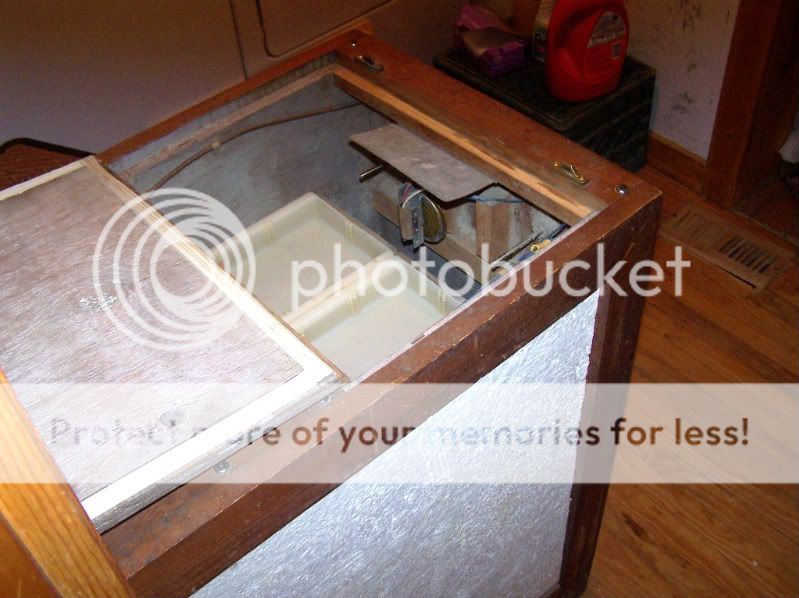
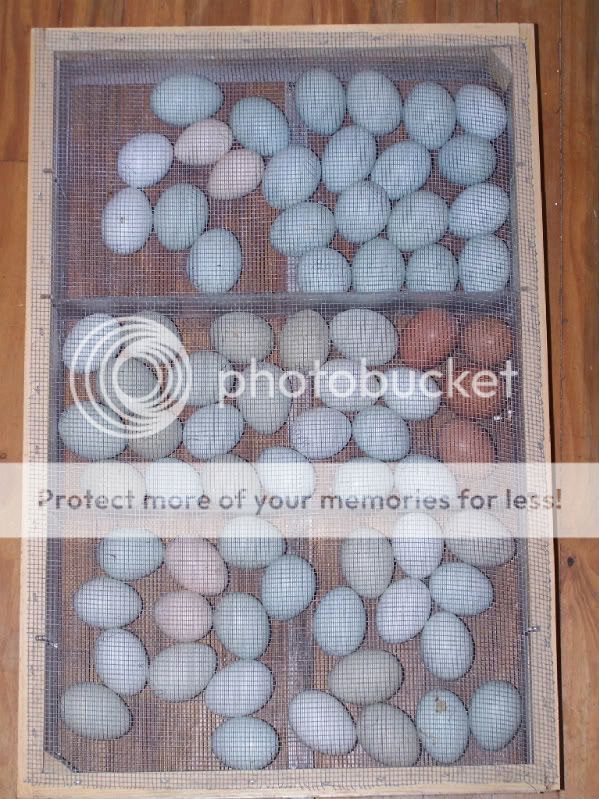
This is a veiw with the door open. When I started building these I didn't have any way to make square bends in metal so all my brackets etc are welded up from flat stock. All my tray racks were made by a friend who had a big time rabbit cage manufacturing plant from 18 gauge galvanized. Also all these nifty plastic egg trays were not available, at least I didn't know about them. The dimensions of the incubator are all based on cutting parts from a 4X8 sheet of plywood. The sides of ths unit are a 31 7/8"X31 7/8" square. The inside dimensions side to side is 16" which did not work with the dimensions of plastic trays. Thats why those 1 1/4" peices are screwed on the sides. The trays I'm using now hold 96 eggs each for a total capacity of 288 eggs. Initiallly there was no hatching tray, because I used a seperate hatcher, but necessity is the mother of invention so now it has a hatching tray.
I took more pictures of the internal workings today if anyone is interested, and will take more of the workings in the rear portion next week. The Cabinet was based on the size and type of the Leahys available in the early 60s and the turning unit was a reduced version of a larger one I upgraded an old Buckeye with.
I got all my parts primarily from WW Grainger to make my turning units, but after researching the prices for all the little motors etc. I feel it would be more economical to just get a complete turning unit from GQF
All of the controls should be front mounted and readable at a glance. The air intake for the humidity control is directly over th humidity pans. The humidity pans cover the entire width of the incubator shelf. The thermostat shown in the picture is the Secondary one, the Primary is mounted on a rear wall. The air flow from the fan is to the rear. This pulls fresh air down directly to the surface of the water pans and over the heating coil. Humidity is super easy to control with the vent openings and can tweaked to a solid reading of + or - 2%
I just looked at the pictures and this incubator looks kind of beat up. Please take into account that this was built about 1964.
I'll try to answer some questions. The air flow is from front to back. I use an air over configured fan blade and a counter clockwise motor rotation. This allows for the fresh air to intake directly on the humidity pans and with the greater distance the air travels from the heating coils to the the primary thermostat makes for more ccurate control of the temperature. There are no rear vents. The only vents is the one on the top, and the one in the door. My thermostats are all wafer. A wafer thermostat is no better than the microswitch it controls. I use the most sensitive microswitches that I can find. When I designed this unit I did not want any of the thermostat controls on the side, but since the design necessitated that I do just that. Take a look at the photos of the top open. See that cord on the far wall That's a length of speedometer cable controling the rear thermostat from the front panel. My therometers were Weksler 3" dial also used by Humidaire. The one on the right side of the incubator was set up as a wet bulb which I no longer use.
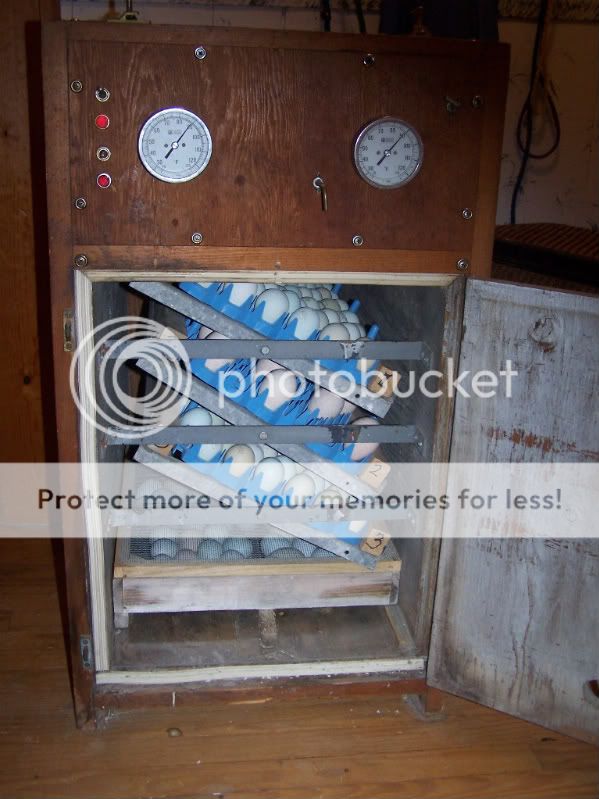
This is a veiw with the door open. When I started building these I didn't have any way to make square bends in metal so all my brackets etc are welded up from flat stock. All my tray racks were made by a friend who had a big time rabbit cage manufacturing plant from 18 gauge galvanized. Also all these nifty plastic egg trays were not available, at least I didn't know about them. The dimensions of the incubator are all based on cutting parts from a 4X8 sheet of plywood. The sides of ths unit are a 31 7/8"X31 7/8" square. The inside dimensions side to side is 16" which did not work with the dimensions of plastic trays. Thats why those 1 1/4" peices are screwed on the sides. The trays I'm using now hold 96 eggs each for a total capacity of 288 eggs. Initiallly there was no hatching tray, because I used a seperate hatcher, but necessity is the mother of invention so now it has a hatching tray.
Last edited:


