This is my first post and wanted to say "I love fresh eggs",and this site has supplied me so much information I wanted to thank the admins and all of the members for their help.
I used to get my eggs from my neighbor who unfortunately recently moved. I could search around and find someone else to buy from but felt I was ready to add a small flock to our homestead. Her moving spurred me on to do so.
First thing was to build a secure enclosure to house 3 hens .
We live on mostly wooded acreage with LOTS of predators passing through.
We knew a Tractor vs a Stationary coop was what we wanted but trying to decide on what to build took me me forever. After looking at hundreds of them on line we finally decided
It is about 4FT Wide X 9Ft Long
I am sorry I didn't document with as many pictures as I should of.
We purchased treated lumber for the boards touching the ground and rough cut 2" X 10" and 1" X 10" pine for the rest of it. Our Sawmill guy also sells metal roofing He gave us a couple of cover sheets for the roof. Total $ 175.00

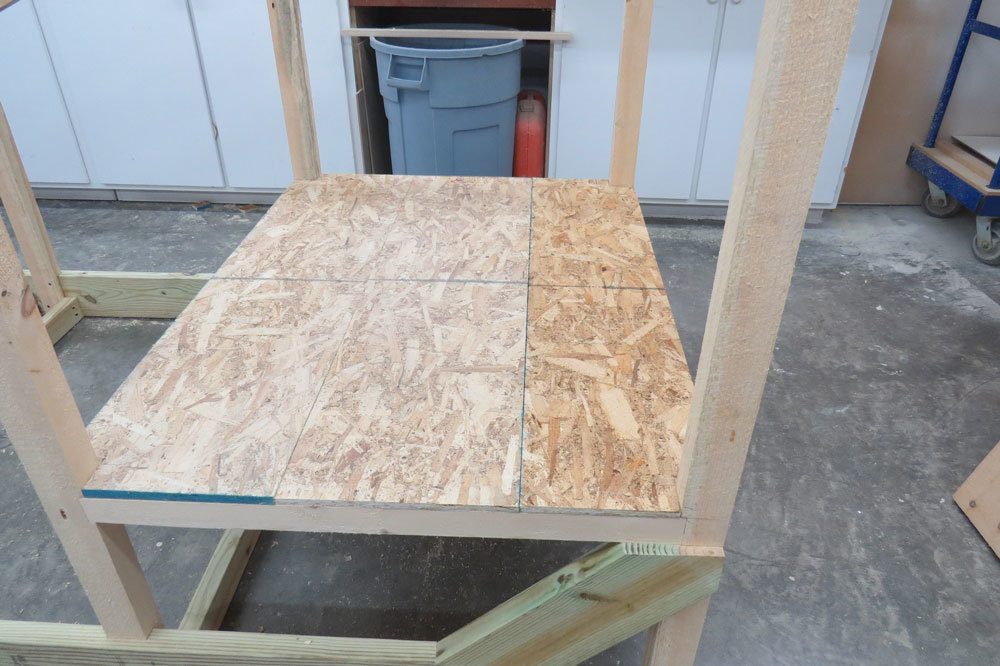
The deck is made from left over roof sheathing from the Tractor Shed project.
I sealed all edges and top and bottom surfaces with 2 coats of Marine spar. We made it in 3 sections so popping them out to replace them when necessary will be easier.
I hope to find a remnant of linoleum to set on top of it to make it easier to clean.
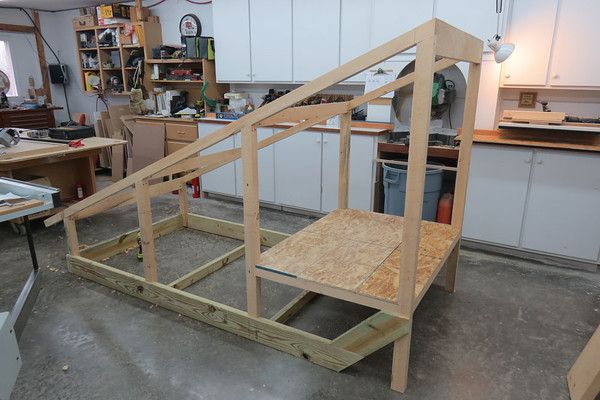
The basis bones of the tractor
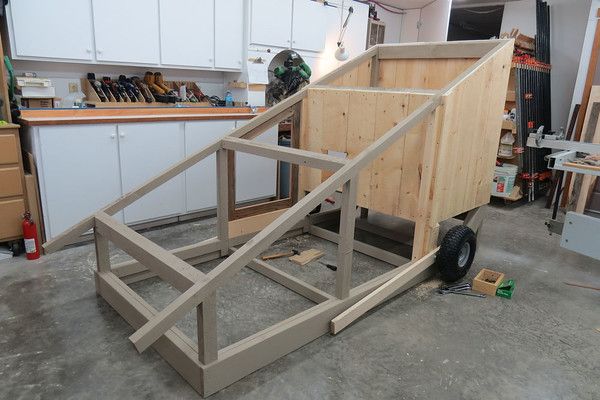
We stained the frame before we covered it with the vertical pine boards so all surfaces are sealed.
The 15" Pneumatic Wide Profile Tires were on sale at Tractor supply for $19.99 per. We also picked up almost all the necessary hardware. Total $ 101.25

Other than the TIME my husband has in to building it ( and it is taking a good deal of time) the material cost is not too bad ( It could of been done for less but we are keeping all of our buildings with Batten Board siding )
They are STILL going to be some expensive eggs but at least we will know what our chickens has eaten to make them.
Applied the battens, made the small chicken pop door, run access door for me then took it all the hardware off and started to stain.
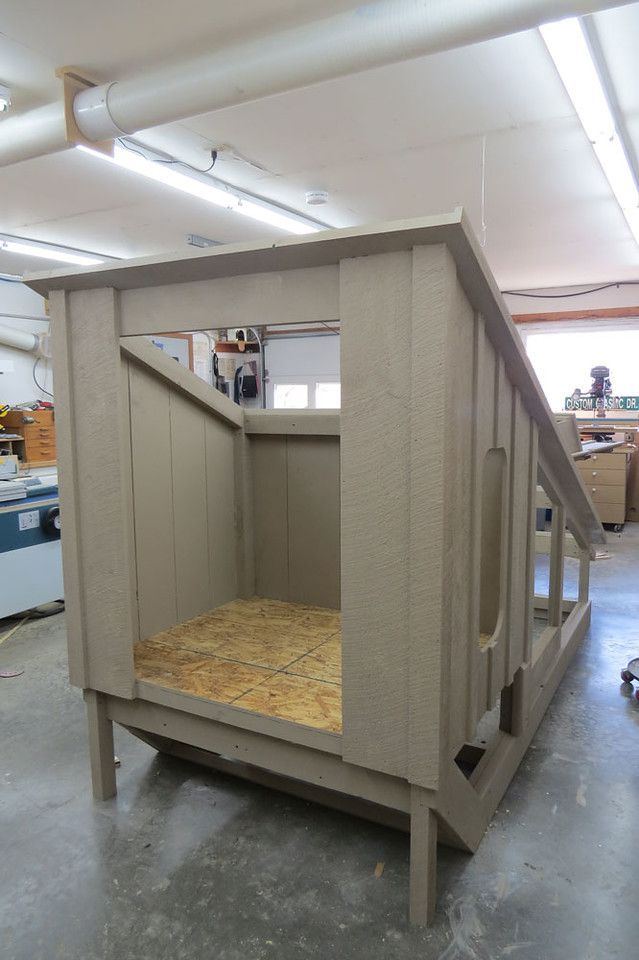

Next we applied a second coat of stain, added the trim color on the run door, corner and rake boards then reinstalled all the doors.

We used Fender Washers to install the screening.

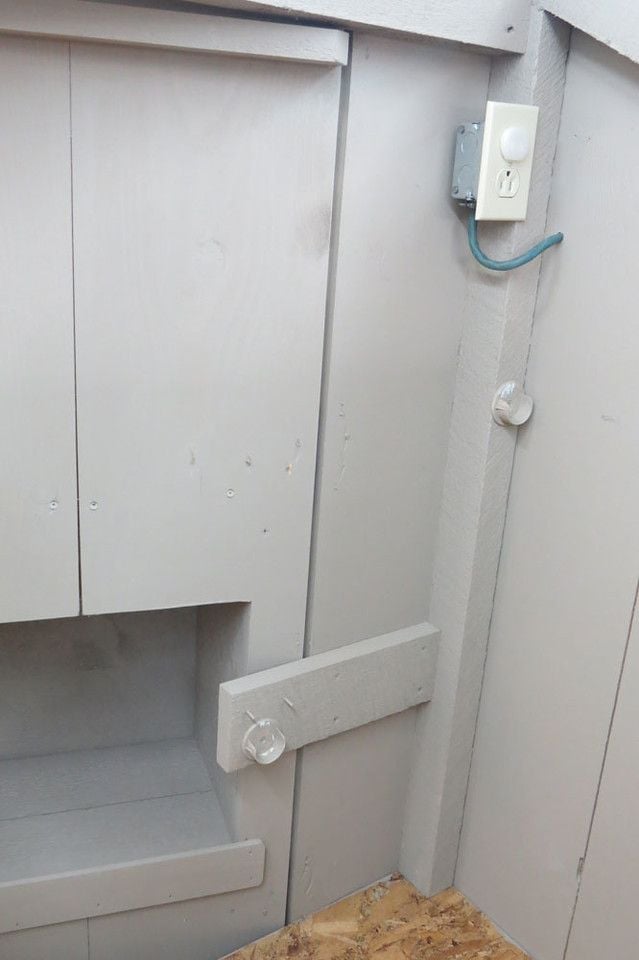
Installed an outlet.

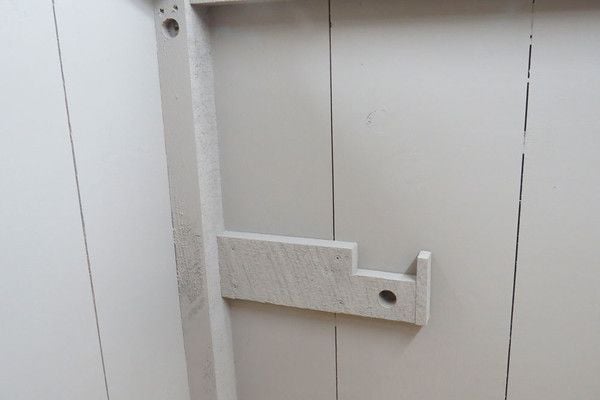
A few braces for the hooks to hold the water vessel and feeder

We spent a few days designing the Roost area:
I decided to try a "Poop Hammock" since I had everything I would need already here.
I figure at the very least it will keep the wall clean.
To show you how we put it together
The roosting bar is easily removed but secure while in place
The other end of the roosting bar is slotted to sit firmly on a couple of pins.

It may be hard to see but we ground the points off of a couple of Long Sheetrock screws for the pins.
We used some open ended closet rod cups to secure the dowels for the "hammock..
Next I sewed a 2 1/2" loop at each end of a piece of 36" wide Landscape fabric for the dowels to slide into.
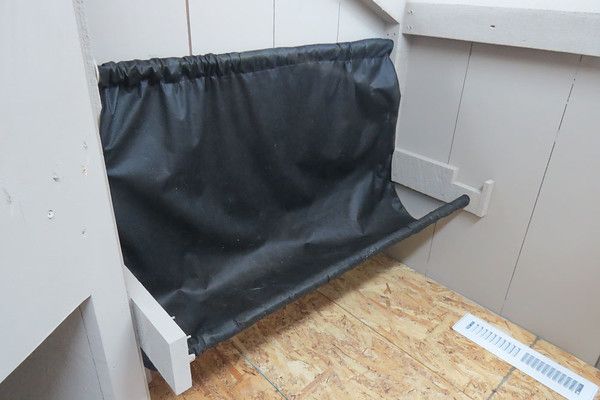
I have about a 9" sag in the fabric
This is what it looks like assembled. . Also cut a vent in the floor to aid in air exchange.

Installed the Linoleum I bought a 3 ft X 8 ft piece for $10 and I have enough to replace it if necessary.
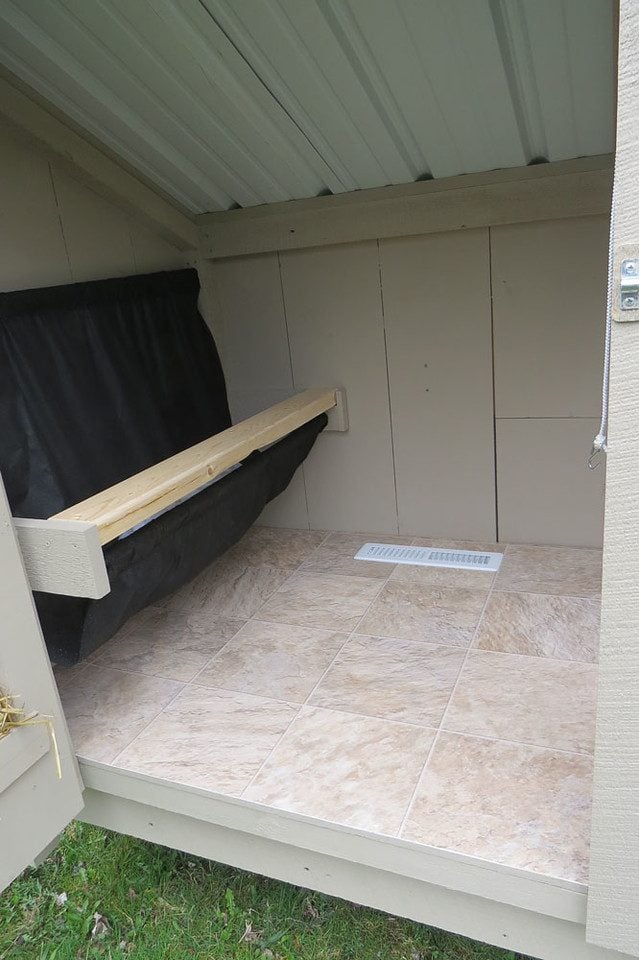
Pine shavings added. I will feed them inside the coop.Water will be in the run

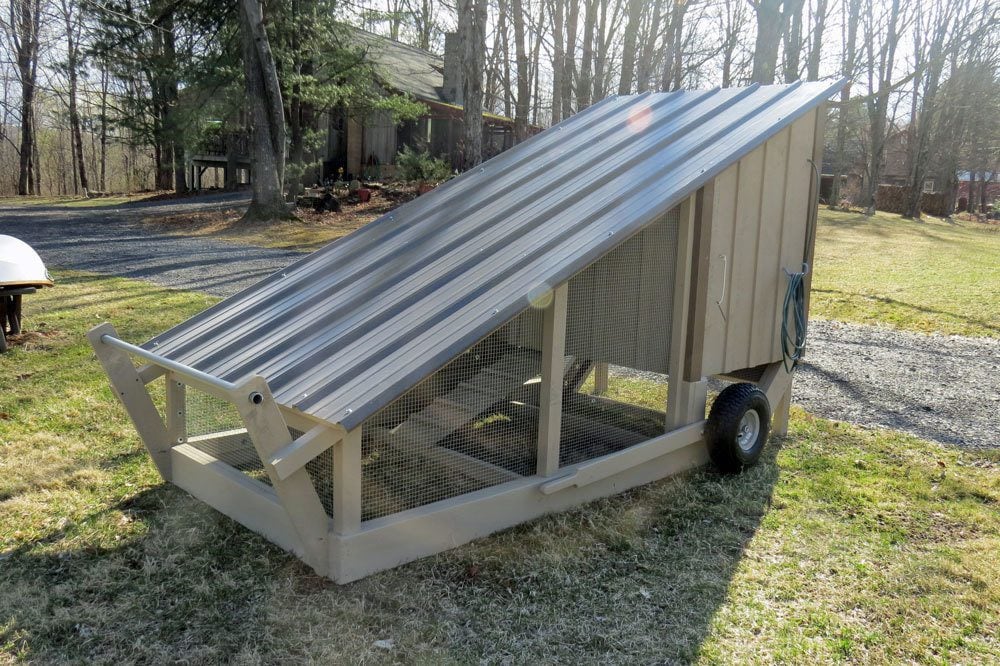
Here is the completed Tractor:

Since taking this picture we have trimmed 4 inches of the upright supports that touch the ground in front of the angled board because we were afraid it might catch when rolling it on uneven ground.
I used to get my eggs from my neighbor who unfortunately recently moved. I could search around and find someone else to buy from but felt I was ready to add a small flock to our homestead. Her moving spurred me on to do so.
First thing was to build a secure enclosure to house 3 hens .
We live on mostly wooded acreage with LOTS of predators passing through.
We knew a Tractor vs a Stationary coop was what we wanted but trying to decide on what to build took me me forever. After looking at hundreds of them on line we finally decided
It is about 4FT Wide X 9Ft Long
I am sorry I didn't document with as many pictures as I should of.
We purchased treated lumber for the boards touching the ground and rough cut 2" X 10" and 1" X 10" pine for the rest of it. Our Sawmill guy also sells metal roofing He gave us a couple of cover sheets for the roof. Total $ 175.00
The deck is made from left over roof sheathing from the Tractor Shed project.
I sealed all edges and top and bottom surfaces with 2 coats of Marine spar. We made it in 3 sections so popping them out to replace them when necessary will be easier.
I hope to find a remnant of linoleum to set on top of it to make it easier to clean.
The basis bones of the tractor
We stained the frame before we covered it with the vertical pine boards so all surfaces are sealed.
The 15" Pneumatic Wide Profile Tires were on sale at Tractor supply for $19.99 per. We also picked up almost all the necessary hardware. Total $ 101.25
Other than the TIME my husband has in to building it ( and it is taking a good deal of time) the material cost is not too bad ( It could of been done for less but we are keeping all of our buildings with Batten Board siding )
They are STILL going to be some expensive eggs but at least we will know what our chickens has eaten to make them.
Applied the battens, made the small chicken pop door, run access door for me then took it all the hardware off and started to stain.
Next we applied a second coat of stain, added the trim color on the run door, corner and rake boards then reinstalled all the doors.
We used Fender Washers to install the screening.
Installed an outlet.
A few braces for the hooks to hold the water vessel and feeder
We spent a few days designing the Roost area:
I decided to try a "Poop Hammock" since I had everything I would need already here.
I figure at the very least it will keep the wall clean.
To show you how we put it together
The roosting bar is easily removed but secure while in place
The other end of the roosting bar is slotted to sit firmly on a couple of pins.
It may be hard to see but we ground the points off of a couple of Long Sheetrock screws for the pins.
We used some open ended closet rod cups to secure the dowels for the "hammock..
Next I sewed a 2 1/2" loop at each end of a piece of 36" wide Landscape fabric for the dowels to slide into.
I have about a 9" sag in the fabric
This is what it looks like assembled. . Also cut a vent in the floor to aid in air exchange.
Installed the Linoleum I bought a 3 ft X 8 ft piece for $10 and I have enough to replace it if necessary.
Pine shavings added. I will feed them inside the coop.Water will be in the run
Here is the completed Tractor:
Since taking this picture we have trimmed 4 inches of the upright supports that touch the ground in front of the angled board because we were afraid it might catch when rolling it on uneven ground.


