- Aug 4, 2014
- 78
- 9
- 41
Greetings.. And welcome to The Bear Sting thread!!
A few nights ago we lost a turkey to a bear. I came onto back yard chickens hoping to find some good solid technical information and reviews about electrical fencing and bear deterents. I found lots of "sorry for your losses" and "install a hot wire" and of course lots of anicoms.. But I didn't find much technical data or reviews of products on the market.
Rather than complain, I plan to write a nice long post w/ all of the information about what I am doing to make my area bear proof!!
I will be updating this post over the next few weeks as the plan comes together.
The Overall Scheme -
Prep - 11/7/14 - Head to tractor supply and buy material
Phase 1 - 11/8/14 - Install a test section of fence, and bait it with Peanut butter, apples, turkey carcasses, ext
11/8-11/10 Let the game camer capture all wildlife and their reaction to the electric fence.
Phase 2 - Evaluate photos, and figure out if we are ready to install through the whole yard. Currently the yard is "protected" (and by the "protected", I mean obviously it is NOT protected since a bear just hops over it and steals 30lb turkeys!)
Phase 3 - 11/11-11/14 - Install whole yard with electric wire. We will use poly wire and poly posts, and install approx 6" OUTSIDE of the existing field fence.
Material List -
We will be using material from Tractor Supply and Lowes
Here is a picture of the "test section" that we will be installing on Saturday and leave baited through the weekend.
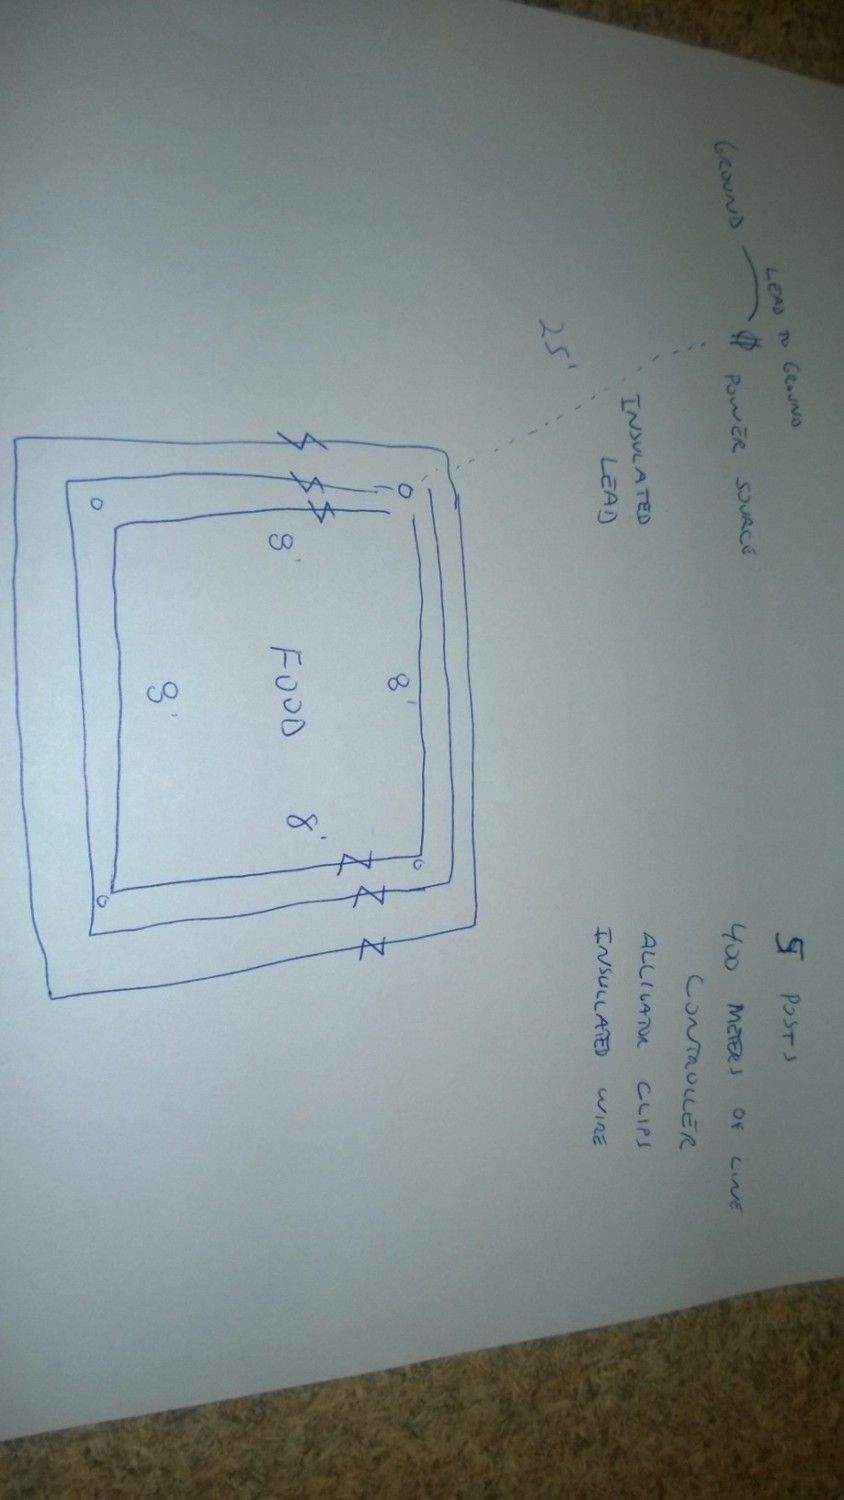
To summarize.. We will be plugging the controller into 110V outlet, connecting to the houses ground with an alligator clip, running poly wire out to the four posts. We will run three strande (8", 20", 32") around an 8'x8' area. Then we will bait the area, set up the camera and wait out the weekend.
Products and specs
Alligator clips - Conduct Tite alligator clip - TSC - 3.49
Ground - EXISTING HOME GROUND
Controller - Zareba 5 Mile LI Fence charger - TSC - 49.99
Wire - Zareba Polywire 400 Meter 6 strand - TSC - 31.99
Poles - Step In poly Fence post - 48" - TSC - 2.49
Pictures of the test plot will be coming tomorrow.. Please feel free to subscribe to this post to watch the drama unfold!
Update 11/7/14
I picked up the supplies. TSC did not have the alligator clips, so I stopped in at lowes and picked up clips and some insullated 12 gauge wire to use as leads from the power source out to the fence.. I also upgraded to the 10 mile controller. A little more money, but a bigger jolt!
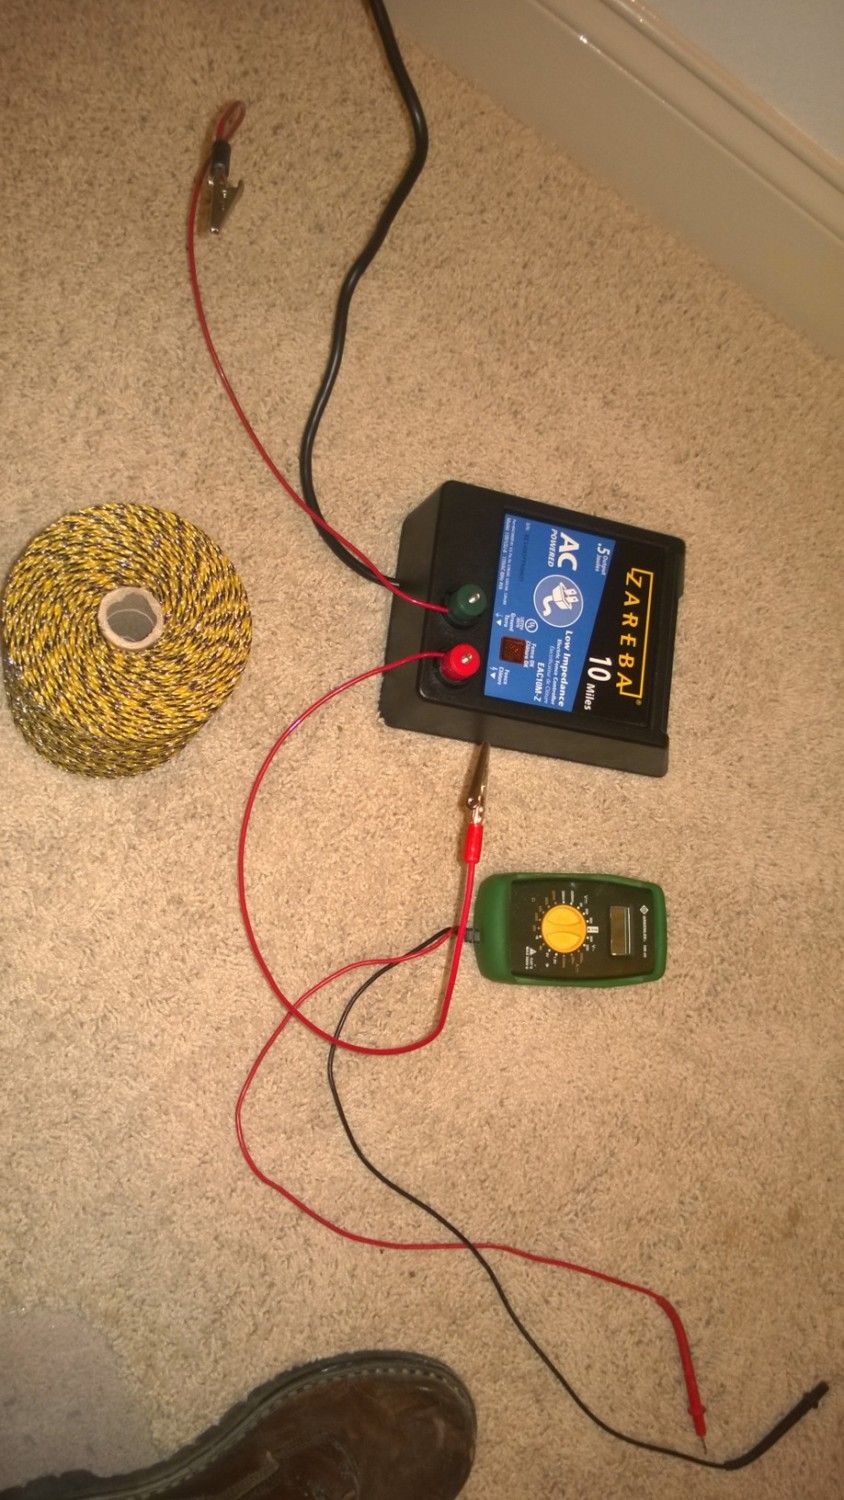
Here are the electrical parts.

I connected the alligator clips to short leads for testing. I plugged it in, and tested by touching the alligator clips to the whole roll of wire. It was arcing, just like it should.. I have a volt tester there in the picture, but unfortunately, it no longer works. It is a little early in the project for human testing, but I will brave the jolt later on when we get some of the test set up.
A few nights ago we lost a turkey to a bear. I came onto back yard chickens hoping to find some good solid technical information and reviews about electrical fencing and bear deterents. I found lots of "sorry for your losses" and "install a hot wire" and of course lots of anicoms.. But I didn't find much technical data or reviews of products on the market.
Rather than complain, I plan to write a nice long post w/ all of the information about what I am doing to make my area bear proof!!
I will be updating this post over the next few weeks as the plan comes together.
The Overall Scheme -
Prep - 11/7/14 - Head to tractor supply and buy material
Phase 1 - 11/8/14 - Install a test section of fence, and bait it with Peanut butter, apples, turkey carcasses, ext
11/8-11/10 Let the game camer capture all wildlife and their reaction to the electric fence.
Phase 2 - Evaluate photos, and figure out if we are ready to install through the whole yard. Currently the yard is "protected" (and by the "protected", I mean obviously it is NOT protected since a bear just hops over it and steals 30lb turkeys!)
Phase 3 - 11/11-11/14 - Install whole yard with electric wire. We will use poly wire and poly posts, and install approx 6" OUTSIDE of the existing field fence.
Material List -
We will be using material from Tractor Supply and Lowes
Here is a picture of the "test section" that we will be installing on Saturday and leave baited through the weekend.
To summarize.. We will be plugging the controller into 110V outlet, connecting to the houses ground with an alligator clip, running poly wire out to the four posts. We will run three strande (8", 20", 32") around an 8'x8' area. Then we will bait the area, set up the camera and wait out the weekend.
Products and specs
Alligator clips - Conduct Tite alligator clip - TSC - 3.49
Ground - EXISTING HOME GROUND
Controller - Zareba 5 Mile LI Fence charger - TSC - 49.99
Wire - Zareba Polywire 400 Meter 6 strand - TSC - 31.99
Poles - Step In poly Fence post - 48" - TSC - 2.49
Pictures of the test plot will be coming tomorrow.. Please feel free to subscribe to this post to watch the drama unfold!
Update 11/7/14
I picked up the supplies. TSC did not have the alligator clips, so I stopped in at lowes and picked up clips and some insullated 12 gauge wire to use as leads from the power source out to the fence.. I also upgraded to the 10 mile controller. A little more money, but a bigger jolt!
Here are the electrical parts.
I connected the alligator clips to short leads for testing. I plugged it in, and tested by touching the alligator clips to the whole roll of wire. It was arcing, just like it should.. I have a volt tester there in the picture, but unfortunately, it no longer works. It is a little early in the project for human testing, but I will brave the jolt later on when we get some of the test set up.
Last edited:


