Below is my procedure for cleaning sand that I use in my duck coop.
If you decide to keep your ducks secured within a duck yard, you will end up with quite a lot of biowaste which must be cleaned in some fashion.
I decided to use sand for multiple reasons:
1. It acts as a great filter keeping the duck yard relatively dry even during periods of lots of rain
2. It can act as a insulator for the ducks to keep them warm during the winter months
3. It can be resused
I decided to construct a duck cleaning station within my duck yard to reduce the labor of removing the sand, cleaning it and then replacing it back into the coop (very laborious).
The system is basically two components:
1. Sand cleaning bin
2. Rinse bin
Sand cleaning bin build procedures:
Materials:
A. Building the Sand Cleaning Bin
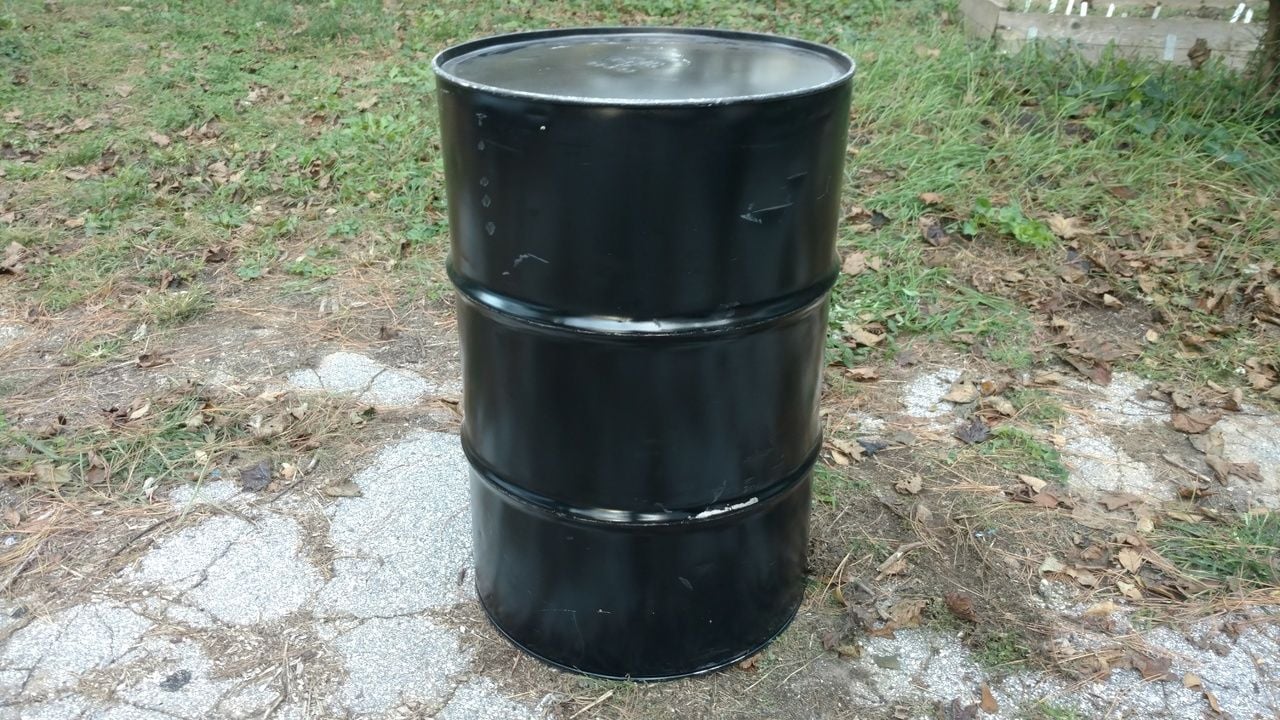
1. Obtain drum
I purchased mine from a local hazardous transport vendor. I got it new for $40.

2. Mark area of drum surface you intend to remove
Use paint pen to outline the area that will be cut out. I cut out approximately 1/3 the area of the drum surface. To ensure my lines were straight, I used a piece of rope cut to a certain length and draped that over the drum to ensure the distance between the two side was equidistant at all times

3. Cut out desirable section of drum
Cut was done using an angle grinder with 4.5" metal cut-out blade ($1.50 each; needed two to get the job done). Make sure you use safety glasses as lots of sparks and debrie will fly out during the procedure

4. Cut out 3/4" holes out of either end of the drum
Using a 1 1/4" bi metal hole saw, cut holes out of each end. I placed my holes dead center on each end of the drum. Make sure when cutting that you use a oil lubricant (DW-40 is fine) two spray the surface of the drum to protect the hole saw from becoming dull.

5. Cover either end of the holes with a 3/4" flange (4x flanges total)
The flange is necessary to re-enforce the support that will be going through your holes. Use two 3/4" galvanized flanges on either end of the hole and screw together using galvanized bolts and nuts

6. Cut lumber into 5' lengths and drill in 3/4" holes and add hardware
Cut your 4" x 4" x 8' lumber into 5' lengths (x2). Using a 3/4" spade bit, drill holes into each side of the lumber (6" from the top of each). Insert 6" 3/4 nipple. Screw flange onto one side and 3/4" bushing into other.

7. Dig hole and set post in using concrete
Using a post hole digger, dig approximately a 3' hole. Place one of posts in and set in place using concrete. Ensure that the post is level and facing in the right direction (i.e. hole and hardware is facing correctly). Wait 24 hours for concrete to set. Attach drum to post. Hold drum so that it is level. Place second post on either side and figure out with the second hole should go. The drum needs to fit almost perfectly between the two posts. Dig second hole. Place 2nd post into hole and attach drum to post. Ensure that the drum is completely level. When your sure the hole depth is just right, add concrete and let set for 24 hours. When finished, drum should be completely level when hung.

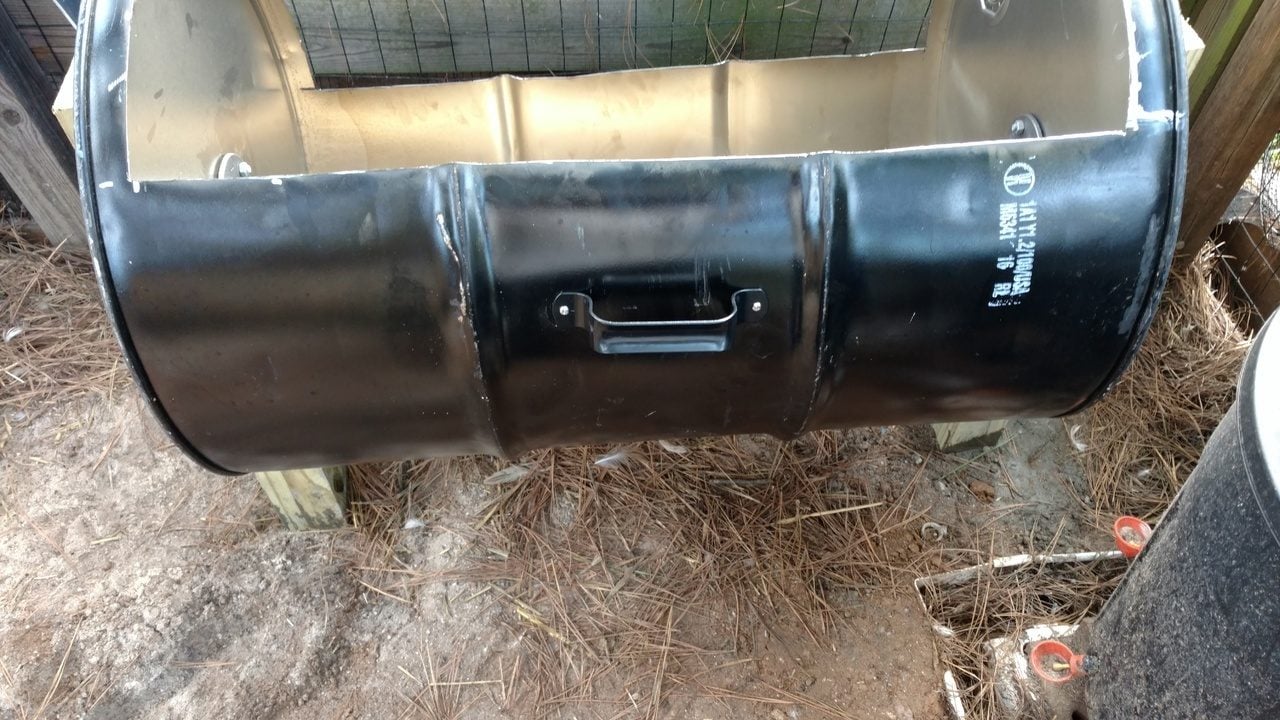
8. Add handles and edging and coat inside of drum with rust preventative.
Screw in heavy duty handles into either end of drum to all you to easily turn the drum. This will be necessary when sucking out the water and/or dumping the sand. You can also add edging to the corner that you cut if you'd like as the edges are very sharp and may cut you when using the drum. I used edging that I purchased from Amazon.com. Coat inside of drum with rust preventative (I used a can of Rustoleum).
B. Building the Rinse Bin
Materials:
1. Obtain drum
I purchased mine from a local hazardous transport vendor. I got it new for $40.
2. Build drum frame
You can build this frame any way you want. My design was simple. However you build it, make sure that the height of you drum including the ball valve assembly is high enough that you can put a bucket on the ground to collect the rinse (my frame had the drum 16" off the ground so that I could use a five gallon bucket to collect my rinse).

3. Cut 1 3/4 hole into end of drum
Remove the top off of the drum (1 inch socket with 1/2 socket wrench). Cut a 1 3/4 hole into the non opening end of the drum using a 1 3/4 bi-metal hole saw. This should fit your 1 1/2 threaded bulkhead but test to make sure. Make sure you use lubricating oil (DW-40 is fine) when cutting the hole to reduce friction and keep your hole saw sharp. Place bulkhead into drum making sure the gasket is on the inside of the drum.


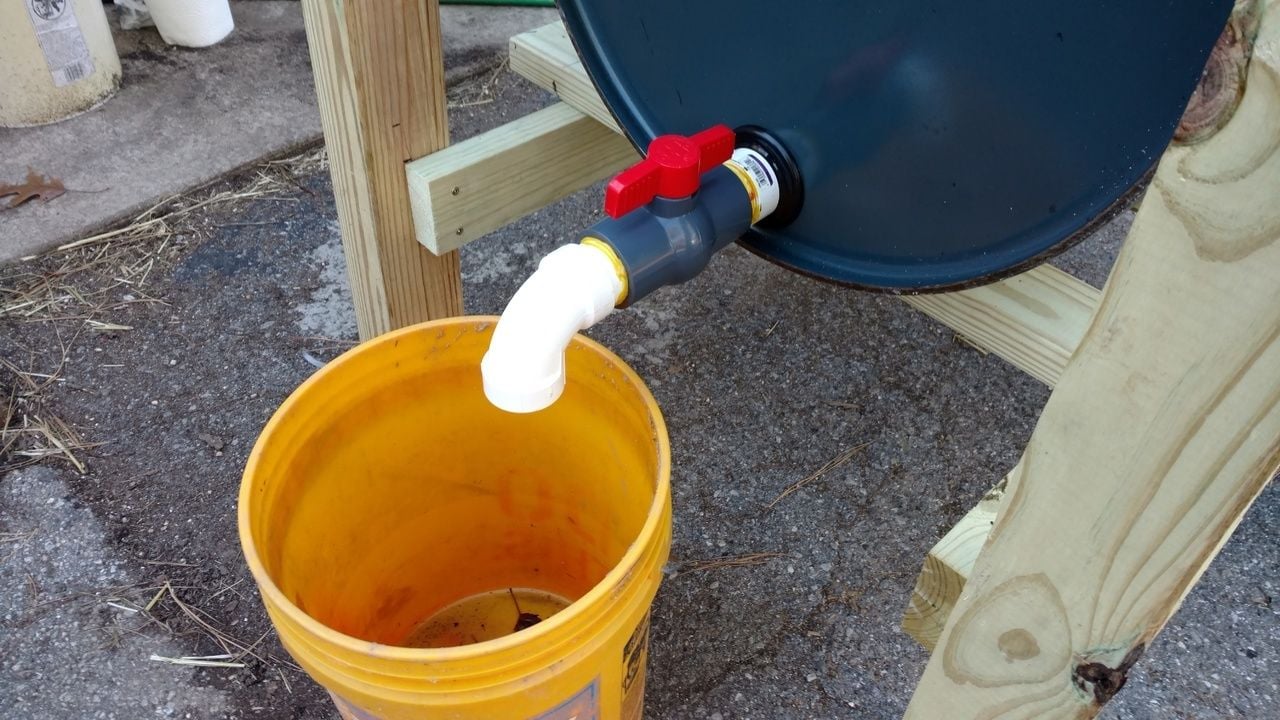
3. Cut PVC pipe to make connectors and glue to male adapter, ball valve and PVC elbow
Using a hand saw, cut two 4" pieces of PVC 1/2" pipe. Glue pipe to male adapter. Glue pipe to 90 degree elbow. Glue ball valve assembly to PVC elbow and male adapter. Screw ball valve assembly to bulkhead fitting.


4. Cut two 1 3/4" holes to side of drum and attach cut pieces of shop vac wand
On the side of the shop vac wand the the shop vac hoses attach to, cut them to 4" long using hand saw. Using bi-metal 1 3/4" hole saws cut two holes into side of drum. Ensure that 1 3/4" hole saw is the right size hole saw to fit the wand cuttings that you made. Make sure that you use oil lubricant when cutting holes (DW-40 is fine). Wands may be a very tight fit. You may need to spray sides and pound in wand pieces using a rubber mallet.

5. Screw drum top back on, add hoses to rinse bin, connect one hose to a shop vac and clean some sand!!
You can see a video of this Sand Cleaning Station in action by clicking here. Please let me know if you have any questions.
Thanks,
smithmal
If you decide to keep your ducks secured within a duck yard, you will end up with quite a lot of biowaste which must be cleaned in some fashion.
I decided to use sand for multiple reasons:
1. It acts as a great filter keeping the duck yard relatively dry even during periods of lots of rain
2. It can act as a insulator for the ducks to keep them warm during the winter months
3. It can be resused
I decided to construct a duck cleaning station within my duck yard to reduce the labor of removing the sand, cleaning it and then replacing it back into the coop (very laborious).
The system is basically two components:
1. Sand cleaning bin
2. Rinse bin
Sand cleaning bin build procedures:
Materials:
- 55 gallon closed head drum (purchased from local hazardous waste vendor (new) for $40)
- 4" x 4" x 8' pressure treated posts (x2)
- 3/4" galvanized flange (x6)
- 3/4" nipple 6" long (x2)
- 3/4" galvanized pipe cap (x2)
- Heavy duty handles (x2)
A. Building the Sand Cleaning Bin
1. Obtain drum
I purchased mine from a local hazardous transport vendor. I got it new for $40.
2. Mark area of drum surface you intend to remove
Use paint pen to outline the area that will be cut out. I cut out approximately 1/3 the area of the drum surface. To ensure my lines were straight, I used a piece of rope cut to a certain length and draped that over the drum to ensure the distance between the two side was equidistant at all times
3. Cut out desirable section of drum
Cut was done using an angle grinder with 4.5" metal cut-out blade ($1.50 each; needed two to get the job done). Make sure you use safety glasses as lots of sparks and debrie will fly out during the procedure
4. Cut out 3/4" holes out of either end of the drum
Using a 1 1/4" bi metal hole saw, cut holes out of each end. I placed my holes dead center on each end of the drum. Make sure when cutting that you use a oil lubricant (DW-40 is fine) two spray the surface of the drum to protect the hole saw from becoming dull.
5. Cover either end of the holes with a 3/4" flange (4x flanges total)
The flange is necessary to re-enforce the support that will be going through your holes. Use two 3/4" galvanized flanges on either end of the hole and screw together using galvanized bolts and nuts
6. Cut lumber into 5' lengths and drill in 3/4" holes and add hardware
Cut your 4" x 4" x 8' lumber into 5' lengths (x2). Using a 3/4" spade bit, drill holes into each side of the lumber (6" from the top of each). Insert 6" 3/4 nipple. Screw flange onto one side and 3/4" bushing into other.
7. Dig hole and set post in using concrete
Using a post hole digger, dig approximately a 3' hole. Place one of posts in and set in place using concrete. Ensure that the post is level and facing in the right direction (i.e. hole and hardware is facing correctly). Wait 24 hours for concrete to set. Attach drum to post. Hold drum so that it is level. Place second post on either side and figure out with the second hole should go. The drum needs to fit almost perfectly between the two posts. Dig second hole. Place 2nd post into hole and attach drum to post. Ensure that the drum is completely level. When your sure the hole depth is just right, add concrete and let set for 24 hours. When finished, drum should be completely level when hung.
8. Add handles and edging and coat inside of drum with rust preventative.
Screw in heavy duty handles into either end of drum to all you to easily turn the drum. This will be necessary when sucking out the water and/or dumping the sand. You can also add edging to the corner that you cut if you'd like as the edges are very sharp and may cut you when using the drum. I used edging that I purchased from Amazon.com. Coat inside of drum with rust preventative (I used a can of Rustoleum).
B. Building the Rinse Bin
Materials:
- 55 gallon open head drum (purchased from local hazardous waste vendor (new) for $40)
- 2" x 4" x 8' pressure treated wood (x2)
- 2" x 4" x 10' pressure treated wood (x2)
- 4" x 4" x 8' pressure treated wood (x2)
- 3" decking screws
- 1 1/2" QVC ball valve
- 1 1/2" PVC male adapter
- 1-1/2-Inch Standard Threaded Bulkhead
- 1-1/2 in. PVC DWV 90 Degree Hub x Hub Elbow
- 1-1/2 x 2' in PVC pipe
- Pipe cement
- 6 gallon shop vac
- 7' shop vac 1 7/8" hoses (x2)
- 1 7/8" shop vac wands (x2)
1. Obtain drum
I purchased mine from a local hazardous transport vendor. I got it new for $40.
2. Build drum frame
You can build this frame any way you want. My design was simple. However you build it, make sure that the height of you drum including the ball valve assembly is high enough that you can put a bucket on the ground to collect the rinse (my frame had the drum 16" off the ground so that I could use a five gallon bucket to collect my rinse).
3. Cut 1 3/4 hole into end of drum
Remove the top off of the drum (1 inch socket with 1/2 socket wrench). Cut a 1 3/4 hole into the non opening end of the drum using a 1 3/4 bi-metal hole saw. This should fit your 1 1/2 threaded bulkhead but test to make sure. Make sure you use lubricating oil (DW-40 is fine) when cutting the hole to reduce friction and keep your hole saw sharp. Place bulkhead into drum making sure the gasket is on the inside of the drum.
3. Cut PVC pipe to make connectors and glue to male adapter, ball valve and PVC elbow
Using a hand saw, cut two 4" pieces of PVC 1/2" pipe. Glue pipe to male adapter. Glue pipe to 90 degree elbow. Glue ball valve assembly to PVC elbow and male adapter. Screw ball valve assembly to bulkhead fitting.
4. Cut two 1 3/4" holes to side of drum and attach cut pieces of shop vac wand
On the side of the shop vac wand the the shop vac hoses attach to, cut them to 4" long using hand saw. Using bi-metal 1 3/4" hole saws cut two holes into side of drum. Ensure that 1 3/4" hole saw is the right size hole saw to fit the wand cuttings that you made. Make sure that you use oil lubricant when cutting holes (DW-40 is fine). Wands may be a very tight fit. You may need to spray sides and pound in wand pieces using a rubber mallet.
5. Screw drum top back on, add hoses to rinse bin, connect one hose to a shop vac and clean some sand!!
You can see a video of this Sand Cleaning Station in action by clicking here. Please let me know if you have any questions.
Thanks,
smithmal
Last edited:
