My diy incubator test run

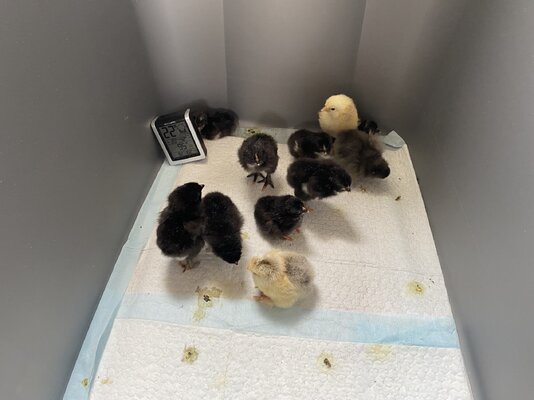
I have never hatched eggs before. Can I ask how long you leave the hatched chicks in the incubator with the unhatched chicks?
I have very little experience hatching but the general rule as I understand is don’t open the incubator until all are hatched. I did open mine to address what I felt was an emergency. One hatched and was having trouble keeping hers head straight. All the chicks that were up and running around started trampling the one the looked crippled.

Anyway I opened it and quickly grabbed everyone that was dry and fluffy and no bed them to the brooder. The crooked neck one looks like it’s improving so I think I made the right call.
 
Very neat experiment! How much total did this cost you?
Probably less than $20 never really added it up but I’ll try from memory.

Toaster oven $5 goodwill

W1209 temperature controller $3 purchase as a 4 pack for 12

Sponges a couple bucks dollar general

Magnet sheets used to cover vents and adjust humidity a couple bucks craft section Walmart

Light bulbs on hand

Computer fan salvaged from an old desktop PC

Light bulb sockets salvaged from an old string of Christmas lights

9 volt wall wart transformer salvaged

I think that about does it
 
A little update on how the hatch is going. We’re coming up on the end of day 22 and I have 11 mostly healthy looking chicks. A couple are still walking a little wobbly but seem to be finding their footing as time passes.

I set 24 eggs that I purchased from a local guy that made a Craigslist post that he had more eggs than incubator space So I bought 12 black copper marans, 4 light Brahma, 4 Rhode Island Red, and 4 olive egger(BCMxEE). I only paid $20 total for the eggs so I feel like he is a hobby breeder not running serious SOP standard program. That’s perfectly fine with me I only need pet/egg laying quality birds.

I removed 1 marans blood ring on day 7. I had one marans egg roll away from me and crack while turning on day 9. 22 eggs made it to lockdown.

8 of the 10 marans hatched out, 2 of the four Brahma hatched , 1 of four OE have hatched, 0 of 4 Rhode Island Red have hatched. I haven’t given up on the other 11 eggs yet they are still incubating and I do see a pip on one of the OE eggs.

I’m not sure why the marans seem to be hatching so much better than the others. The eggs were all marked to identify the breed but no collection date was written so maybe he was putting more marans in his incubators not storing them as long. So I got fresh marans and older eggs for the other one. Anyway I’m not upset if they were older just trying to work out why they are not hatching yet. They were dirt cheap for specific breed eggs. Most BYM go for $1-$3 an egg around my area
 

Attachments

  • 280F5794-67B1-4612-8162-D8F49521679B.jpeg
    280F5794-67B1-4612-8162-D8F49521679B.jpeg
    392.8 KB · Views: 5
No progress for the past 24 hours. So I pulled all 11 eggs out of the incubator to candle them. One did have a small pip hole but when I looked into the hole it was clear that the chick had given up and died. No sign of life in the other 10 either. I went ahead and opened them up and found all of them were fully developed but dead. The 10 that didn’t pip also didn’t pip internally. They looked to be in position but for some reason they quit just before hatching.

What would cause such a thing? 80% of the marans hatched 50% of the Brahma hatched 25% of olive eggers and 0 of the Rhode Island reds. They all came from the same place I picked them up locally so they didn’t go through the mail just a 20is minute drive in my car. All eggs were unwashed and stored pointed end down in the guy’s basement.

The eggs were marked what breed they were but no collection date. If the RIR eggs were old would they quit late or not develop at all?

I’m totally happy to have the 11 healthy chicks just wondering what went wrong and how can I improve things for next time. I’m in no rush to do another batch these 11 will probably put me near my maximum flock capacity assuming that I get 4-6 pullets out of the group.
 
I had a few people from a Facebook group I’m in ask for closer pictures of my incubator. I figured since I already took the pictures I might as well share them here as well for anyone interested

This is not meant to be a step by step guide and I don’t claim it to be perfect. It’s just what I did with what I had to work with. Please use this as a jumping off point if you would like to try your hand a building your own

FF1885EF-FA30-4EF7-A6FB-2D9A042632A7.jpeg

The two small bulbs are 5 watts each and are always on, not controlled by the thermostat they offset the heat leakage through the door. This was a cold spot before I added them. They also provided some illumination for better viewing inside the incubator.

The two larger bulbs are 40 watt and are controlled by the w1209 temperature controller. This is what heats the incubator they flash on and off to keep the temperature at acceptable levels. I really only used one of them and unscrewed the other because when both were operational it would overshoot the desired temperature. They would click off but because they were still hot the temperature would continue to climb. Using only one bulb made the temperature overshoot more tolerable

The fan is a salvaged fan out of a desktop computer it runs from a 12 volt wall wart and is always on it doesn’t cycle with the light bulbs
8ECF5752-90DE-41A0-B65E-A38E2DBA5908.jpeg
Original oven rack turned upside down to make it as high as possible. Two drawers from an old nut and bolt bin fit perfectly on the rack to hold some sponges. Water can be added through holes drilled in the top. The holes are covered with magnet sheets to keep the humidity in.

These 2 trays could get the humidity up to about 40-50%. I had to add more water containers in the lower part at lockdown to raise the humidity higher.

On the right you can see the temperature probe it simply runs from the w1209 through a hole where the original toaster elements were mounted.
A2AD625F-2D75-416F-B44D-0E125687F607.jpeg
The original power cord was replaced with an extension cord so I had a way to plug in a 12 volt DC wall wart transformer. The 12 volt transformer powers the fan and the w1209 temperature controller. All bulbs run on 120 volts AC
E05D7A1D-4127-47DE-85AA-C1639FD0754A.jpeg
Pieces of magnet sheets are used to cover some of the original vents when I need to raise humidity
 

New posts New threads Active threads

Back
Top Bottom