The total run size and coop is 8x21. I’ve gotten mixed results from people I’ve talk to say plenty of space and other not enough. Still not 100% on size as I keep getting different opinions.
It's because what might work great for one keeper/flock might not work for another.
A coop and run will never be too big. They can be too small. If it's in the budget it doesn't hurt to overshoot and end up with a bit of "extra" space than to go for minimum, end up with behavioral issues that could be addressed with space, and then have to expand (or remove birds).
Also assuming that eggs are a top priority for you, the reality is you will either need to cycle out birds every few years, or add on to the flock, in order to keep production going. So more space would give you the option of adding on more easily as integration takes room.
Free ranging will help for sure, but it does sound like there are times when that won't be possible, whether due to weather, predators, your family's schedules, etc. So still a good idea to have space to be able to comfortably lock the birds in. I think your run space is right about at that point, the coop if I understand correctly is going to be 8x7 (I docked the nest box space) which is also close if you end up keeping all 16.
I think our goal is going to be keeping 12-14 at 1 time. We still need to see if any roosters are in the bunch and how many will make it health wise. Speaking to friends they said expect to loose a few to illness in the first 60-90 days. So far these little chicks are pulling strong and vents are kept clean.
I used to tell myself that and kept ending up with "extras" - yes sometimes you read about someone tragically losing half their broods for unknown reasons, but it's probably more common that you don't lose any.
This year was the first year I didn't buy an extra "just in case."
Of course if you don't mind eating extra birds or problem birds, then that gives you more leeway in adjusting as needed if problems do pop up (or if you need to cycle out old layers).
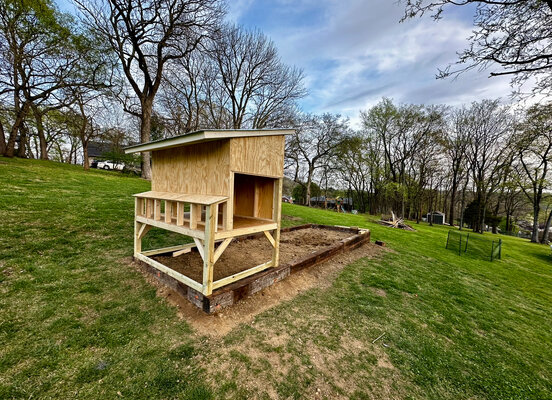
Thank you to everyone who posted feedback. The original plans were laid out for a 6 foot wide coop so I stretched it for 8. Looking at it again I see the point of access on 8 feet being harder. I think I will modify the right side (non door access wall) to add a door to allow better access for cleaning. Were fine eating birds or rehoming to some friends with more property.
Nevertheless some great feedback and I’m looking at way to improve the design to better fit our needs
I wanted to document our family's first coop build for our new flock. Since moving to an area that can allow BYC we decided to finally make it happen. I should say I because I surprised my wife while she was out of town with 10 pullets (5 golden buffs and 5 Rhode Island Reds). I also told our 5-year-old son if he could keep a tight lip until my wife arrived home I would take him to tractor supply to pick out his very one baby chick.
My wife arrived and she was shocked my son and I were able to keep a surprise from her. She was excited to start on our chicks but also shocked I opted to get so many. As promised we took my son to tractor supply to pick out his very one chick. While there we learned you can’t just buy one chick as state law requires 4. So he picked out two Black Sex links and two barred rocks. While checking out the wife asked a lady about these smaller chicks (bantam Cochin a bantam silkie). Nevertheless, 10 went to 14 then to 16.
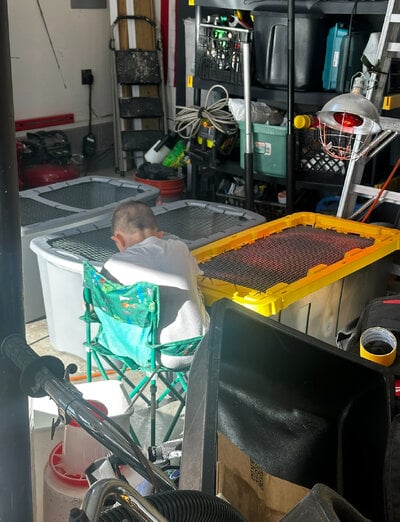
Now the 55-gallon brooder I set up for 10 was a bit tight for 16 chicks so we grabbed two more 55-gallon totes and used 5-gallon buckets to connect. This has since worked fantastic and baby chicks are happy and now run around between the totes. This also makes cleaning a bit easier as we can section off each tote as we go. So far 10/10 would recommend.
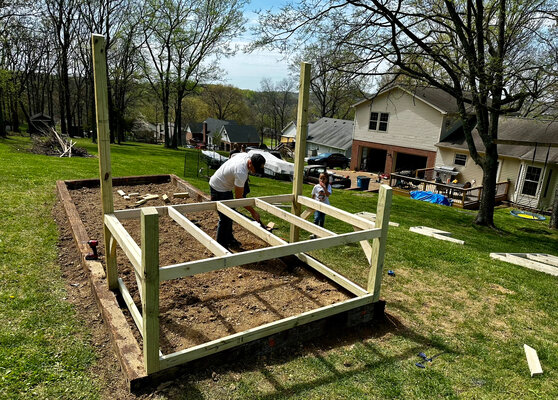
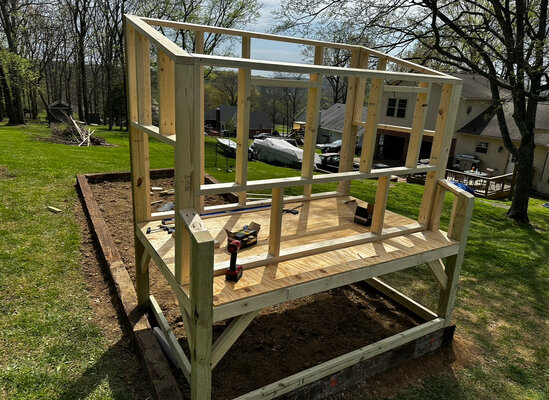
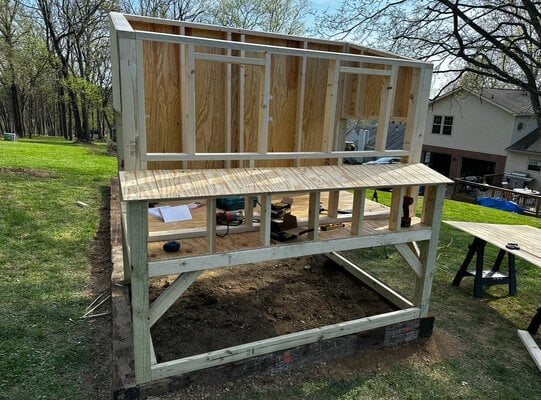
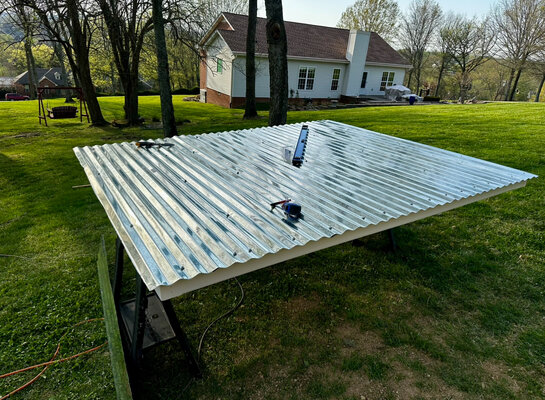
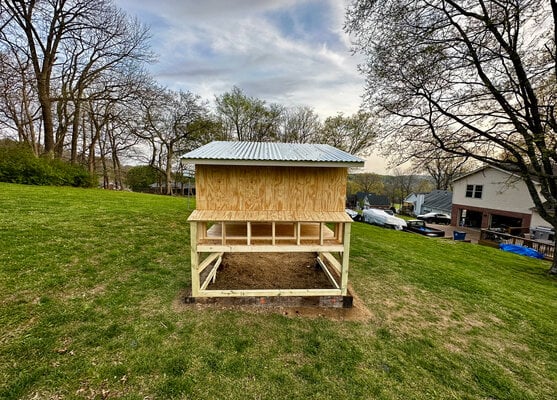
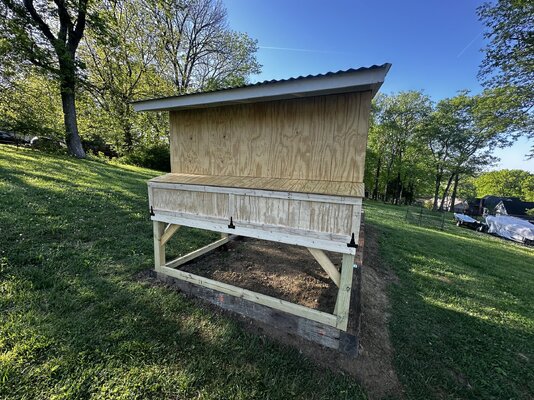
The coop build must start and 16 chicks will need a place to call home. We live on about an acre outside city limits and unfortunately is located on a nice slope. Being located in Tn the rain...happens a lot and we must account for a lot of rain water. We have a nice 15x30 flattish section above the house that we felt was the best spot for the coop. My fear was water runoff flooding the coop making it a muddy mess for the hens. I jumped on the marketplace and found a reasonable deal on 10 8.5' railroad ties I could build a coop base. This would allow the coop and run to be off the ground enough to hopefully keep the rain diverted around the coop and have happy hens.
My wife and I used a tiller to break up the clay soil outline and started laying down the ties. To backfill the coop base we used a mix of dirt from the ground we pulled up and pond fill we got for free locally. That netted us about 3-4in of build-up over the ground to hopefully help retain dirt inside the coop and the water out. Once the coop is built we will run the hardware cloth down the front of the ties and bury it to prevent digging. We have a family of foxes as well as local dogs that run around so protecting the flock is a top priority.
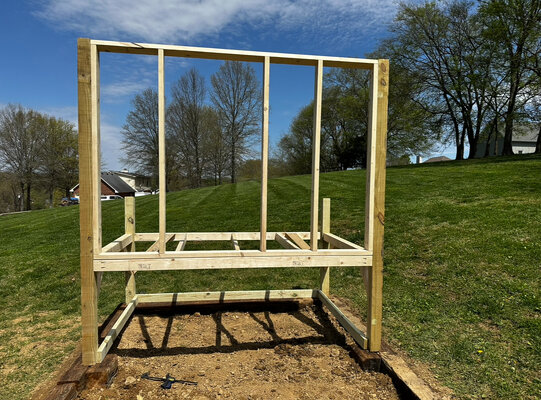
The coop design we are using was from Third Coast Craftsman as it appears to be well thought out. The plan is to expand the design from 5 feet to 8 feet and the run to 16 feet. We have since collected most of the coop lumber and roofing and started building sections to make moving easier. This weekend I should be able to get a good chunk of the coop section built.
I do have some questions for those more experienced with chickens. I am looking to automate food and water to a certain degree.
For food, we are thinking of the Grandpa's large automatic chicken feeder. We do plan to fence a large part of our backyard to free range when possible but in the run, we want to keep them happy and mice/rodents away (when possible). Are the reviews as good as they say or is there a better solution I am not seeing?
For water, I do plan to gutter the roof lines and collect rainwater in a 55-gallon drum. The thought would be to mesh the inlet and outlet to keep leaves and disburse out of the water. The only issues would be bugs and mildew. Is there a trick to filter and dispense the water? I have seen a nipple system used as well as hanging manual dispensers. Not sure what's the best.
I purchased a Rent A Coop (great small business & customer service) treadle feeder in 2021 & it's one of my favorite investments! I only need to add food about once a week to keep it full. Automatic coop door that takes batteries & uses a sensor for light & darkness detection that you can adjust the sensitivity. I got it from Happy Henhouse. (Another small business with wonderful customer service)
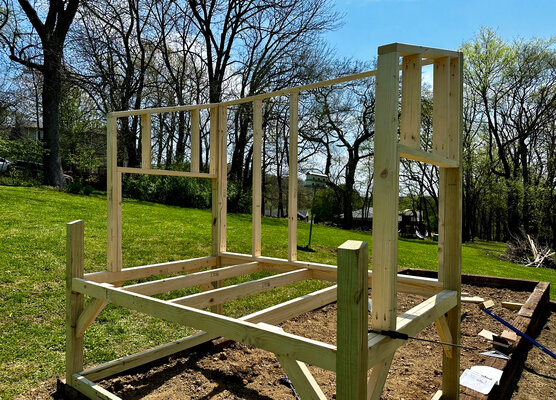
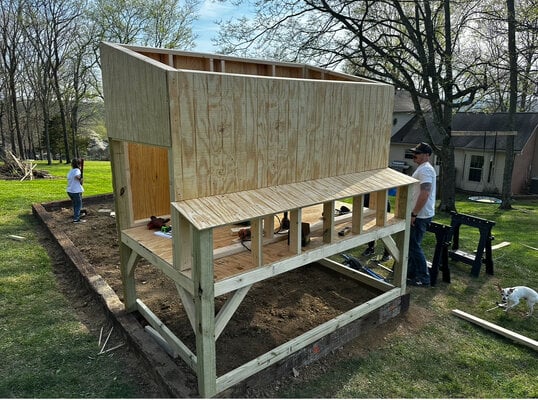
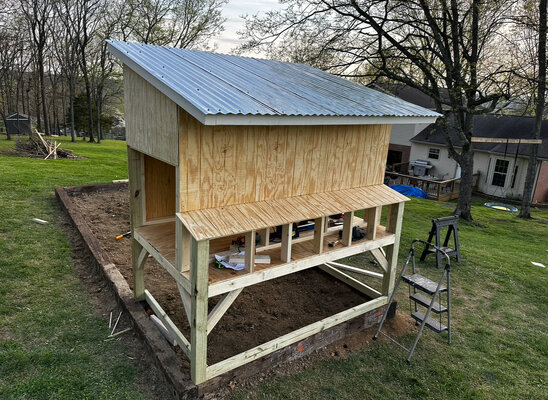
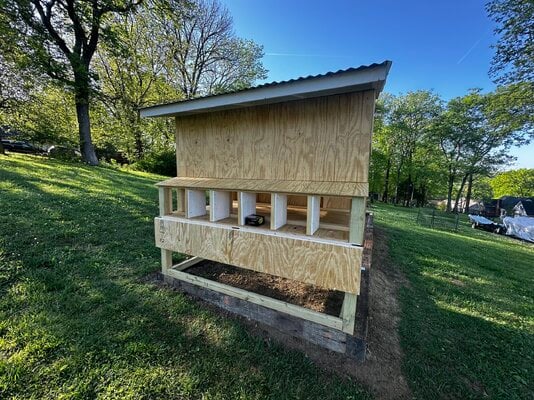
Well we made some solid progress Sunday. Had some family friends some over and lend a hand putting up the walls and roof. A second, third and forth set of hands really helped. Over the next few days I’m working after work to build out the doors and get trim cut, fit and then painted before install. Little vacation upcoming so progress will be slowed down but once we get back we should be ready to wrap it it.
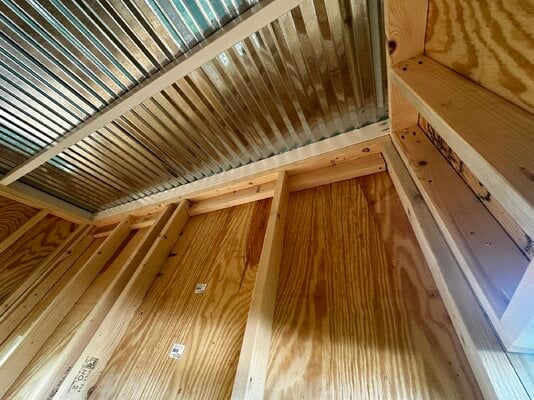
I will say the access suggestion for cleaning access on the far wall was a great idea and I’m so happy I modified the plans to allow it. I’m thinking about making the poop board on a hinge so I can remove the perches and get in there to better clean.
Looking back I wish I would have made the cool about 1-2 feet deeper . I guess I can also add to it should we feel the need.
I wanted to document our family's first coop build for our new flock. Since moving to an area that can allow BYC we decided to finally make it happen. I should say I because I surprised my wife while she was out of town with 10 pullets (5 golden buffs and 5 Rhode Island Reds). I also told our 5-year-old son if he could keep a tight lip until my wife arrived home I would take him to tractor supply to pick out his very one baby chick.
My wife arrived and she was shocked my son and I were able to keep a surprise from her. She was excited to start on our chicks but also shocked I opted to get so many. As promised we took my son to tractor supply to pick out his very one chick. While there we learned you can’t just buy one chick as state law requires 4. So he picked out two Black Sex links and two barred rocks. While checking out the wife asked a lady about these smaller chicks (bantam Cochin a bantam silkie). Nevertheless, 10 went to 14 then to 16.
Now the 55-gallon brooder I set up for 10 was a bit tight for 16 chicks so we grabbed two more 55-gallon totes and used 5-gallon buckets to connect. This has since worked fantastic and baby chicks are happy and now run around between the totes. This also makes cleaning a bit easier as we can section off each tote as we go. So far 10/10 would recommend.
The coop build must start and 16 chicks will need a place to call home. We live on about an acre outside city limits and unfortunately is located on a nice slope. Being located in Tn the rain...happens a lot and we must account for a lot of rain water. We have a nice 15x30 flattish section above the house that we felt was the best spot for the coop. My fear was water runoff flooding the coop making it a muddy mess for the hens. I jumped on the marketplace and found a reasonable deal on 10 8.5' railroad ties I could build a coop base. This would allow the coop and run to be off the ground enough to hopefully keep the rain diverted around the coop and have happy hens.
My wife and I used a tiller to break up the clay soil outline and started laying down the ties. To backfill the coop base we used a mix of dirt from the ground we pulled up and pond fill we got for free locally. That netted us about 3-4in of build-up over the ground to hopefully help retain dirt inside the coop and the water out. Once the coop is built we will run the hardware cloth down the front of the ties and bury it to prevent digging. We have a family of foxes as well as local dogs that run around so protecting the flock is a top priority.
The coop design we are using was from Third Coast Craftsman as it appears to be well thought out. The plan is to expand the design from 5 feet to 8 feet and the run to 16 feet. We have since collected most of the coop lumber and roofing and started building sections to make moving easier. This weekend I should be able to get a good chunk of the coop section built.
I do have some questions for those more experienced with chickens. I am looking to automate food and water to a certain degree.
For food, we are thinking of the Grandpa's large automatic chicken feeder. We do plan to fence a large part of our backyard to free range when possible but in the run, we want to keep them happy and mice/rodents away (when possible). Are the reviews as good as they say or is there a better solution I am not seeing?
For water, I do plan to gutter the roof lines and collect rainwater in a 55-gallon drum. The thought would be to mesh the inlet and outlet to keep leaves and disburse out of the water. The only issues would be bugs and mildew. Is there a trick to filter and dispense the water? I have seen a nipple system used as well as hanging manual dispensers. Not sure what's the best.
We bought the Grandpa's automatic feeder when we got our first chickens in 2016. BEST MONEY WE EVER SPENT! It works perfectly. Food stays dry and pest free. HIGHLY recommend it!
We bought the Grandpa's automatic feeder when we got our first chickens in 2016. BEST MONEY WE EVER SPENT! It works perfectly. Food stays dry and pest free. HIGHLY recommend it!
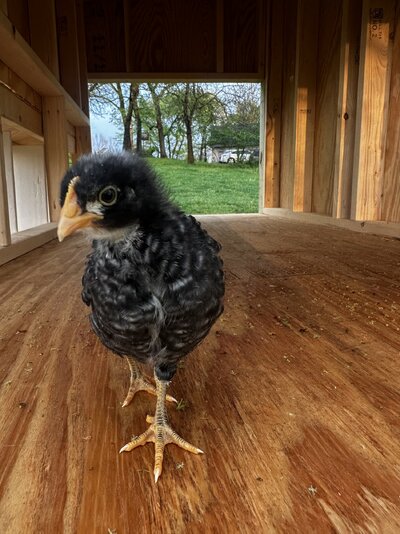
Finally back from vacation and got a little work in last night. Being gone for 8 days these little chicks doubled in size. It truly crazy to see how big they have gotten.
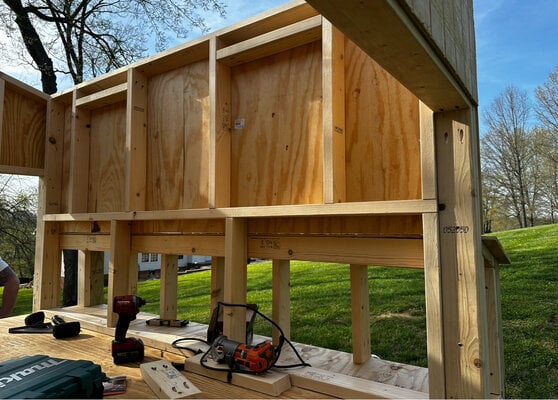
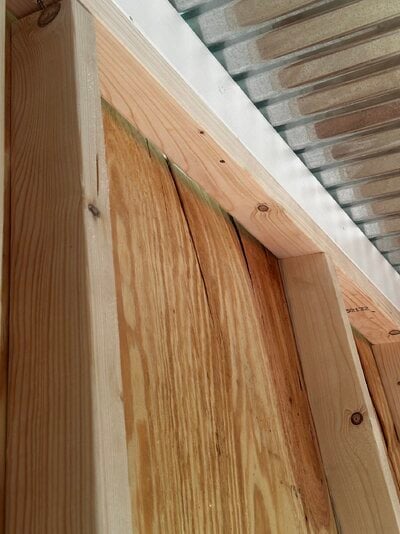
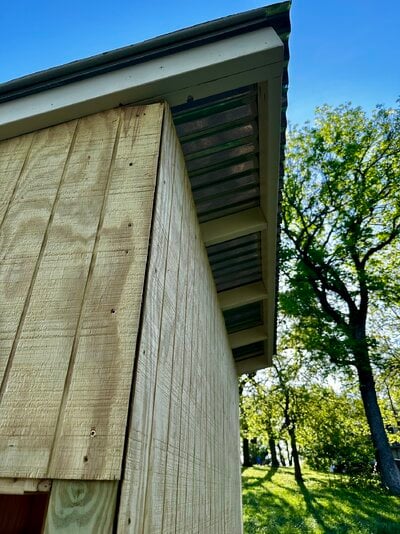
For work I left off for vacation a little bummed out. The siding I put on was a little thin and was curling at the top due to no upper support. The top roof support was inset from the wall about 1/2in so I could tap into that without a gap. I left off planning on removing it and starting over. After some consideration I decided to add some supports at the top roof line to correct the curling. It worked out perfectly!
After calling the siding a wrap I got around to installing the front door to make sure everything lined up. Tonight I’m gonna get more wood so I can finish the side doors and if time allows cut out the windows. Once that’s all done I can start painting as this part of the project is almost a wrap and I can finally start on the run.


")
 . I guess I can also add to it should we feel the need.