I moved this post from the forum "Pictures and Stories" to "Coop Design", I thought it more fitting since it's more about the coop than the chickens so far.
JoAnn and I finally made it to our new digs, keys last day of Feb I believe, but our boxes and tools didn't get here till end of March or so, but we have everything now and we are ready to build. We have one acre, about 135 x 325. We chose a spot in the back of the property so we could build towards the house as we plan on more than just chickens, but it's one farm group at a time for now.
 We want both meat and laying birds so we are starting with a coop that is 8 x 8 x about 8 (a lazy two story affair) with two levels of roosts, poop trays under the roosts, linoleum floors,and it will have 2 rows of 5 nest boxes accessible from the outside when finished. The plan is for the roof to supply the water needs via a catchment of about 35 gallons off the corrugated PVC panels(it rains 100-300 inches/ year here) complete with their own water filter system. Our plans call for two electric (solar) pop doors and timers, double entry doors with a grand staircase/ramps for the hens to enter, Semi or Auto feeder system, again solar powered, and the ability for coop expansion when we add meat chix, turkeys, and the game fowl like quail, and golden pheasant. JoAnn has a new friend that is donating our first birds- one rooster and two laying hens, we just needed to get a coop going for them. Silly me, I scheduled two weeks for this. The meat birds will follow when we get the kinks worked out of layer side of this coop.
I started the work on April 22, when we first got word of the freebies. The photos below are going to try to show the work so far.
This is the build site: Yes, it's real Lava- can't go anywhere out here without hitting some form of it. We actually bought the house here based on the way the lava had flowed. Exciting landscaping possibilities, but that is another forum all together.
This are the DIY Concrete piers- I didn't have the bigger size cinder blocks but these smaller blocks are working just fine, I also used 9 total. It took half a day to chisel out a level spot for 9 pads, so it is definitely taking longer than I ever thought it would to get this done. The area under the decking will be accessible to the birds, both for foraging space and shade in the hotter months.

Starting the deck with ply covering. We built all the walls then fixed them temporarily in place for fit, then removed them and painted them prior to installation because of the reach issue once in place. You'll see later on what I mean.

Three of the four walls ready for paint, the fourth is a full width swinging 'bi-opening door' for coop cleaning and I had to build that in place for roof eave clearances.

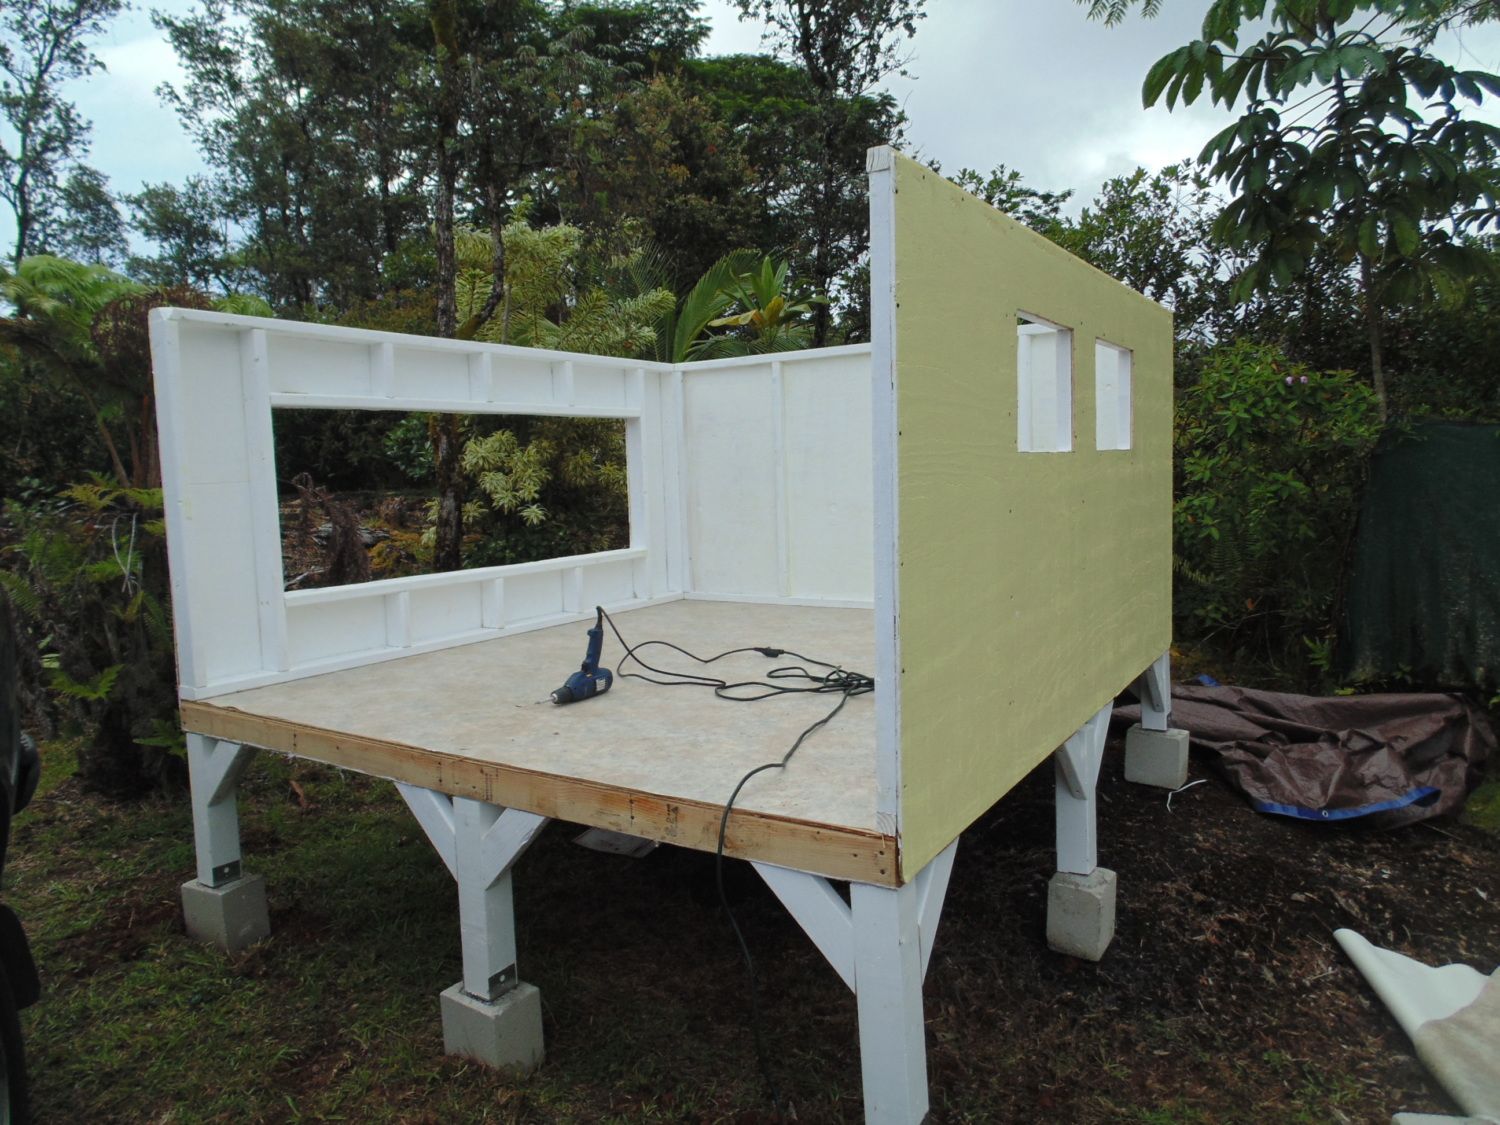
Paint applied- two coats exterior latex over a borate treated lumber for both the humidity and the insects. The only area that isn't getting the treated lumber will be the nest boxes. We agonized over this for a week before finally deciding that the cost of fighting the humidity and termites here was too high without the borate lumber.

Gable ends complete and painted- and yes, it's egg yolk yellow and white.

The rest of the trusses are open so there won't be any ideas of the chickens roosting on the span- the shear strength will come from the plywood panel on the outside verticals (Lazy second story). Honest, the trusses are open and you'll see them a bit better later.

Fast forward to the day the walls were installed on the floor / decking!
So we added a small header across the space for the 4th wall and installed the gable ends, tied them together with a small ridge beam made from a 2x4 .

Next we added the open trusses

And then got to work on the Lazy 2nd floor-also known as the clerestory wall with 4 windows placed between the trusses. Note that these were completed with trim and painted, again, for ease of access in the garage vs. the tiny roof! I will have more photos of the finished work as I still need to put the final touches in paint on these before I can install them.

Next was making and painting the "clean out wall" that is full width for ease of cleaning the floor of the coop. It was made full size then cut at the height to clear the rafters and fascia boards.

That brings us to today. It's midnight here and I will be installing the clerestory panels, the roof purlins AKA, roof battens, the roof panels and hopefully the fascia boards and the 4th wall. Friday should be the punch list and the pick up item list then getting ready for the fencing. We will be Fenching approximately 20 x 50 at a height of 5 foot. We'll see what actually gets done.
Till next time- Ken
Okay, update:
ROof is almoct complete at this point,

Finally done. Gutters will be applied to catch the rain water for the chickens. I plan on using a 35 gallon barrel to hold the ewater and use a filtration system that came off our home to supply filtered water to them. This will be installed soon.

Nest wall as seen from the lava pad above the chickens, I will be working on this part next.

Until next time-
JoAnn and I finally made it to our new digs, keys last day of Feb I believe, but our boxes and tools didn't get here till end of March or so, but we have everything now and we are ready to build. We have one acre, about 135 x 325. We chose a spot in the back of the property so we could build towards the house as we plan on more than just chickens, but it's one farm group at a time for now.
I started the work on April 22, when we first got word of the freebies. The photos below are going to try to show the work so far.
This is the build site: Yes, it's real Lava- can't go anywhere out here without hitting some form of it. We actually bought the house here based on the way the lava had flowed. Exciting landscaping possibilities, but that is another forum all together.
This are the DIY Concrete piers- I didn't have the bigger size cinder blocks but these smaller blocks are working just fine, I also used 9 total. It took half a day to chisel out a level spot for 9 pads, so it is definitely taking longer than I ever thought it would to get this done. The area under the decking will be accessible to the birds, both for foraging space and shade in the hotter months.
Starting the deck with ply covering. We built all the walls then fixed them temporarily in place for fit, then removed them and painted them prior to installation because of the reach issue once in place. You'll see later on what I mean.
Three of the four walls ready for paint, the fourth is a full width swinging 'bi-opening door' for coop cleaning and I had to build that in place for roof eave clearances.
Paint applied- two coats exterior latex over a borate treated lumber for both the humidity and the insects. The only area that isn't getting the treated lumber will be the nest boxes. We agonized over this for a week before finally deciding that the cost of fighting the humidity and termites here was too high without the borate lumber.
Gable ends complete and painted- and yes, it's egg yolk yellow and white.
The rest of the trusses are open so there won't be any ideas of the chickens roosting on the span- the shear strength will come from the plywood panel on the outside verticals (Lazy second story). Honest, the trusses are open and you'll see them a bit better later.
Fast forward to the day the walls were installed on the floor / decking!
So we added a small header across the space for the 4th wall and installed the gable ends, tied them together with a small ridge beam made from a 2x4 .
Next we added the open trusses
And then got to work on the Lazy 2nd floor-also known as the clerestory wall with 4 windows placed between the trusses. Note that these were completed with trim and painted, again, for ease of access in the garage vs. the tiny roof! I will have more photos of the finished work as I still need to put the final touches in paint on these before I can install them.
Next was making and painting the "clean out wall" that is full width for ease of cleaning the floor of the coop. It was made full size then cut at the height to clear the rafters and fascia boards.
That brings us to today. It's midnight here and I will be installing the clerestory panels, the roof purlins AKA, roof battens, the roof panels and hopefully the fascia boards and the 4th wall. Friday should be the punch list and the pick up item list then getting ready for the fencing. We will be Fenching approximately 20 x 50 at a height of 5 foot. We'll see what actually gets done.
Till next time- Ken
Okay, update:
ROof is almoct complete at this point,
Finally done. Gutters will be applied to catch the rain water for the chickens. I plan on using a 35 gallon barrel to hold the ewater and use a filtration system that came off our home to supply filtered water to them. This will be installed soon.
Nest wall as seen from the lava pad above the chickens, I will be working on this part next.
Until next time-
Last edited:


