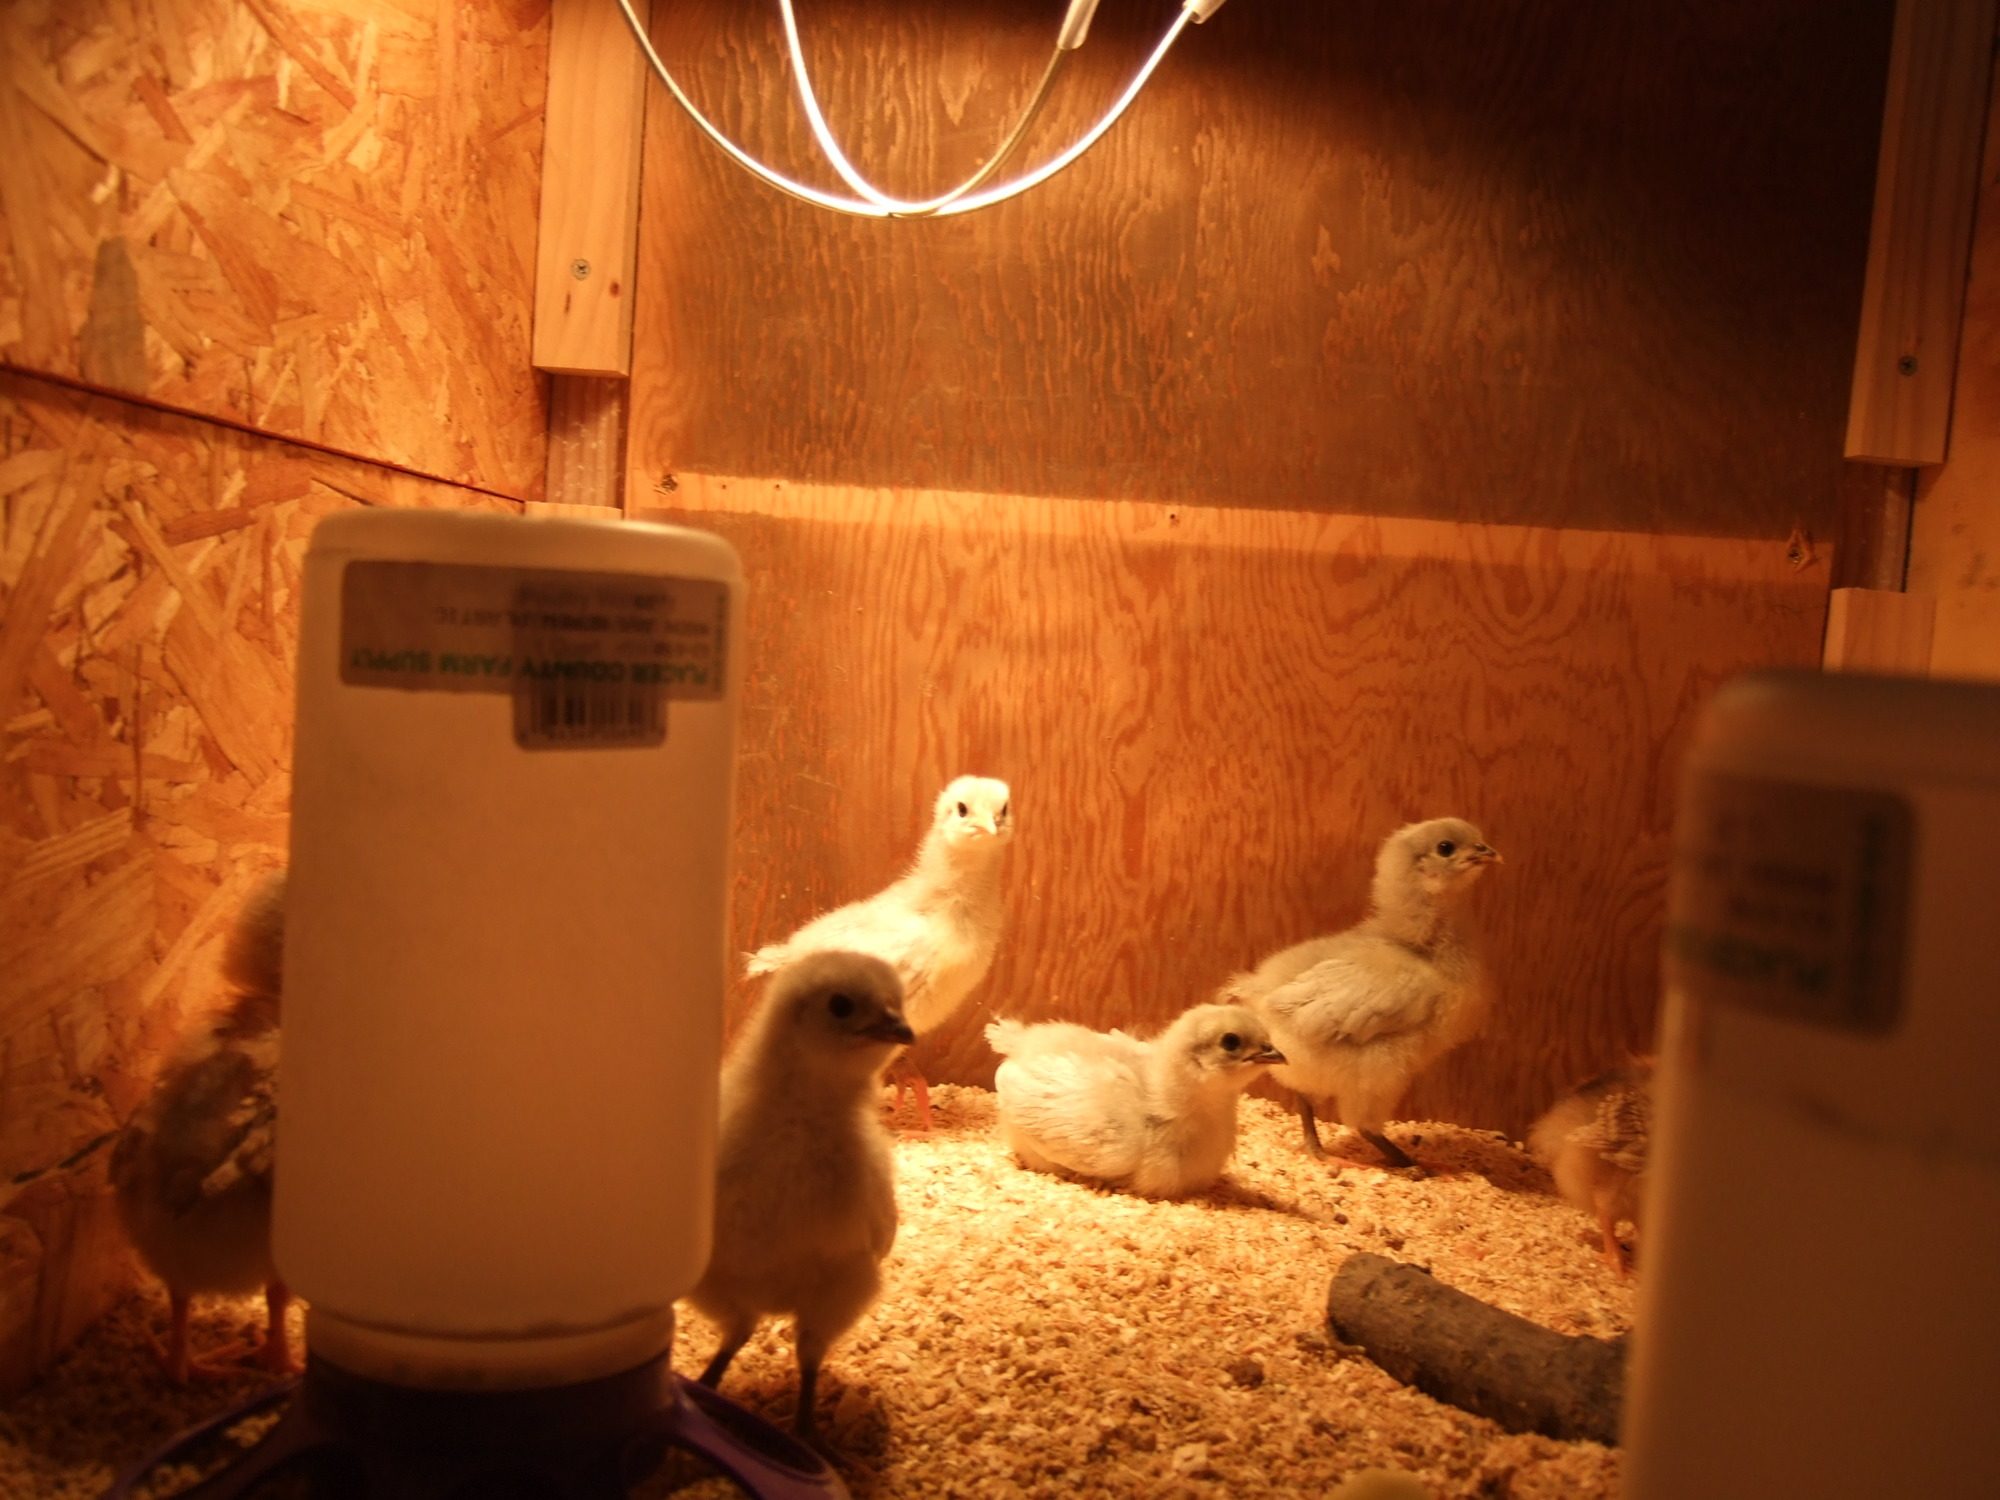
So I got chickens. 8 straight run, 5 of which are Lavender Orpingtons, and 3 Splash Red Laced Wyandotes. They're 6 weeks old and I already think I 'might' know which ones are those dang roosters!
Here the birds are a week old, and It was time to build the coop. Woot Woot Woot!
Now, we've been in a drought out here, so it's no problem, I've got weeks. Then the birds started growing, and it started raining. Every Day!!! Did I mention the birds were growing? Like,,,really fast!!!
Then there was a break in the weather. Me and the Wifey got out there and got busy. I mean, how long could it take to build a coop and run??? Piece of cake.

I had already decided on my design. The Wichita, Boisemarker, Bigghoss design seemed so popular and simple, that I decided on this design. With a couple of modifications, of course, because I've never built a coop before and I obviously know what I'm doing! What's ironic, is that I had lot's of innovative and creative ideas for my coop, then after surfing BYC for many weeks, I realized there are no new ideas. It's all 'Been there, done that'. My creative juices feel dehydrated!! I need a beer!
First off, there were changes to address the weather. All of the Kaleefornia winds blow through our little valley, so it had to be sturdy. Real sturdy. And it had to have a pitched roof. Oh wait, I've never done that before. But the guy at Lowes said I could do it, so I believed him. Second, I realize all things are bigger in Texas, but not their Raccoons. I have Sampson, Hercules, and Gargantuan, and we aren't even talking about the Possum, Skunks, Foxes, and those lovely Red Tailed Hawks. Hmmmmm, and I still plan to free range. Movin' on,,,,,,
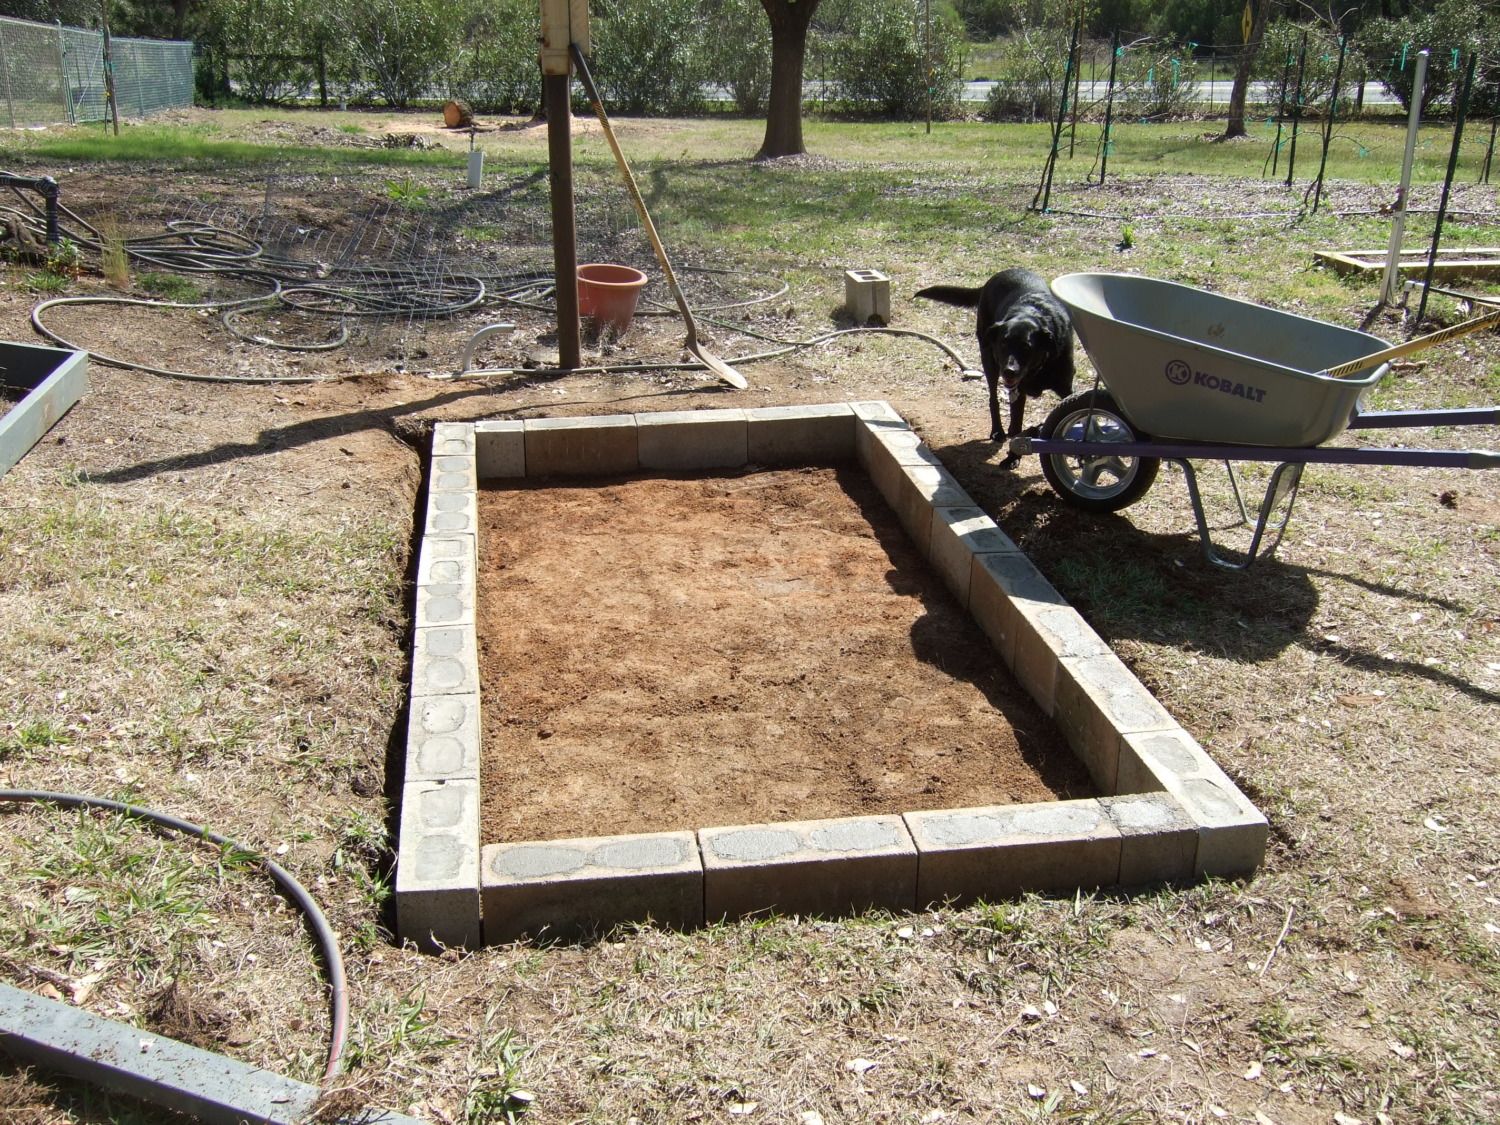
So to start, we dug down into the DG. drove in rebar, and placed cinder block into the ground. Then mixed concrete and filled the centers. There will be no digging into our coop!
Notice how the Supervisor gets in all the Pics. She's really on top of this worksite!!!
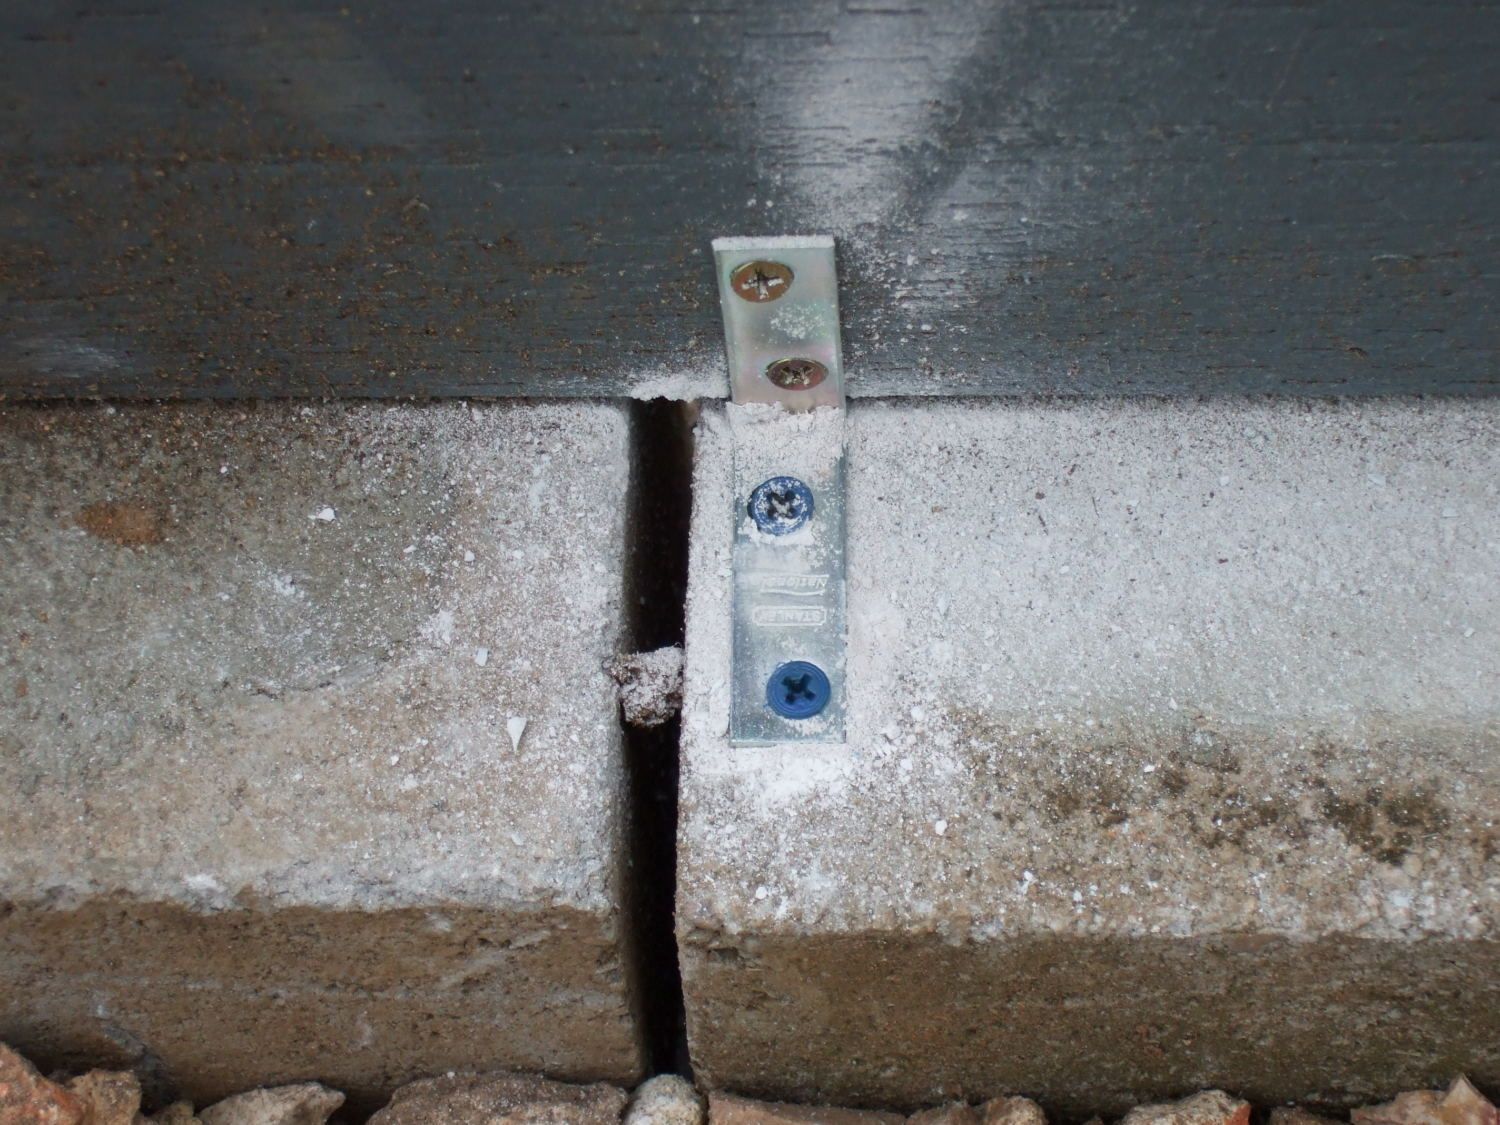
As I mentioned the wind in the valley, it was important to secure the coop to the cinder blocks. This might not be Kansas, and I never met Dorothy and Toto, but the winds are really rude. So I used Tapcot fasteners and drilled into the cinder blocks with a masonry bit.
.
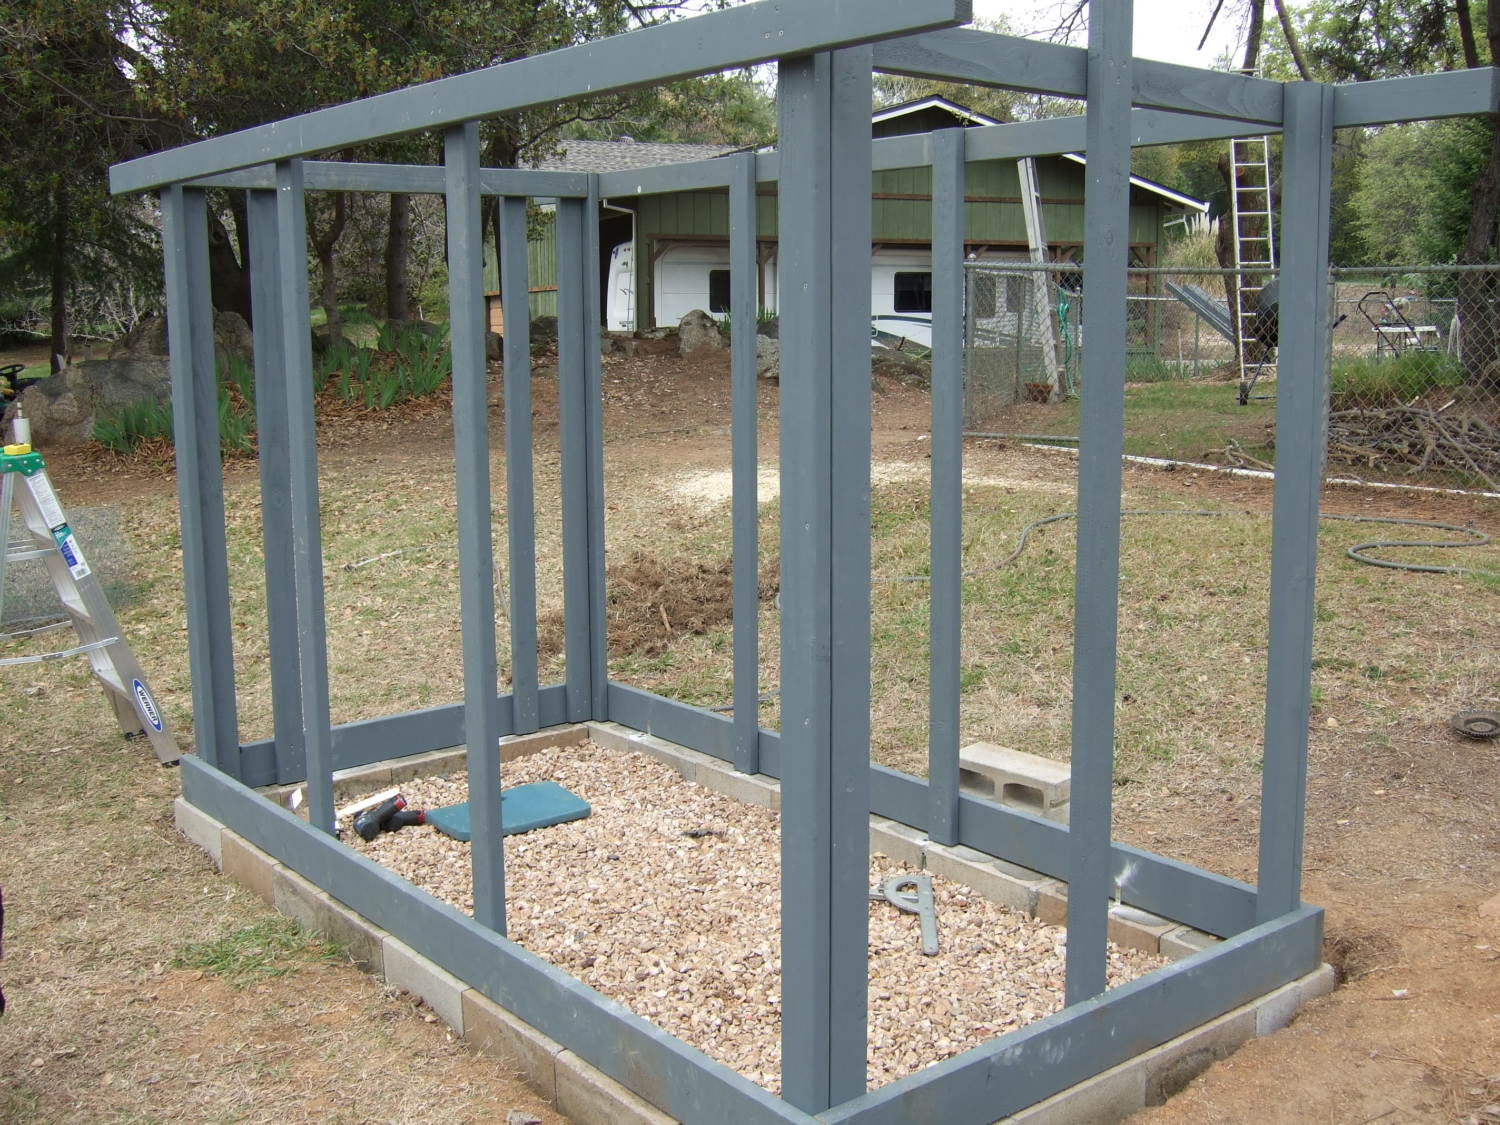
Then it was time for some Lumber to go up. Do you have any idea how much lumber can go into a Chicken Coop? Yea,,,I didn't either. The color is grey, 'cause we were trying to make the coop as close to the house as possible. I used Cabot stain that I got at Lowes. The advantage to this stain is that it smells just like those little chocolate pudding cups. I can't, however, attest to the taste!
The previous owner had rocks everywhere as landscape material, so finding rocks to fill in the void was not an issue. In the picture above we already have rocks, chicken wire, more chicken wire, landscape cloth, and then more rocks. No shortage of rocks!!! Then it was time to start the roof trusses. It's roughly six feet at the sides, and seven feet at the peak. After I measured the pitch, it came out to 26 degrees. This was important, 'cause after this, everything will be a variable of 26 degrees. I'm simple minded and like simple measurements. Ask My wife,,,,,I'm measurement impaired!!!!!

Notice the peak board is short, but the bottom boards are long. Hmmmm, I decided (after I cut the peak board), that I wanted gable ends. I could have saved myself a lot of work if I'd planned for this, but I didn't. More on this next.


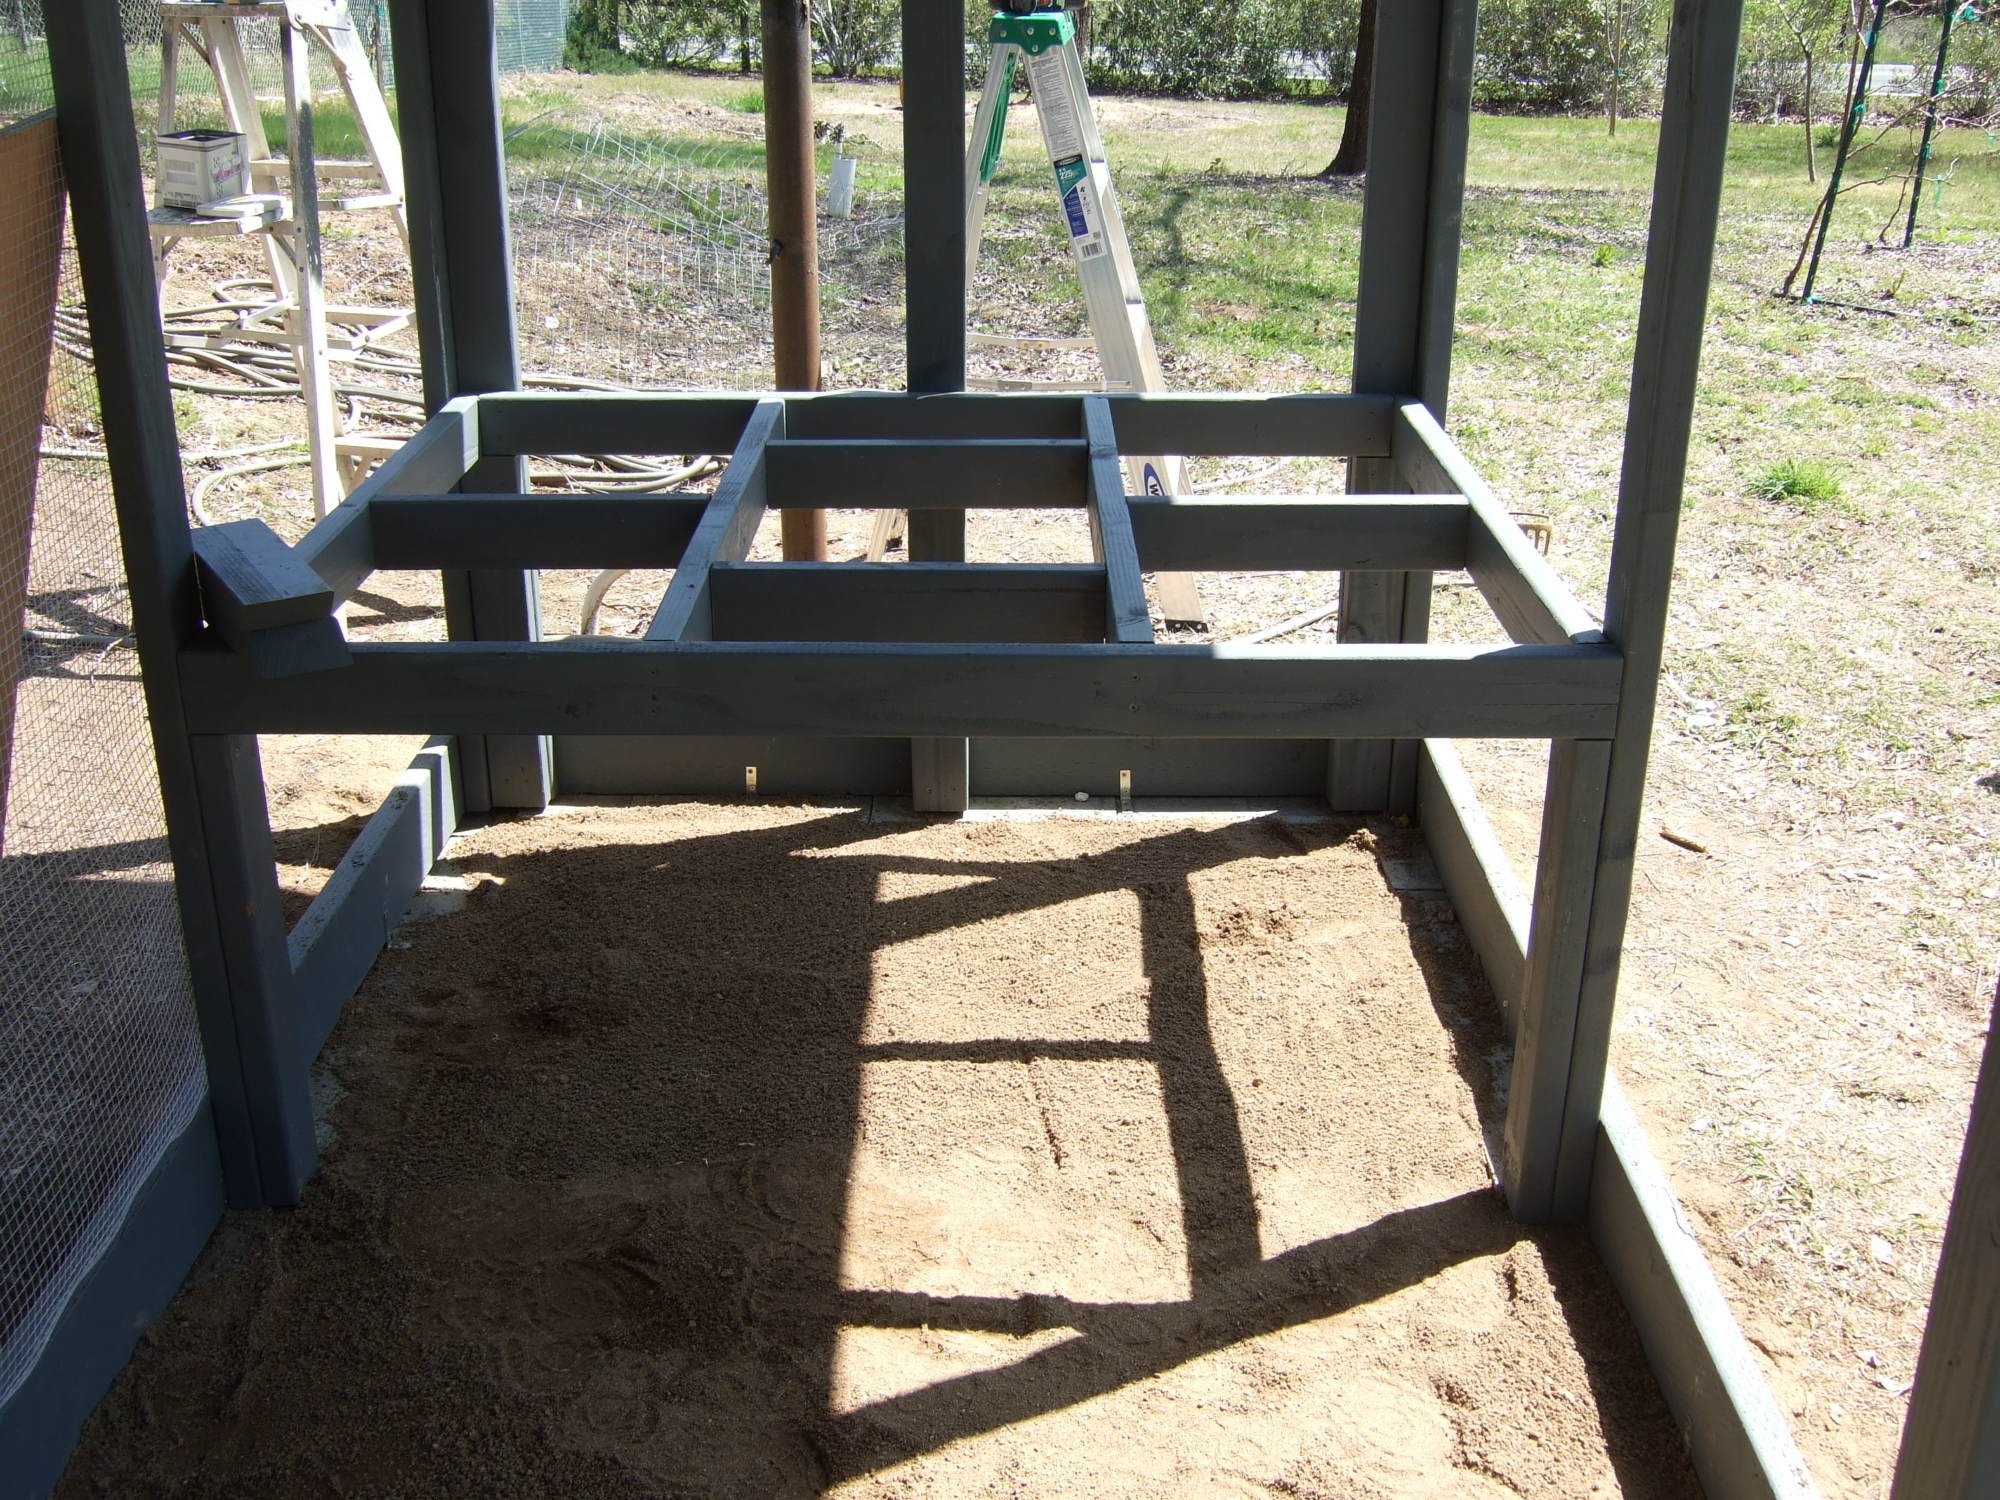
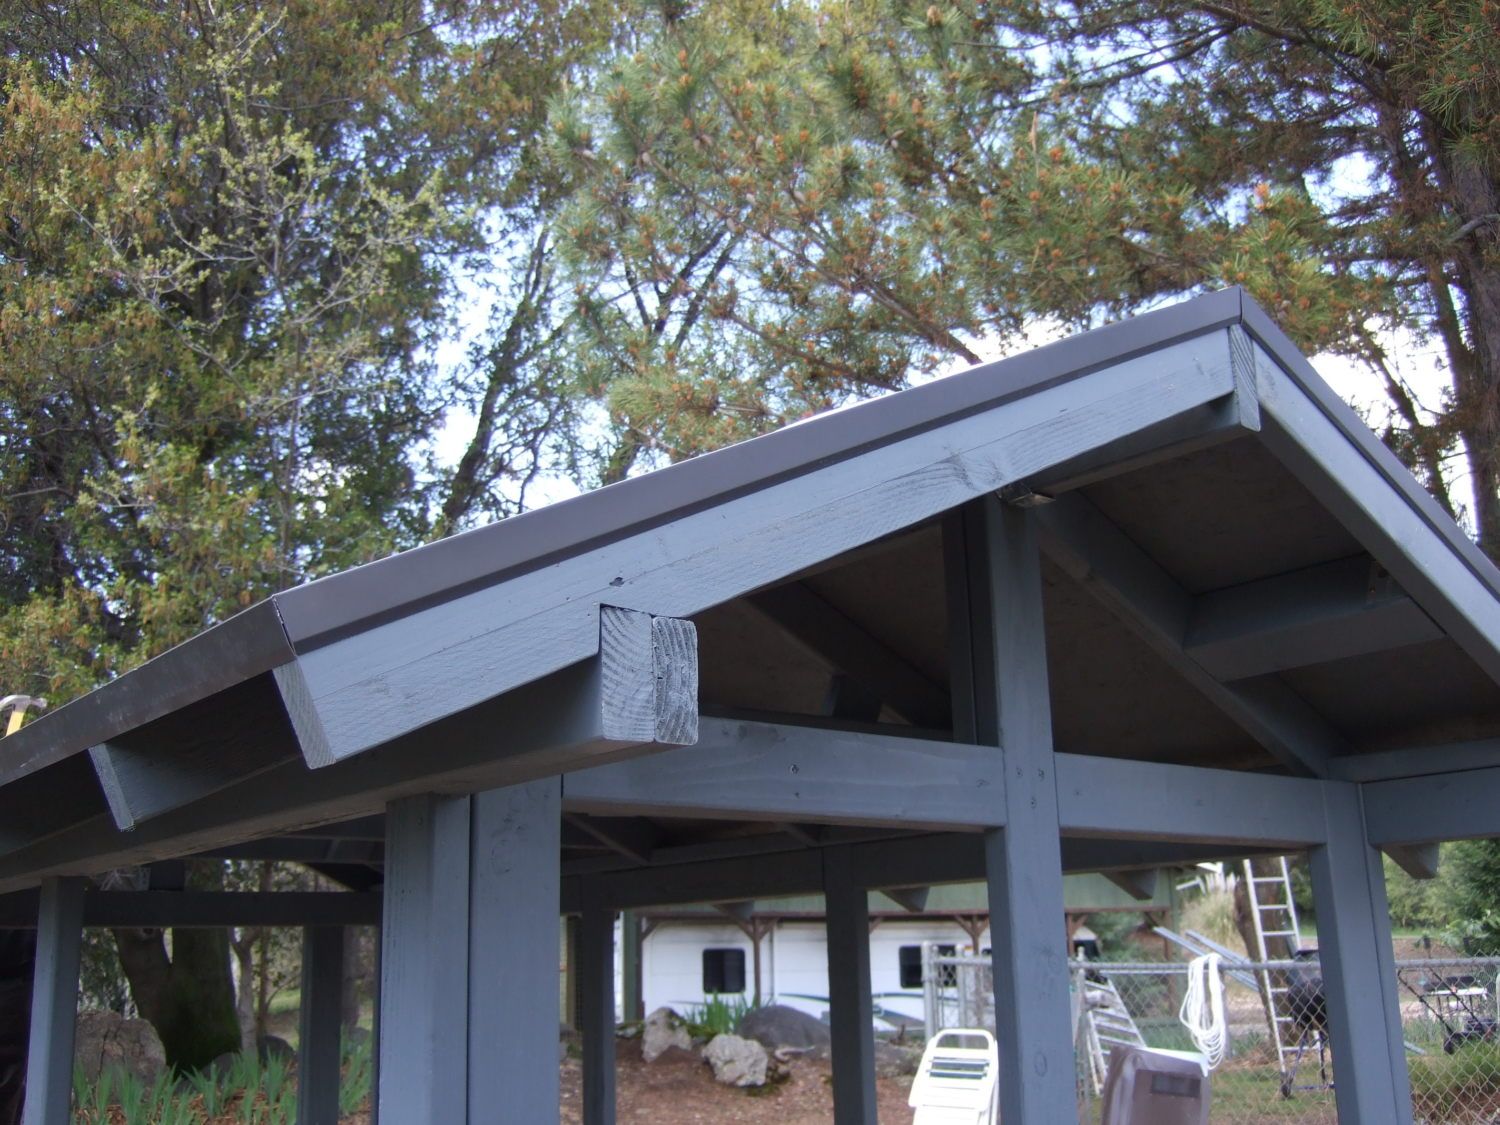
Notice the 2x6 and 4x4 extentions using metal hangers. What's a few more dollars for our boys and girls????

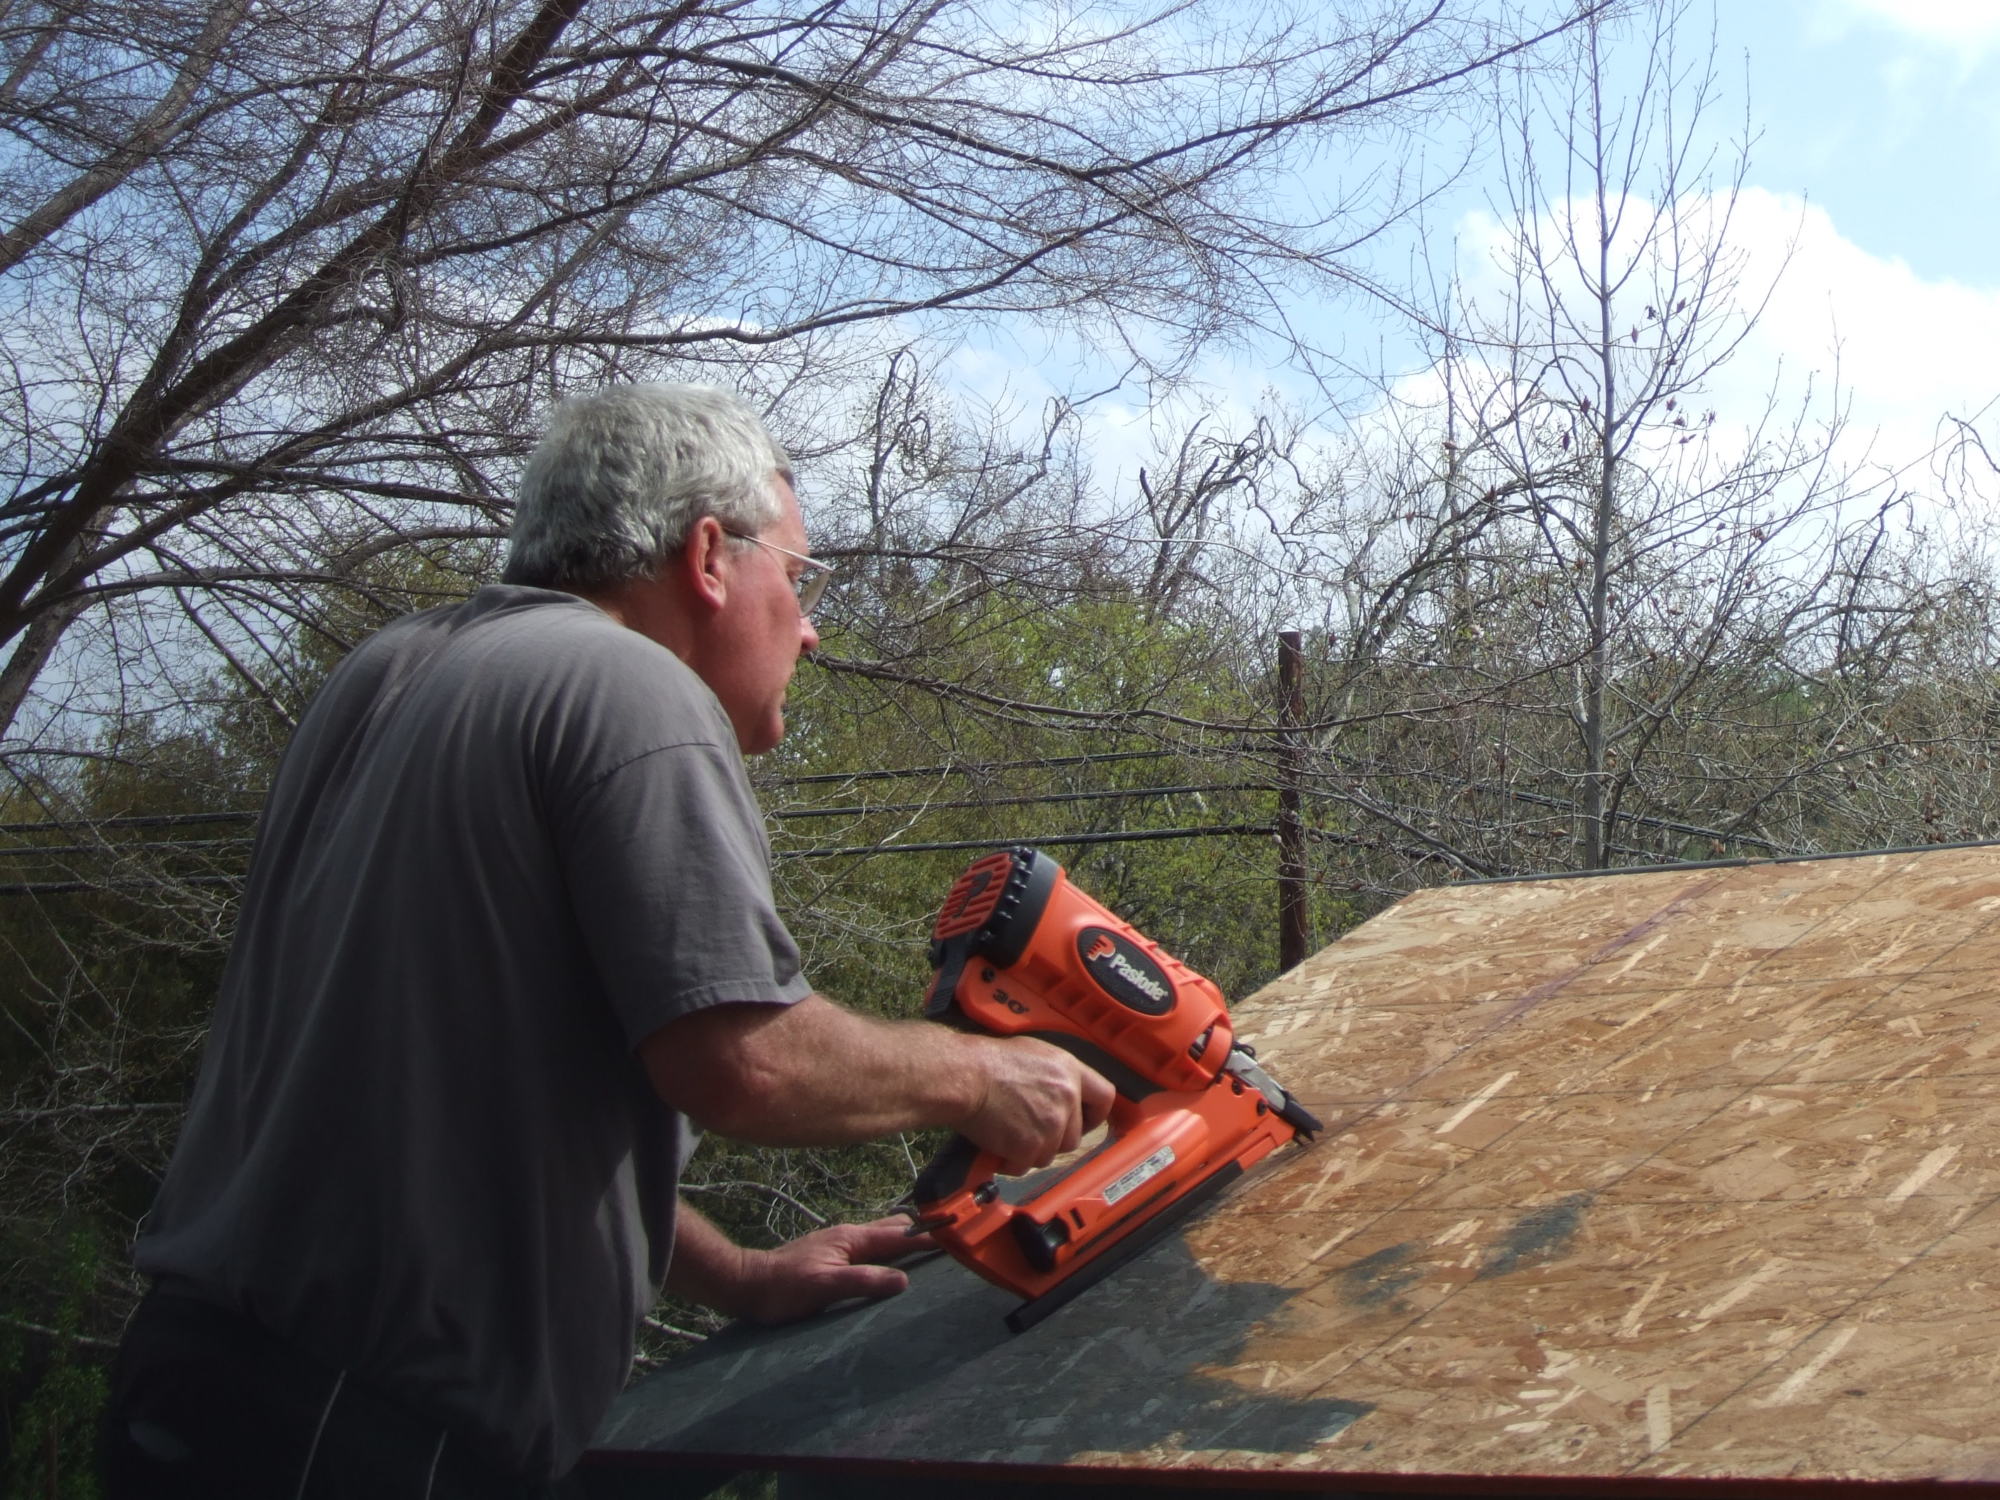
Now here was the first 'major' screwup. I wanted to put in a ridge vent, but I hadn't purchased them yet. So I put up the sheathing for the roof, and left too much of a gap at the top. Even putting in trim boards up near the peak didn't work 'cause the ridge vents had nothing to nail in to. Oh well, at least the roofing company gave me a full refund. On the plus side, I got to use my new Pasload nailer and that was sweet!!
And finally,,,,,,,ready for some padding and shingles.

Oh,,,,but guess what? It's started to rain. And it will rain for 4 more days. Did I mention the birds are still growing??????
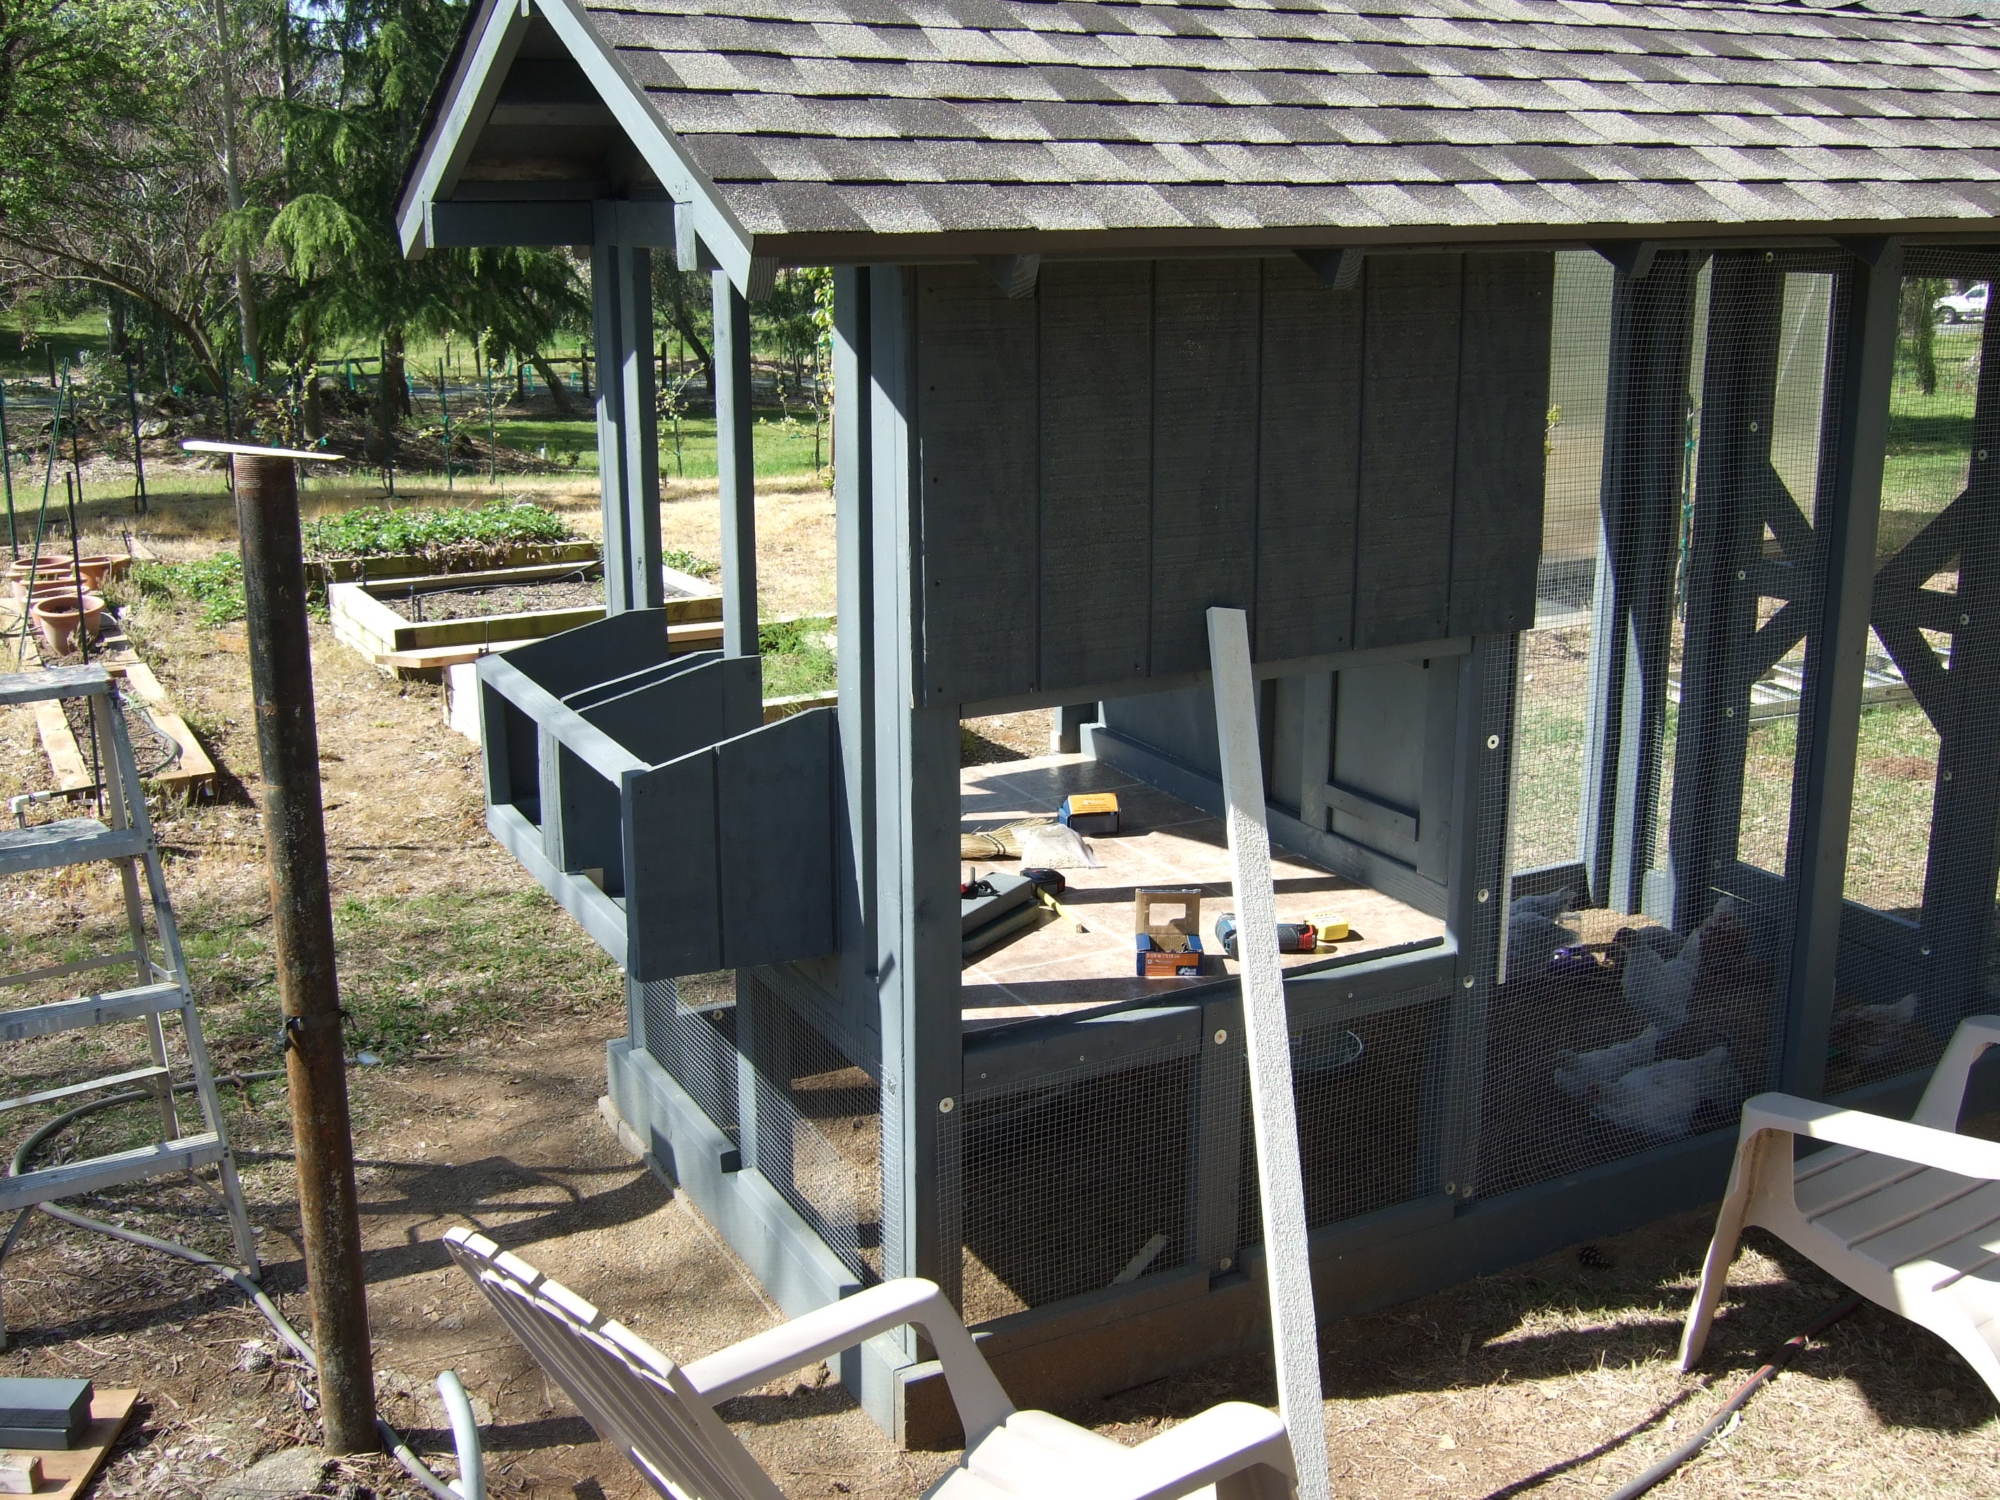
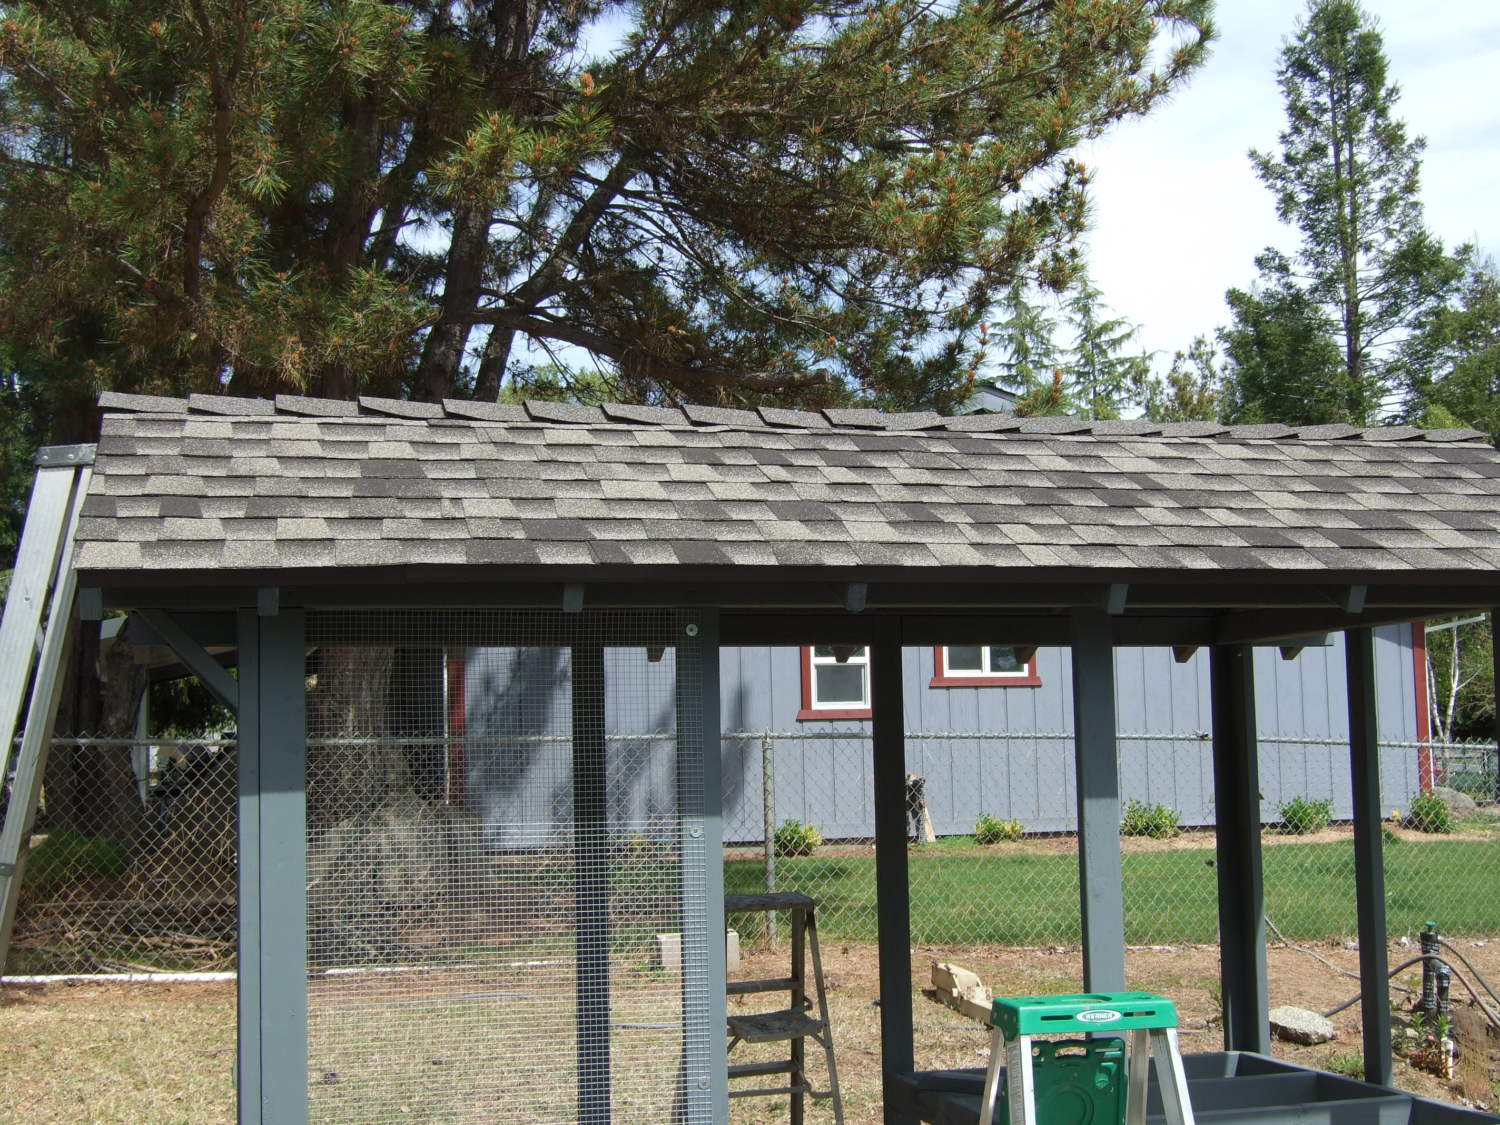
Got the trim on. At least I didn't return this stuff to the roofing company!
So let's cut to the chase. After a smashed thumb, here's the roof,,,,,
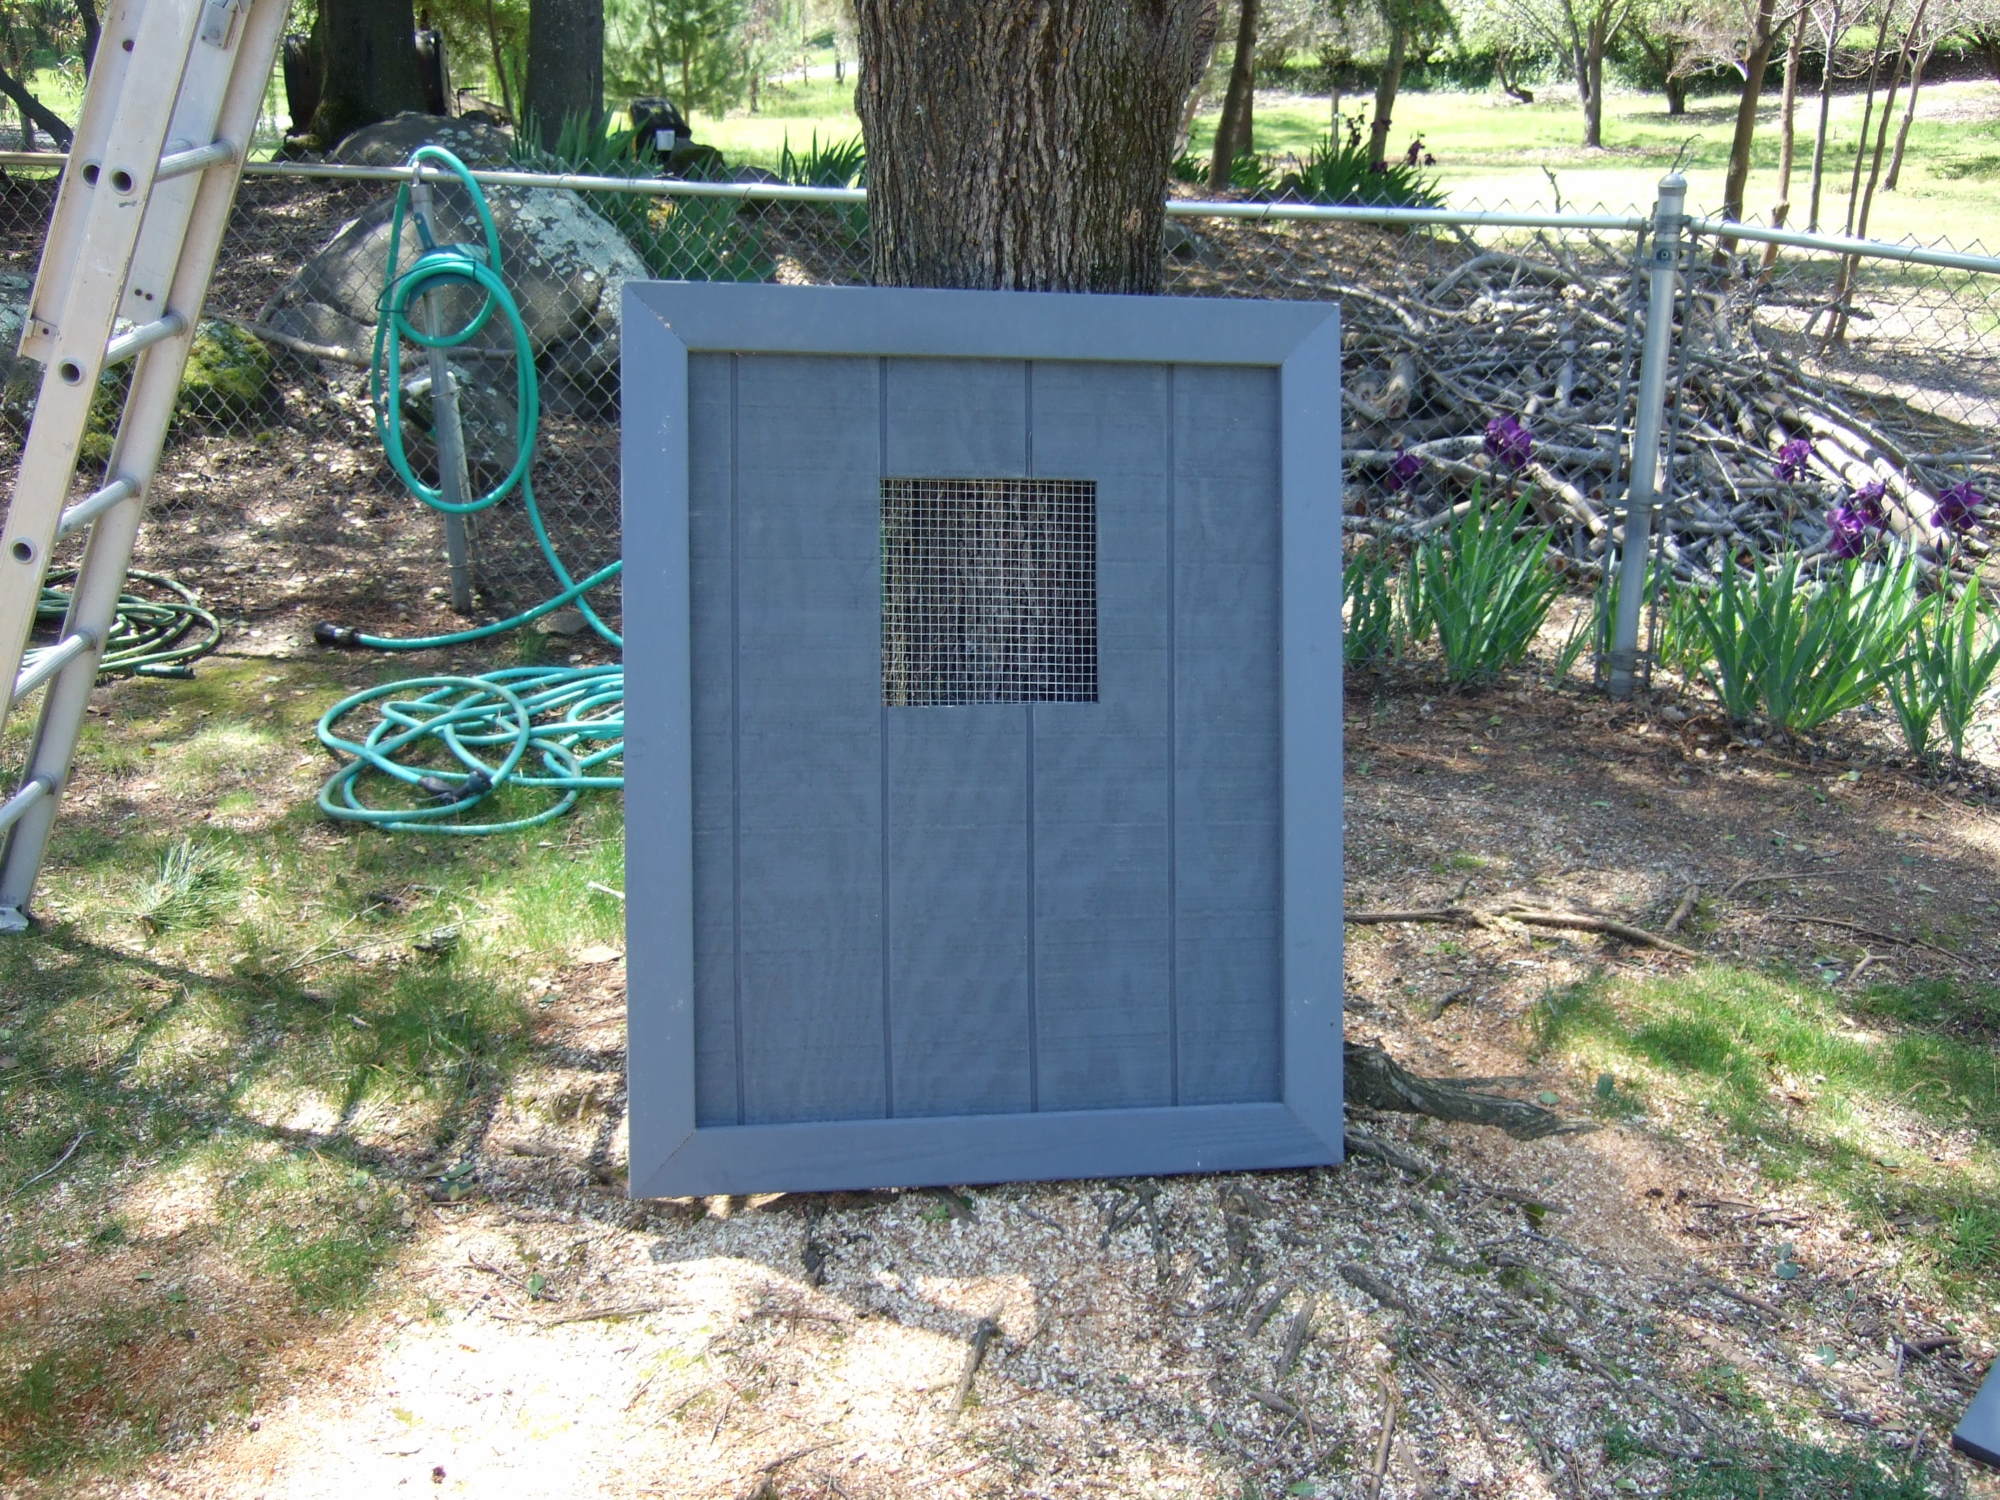
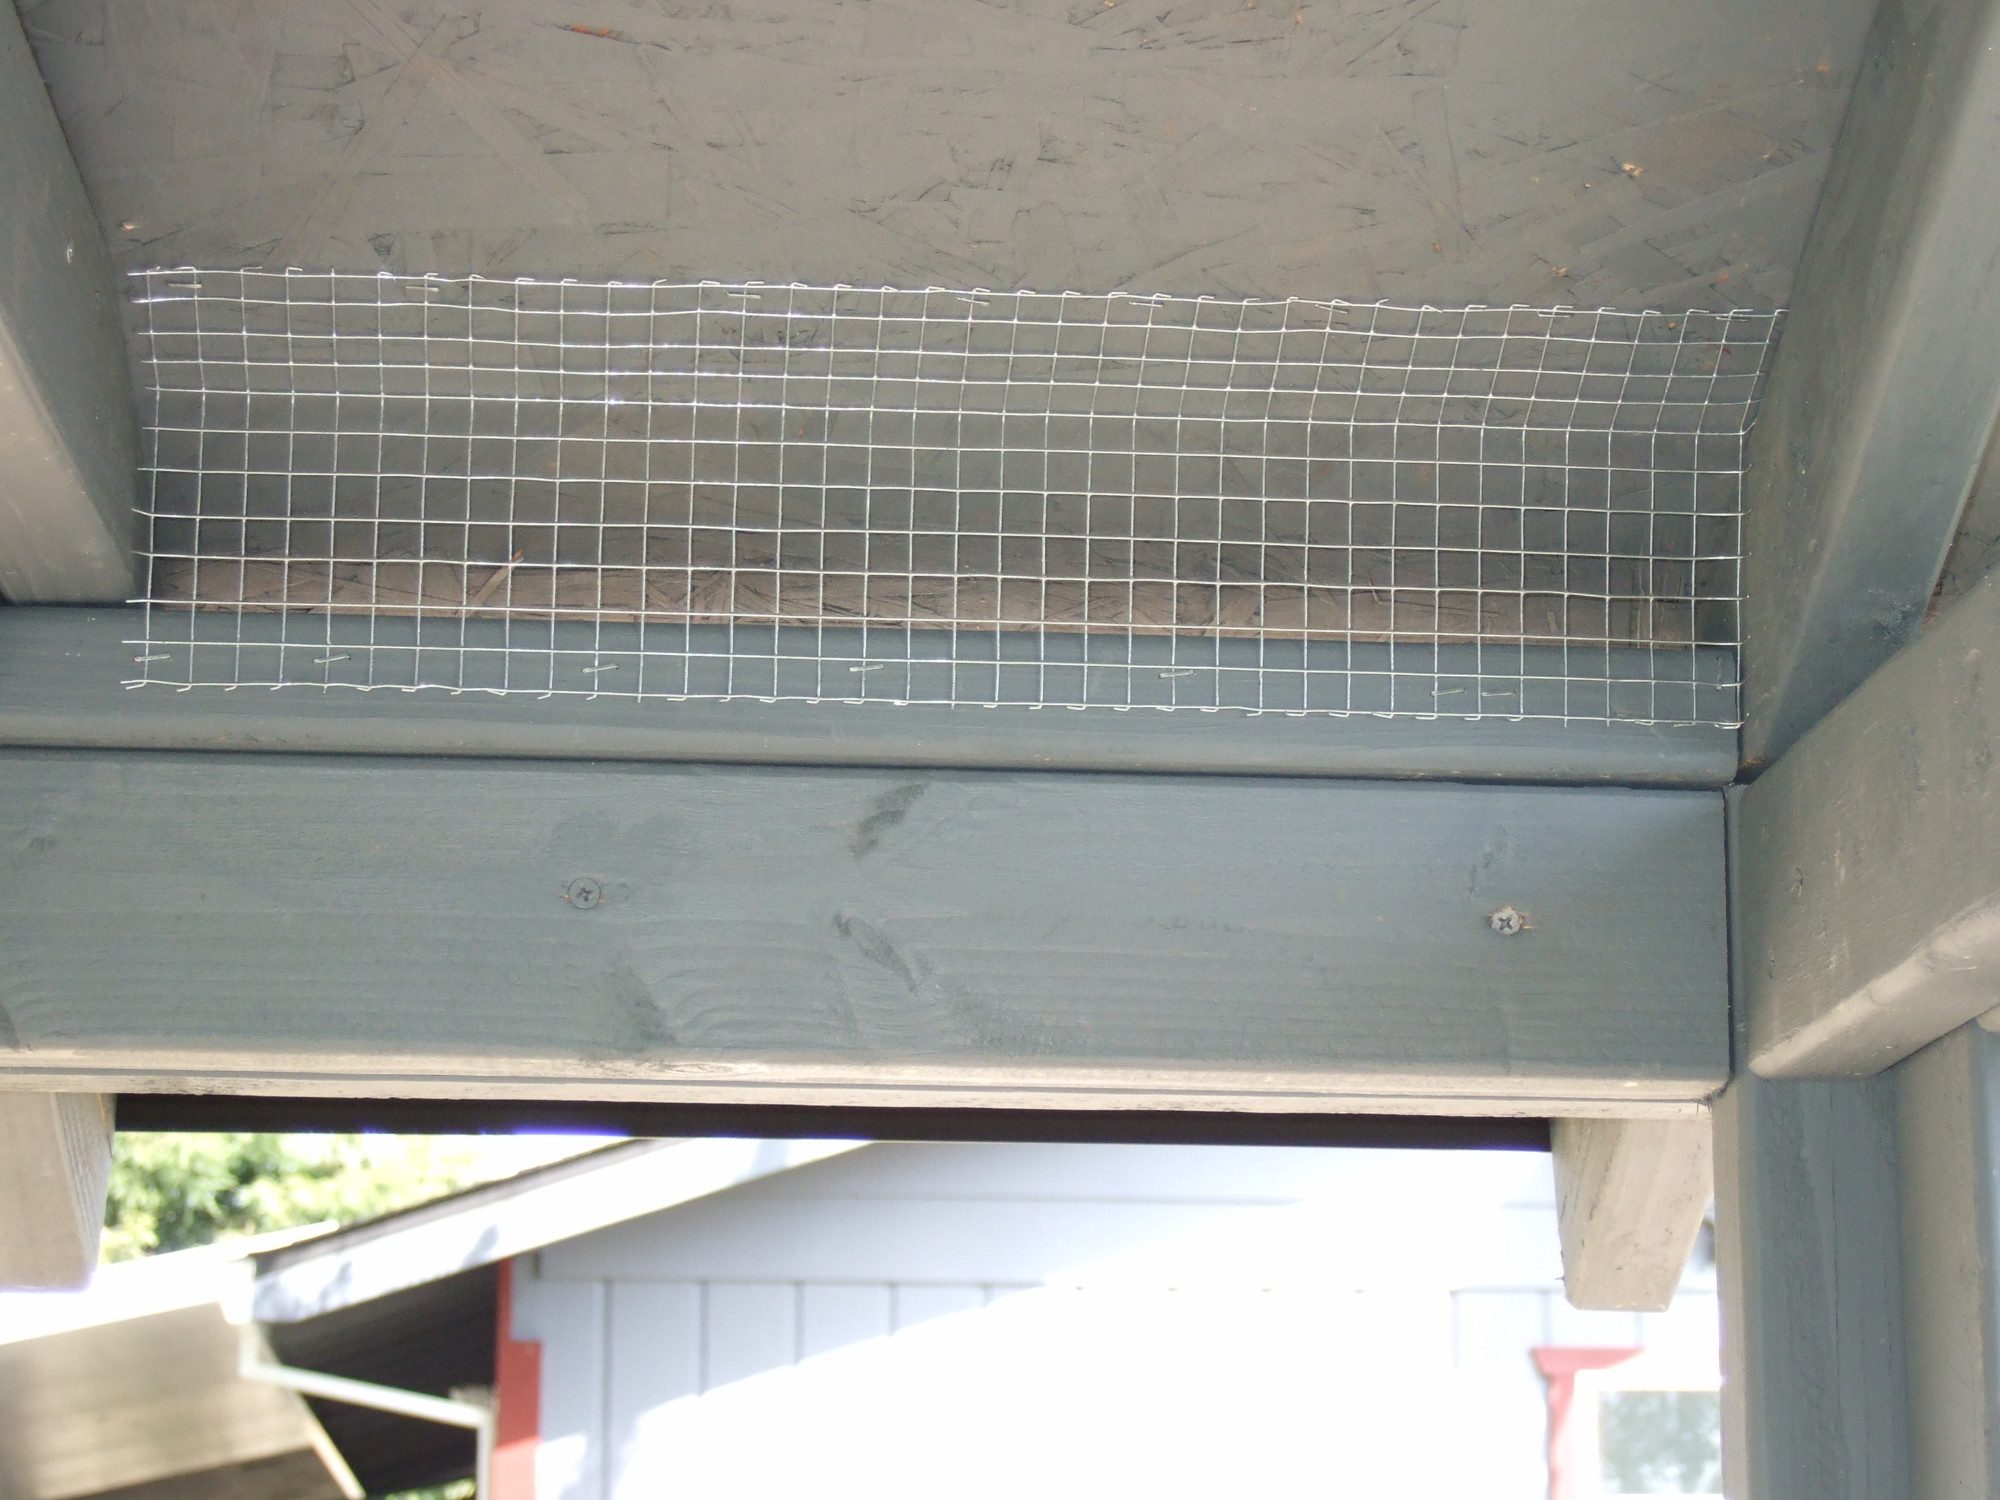
And while my fat body still fits into the coop area, here's the obligatory wire mesh over the eves.
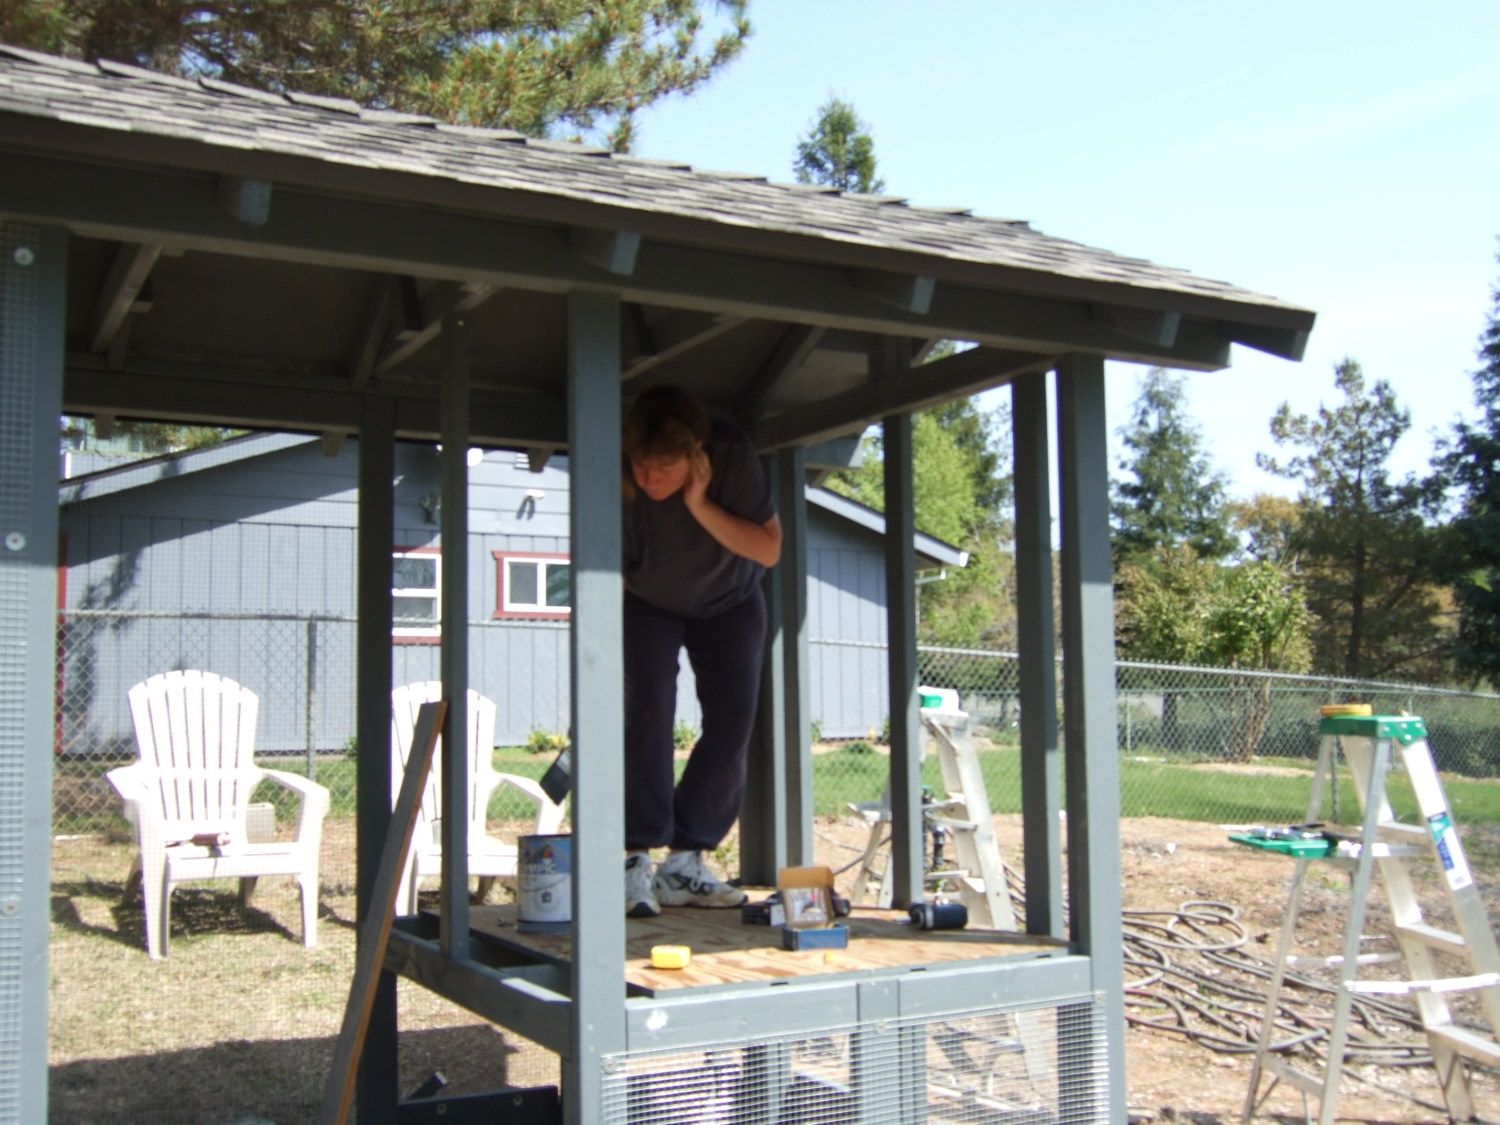
And of course my better half had to touch up the stain 'cause she was worried the birds might be upset if the paint job wasn't just right!!
STOP!!! TO BE CONTINUED>>>>>>>>>>
Here the birds are a week old, and It was time to build the coop. Woot Woot Woot!
Now, we've been in a drought out here, so it's no problem, I've got weeks. Then the birds started growing, and it started raining. Every Day!!! Did I mention the birds were growing? Like,,,really fast!!!
Then there was a break in the weather. Me and the Wifey got out there and got busy. I mean, how long could it take to build a coop and run??? Piece of cake.
I had already decided on my design. The Wichita, Boisemarker, Bigghoss design seemed so popular and simple, that I decided on this design. With a couple of modifications, of course, because I've never built a coop before and I obviously know what I'm doing! What's ironic, is that I had lot's of innovative and creative ideas for my coop, then after surfing BYC for many weeks, I realized there are no new ideas. It's all 'Been there, done that'. My creative juices feel dehydrated!! I need a beer!
First off, there were changes to address the weather. All of the Kaleefornia winds blow through our little valley, so it had to be sturdy. Real sturdy. And it had to have a pitched roof. Oh wait, I've never done that before. But the guy at Lowes said I could do it, so I believed him. Second, I realize all things are bigger in Texas, but not their Raccoons. I have Sampson, Hercules, and Gargantuan, and we aren't even talking about the Possum, Skunks, Foxes, and those lovely Red Tailed Hawks. Hmmmmm, and I still plan to free range. Movin' on,,,,,,
So to start, we dug down into the DG. drove in rebar, and placed cinder block into the ground. Then mixed concrete and filled the centers. There will be no digging into our coop!
Notice how the Supervisor gets in all the Pics. She's really on top of this worksite!!!
As I mentioned the wind in the valley, it was important to secure the coop to the cinder blocks. This might not be Kansas, and I never met Dorothy and Toto, but the winds are really rude. So I used Tapcot fasteners and drilled into the cinder blocks with a masonry bit.
.
Then it was time for some Lumber to go up. Do you have any idea how much lumber can go into a Chicken Coop? Yea,,,I didn't either. The color is grey, 'cause we were trying to make the coop as close to the house as possible. I used Cabot stain that I got at Lowes. The advantage to this stain is that it smells just like those little chocolate pudding cups. I can't, however, attest to the taste!
The previous owner had rocks everywhere as landscape material, so finding rocks to fill in the void was not an issue. In the picture above we already have rocks, chicken wire, more chicken wire, landscape cloth, and then more rocks. No shortage of rocks!!! Then it was time to start the roof trusses. It's roughly six feet at the sides, and seven feet at the peak. After I measured the pitch, it came out to 26 degrees. This was important, 'cause after this, everything will be a variable of 26 degrees. I'm simple minded and like simple measurements. Ask My wife,,,,,I'm measurement impaired!!!!!
Notice the peak board is short, but the bottom boards are long. Hmmmm, I decided (after I cut the peak board), that I wanted gable ends. I could have saved myself a lot of work if I'd planned for this, but I didn't. More on this next.
Notice the 2x6 and 4x4 extentions using metal hangers. What's a few more dollars for our boys and girls????
Now here was the first 'major' screwup. I wanted to put in a ridge vent, but I hadn't purchased them yet. So I put up the sheathing for the roof, and left too much of a gap at the top. Even putting in trim boards up near the peak didn't work 'cause the ridge vents had nothing to nail in to. Oh well, at least the roofing company gave me a full refund. On the plus side, I got to use my new Pasload nailer and that was sweet!!
And finally,,,,,,,ready for some padding and shingles.
Oh,,,,but guess what? It's started to rain. And it will rain for 4 more days. Did I mention the birds are still growing??????
Got the trim on. At least I didn't return this stuff to the roofing company!
So let's cut to the chase. After a smashed thumb, here's the roof,,,,,
And while my fat body still fits into the coop area, here's the obligatory wire mesh over the eves.
And of course my better half had to touch up the stain 'cause she was worried the birds might be upset if the paint job wasn't just right!!
STOP!!! TO BE CONTINUED>>>>>>>>>>
Last edited: