**Anyone make dividers for hatching different breeds in an incubator?

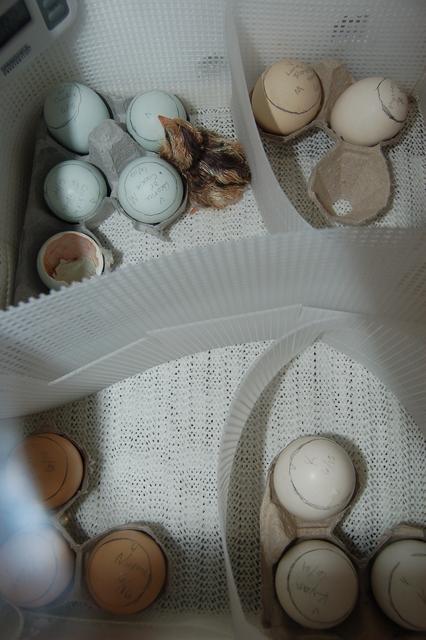
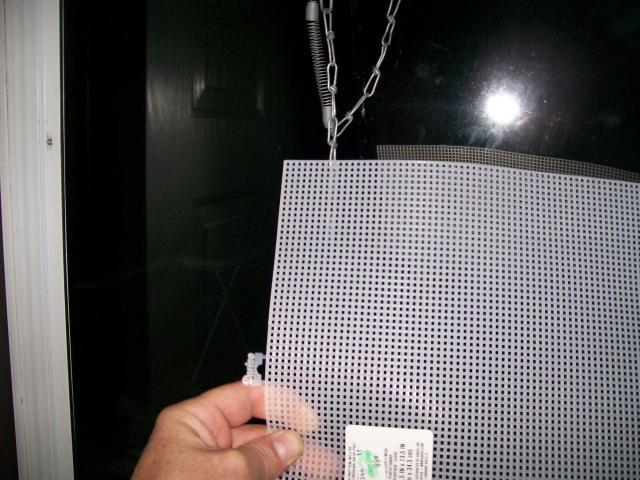
my homie did this...


2011-02-07_18-12-36_811.jpg


i tried to do the same thing, but i under estimated the size of OEGB chicks... they squeezed thru and they got all mixed up... fail... but my friend did a good job with his hatch...
 
Quote:
Do you have a picture of this set up? I need a visual.

I have not done one yet, but here's a picture of the stuff. They had only two grades, I bought the heavier, they didn't have any with more open mesh. The mesh is open enough to get a pipe cleaner, garbage sack twist tie, or threaded darning/leather needle through. Butt two pieces [cut to the size you need] together and run something through the ends to connect them. You can make a box with four sides, a top, and a bottom if you want. It's your choice, square, rectangular, triangular, even pulled around to make a round corral with a circular bottom and a top that closes. My ex used to make things with it in the 70s or 80s, the entire thing would be kind of crocheted to cover the screen with thread and hide the plastic from view, and formed into kleenex box holders, jewlery boxes, etc. ............................ I "borrowed" some from her and made a book cover to protect an old book I had. Naturally, the screen will not be covered for a bator divider.

44349_plastic_canvas.jpg
 
I have tried the cardboard trick before since I always seem to hatch similar colored breeds. The Problem I have had it I can NEVER get the cardboard tall enough and the fuzzy butts always seem to find a way over and mixed up. Then I have to wait for the to feather out to figure out who is who and what is what.

I have 63 split into 3 incubators right now. I have the materials gathered together to build a hatcher. I plan on building it 2 ft x 4ft and 3 ft tall. this will allow enough room to install dividers made from 1/4 inch wire mesh that are tall enough so the cannot get across. I plan on making the dividers adjustable in 6 inch increments. The floor will also be made with the 1/4 inch mesh with a clean out tray underneath, tray will be deep enough to allow water pans for humidity. Since the hatcher is so big I plan on using 3-100 watt bulbs with a dimmer switch to adjust the temps.

I know I got off subject but thought I would give you another ideal. Hope it helps.

Happy hatching to all.
thumbsup.gif
 
smile.png


Wow thank you Everyone!! I have been thinking about this for a while, and was hoping that someone out there had already solved the problem and you all have!

What great ideas, not exactly sure which one that I will use but they are all great.

I really work better with visuals so thanks for all of the great pictures.

Happy hatching Everyone!!

wee.gif
 
I recently read on here about using small mesh bags, like you would use for laundering delicate items. Pop the eggs in the mesh bag and then you can band the chicks when you take them out. I thought this was a brilliant idea!
 
Last edited:
this post came just at the right time for me. I went to friends house yesterday to help her with her chickens she has about 12 different pens set up for each of her breeds of chickens this way when she hatches she knows who the parents are and what pen they were from. Or if she want to cross breed she has a pen for that as well. Well when I was about to leave she have me 3 dozen of her eggs and 2 mutts. I was not set up at all to do any hatching but was not going to say no. So finally today at 9pm I set my eggs all 50 of them this is only my second hatch ever, first one I did was last summer with just 6 of my own mutt eggs.
I am trying to keep the same breeds together but will be hard so was just wondering how to keep them separated with wood sticks, wire. And short of buying an egg turner tomorrow and putting them on that think I will try the plastic Canvas think i have some.


thanks for the tip
deana:)
 
I've done what Steve suggested. You can also slit the canvas half way on the top of one sheet and the bottom of the other, then slide them together to get a cross piece. I'd still twist tie the tops and bottoms.

Here's how mine looked last year.
39865_batorsetup1stchick.jpg


I did have a rambunctious one go along the edges I hadn't tied -- I thought they were snug enough against the bator walls, but nothing gets past some chicks!

ETA: maybe that should be "some chicks can get past anything!"
 
Last edited:
Quote:
I was wondering when you do a egg carton hatch do you lean the egg to the right and when its time to say turn for the 2nd time you lean them to the other direction? have not done it that way and think with 50 eggs it might help me to turn them faster 3x's a day and for my girls who will have to help me. I leave home at 3am for wrk and do not get home till 2:30pm but go to bed at 8pm for the next day. Not sure with those hours they will get turned right.

and what is the pencil circle for on the top of the egg that is new to me as well.
deana
 
Deana, we used the pencil circles to mark the edge of the air cell. This helped us point the eggs toward the window during lockdown so we could have the best chance of watching a pip/zip. In previous hatches we had marked the air cell each time we candled, this time we only did it on day 18.

As far as turning in egg cartons, we have just leaned them left to right when we over-filled the bator. You can even set them a little more on their sides, but it didn't change the hatch rate, so we only did that for one hatch. We have also used a block and elevated each end alternately. This works ok, but some of the cartons weren't as rigid as others. (Ended up with more of a curved ramp.) Both methods worked well for us, though.

If you have room, what seems easiest is to use the smaller dozen carton instead of the larger 18 ones. Then you can put a length of cardboard tube or pvc under the carton and easily rock the whole thing side to side. I currently have an 18 on the dowel for the paper towel holder. It's fine, but you have to move the dowel (to between the middle and upper end) each time you want to rock the eggs. I think it would be simpler with a dozen as you'd not need to maneuver the rod.

One thing I should have said about the plastic canvas set up. We had the eggs all together until day 18. I let the girls cut out the shapes and bottoms of the cartons ahead of time so the switch was smoother. Removed the carton they were in, put the plastic in place, dropped the 'tetris' shapes in (no straight ones though, you have to have at least 3 in a v or they tip), then candled and set the eggs in their 'cages'. If your house is cold you may want to put a towel over the eggs while they wait to be put back in. We don't have AC, so all we did was close the windows.
 

New posts New threads Active threads

Back
Top Bottom