


This needs a coop page, got pic to go along with it?When my bf built our coop, he created a door at one long end of the coop for entry/exit that is about 14" off the floor. It's about 14" or so down to the floor of the coop and about 12-14" up to the first roost bar. In the photos you showed above, imagine the roost bars running from side instead of lengthwise in the coop.
Our first roost bar is just inside of the door by about 14" but about 14" higher than the door threshold (it's a step up in effect), so to roost they have to jump up to go to the higher roost bars. Those remaining roost bars run laterally (like the first) but another 14" higher and each successive roost bar is the same total height of about 42" off the floor. The chickens just jump from bar to bar as they wish. In the morning, they file across the bars one by one, jump down to the low bar, then to the door threshold and come out.
When they need to reach the nest boxes, they jump down to the floor from the doorway and walk to whichever nest box they need to reach. When finished, they walk across the floor, then jump up to the door opening and exit.
Try thinking about a split level house for what I've described and you'll get the picture of our entry door versus the floor and the door versus the roost bars. ADVANTAGE: we don't have issues with them being able to reach either the nest boxes or the roosts and we're using most all the horizontal space at the floor level and at the roost bar level.
BEST OF ALL HOWEVER:
We put a pullout floor (drawer) in the same end as the door and just below it that allows us to pull the entire "floor" from the coop and clean it super easily any time we wish.
With a slanted, stepped setup like I see in your photos, it looks like you're creating work for your birds to get to the roosts and eliminates easy access to that side of the coop, not to mention cleaning under the roost bars will be less than fun.
Sounds amazing!
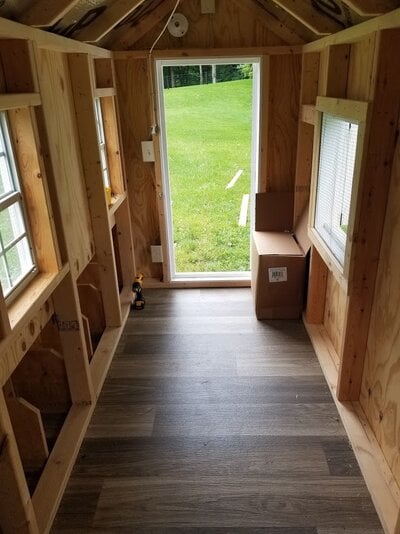
 We've just disassembled them and now this is what we have to work with! (pix below)
 We considered doing horizontal stair-step bars across the whole width of the coop, but wanting the droppings boards made that not possible with the space we have. If I wasn't dead-set on the boards, I think that setup could work excellently in our coop with a few minor tweaks. I assume your coop is not a walk-in type then? I peeked at your profile and found one partial pix of a light green coop and wasn't sure if it was a walk-in or not.
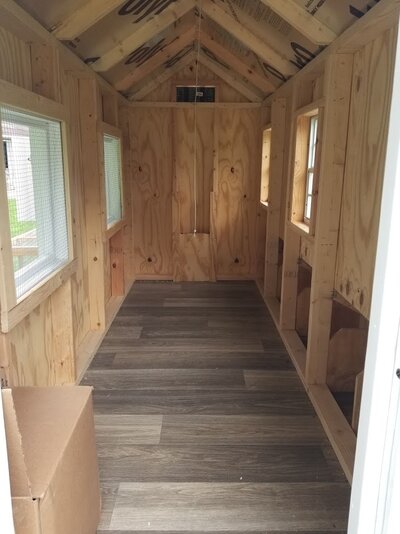
 If it were only roosts, that might work; but with added poop boards that most say need to be 24" wide with a roost centered over it, the most we could do would be an L-shape (I'd do the left side and then back).
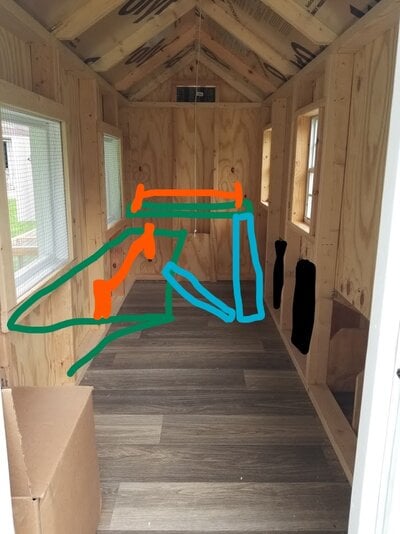


 with it is the lack of actual poop boards (LOL I know, I just can't let it go!). We are fine with scooping boards daily and don't want to empty the entire coop floor weekly. We also may try sand next spring/summer and that would just be way too heavy to pull out if the floor were a tray. I think I'd also prefer open walking space without having to mess with lifting bars out of the way. (With a non-walk-in coop obviously that wouldn't be an issue!) I just want most poop cleaned up more frequently (we both work at home and have ample time for daily chores!). I also want the ability to easily inspect poop on the boards for any health issues (as a newbie, I will probably be hyper-vigilant about that for a while!).
 (Because CHICKEN MATH...
 ) I am most certainly keeping notes of all these designs. THANK YOU!!

 Seriously a work of art and a labor of love. Your bf should consider building those for a living. hehe. THANK YOU for sharing all of this!! I'm seriously impressed and I'd love to know what others think, too.