green_thumb
Songster
I’ve decided to create a thread where I can document the progress of my coop and run construction.
The original plan was to build, but after Hubby started working a 2nd full-time job, it just wasn’t feasible in the time frame we wanted. I found this little 8x6 beauty on Facebook marketplace for $500 and snatched it up.

(The coop at its original home)
It is Amish-built (quite common for sheds and outbuildings here in Ohio) and usually costs around $1800 new so even at 3ish years old and used, we got it for a steal.

(It was quite a chore to get home &loaded, accomplished only with ingenuity [pvc pipe rollers] and the brute strength of my corn-fed firefighter with literally less than an inch of space to spare)
I know there are mixed feelings about buying pre-owned coops but I went ahead with it knowing the risks. Previous owner said she had sent all her remaining girls to freezer camp after her German Shepard wouldn’t stop getting loose and killing them so I was fairly confident we didn’t have any major disease concerns.

(When we first got the coop home)
The outside was in great shape but the inside...needed some work. First step was to tear out the poorly-spaced roost bars and mess of 2x4s and fiberglass insulation.

(It was a mouse paradise behind the back wall)
Cleaning this out was quite the job. I wore a face mask and gloves and boy did I need it! My saving grace was that everything was put in with screws and not nails (except for the roost bars). The wall with the windows (not pictured) wasn’t as bad since they had used OSB and plywood along with sheet foam insulation, but all that got torn out too.

(Pre-cleaning)
Next step was cleaning. The walls and floor were pressure washed, scrubbed, and disinfected with Virkon S. I got up as much as I could, but I knew it wouldn’t be perfect. Also tore out the chicken wire in the back window (to be replaced with hardware cloth).

(Much better! Still lots of ground-in dirt and several spots where the paint had worn off the floor)

(The nest boxes have been a major challenge. They didn’t get pressure washed because the OSB is already in poor shape from the previous owner repeatedly hosing them out)

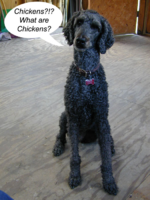
(My two poodles are convinced I’m really not capable of doing anything without their supervision)
After cleaning, I let everything dry out for about a week before caulking all the edges and cracks. I went through 4 tubes just to do the inside. This was followed by painting everything with porch & floor paint.

(What a difference! The floor will get a second coat)

(Painted nest boxes. You can see how previous owner drilled drain holes [with plugs] in each box)

(Window wall, with nest boxes below)
Part II coming up!
The original plan was to build, but after Hubby started working a 2nd full-time job, it just wasn’t feasible in the time frame we wanted. I found this little 8x6 beauty on Facebook marketplace for $500 and snatched it up.
(The coop at its original home)
It is Amish-built (quite common for sheds and outbuildings here in Ohio) and usually costs around $1800 new so even at 3ish years old and used, we got it for a steal.
(It was quite a chore to get home &loaded, accomplished only with ingenuity [pvc pipe rollers] and the brute strength of my corn-fed firefighter
 with literally less than an inch of space to spare)
I know there are mixed feelings about buying pre-owned coops but I went ahead with it knowing the risks. Previous owner said she had sent all her remaining girls to freezer camp after her German Shepard wouldn’t stop getting loose and killing them so I was fairly confident we didn’t have any major disease concerns.
(When we first got the coop home)
The outside was in great shape but the inside...needed some work. First step was to tear out the poorly-spaced roost bars and mess of 2x4s and fiberglass insulation.
(It was a mouse paradise behind the back wall)
Cleaning this out was quite the job. I wore a face mask and gloves and boy did I need it! My saving grace was that everything was put in with screws and not nails (except for the roost bars). The wall with the windows (not pictured) wasn’t as bad since they had used OSB and plywood along with sheet foam insulation, but all that got torn out too.
(Pre-cleaning)
Next step was cleaning. The walls and floor were pressure washed, scrubbed, and disinfected with Virkon S. I got up as much as I could, but I knew it wouldn’t be perfect. Also tore out the chicken wire in the back window (to be replaced with hardware cloth).
(Much better! Still lots of ground-in dirt and several spots where the paint had worn off the floor)
(The nest boxes have been a major challenge. They didn’t get pressure washed because the OSB is already in poor shape from the previous owner repeatedly hosing them out)
(My two poodles are convinced I’m really not capable of doing anything without their supervision)
After cleaning, I let everything dry out for about a week before caulking all the edges and cracks. I went through 4 tubes just to do the inside. This was followed by painting everything with porch & floor paint.
(What a difference! The floor will get a second coat)
(Painted nest boxes. You can see how previous owner drilled drain holes [with plugs] in each box)
(Window wall, with nest boxes below)
Part II coming up!
Last edited:


 she still isn’t convinced and thinks I’m a bit touched.