


Hubs and I have had a very busy weekend, lets call it "Together Time"

We had more time fine tuning our new incubator than building it so it has perfection in temps top to bottom, but our brainstorm has turned out amazing!
And WAIT till you see the temps holding top to bottom!!
Gigantic Cabinet COOLER INCUBATOR w/semi auto turning

I took images all the way through this project even the fine tuning to get no variance top to bottom. This brainstorm started with the desire and need for a large capacity incubator that could hold enough eggs for our chick sales and also lesson all of the hand turning I have to do. And we are always trying to come up with cheaper and better ways of doing things, plus I really dont have $800. to have a new sportsman mailed to me.
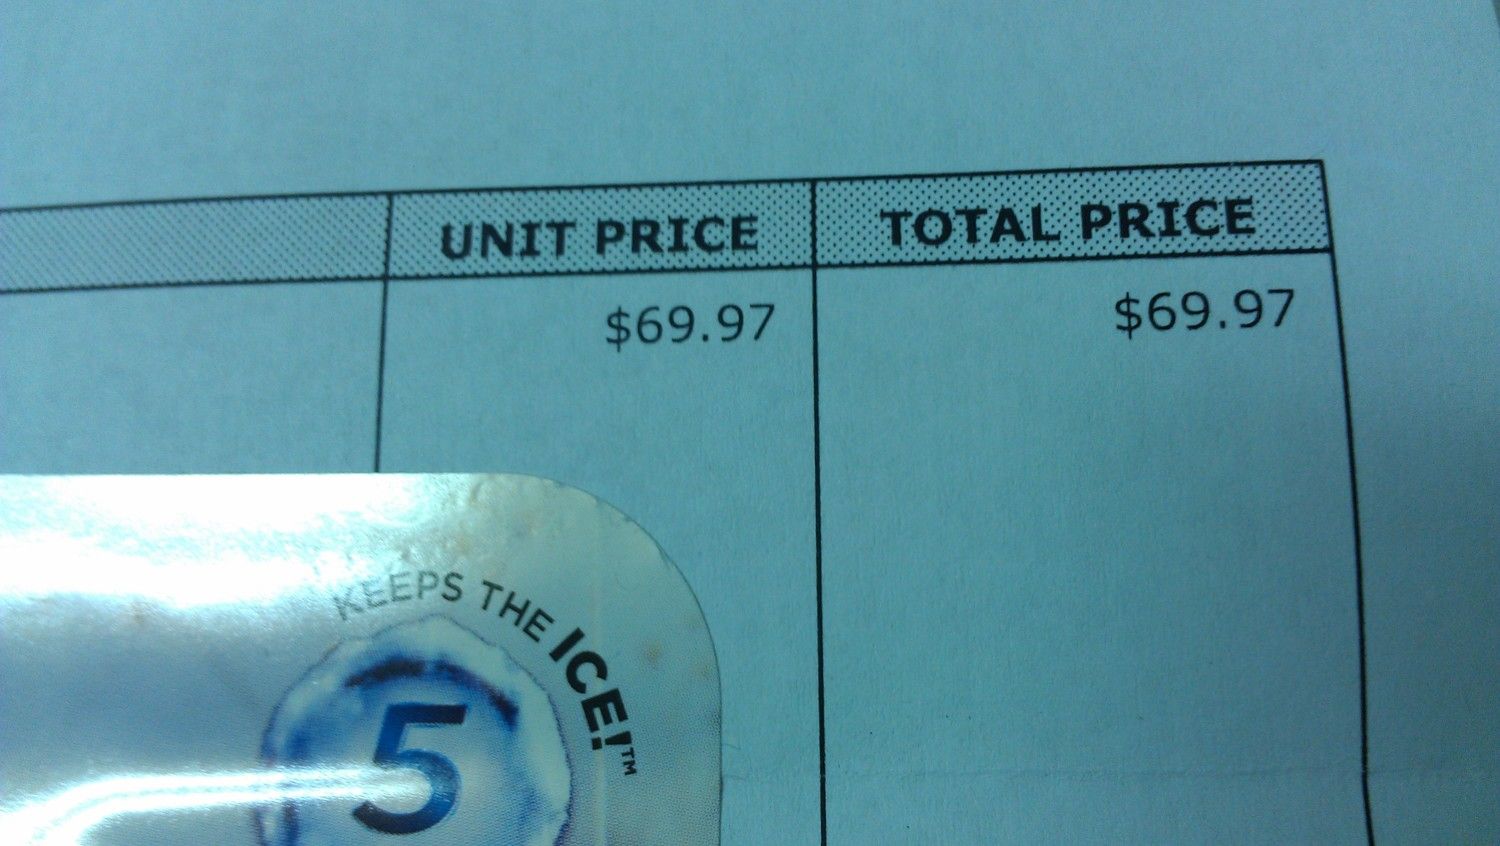
est $135.00 cost
IF y'all make one, come back and share your cooler cabinet with us please!


I started with the largest cheapest cooler I could find.....
Walmart 150 quart Cooler as of 3/2014
Free shipping too! Came in two days!
Next thing we did was admire the size of our new cooler! After having made several coolerbators we were in awe of this cooler and its endless possibilities!
Product in Inches (L x W x H): 43.2 x 19.2 x 19.2
inside is 15" x 38" HOWEVER if you look at the images you can see at the bottom that a cooler is tapered not square


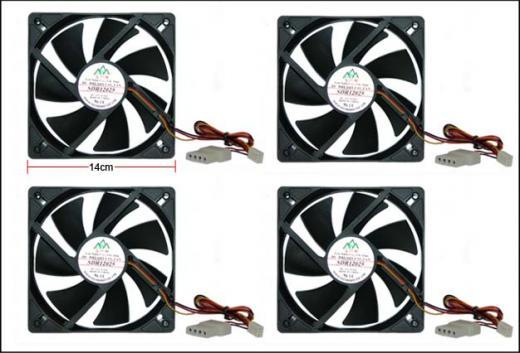
These are our fans from Ebay
Lots of 4pcs Black 14CM Computer Case Fan w/Screws *NEW $14.97 for all 4 fans so I have two spare!

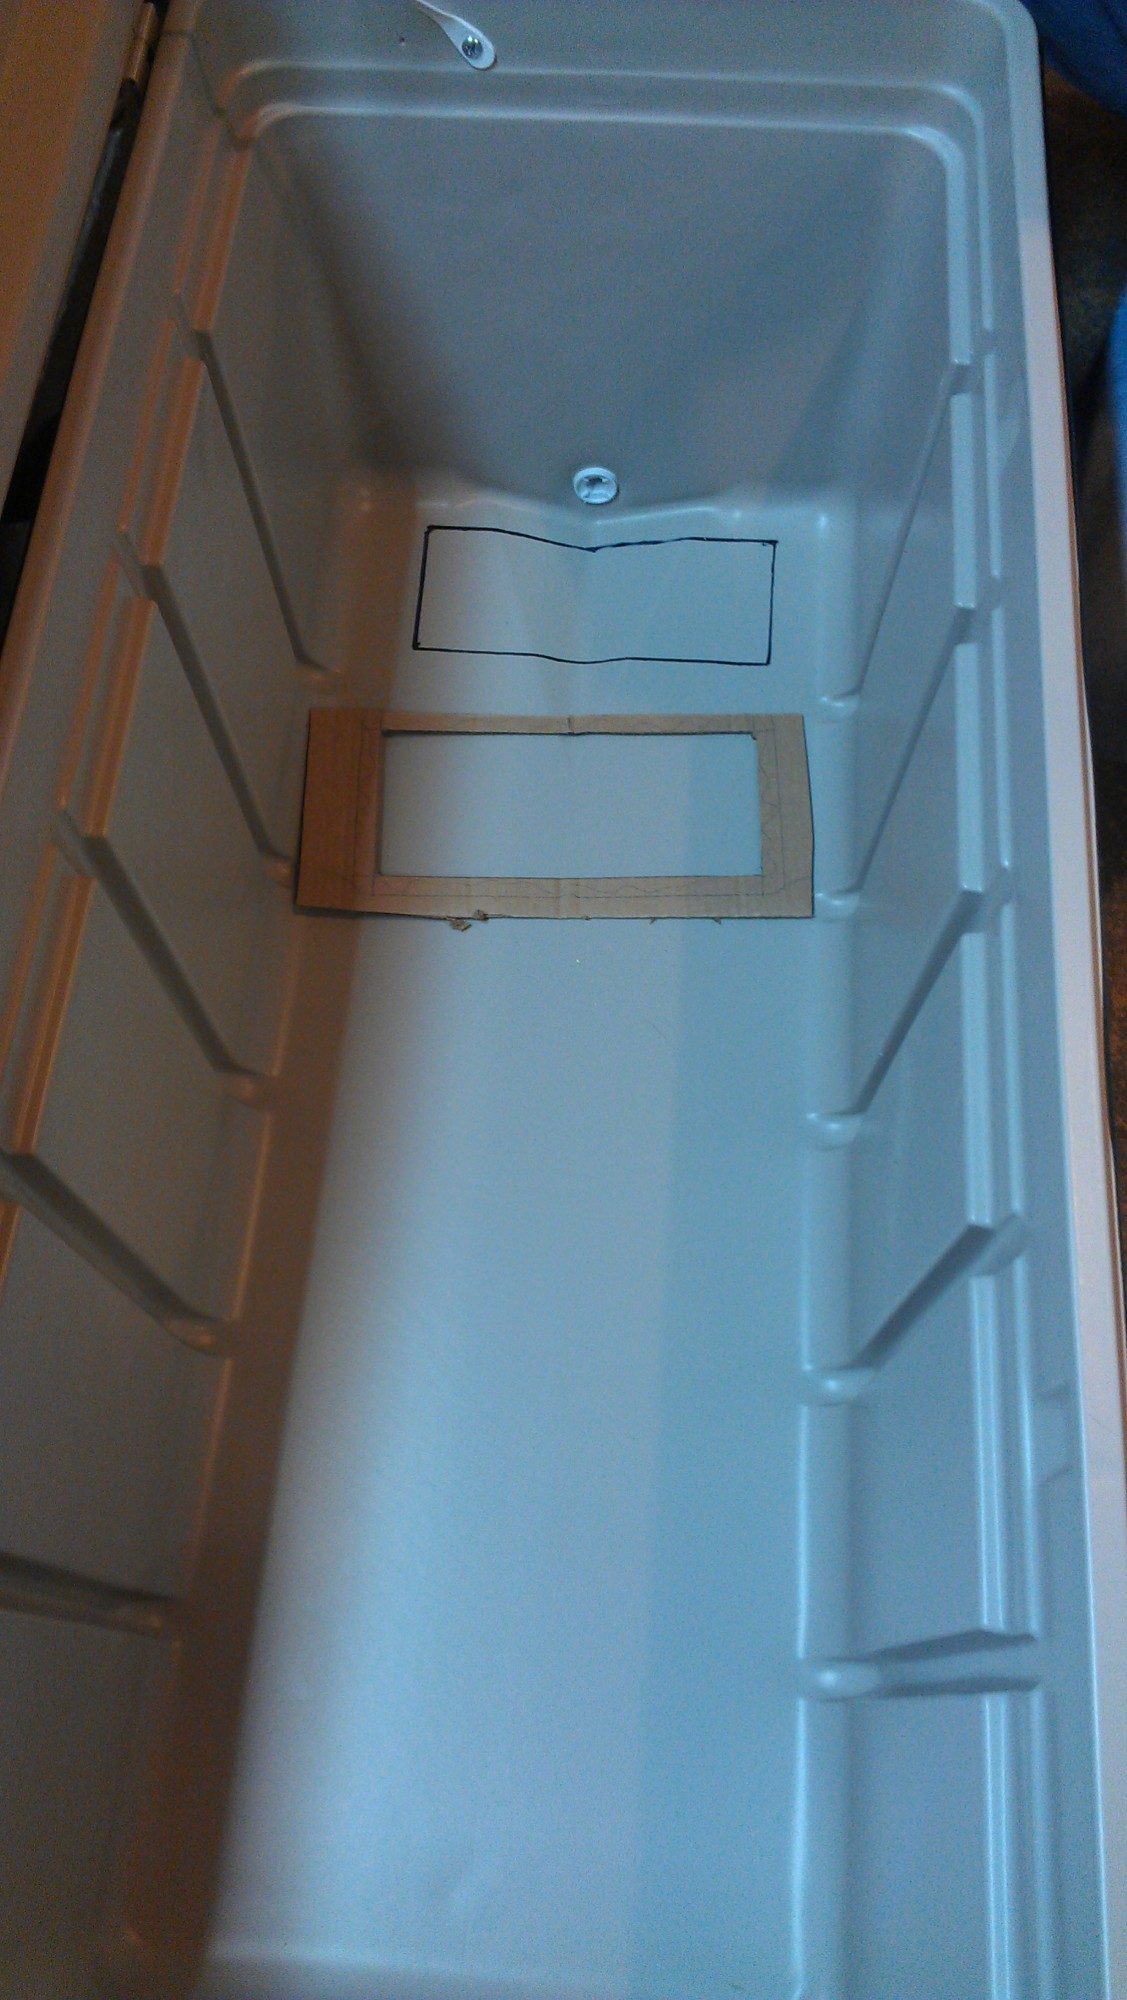
We laid our our fans side by side, traced them and reduced traced size enough to fit screws for installation (aprox 1/2" reduction from trace)
open image to see better.

then we traced this template as seen below and drilled holes from the inside out in each corner of the template, flipped cooler over and traced the template on the outside and then finished up with the jigsaw. We simply "eyed up" the template to center it, making sure we had enough cooler above the template to screw into later on.
You can easily see how it fell in that middle section of the bottom of the cooler, I would skip lining inside and if its the same cooler just lay the template on the bottom at the start of that recessed middle.
We cut this fan hole and we cut the bottom air duct hole as well,
NOTE: I forgot to take dimentions here so I did it with the shelf installation.... see that section below...


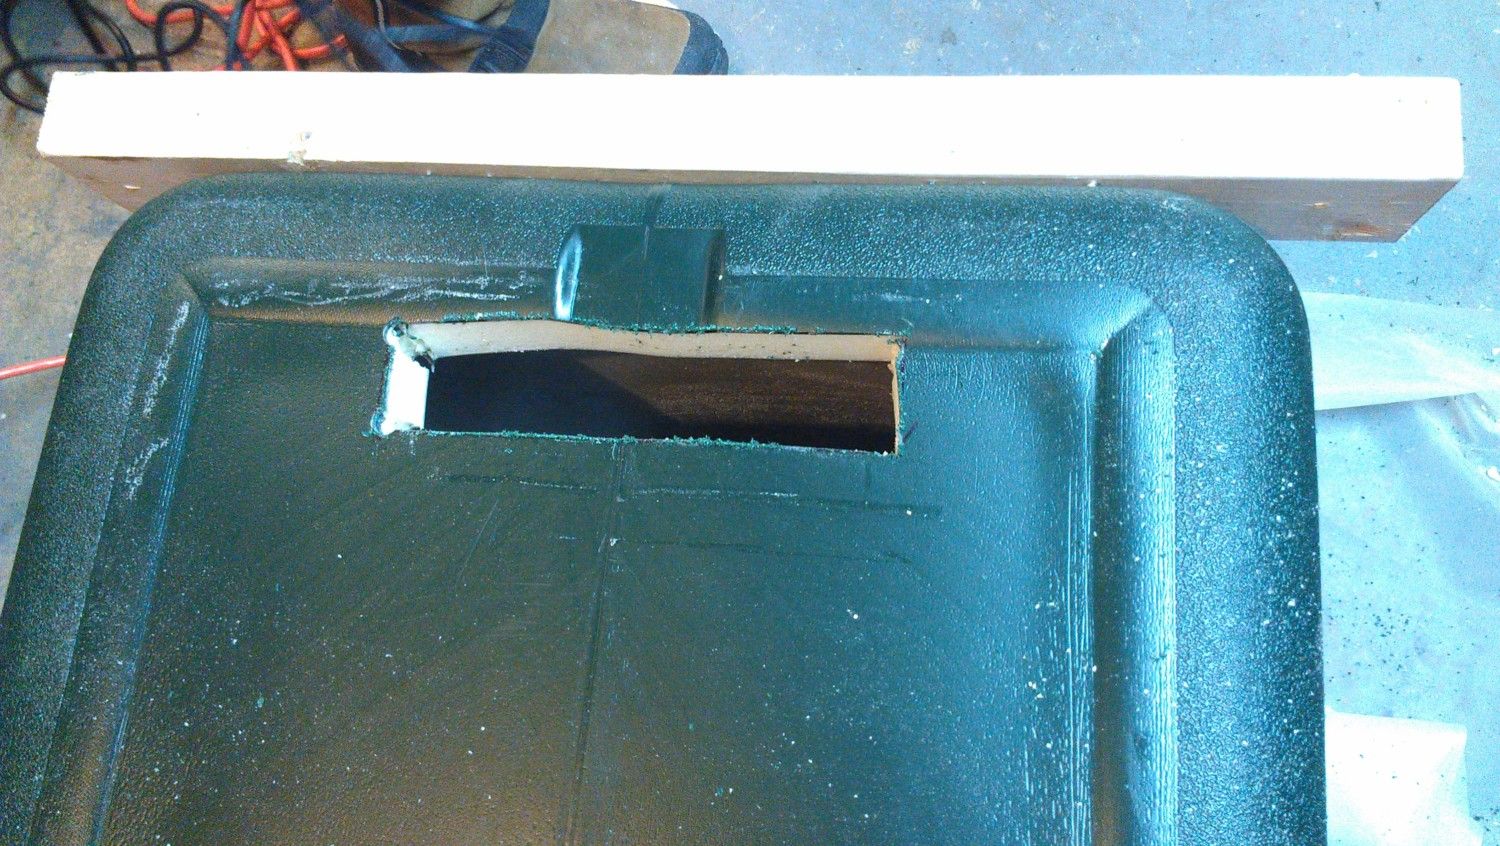
As you can see below I made the opening aprox 3 inches too long for the lower air return but it worked out well as I could make it smaller with duct tape and control the air flow to achieve perfect temps at all levels of the incubator. It would have messed up my egg turner had I made the hole any higher, and would have been bad if I would have to rip all the back air duct off to make it longer! SO refer to the total height in the one picture below. I will include a video below of my hours of using tape and cardboard to achieve the perfect depth and hole size before final installation of cabinet backboard and caulking.


Check out this vid of my fine tuning temps so top to bottom are identical, MIND you I messed with a taped piece of cardboard in the bottom and re-sized the return duct opening numerous times and the depth of the bottom shelf to get the temps the same. It wasn't an easy feat and my bum hurts from sitting in the kids little chair watching the thing and making minor adjustments! HA HA HA
This vid is before I added the permanent backer board shelf at the bottom as I was adjusting for perfection. I could technically include a hatcher in the bottom or another egg rack, but I dont want to hatch in it, but it has plenty room for additions stuff, also if you note the cut outs in the side of the cooler, you can easily take out the racks and turn this quickly into a multi level hatcher, we may do another for a hatcher and find plastic tubs to fit in the slits.
WE ADDED TWO pcs of 2x3's to the bottom just screwed in with galvanized decking screws, just in case it had a wobble effect and to lift "off" the table for easy opening.

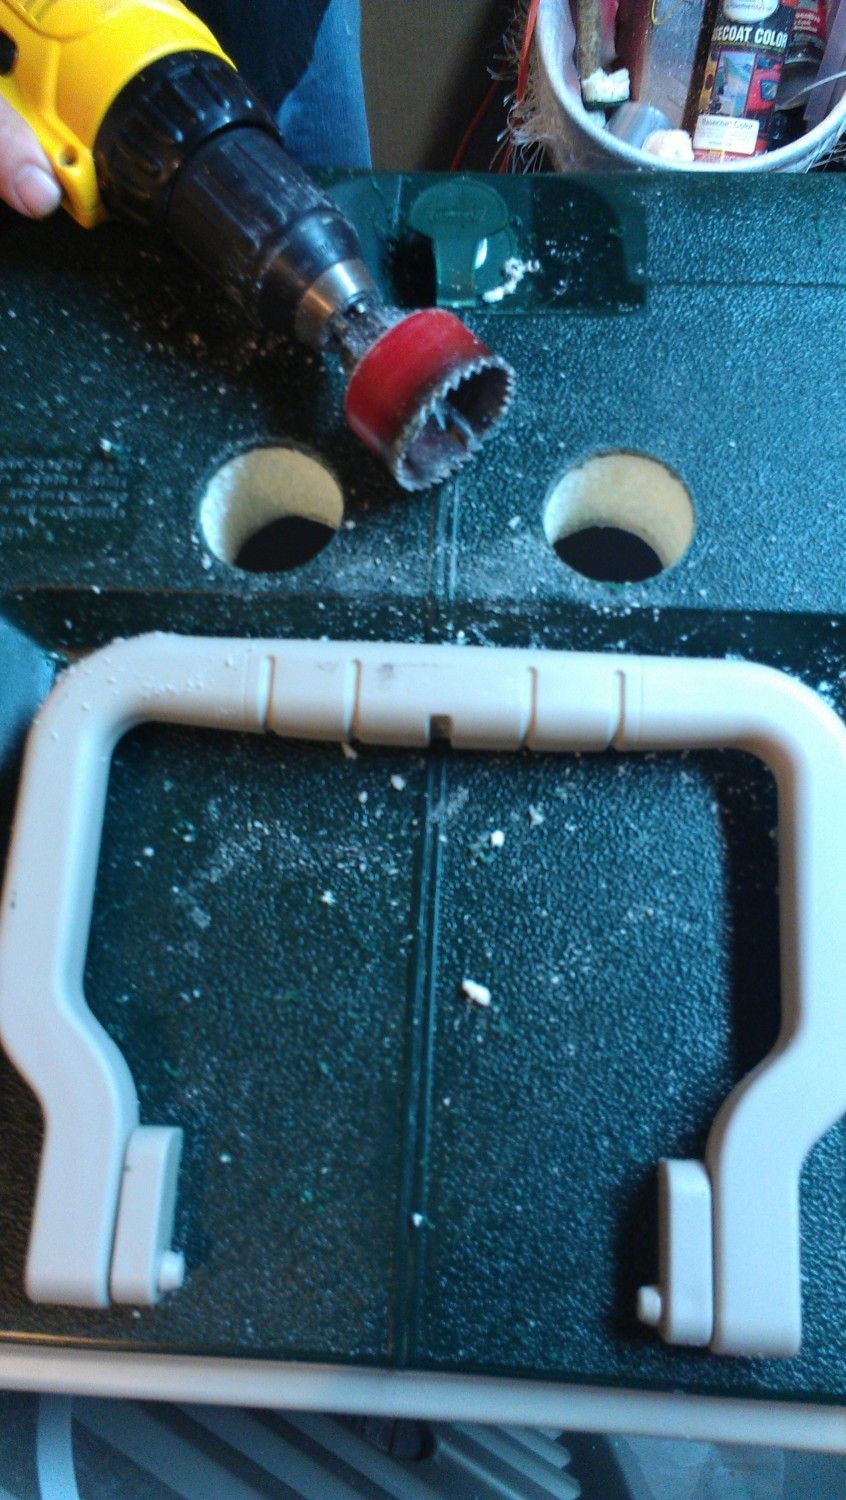
We drilled the holes for our CERAMIC light sockets

 t
t
We also drilled vent holes 7/8" paddle bit, we covered them and would only open the top up for use as a hatcher


Also drilled 7/8" holes down the left side of the incubator for ventilation, these remain UNCOVERED
Then the lid was also cut for the plexi, 8x10" plexi x2 Lowes $1.98 each.
Trace the plexi and then again REDUCE template so you can fit screws in.


Drilled first to get jigsaw started

We decided to angle the plexi and slide it under the top thin pc of cooler plastic, then we pre-drilled and screwed and since the plexi was between the foam insulation and the plastic it sealed well with four screws.
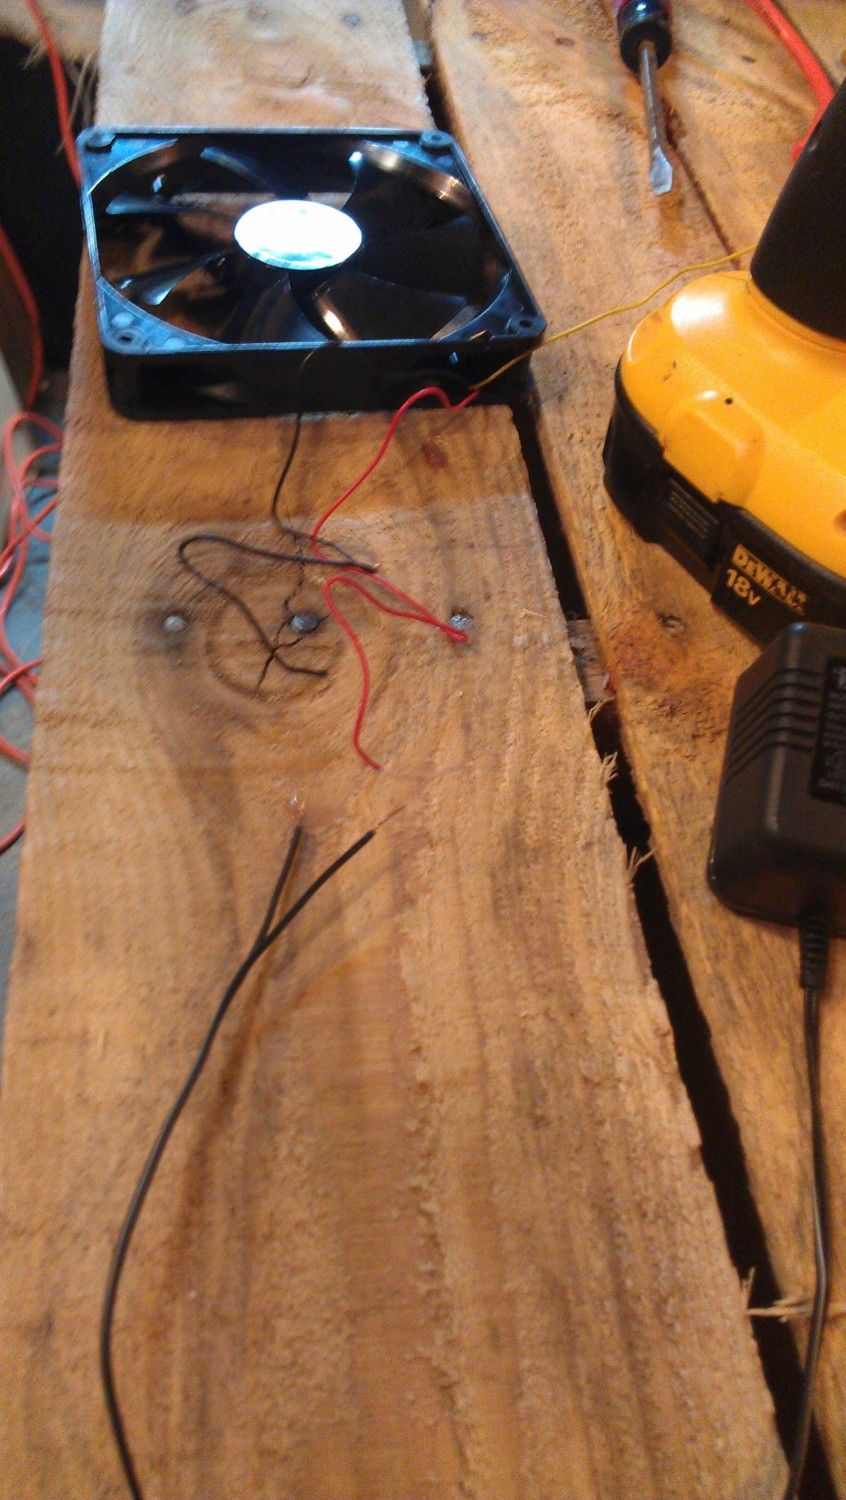
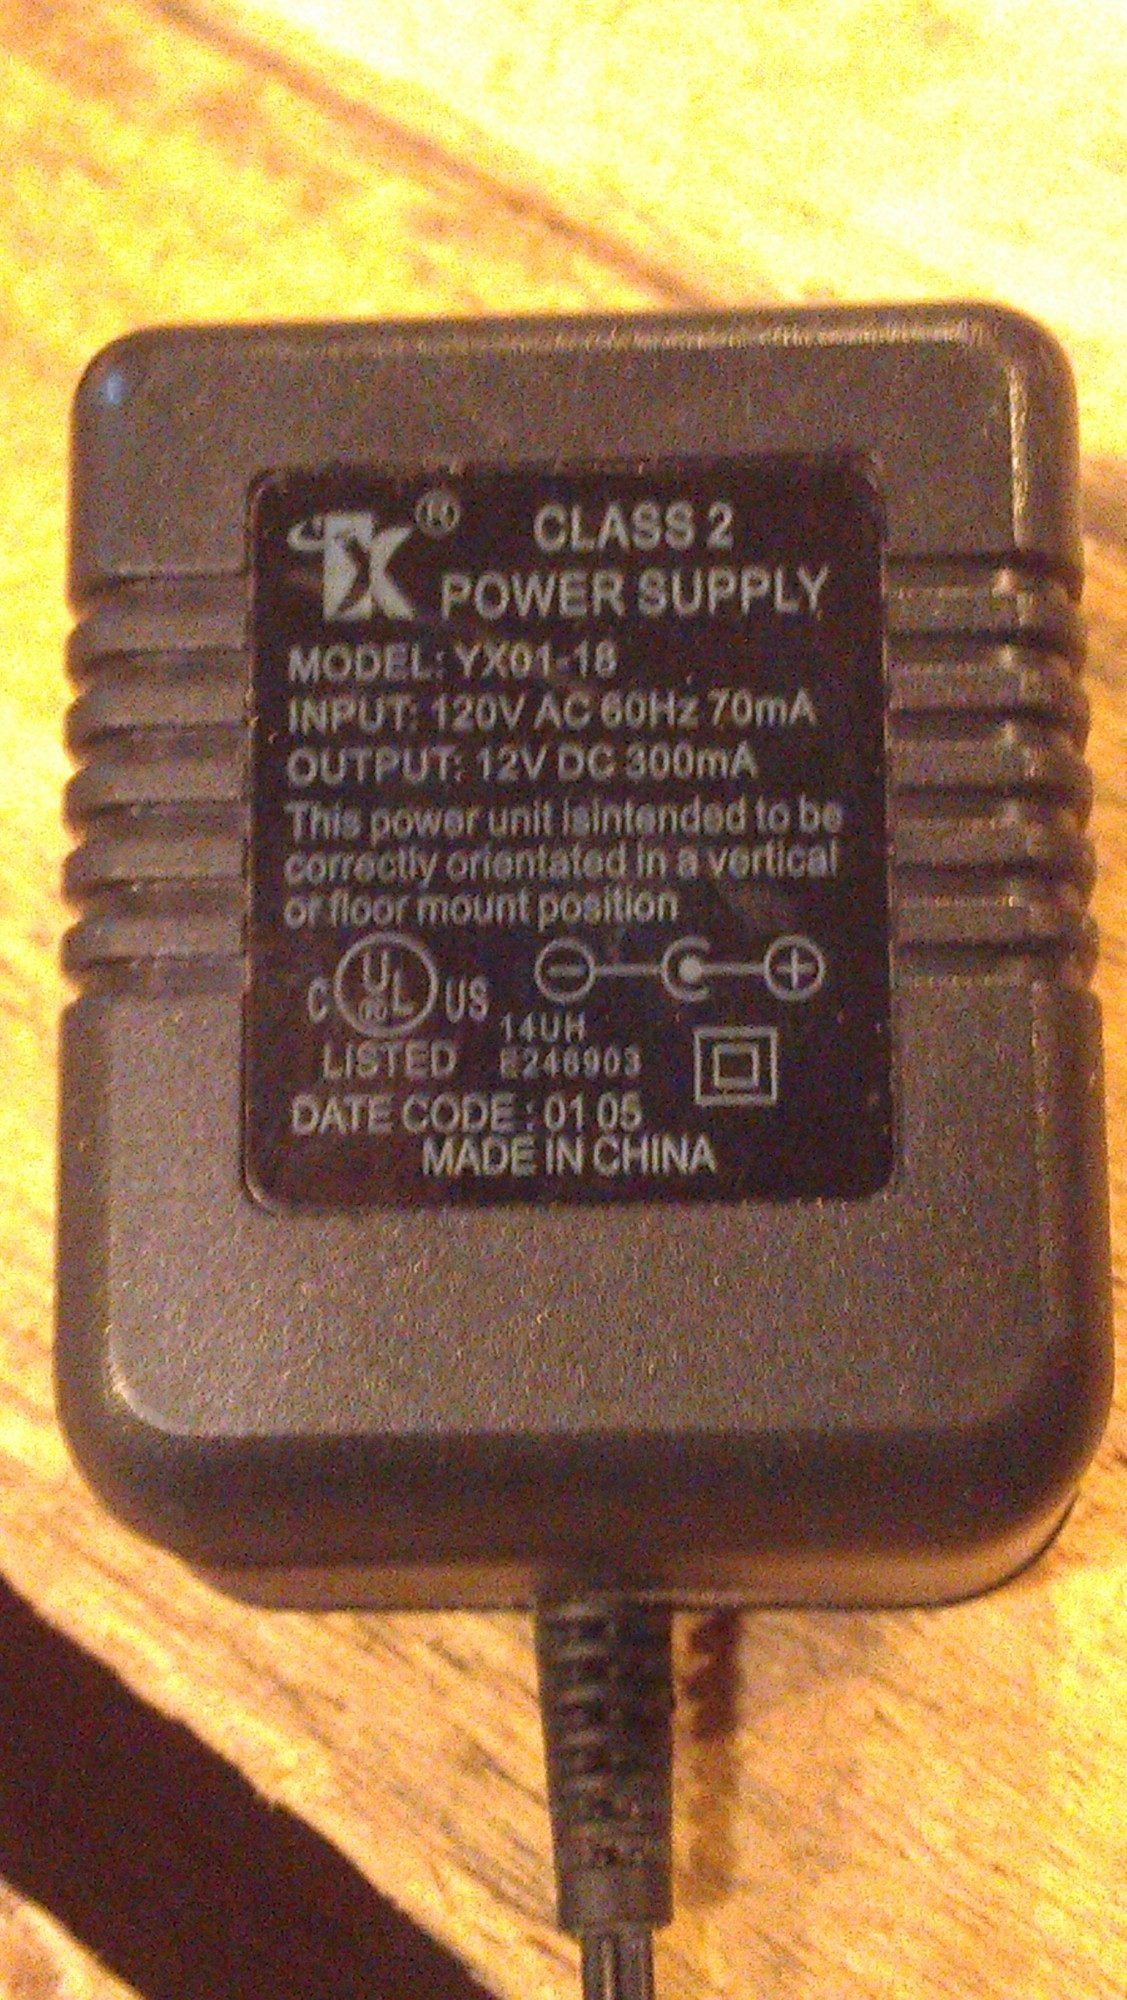
We tested our fans before installation to make sure they worked, as you can see its only 12V and nothing to be too scared of. We cut an old Power Supply seen below and wired them up.
WE USED ONE POWER SUPPLY FOR EACH FAN, in case one went the other fan would still run!
Not sure what these are called below? but you need a spacer of some sort to install the fans so they don't hit the cooler, see below for spacers and installed fans with spacers, NOTE: there is a dip in the cooler at the drain plug, we didnt put a screw in either fan in the inside top corner, no need either as three screws each were fine.


We pulled the wires through the drain plug.

Below you can see we used two power supplies,
One is not like the other, because its what we had on hand.

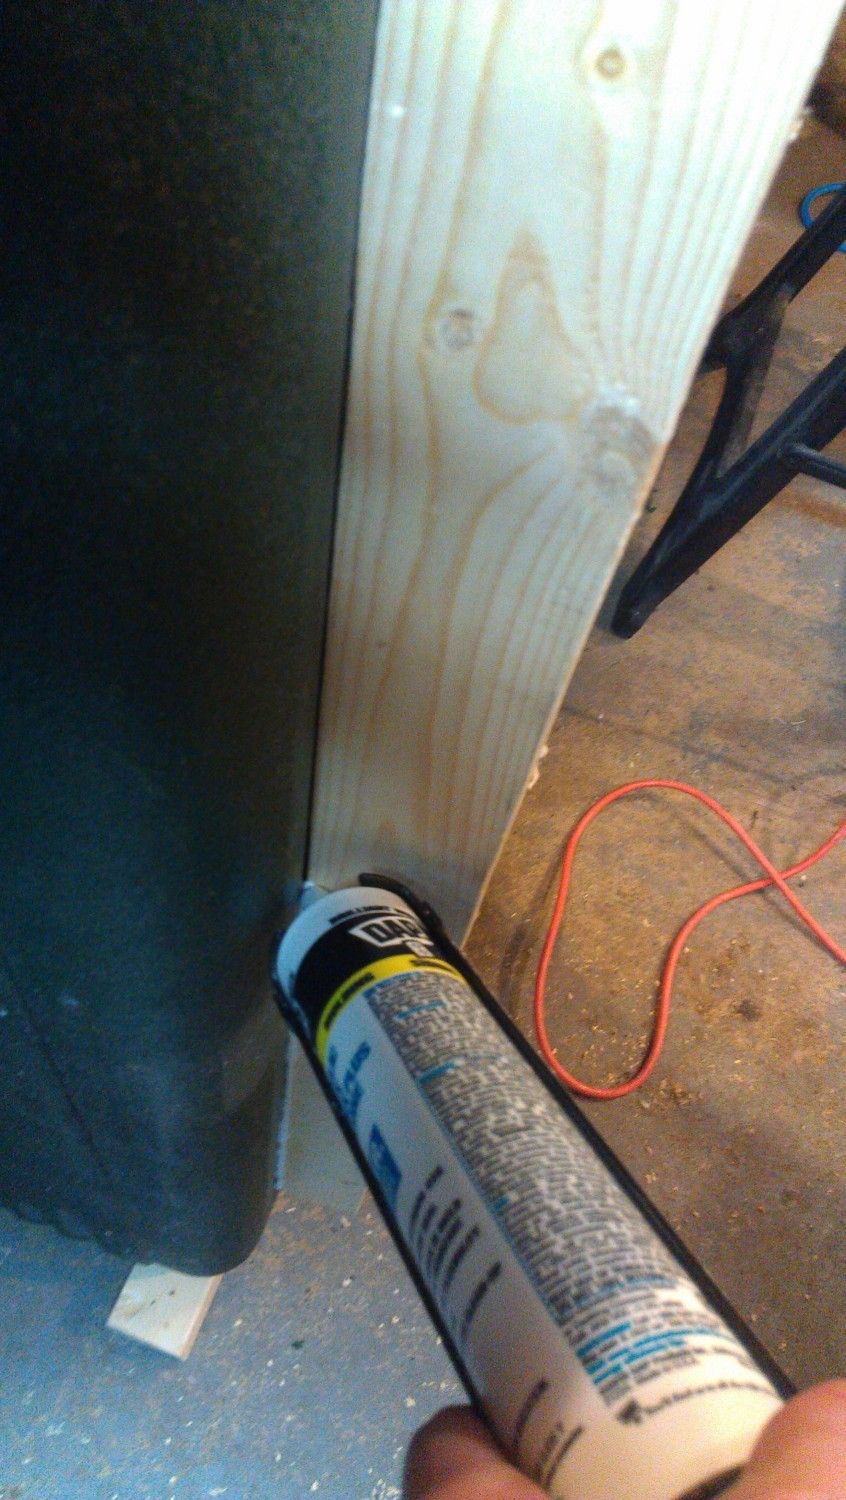
we cut 2 pcs of 2x3's and drilled and counter sunk them onto the cooler. Long enough to go to the top of the fan box and below the lower return hole. Then we caulked the outside and inside.
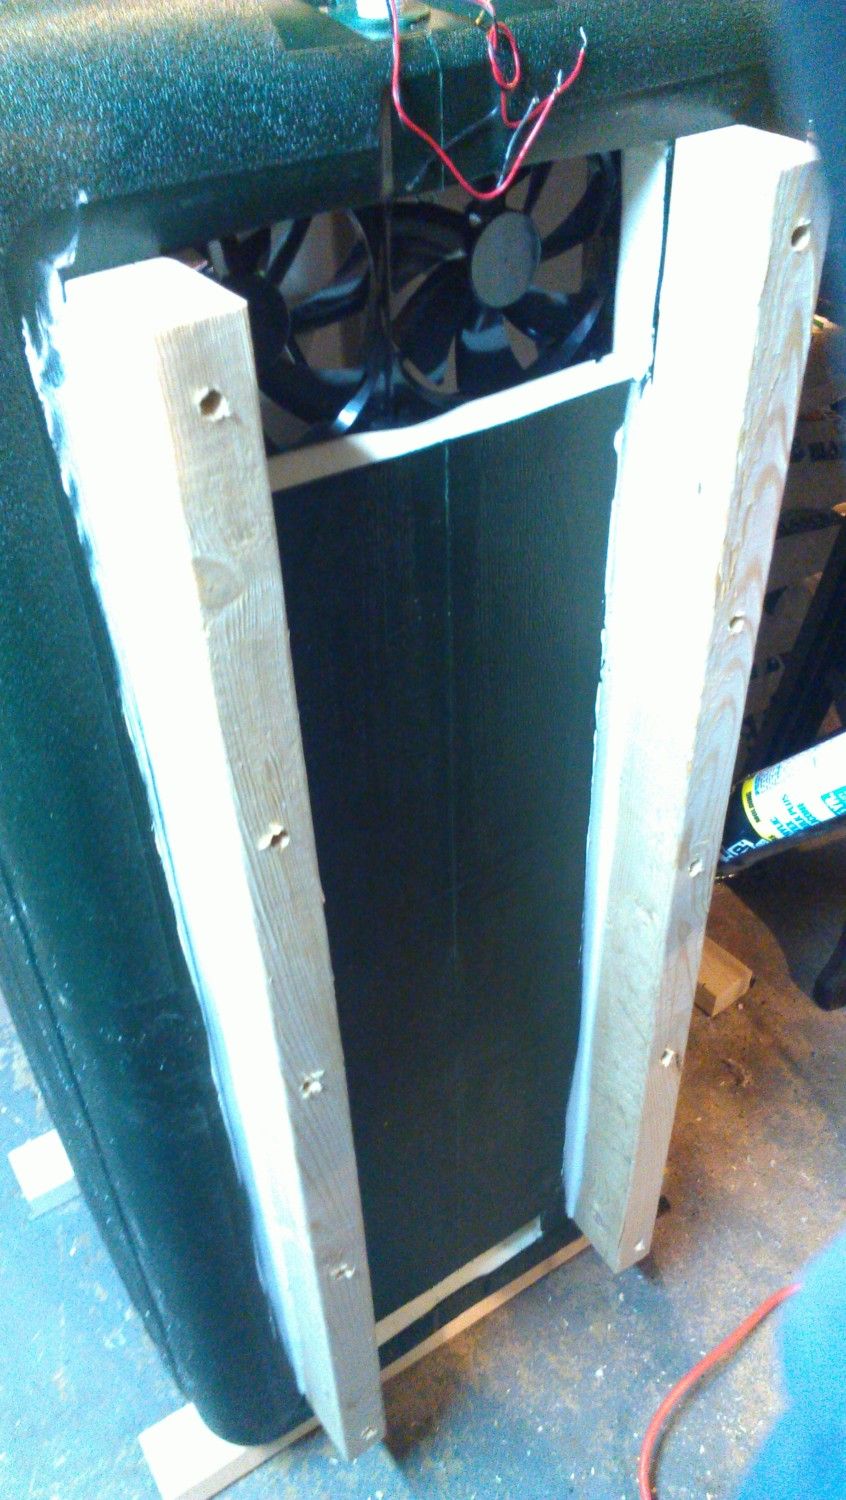
we cut a pc of left over foam insulation and used washers on screws to install over the 2x3s

So the inside dept is the width of a 2x3
We cut two small pc of insulation board to cover the top and the bottom and sealed it with metal duct tape
We made sure we wouldn't have leaks in this air duct.
With insulation..


Now is a good time to install a handle to pull as you push to seal the door closed. We thought of latches but cannot find any local. The lid is way too thick to accommodate a normal handle, would need a gate handle that screws in, but a normal handle worked on the side!
then we installed our wafer thermostat available all over the internet $22.
and you need a cord
I could retype how to do this part but its already been documented very well on an online site so Please
Here are the links to the wiring diagrams for DOUBLE WAFER INSTALLATION to add the double system like the GQF does
http://www.poultrysupply.com/manuals/GQF3255_3002Thermostats_from_Kemps_Koops.pdf
http://www.gqfmfg.com/pdf/THERMOSTAT WIRING.pdf


I forgot dimensions so here they are after installation


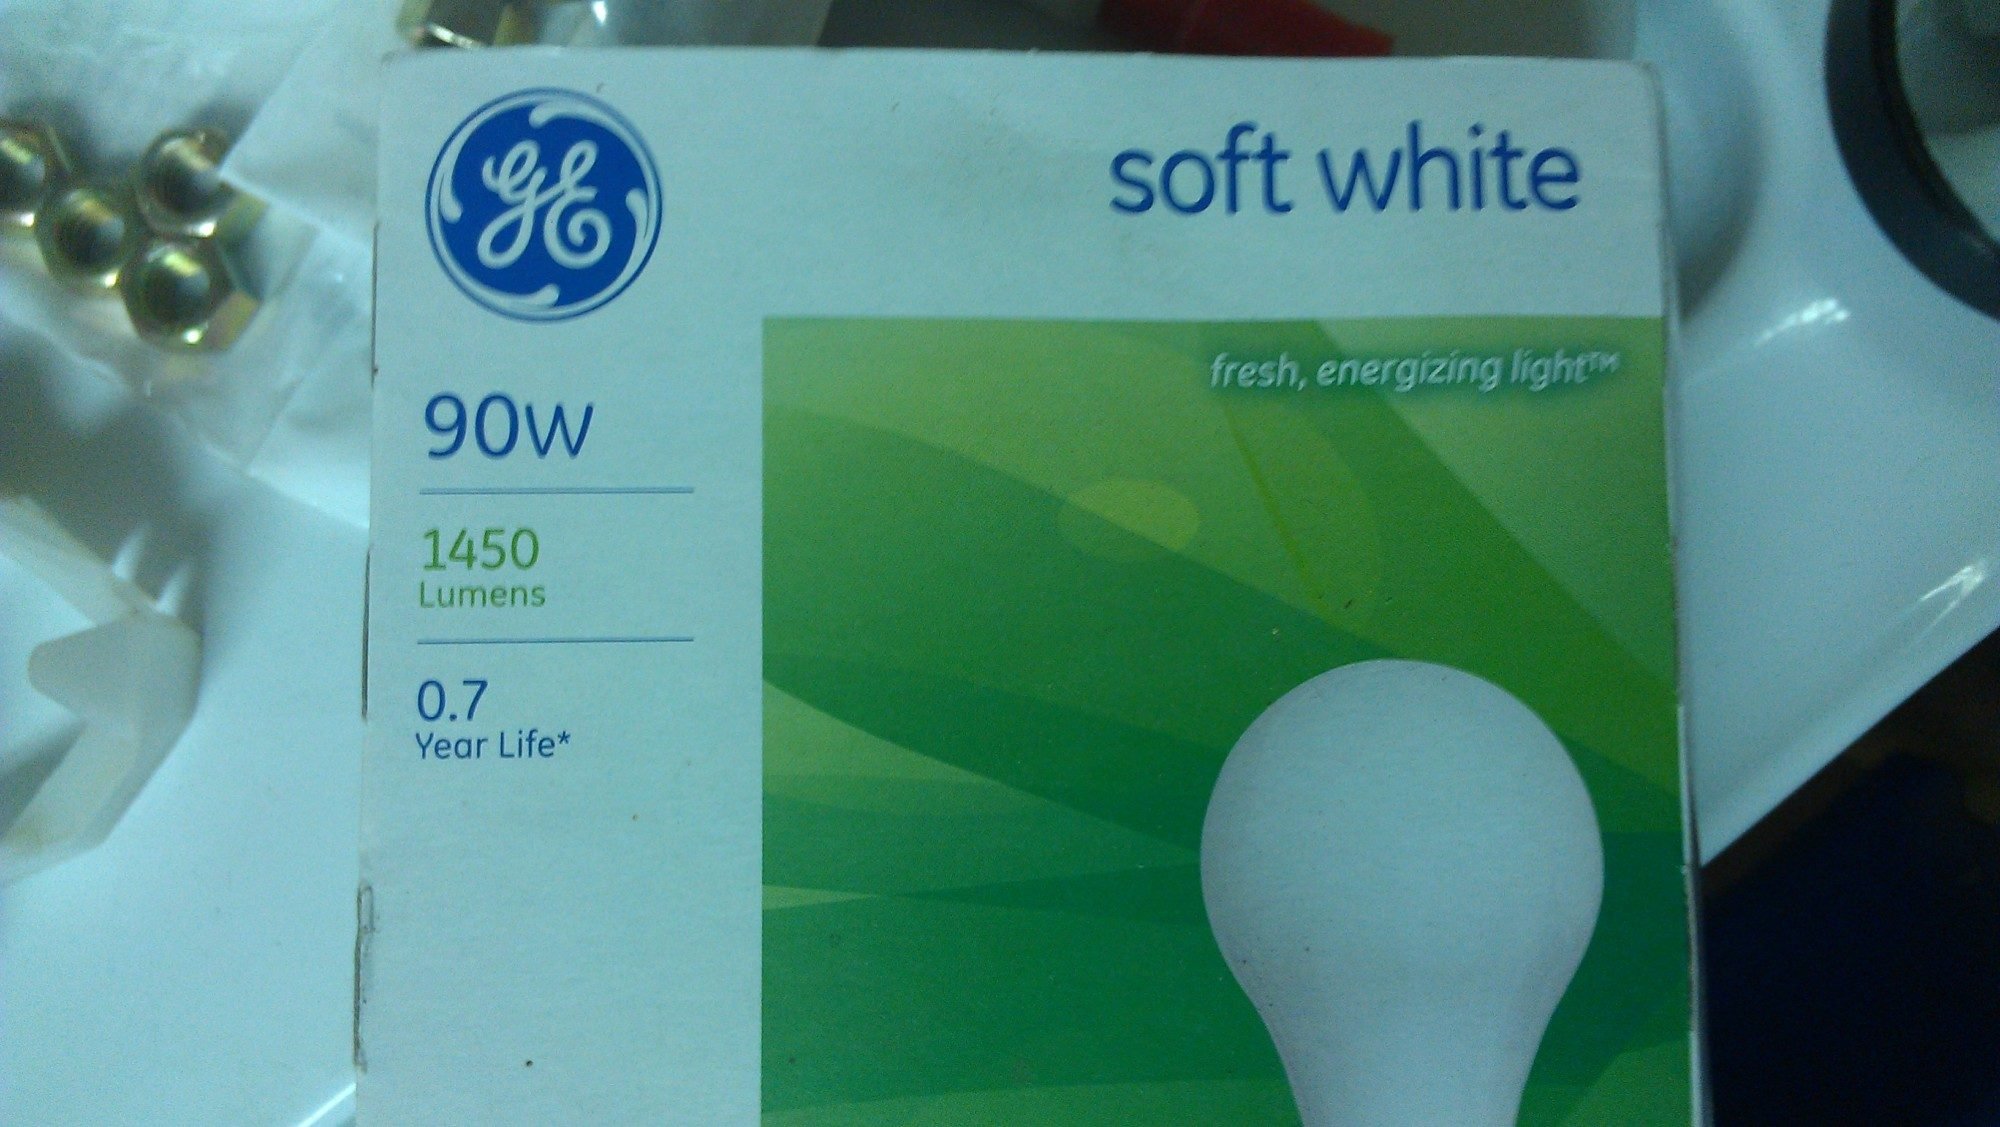
We found these heavy duty ceramic light sockets at our local supply store dirt cheap, you can find them or ones that are already wired at lowes, OF COURSE ALWAYS CERAMIC, we use 90 W lights x2 TWO LIGHTS are ALWAYS better than ONE! If one blows you have a back up!

We checked to make sure the wires were connected securely and tested them with lights BEFORE installation

installation of sockets, HAD TO DRY overnight
See placement measurements below
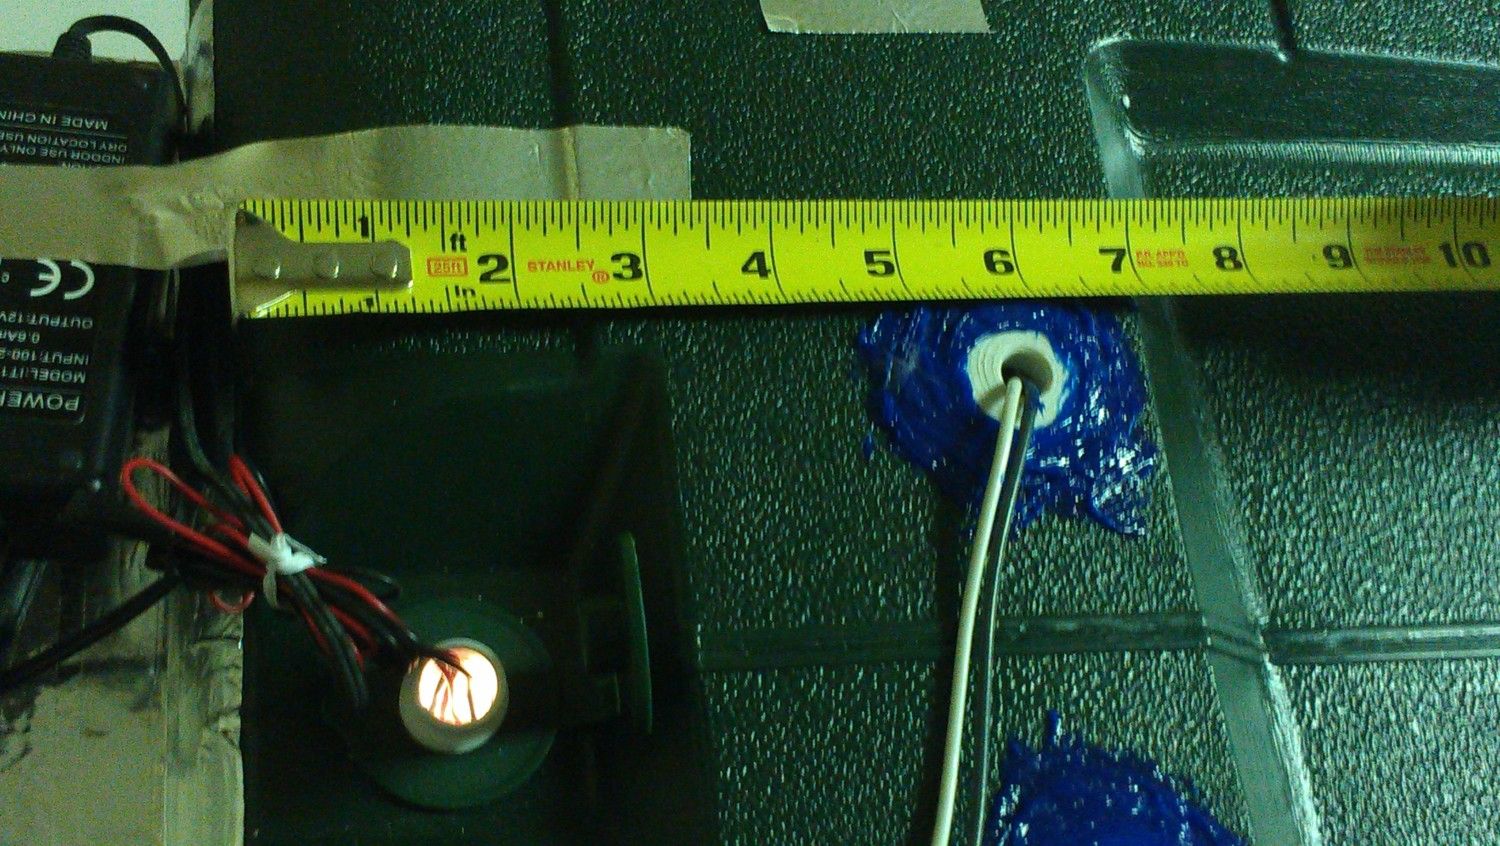


You can see the depth of sockets below in image
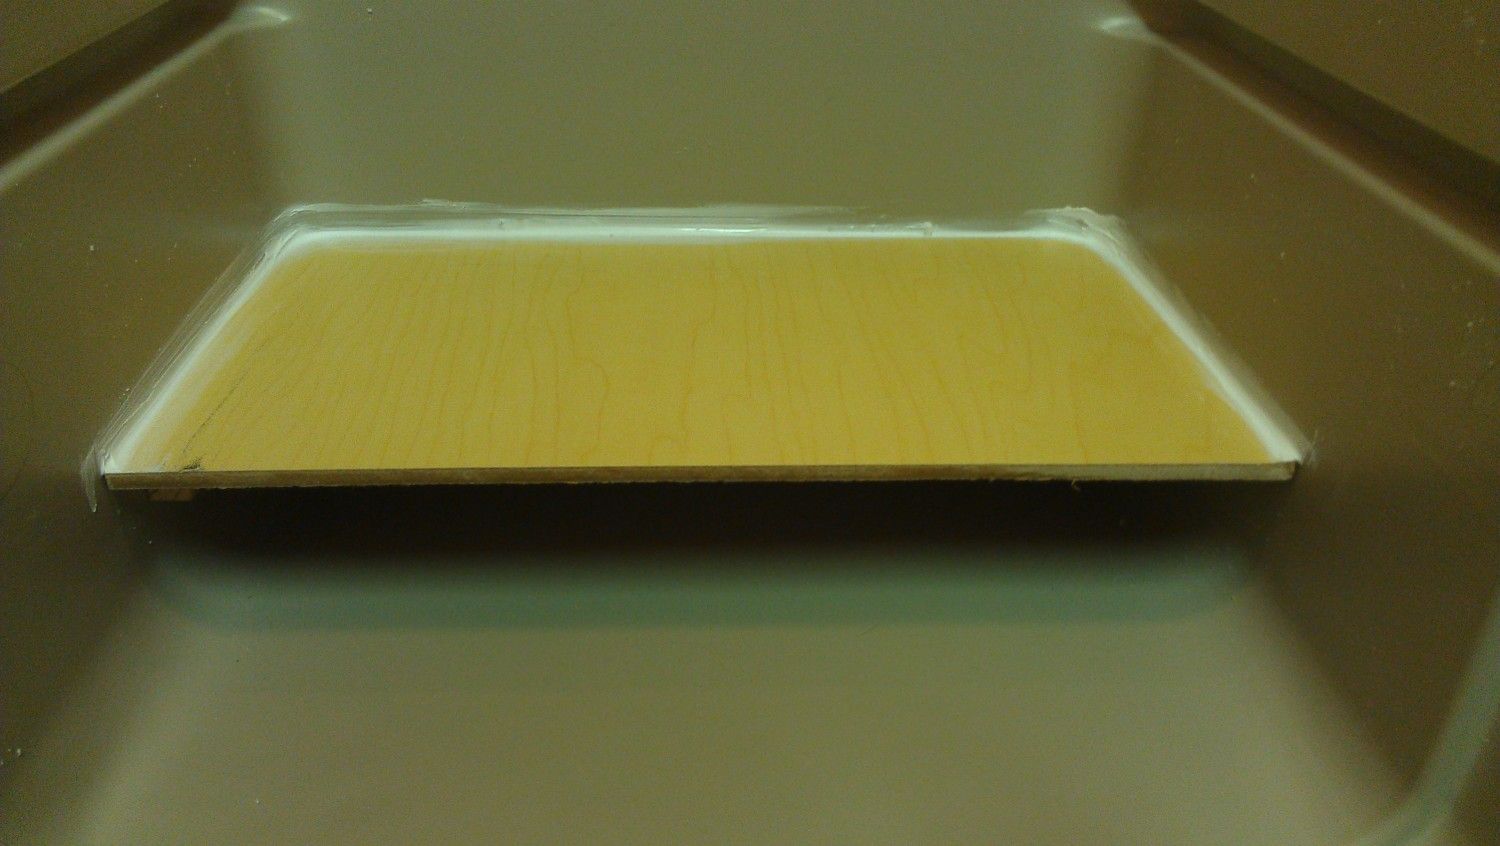
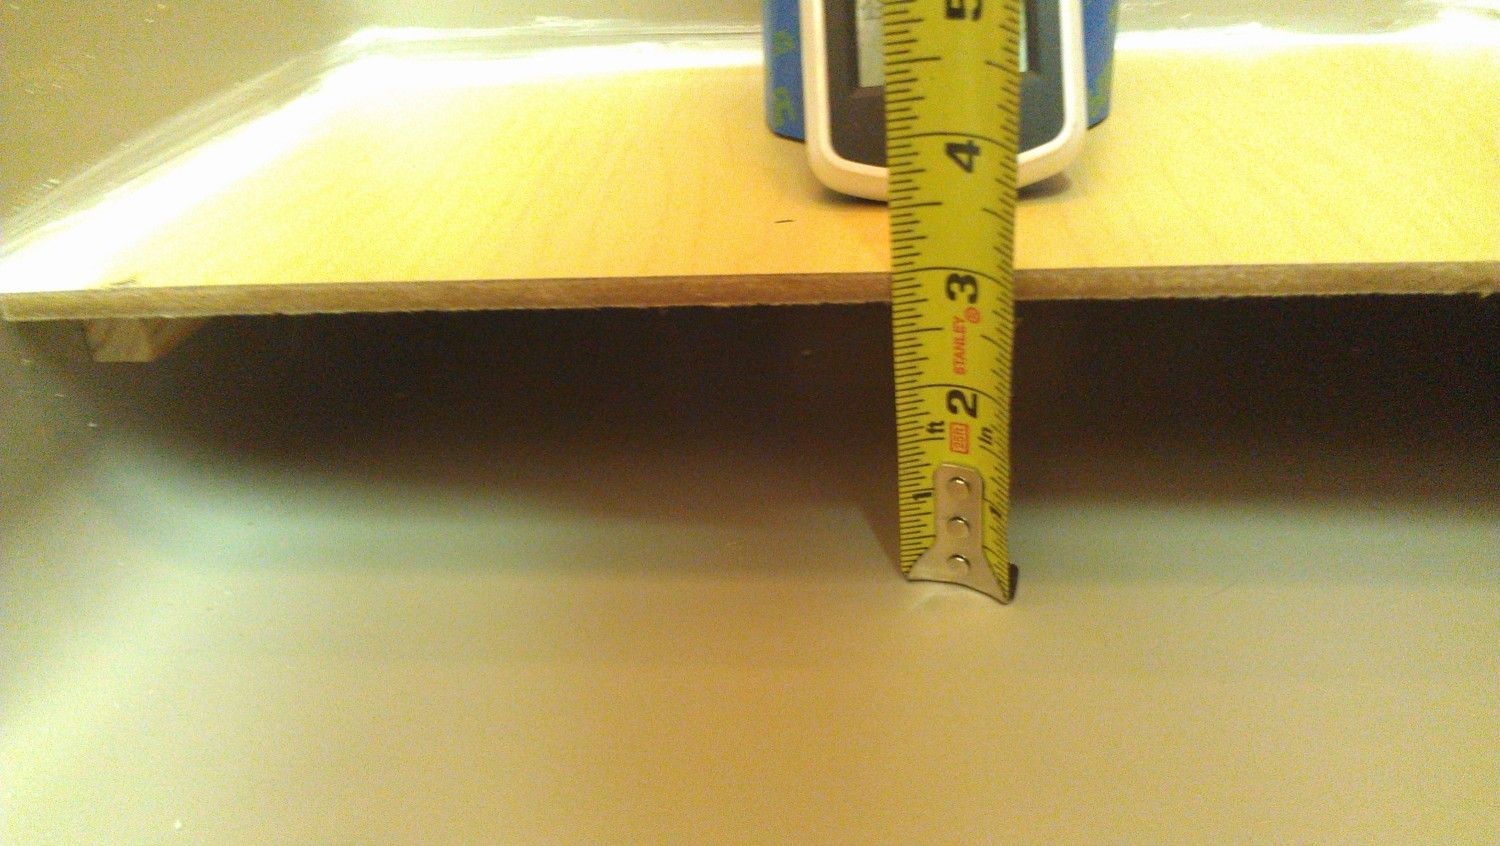
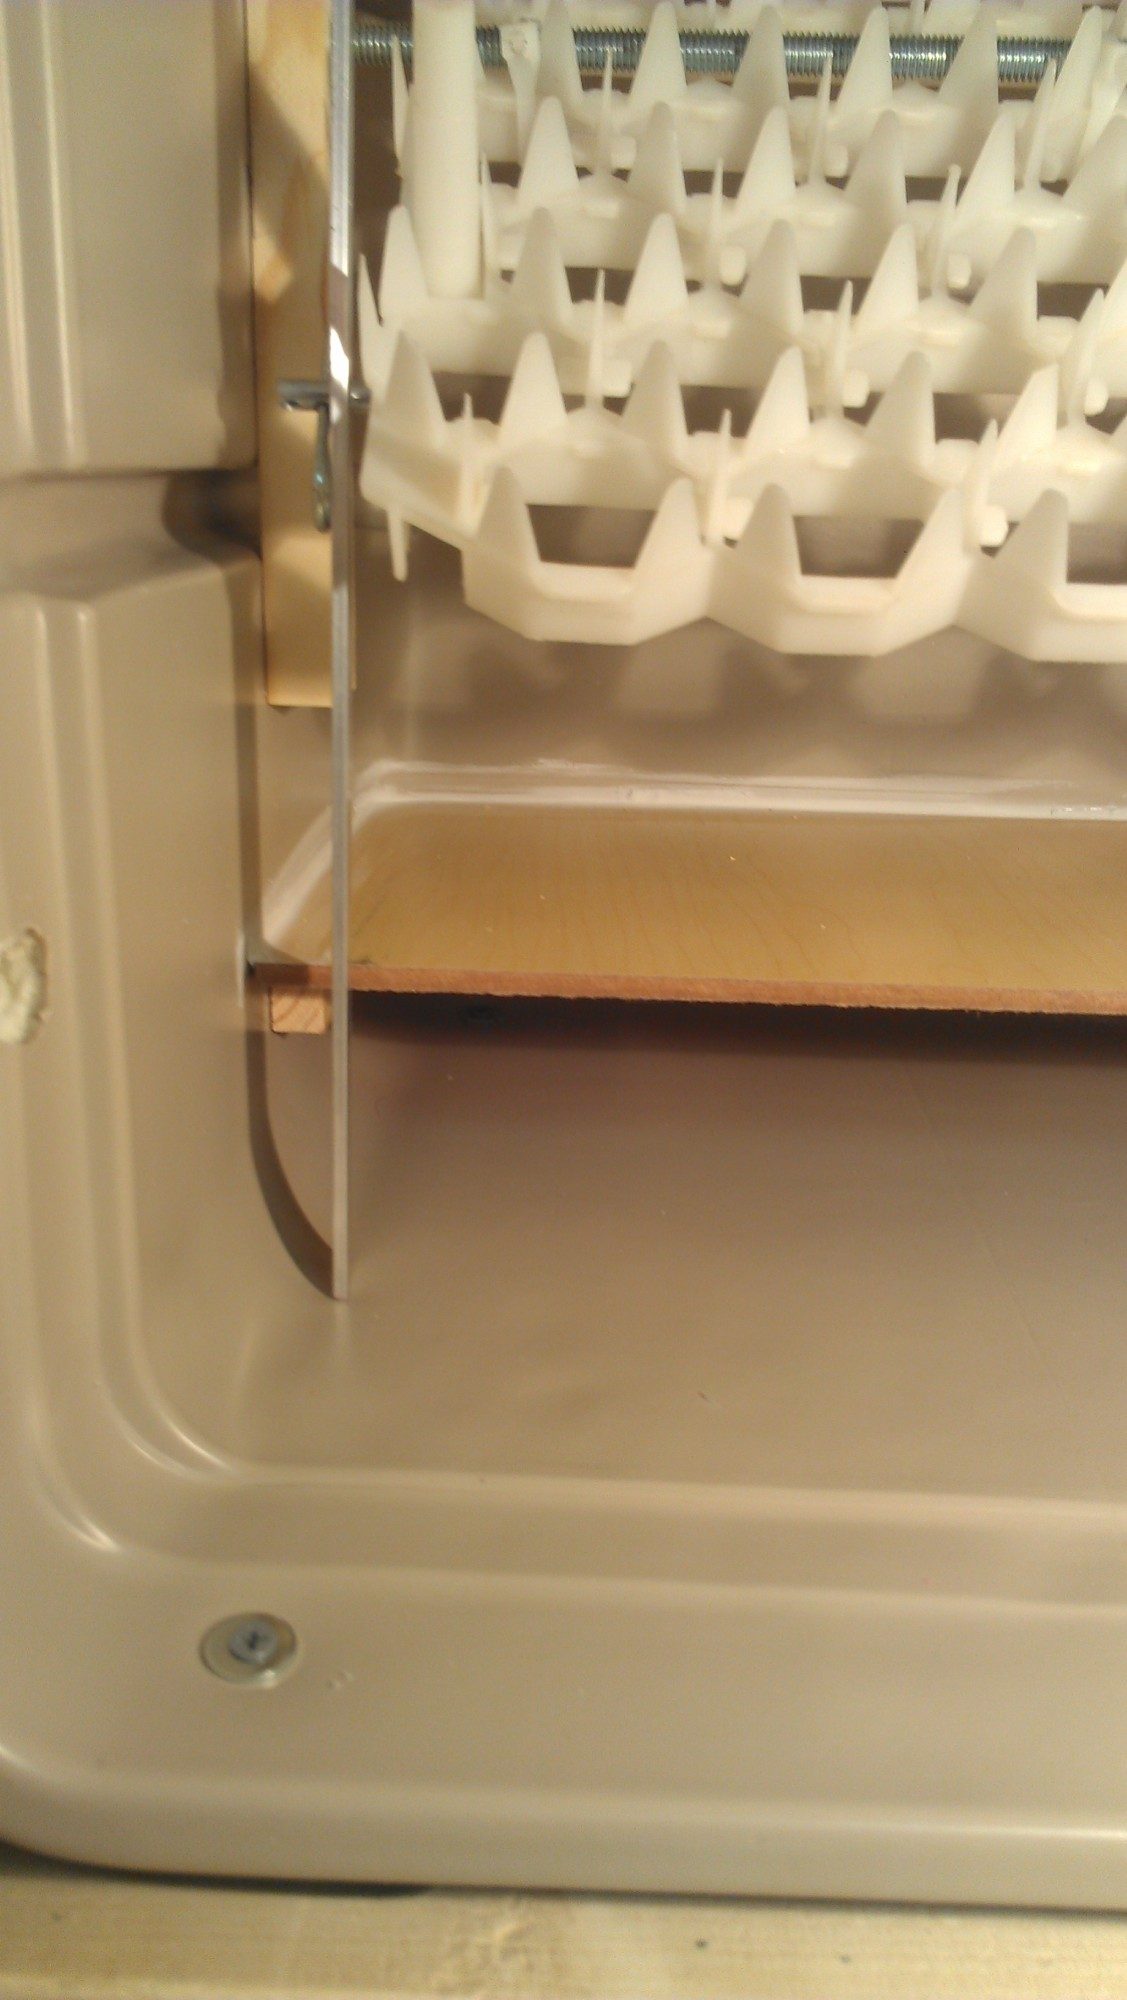
Also note we used a left over pc of shelf for under fans to fit in slot, see measurements below for shelf depth

More pics of our wiring..... again link above for SIMPLE DIAGRAMS!
Its not as complicated as this appears! truly NOT!


Semi Auto turner...
Three or four egg racks ebay Stabil Incubator 48 Egg Plastic 6 Tray Flats $21.99 for six
THESE ARE USED so we bleached and sterilized immediately.
NOTE: The only reason our turning Alum Rod doesnt go up through to the top of the bator (for turning w/o opening) is because the incubator is 42" plus the base 2x3s and added table underneith, I AM SHORT 5'2 and shrinking every year at this point
 plus me up on a stool or a chair is a NO NO. Plus I do think opening the incubator will have positive effects on the embryos and you will be amazed at how fast the temp heads back up, faster than a hen back on the nest for sure!
Its just like all my other coolerbators just a different arrangement with more convenience. In the spring I can replace the rod if we decide to build a custom cabinet to hold it out of skids, but our skids are still buried under snow and ice.

three or four rods for the tuners, see size on label $1.95 each Lowes, can use dowels I guess

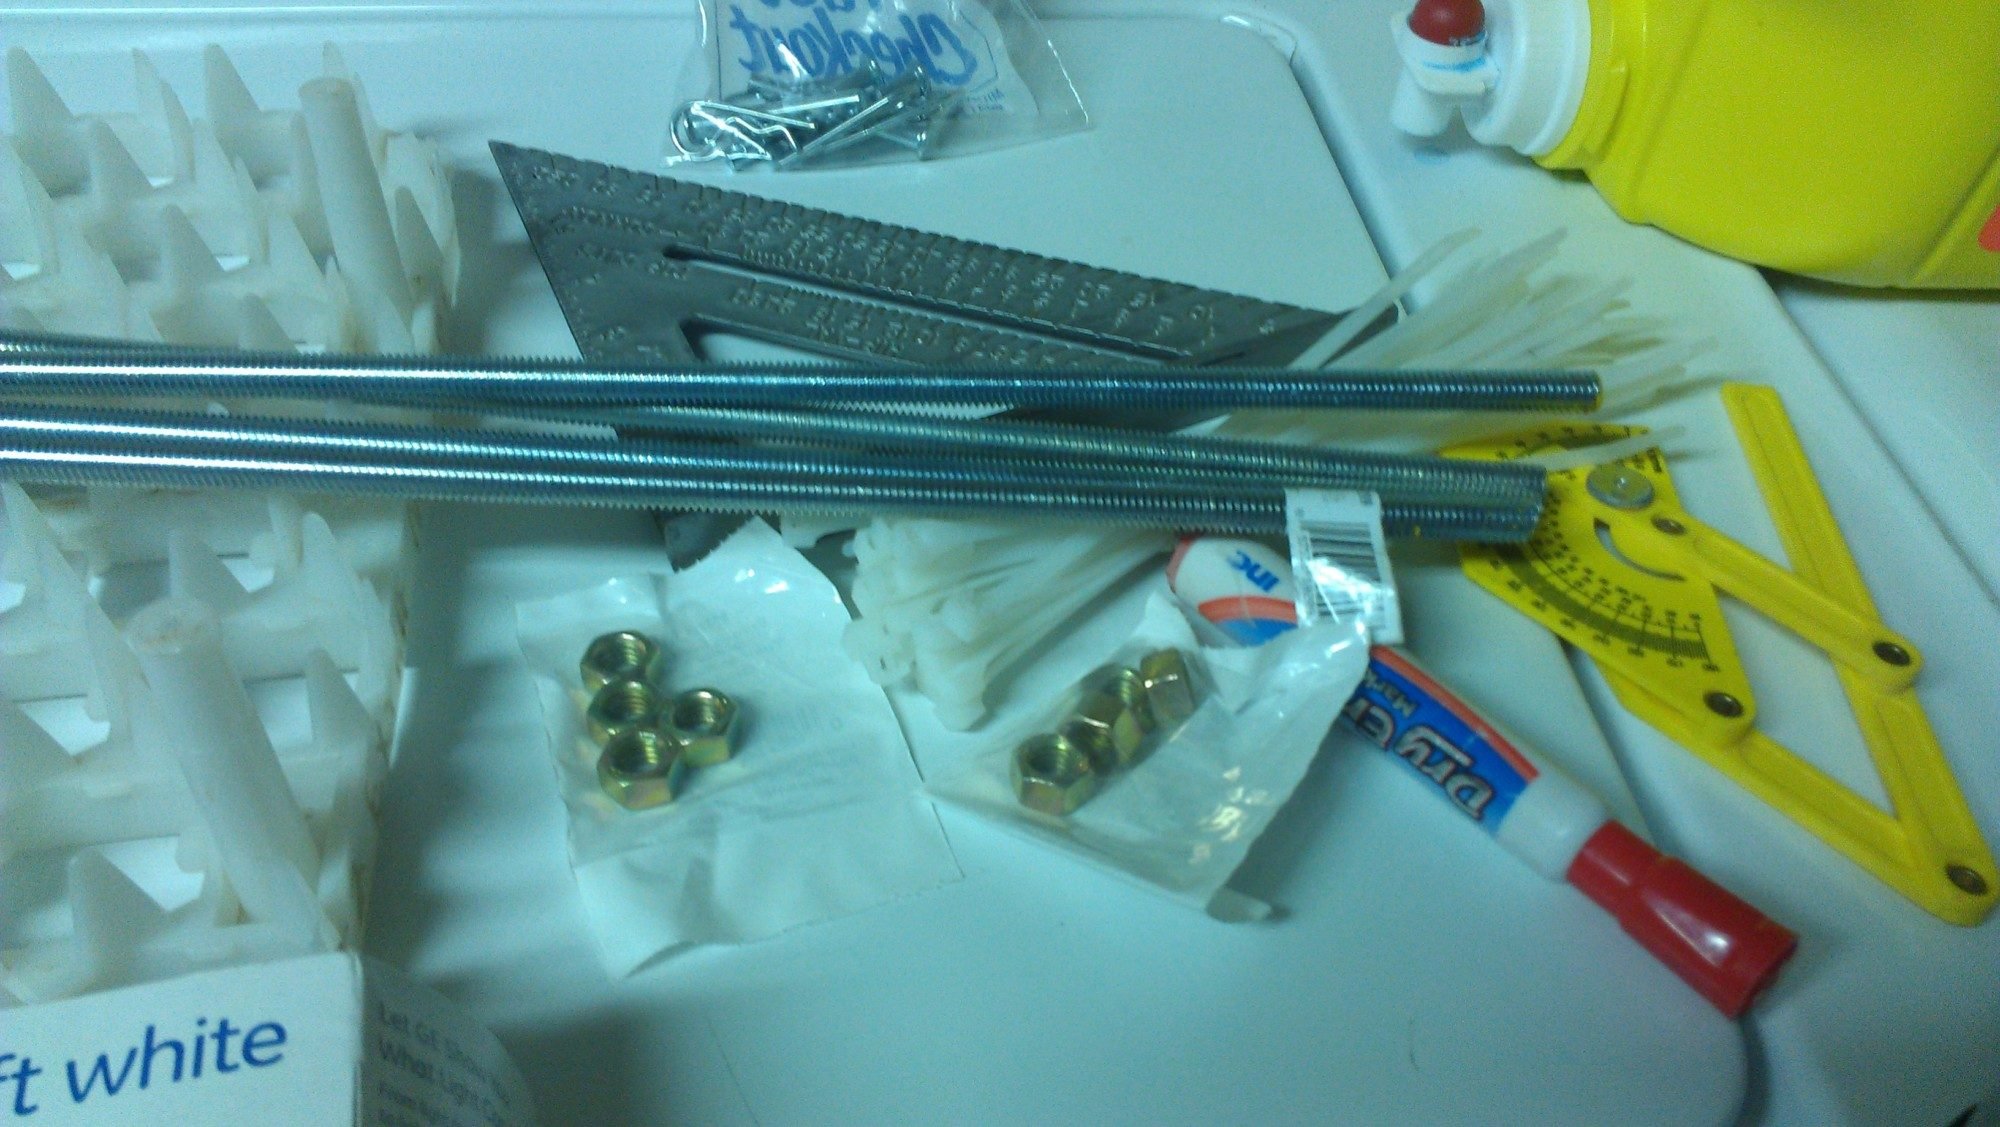
three or four clevis pins for turners

Simple turning rack which was screwed in each side... PLEASE watch video for how they work.
Also needed a alum flat stock for attaching all trays together.


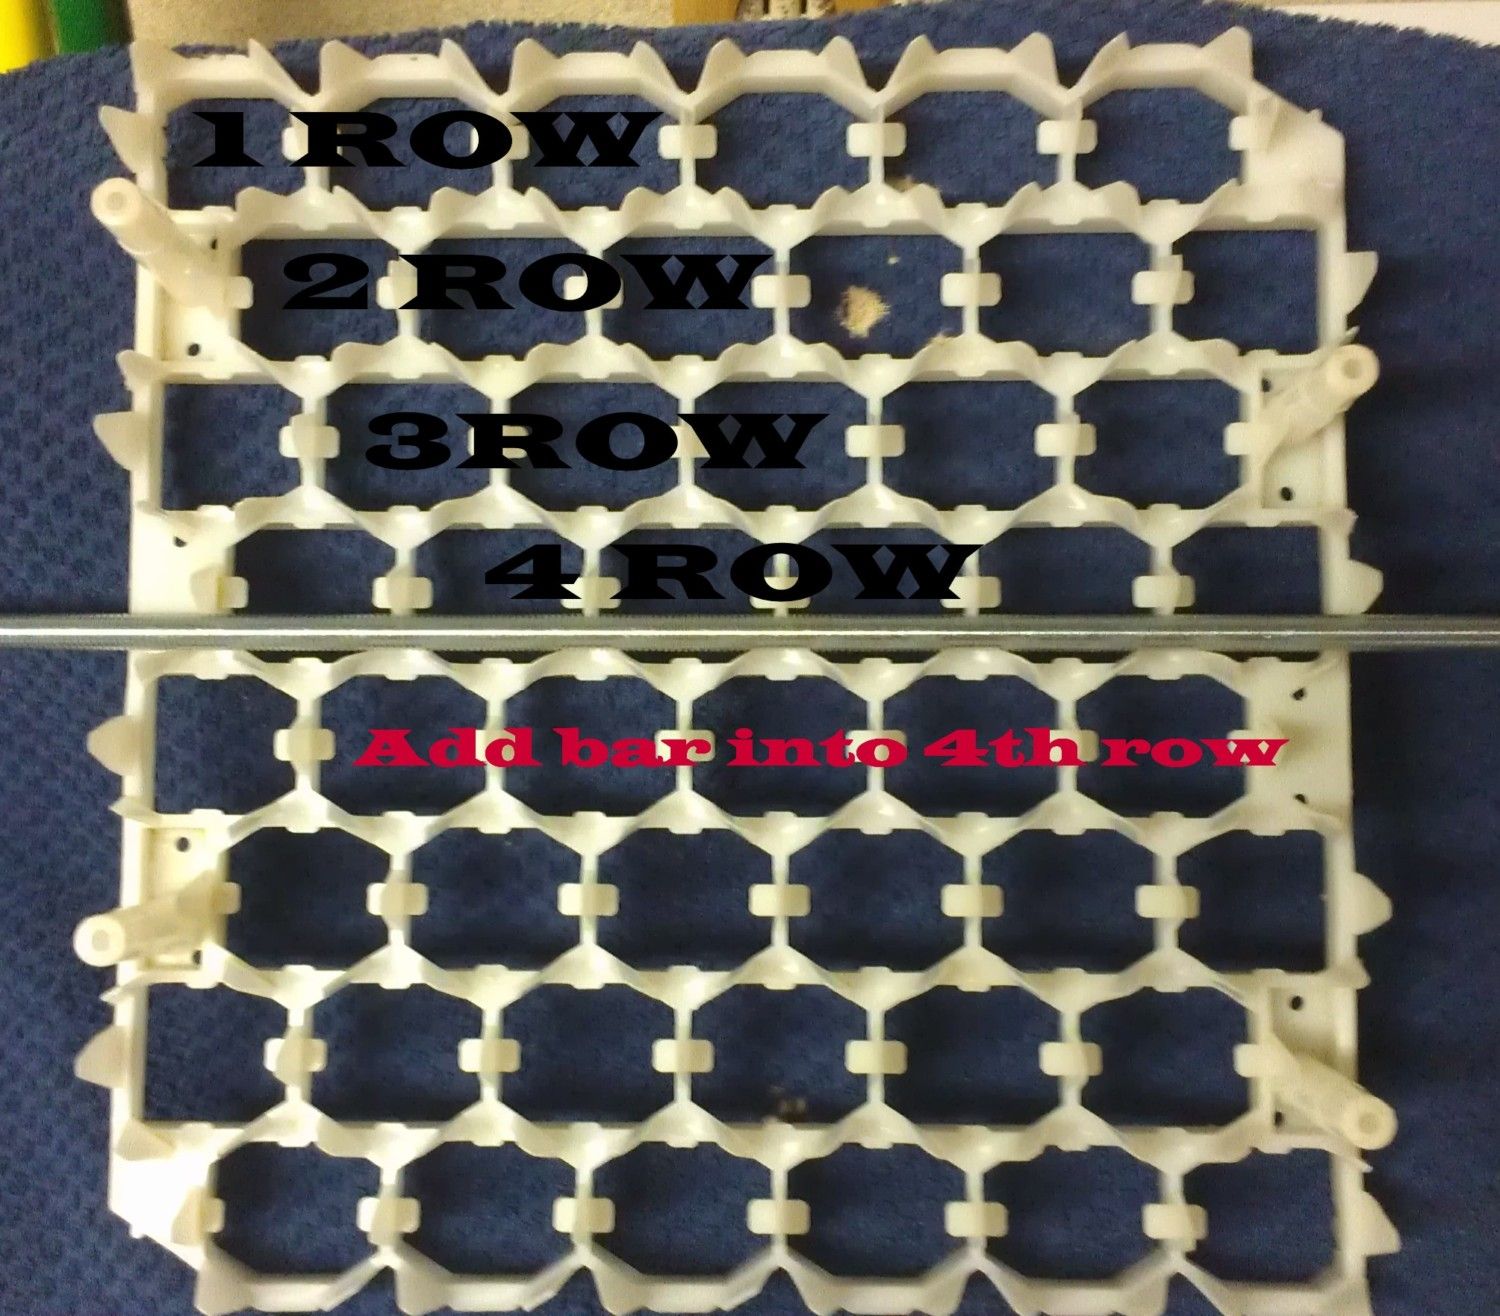
I simply cut rods to length and ziptied the racks on. I will be switching the zipties out with hose clamps because zip ties can become fragile and break at some point.


NOTE bar placement......
you do use up one row of the 48 egg slots, so your capacity is then 42 still not bad
also install with the side that will have 4 rows of eggs FRONT, this way you can put your side rails back just a tad more too.

NOTE: if at some point I feel the trays do not have the strength to hold the eggs (which doesnt seem likely at this point, they are very very strong) I can always follow through with the angle alum squares to hold my trays.

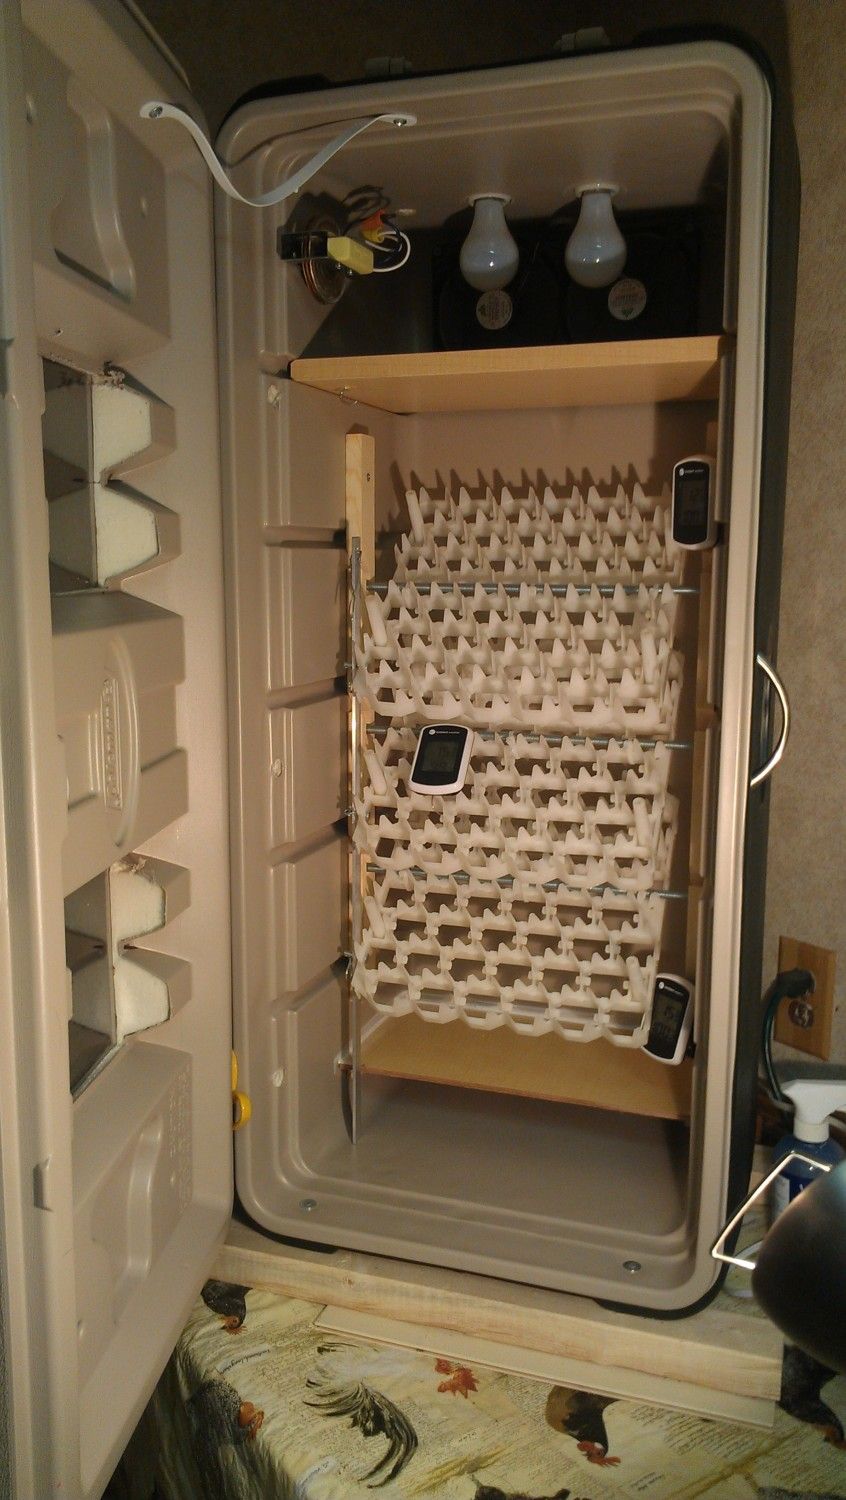
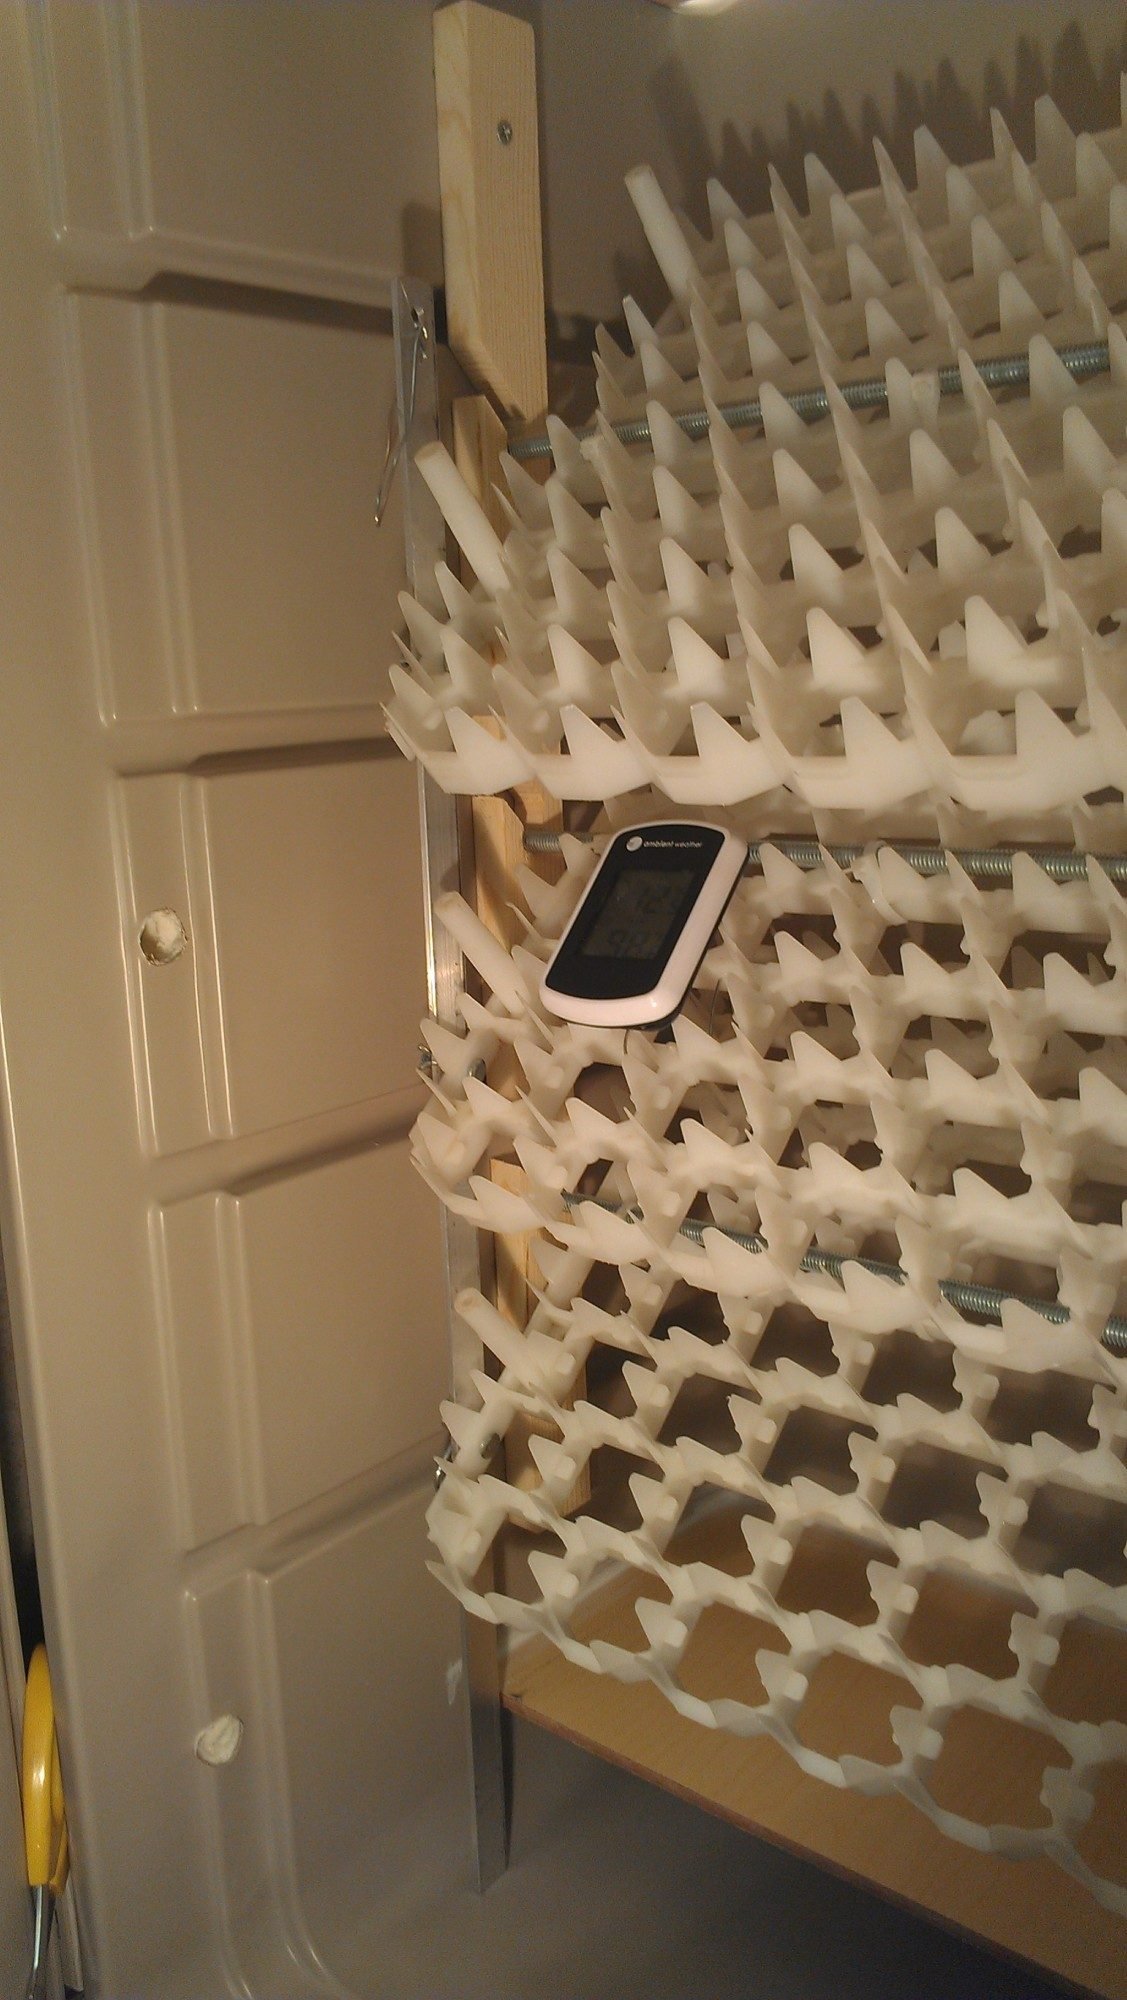
Here is hubs showing off his handywork of my GENIUS! HOWEVER I did get yelled at because I put the "darn thermometer" in his way for when he took the tray out!
Has some tweaking needs done, but Its awesome!!


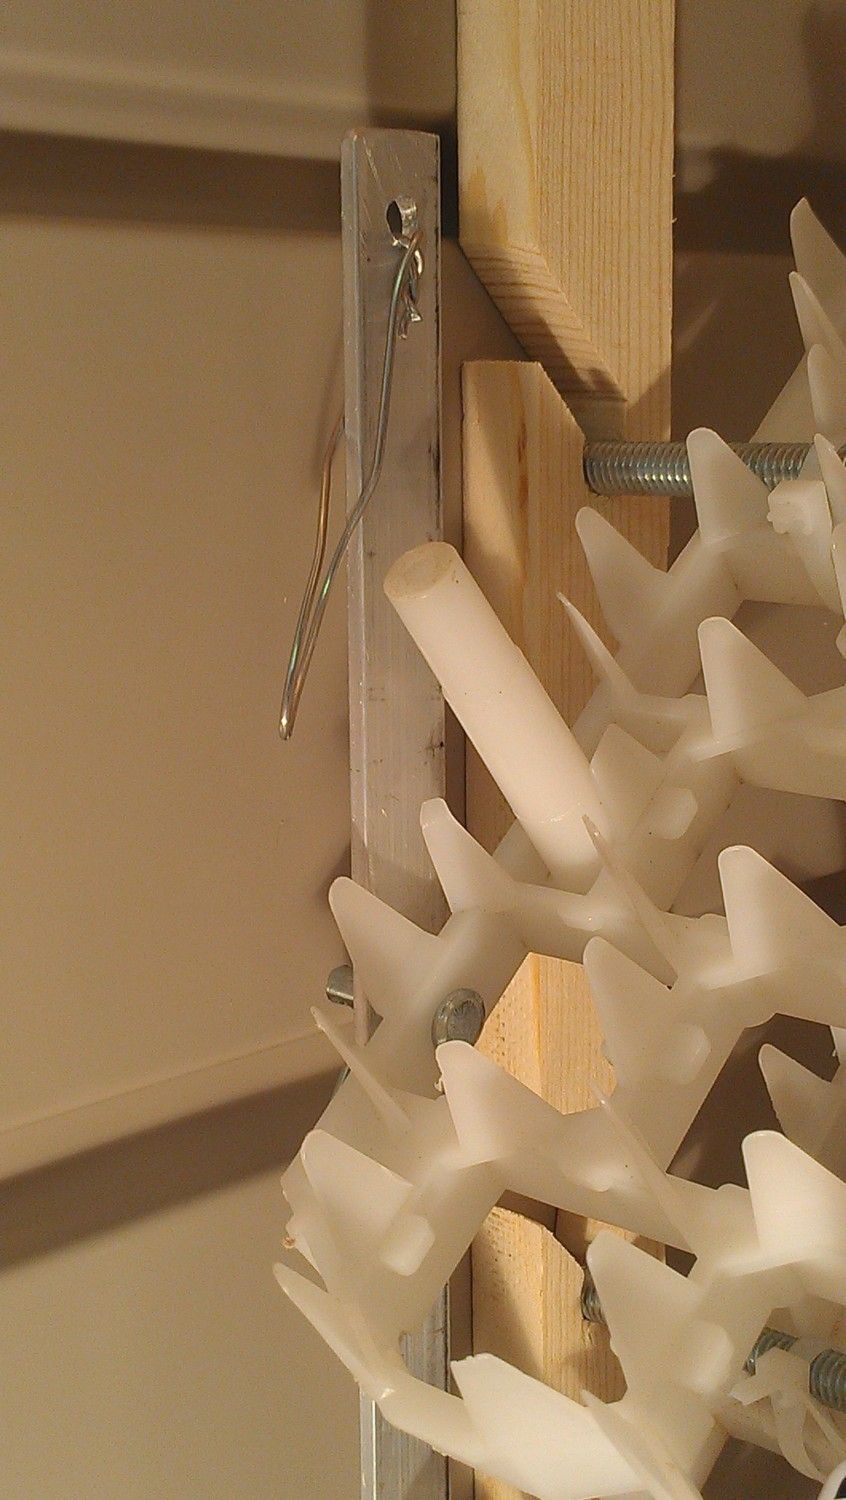
Clevis Pin holds rack, undo pin when using loop to hold level and remove trays.
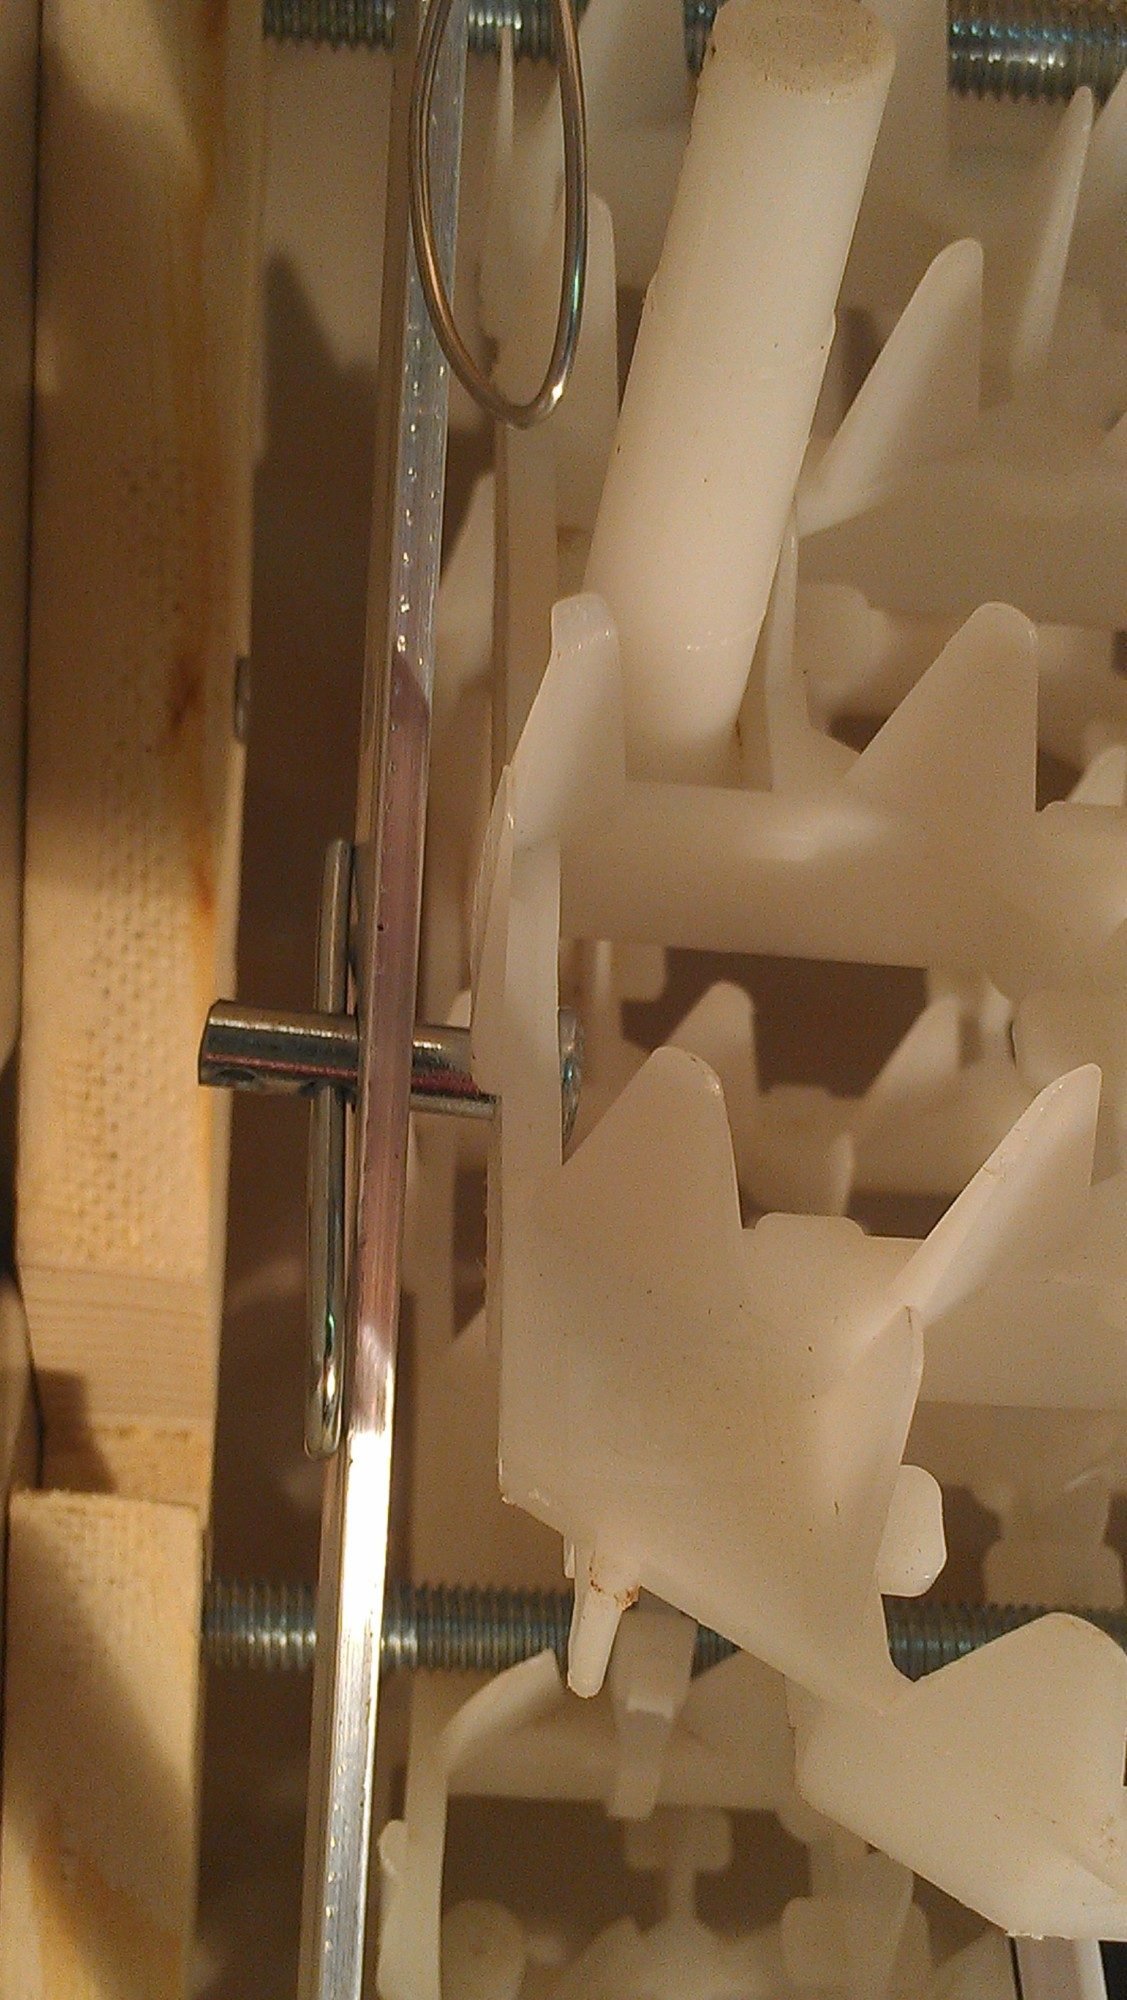


Loop we made to hook on to level egg racks when working with eggs or removing trays below

When tilted in lower position the alum bar just rests on the bottom of the cooler

When tilt in upwards position there is a round eye hook bent open a tad to hook the hole on the top of the bar to hold them in up position.


The trays are even level with eggs filled, I am paranoid of this angle 45 degrees, as I never had a turner like this and its like HANGING AND EGG OFF A CLIFF! HA HA HA

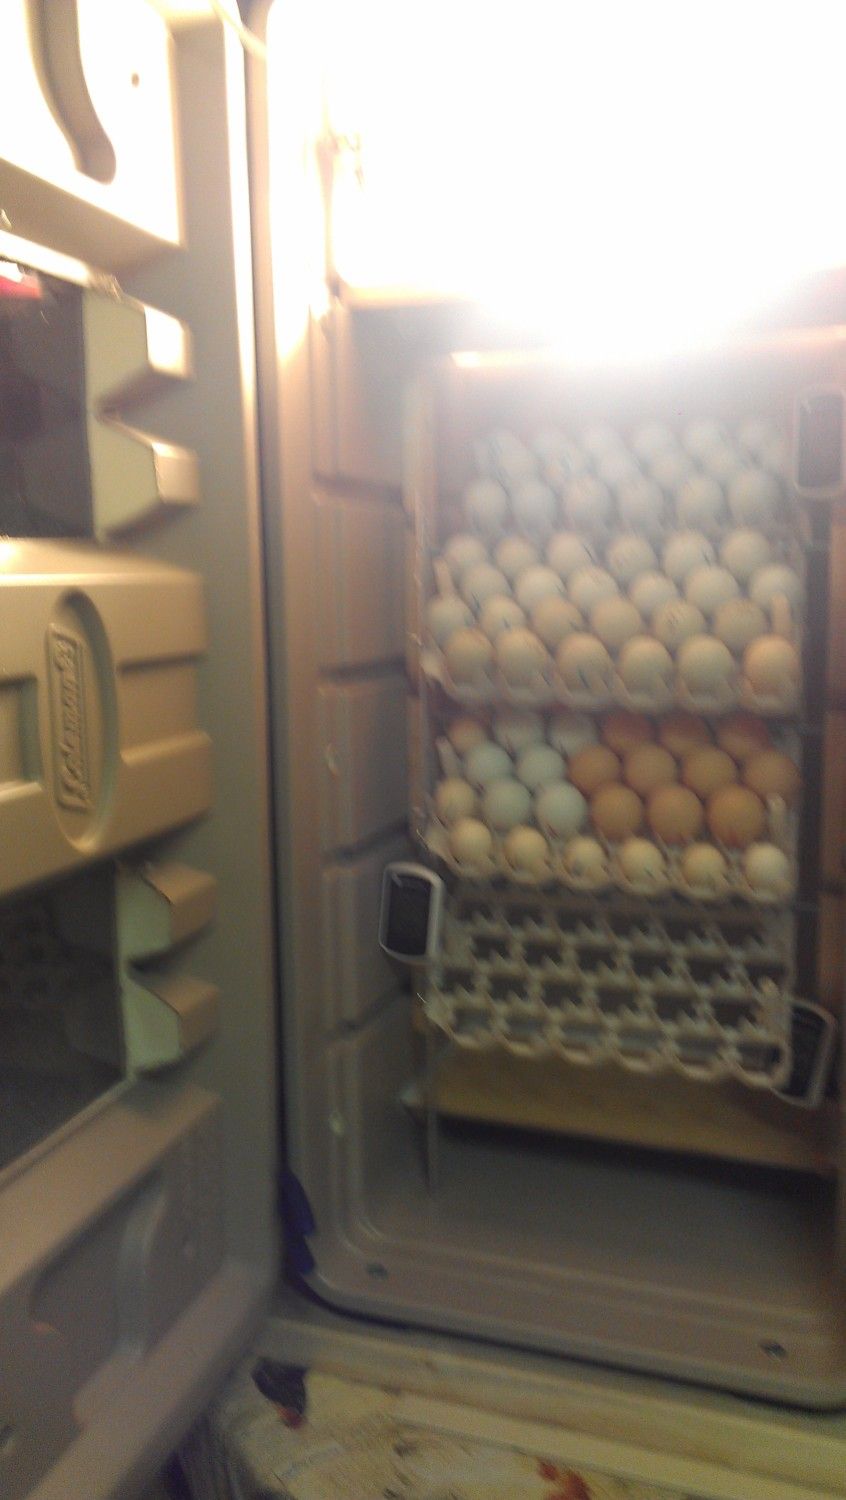
There she is.... or he is <shrugs>


We had more time fine tuning our new incubator than building it so it has perfection in temps top to bottom, but our brainstorm has turned out amazing!
And WAIT till you see the temps holding top to bottom!!
Gigantic Cabinet COOLER INCUBATOR w/semi auto turning
I took images all the way through this project even the fine tuning to get no variance top to bottom. This brainstorm started with the desire and need for a large capacity incubator that could hold enough eggs for our chick sales and also lesson all of the hand turning I have to do. And we are always trying to come up with cheaper and better ways of doing things, plus I really dont have $800. to have a new sportsman mailed to me.
est $135.00 cost
IF y'all make one, come back and share your cooler cabinet with us please!
I started with the largest cheapest cooler I could find.....
Walmart 150 quart Cooler as of 3/2014
Next thing we did was admire the size of our new cooler! After having made several coolerbators we were in awe of this cooler and its endless possibilities!
Product in Inches (L x W x H): 43.2 x 19.2 x 19.2
inside is 15" x 38" HOWEVER if you look at the images you can see at the bottom that a cooler is tapered not square
These are our fans from Ebay
Lots of 4pcs Black 14CM Computer Case Fan w/Screws *NEW $14.97 for all 4 fans so I have two spare!
We laid our our fans side by side, traced them and reduced traced size enough to fit screws for installation (aprox 1/2" reduction from trace)
open image to see better.
then we traced this template as seen below and drilled holes from the inside out in each corner of the template, flipped cooler over and traced the template on the outside and then finished up with the jigsaw. We simply "eyed up" the template to center it, making sure we had enough cooler above the template to screw into later on.
You can easily see how it fell in that middle section of the bottom of the cooler, I would skip lining inside and if its the same cooler just lay the template on the bottom at the start of that recessed middle.
We cut this fan hole and we cut the bottom air duct hole as well,
NOTE: I forgot to take dimentions here so I did it with the shelf installation.... see that section below...
As you can see below I made the opening aprox 3 inches too long for the lower air return but it worked out well as I could make it smaller with duct tape and control the air flow to achieve perfect temps at all levels of the incubator. It would have messed up my egg turner had I made the hole any higher, and would have been bad if I would have to rip all the back air duct off to make it longer! SO refer to the total height in the one picture below. I will include a video below of my hours of using tape and cardboard to achieve the perfect depth and hole size before final installation of cabinet backboard and caulking.
Check out this vid of my fine tuning temps so top to bottom are identical, MIND you I messed with a taped piece of cardboard in the bottom and re-sized the return duct opening numerous times and the depth of the bottom shelf to get the temps the same. It wasn't an easy feat and my bum hurts from sitting in the kids little chair watching the thing and making minor adjustments! HA HA HA
This vid is before I added the permanent backer board shelf at the bottom as I was adjusting for perfection. I could technically include a hatcher in the bottom or another egg rack, but I dont want to hatch in it, but it has plenty room for additions stuff, also if you note the cut outs in the side of the cooler, you can easily take out the racks and turn this quickly into a multi level hatcher, we may do another for a hatcher and find plastic tubs to fit in the slits.
WE ADDED TWO pcs of 2x3's to the bottom just screwed in with galvanized decking screws, just in case it had a wobble effect and to lift "off" the table for easy opening.
We drilled the holes for our CERAMIC light sockets
We also drilled vent holes 7/8" paddle bit, we covered them and would only open the top up for use as a hatcher
Also drilled 7/8" holes down the left side of the incubator for ventilation, these remain UNCOVERED
Then the lid was also cut for the plexi, 8x10" plexi x2 Lowes $1.98 each.
Trace the plexi and then again REDUCE template so you can fit screws in.
Drilled first to get jigsaw started
We decided to angle the plexi and slide it under the top thin pc of cooler plastic, then we pre-drilled and screwed and since the plexi was between the foam insulation and the plastic it sealed well with four screws.
We tested our fans before installation to make sure they worked, as you can see its only 12V and nothing to be too scared of. We cut an old Power Supply seen below and wired them up.
WE USED ONE POWER SUPPLY FOR EACH FAN, in case one went the other fan would still run!
Not sure what these are called below? but you need a spacer of some sort to install the fans so they don't hit the cooler, see below for spacers and installed fans with spacers, NOTE: there is a dip in the cooler at the drain plug, we didnt put a screw in either fan in the inside top corner, no need either as three screws each were fine.
We pulled the wires through the drain plug.
Below you can see we used two power supplies,
One is not like the other, because its what we had on hand.
we cut 2 pcs of 2x3's and drilled and counter sunk them onto the cooler. Long enough to go to the top of the fan box and below the lower return hole. Then we caulked the outside and inside.
we cut a pc of left over foam insulation and used washers on screws to install over the 2x3s
So the inside dept is the width of a 2x3
We cut two small pc of insulation board to cover the top and the bottom and sealed it with metal duct tape
We made sure we wouldn't have leaks in this air duct.
With insulation..
Now is a good time to install a handle to pull as you push to seal the door closed. We thought of latches but cannot find any local. The lid is way too thick to accommodate a normal handle, would need a gate handle that screws in, but a normal handle worked on the side!
then we installed our wafer thermostat available all over the internet $22.
and you need a cord
I could retype how to do this part but its already been documented very well on an online site so Please
refer to wiring diagrams for either single or double light fixtures in this
VIDEO
(scroll to bottom of link page)
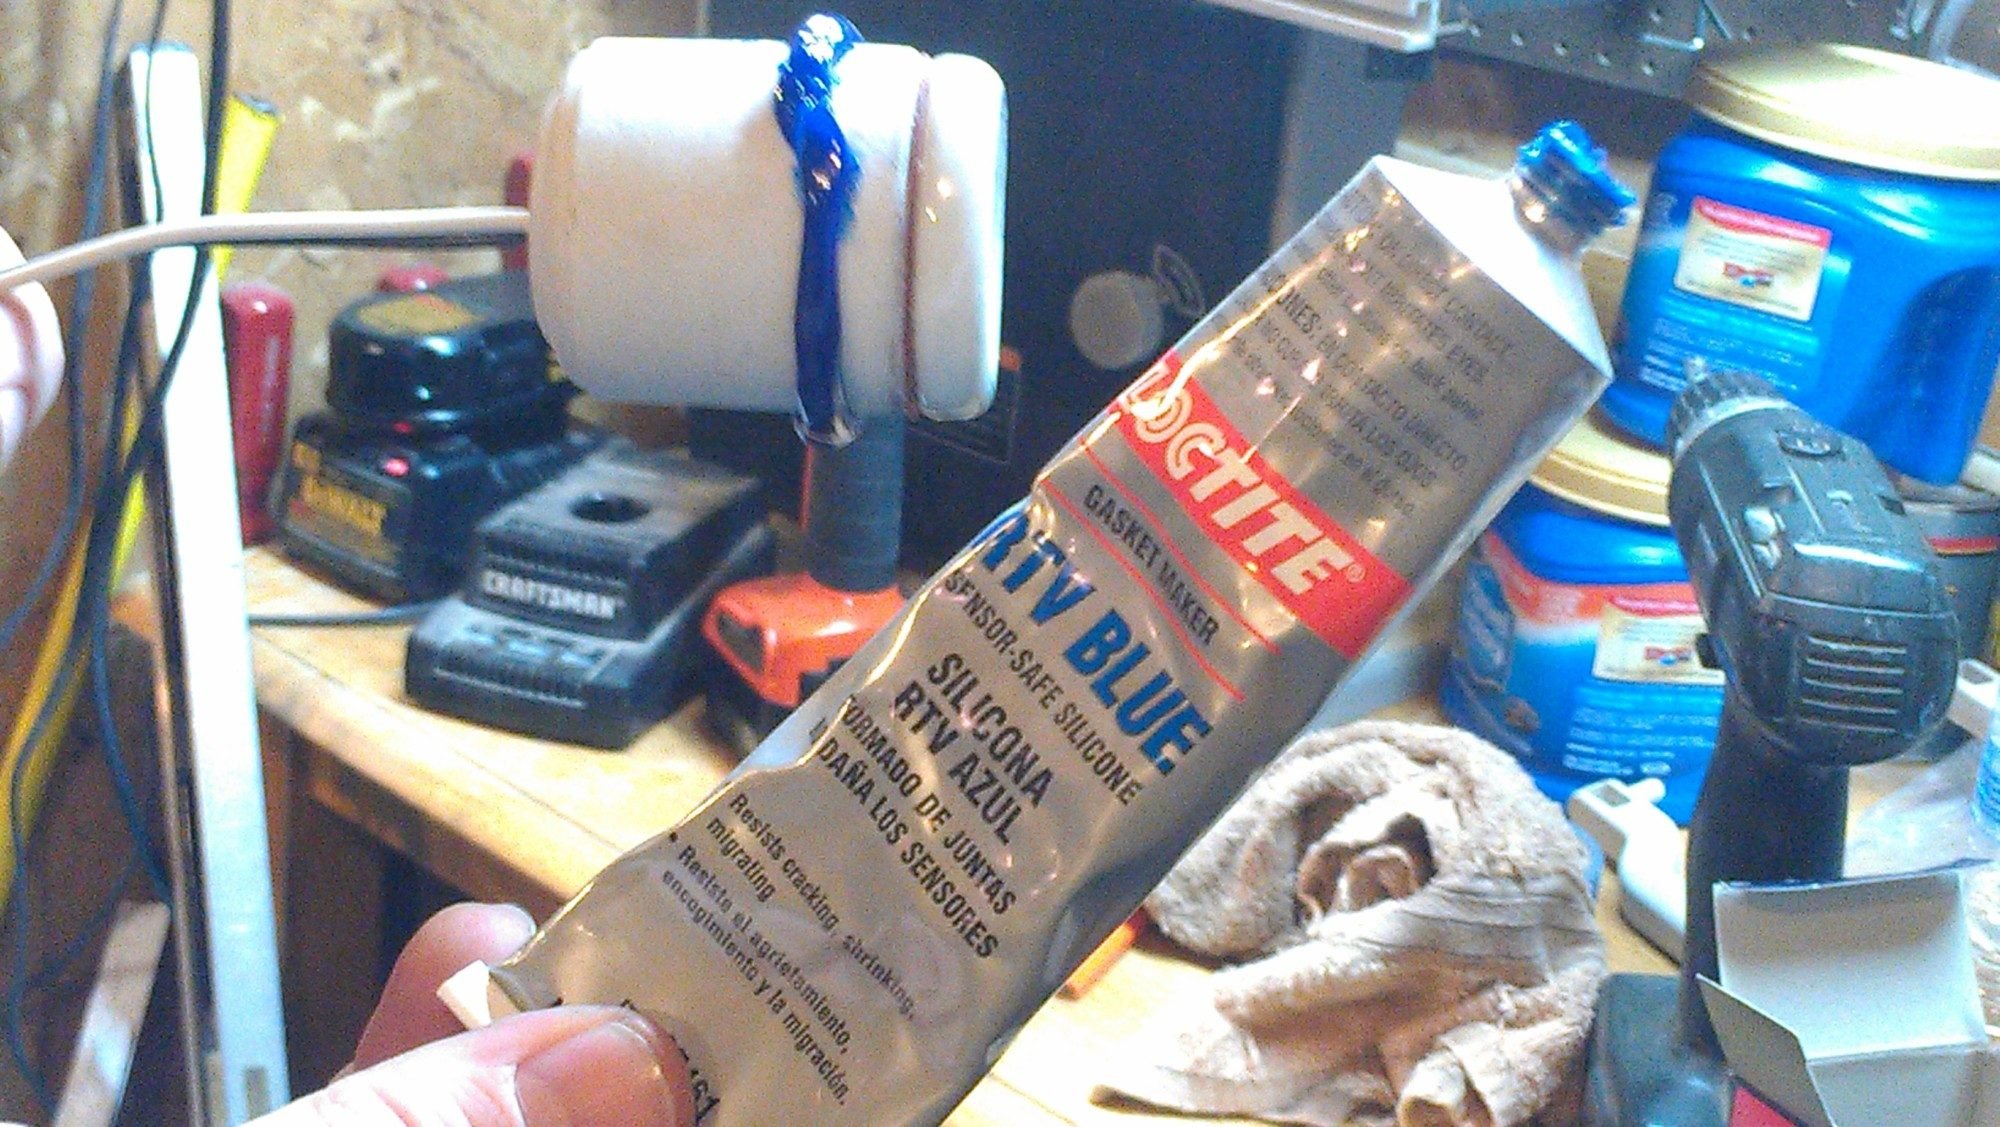
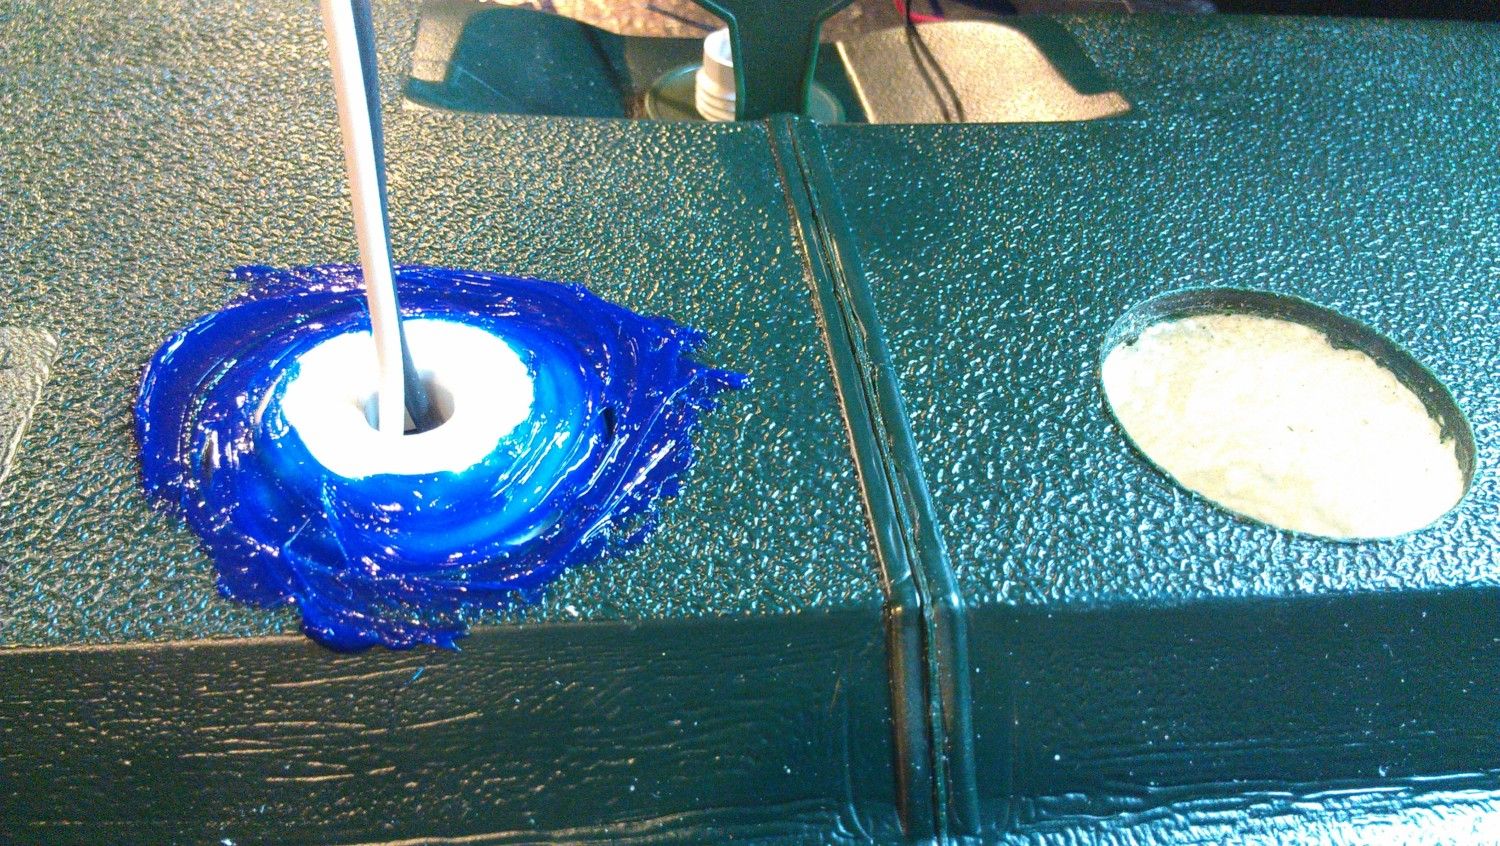
NOTE: this cooler is extremely thick with insulation so we had to drill out and pull out some insulation in order to install the thermostat, we put the cut circle back in with some silicone. WE DID NOT PADDLE CUT ALL THE WAY THROUGH JUST LIKE A HALF INCH PAST FIRST PLASTIC LAYER NOT INTO INNER COOLER, just the initial drill hole for the Allen wrench adjuster
SOME NOTES: The traditional wafer-type thermostat uses an ether filled capsule which expands under heat to mechanically activate a microswitch. On contracting as the incubator cools, it releases the microswitch, thus switching the heater on again. These are also very reliable and maintain a stable egg temperature even though the air temperature maintains a regular “wave” pattern. Wafer Thermostat is Adjustable between 75 and 120 degrees F. depending on room temperature. 110 Volt AC Power ONLY
HERE IS A PDF for a DOUBLE wafer SET UP, installation of two in case one fails. Always suggest to keep extra wafers on hand just in case! http://www.gqfmfg.com/pdf/1202 1250 Cabinet model instructions.pdf
Here are the links to the wiring diagrams for DOUBLE WAFER INSTALLATION to add the double system like the GQF does
http://www.poultrysupply.com/manuals/GQF3255_3002Thermostats_from_Kemps_Koops.pdf
http://www.gqfmfg.com/pdf/THERMOSTAT WIRING.pdf
I forgot dimensions so here they are after installation
We found these heavy duty ceramic light sockets at our local supply store dirt cheap, you can find them or ones that are already wired at lowes, OF COURSE ALWAYS CERAMIC, we use 90 W lights x2 TWO LIGHTS are ALWAYS better than ONE! If one blows you have a back up!
We checked to make sure the wires were connected securely and tested them with lights BEFORE installation
installation of sockets, HAD TO DRY overnight
See placement measurements below
You can see the depth of sockets below in image
Also note we used a left over pc of shelf for under fans to fit in slot, see measurements below for shelf depth
More pics of our wiring..... again link above for SIMPLE DIAGRAMS!
Its not as complicated as this appears! truly NOT!
Semi Auto turner...
Three or four egg racks ebay Stabil Incubator 48 Egg Plastic 6 Tray Flats $21.99 for six
THESE ARE USED so we bleached and sterilized immediately.
NOTE: The only reason our turning Alum Rod doesnt go up through to the top of the bator (for turning w/o opening) is because the incubator is 42" plus the base 2x3s and added table underneith, I AM SHORT 5'2 and shrinking every year at this point
Its just like all my other coolerbators just a different arrangement with more convenience. In the spring I can replace the rod if we decide to build a custom cabinet to hold it out of skids, but our skids are still buried under snow and ice.
three or four rods for the tuners, see size on label $1.95 each Lowes, can use dowels I guess
three or four clevis pins for turners
Simple turning rack which was screwed in each side... PLEASE watch video for how they work.
Also needed a alum flat stock for attaching all trays together.
I simply cut rods to length and ziptied the racks on. I will be switching the zipties out with hose clamps because zip ties can become fragile and break at some point.
NOTE bar placement......
you do use up one row of the 48 egg slots, so your capacity is then 42 still not bad
also install with the side that will have 4 rows of eggs FRONT, this way you can put your side rails back just a tad more too.
NOTE: if at some point I feel the trays do not have the strength to hold the eggs (which doesnt seem likely at this point, they are very very strong) I can always follow through with the angle alum squares to hold my trays.
Here is hubs showing off his handywork of my GENIUS! HOWEVER I did get yelled at because I put the "darn thermometer" in his way for when he took the tray out!
Has some tweaking needs done, but Its awesome!!
Clevis Pin holds rack, undo pin when using loop to hold level and remove trays.
Loop we made to hook on to level egg racks when working with eggs or removing trays below
When tilted in lower position the alum bar just rests on the bottom of the cooler
When tilt in upwards position there is a round eye hook bent open a tad to hook the hole on the top of the bar to hold them in up position.
The trays are even level with eggs filled, I am paranoid of this angle 45 degrees, as I never had a turner like this and its like HANGING AND EGG OFF A CLIFF! HA HA HA
There she is.... or he is <shrugs>
Disclaimer:
Please note this information is offered as friendly advice only and, whilst I have made every effort to ensure it is accurate, I can not be held responsible if it proves not to be useful in your case!
Last edited by a moderator:
") I do not suggest that. It's better to drill holes and add more till
I do not suggest that. It's better to drill holes and add more till


