Duck Houses

Pics

dixygirl

Songster
11 Years
May 14, 2008
957
11
151
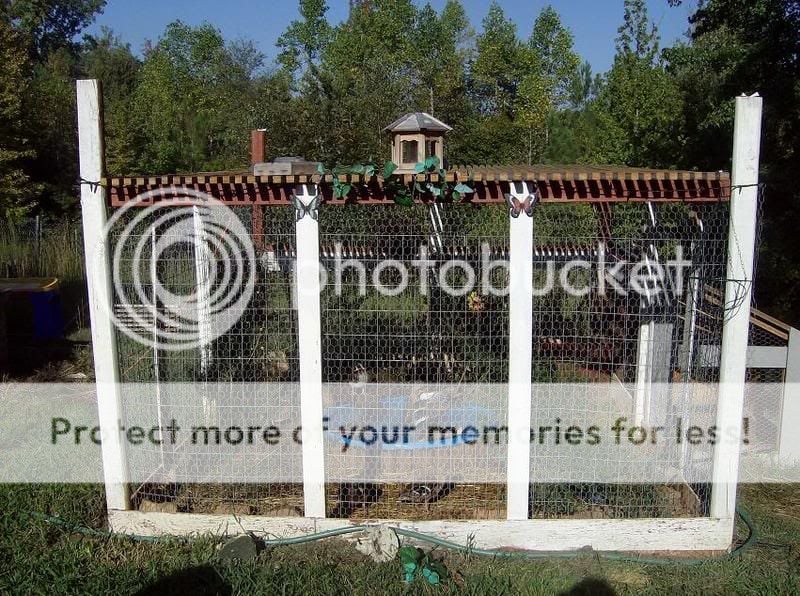
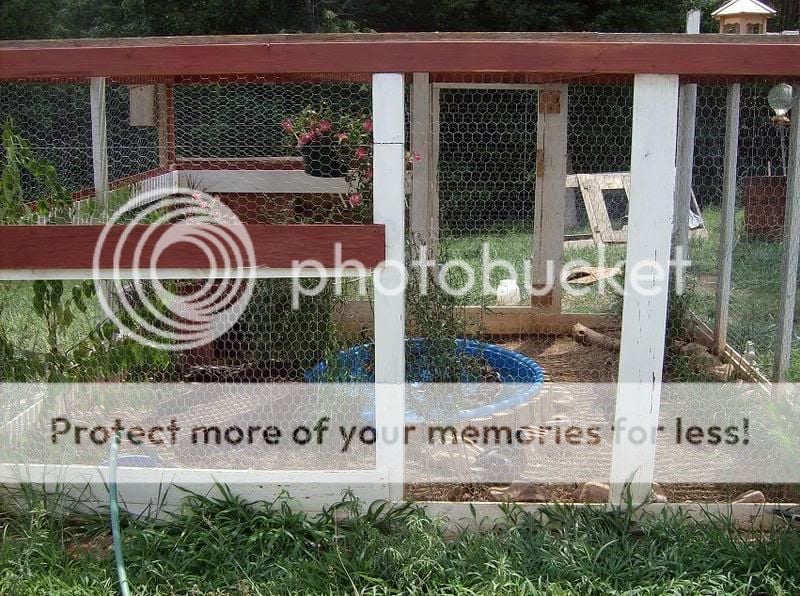
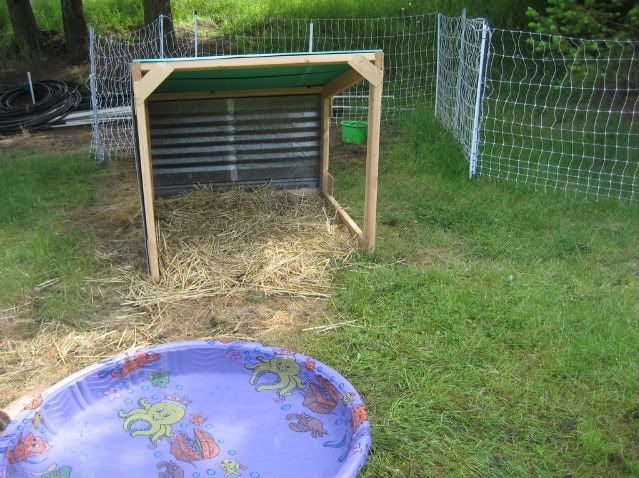
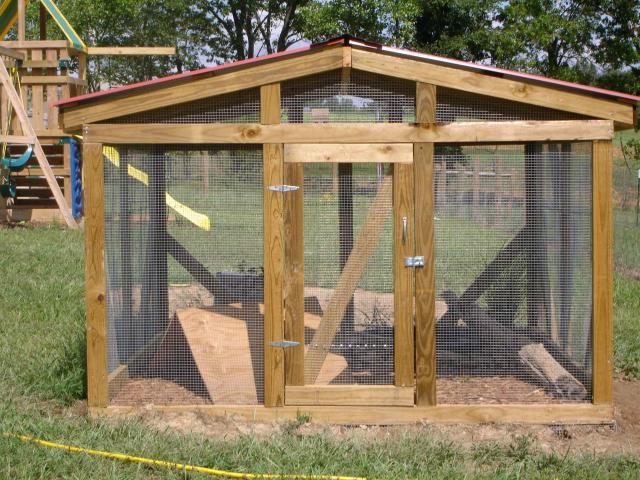
I see so many chicken coops here but no pictures of duck housing.

Please post pictures of your ducks in their housing. I need some ideas please.
pop.gif
 
Here's my duck house. I LOVE ducks, but they are the messiest creatures on earth. For their pool, I dug a large pit in the ground, and put several boards over the pit. The pool sits on the support boards. I drilled a hole in the bottom, and put a regular bathtub plug in the hole. Now, I just pull the plug, and all that dirty water drains into the pit below, then soaks into the ground. It is the easiest way to change water, and the ducks love it!

Here are a few views of the house. Some of these pics were taken last year, and I have since put tough livestock wire around the pen. Hope you like them:)
HPIM3426.jpg


HPIM2594.jpg
 
I switched out the sand (which was on top of crushed limestone) for round pea gravel. The sand would never dry. The pea gravel dries awesome and drains even better! I can just hose off the rocks and the poop disappears. The smell is also gone. I'm so impressed!

I was told if you can walk on it without any pain, it is good for your ducks. I tested it out barefoot and it was just fine - no "ouch" "ooh" and "yow".

 
We finished our 'Duckie Palace' this weekend. We've got 3 ducks, 2 Pekins (Chunk and Squirt) and a Khaki Campbell (Khaki) and these are the new digs...

It started with a 6'x5' chicken coop built by a local shed manufacturer (and built solid like a shed!). We modified it a bit inside for the ducks by removing the lower roost so they would have ample wing span stretching space, and made a shelf out of the upper roost for food/shaving/etc storage.

We then added a protected 6'x8' run to the side for when we aren't able to let them out in the yard....

The run framing is all 4x4 pressure treated lumber, and the floor is made up of 3" of washed 3/8" river stone, covered with a layer of 4" plastic pallets (for air space over the rocks), and a 1" rubber horse stall mat layer on the top. The 'indoor pool' is a 10 gallon low sided plastic wash tub, and there's also a 5 gallon waterer, and a PVC gravity feeder.

The mesh side panels are 1/2x1/2 welded, galvanized, vinyl coated wire - stainless stapled to the frame, and sandwiched between the framing and the trim. We put on a 1/2" plywood roof, covered with the steel wall panels of a pole building as the final roofing material.

Finished the wood up with a coat of grey paint to match the house and deck, added some black iron hardware and a vinyl rain gutter at the rear roof line for rain runoff, and vinyl gutter at the rear floor for washing the pen out (the rear bottom frame cross member is 1/2" off of the floor to allow the water to pass through the back when hosing the pen out).

First go at a duck pen (or anything like this actually), we are quite pleased, and wanted to share!


Here is my house. I will add a 3rd side for the winter, and a board across the bottom to hold in a deeper layer of straw. It doesn't usually get below 25 degrees in the winter, I can always pile some straw bales across the front and just leave a little door if needed.
I wanted it to be light and portable to move around with the electric net fencing.

IMG_4020.jpg
 
Here is what I did with my pool.
I got an extra large one, but it is a pain to empty and make sure it is clean. So...

I bought a hose mending kit, washers, and a plastic hose end cap. I already had a kiddie pool, silicone aquarium sealer, and some old hose.

I drew a circle on the pool the size of the connector and used a hot poker to make the hole.

Then I put the connector through the hole and added the washers on to both sides. Next I sealed it with the aquarium sealant. That had cure for two days. I actually have to redo this part as mine is leaking just a little, but it has not been too big of a problem.
DSC02834.jpg

DSC02833.jpg

Put the clamp on the hose and then I put a hose piece on the inside of the pool because I didn't put mine as close to the bottoms as I should have. Really check when you make the hole how low it is.

Then I put the other clamp on the other hose piece and attach on the outside. This piece has a male end on it- the cut end attaches to the connector thing . I think this might be a good place to use the sealant again.
DSC02836.jpg

Once that dries attach the clamps inside and out. Put the end cap on the male end of the hose.
DSC02837.jpg

I hope that makes sense. I attached pics that hopefully help.
 

New posts New threads Active threads

Back
Top Bottom