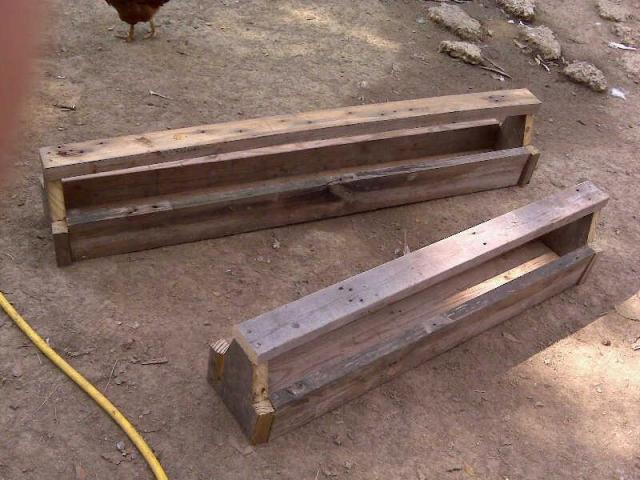
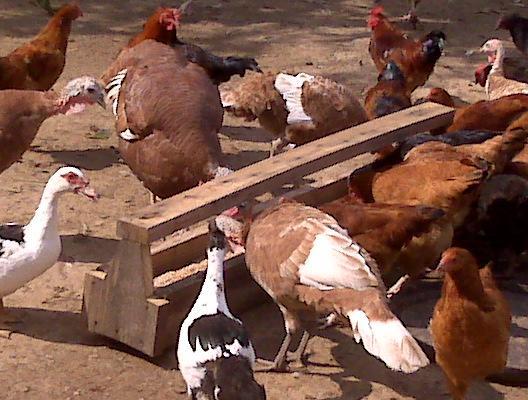
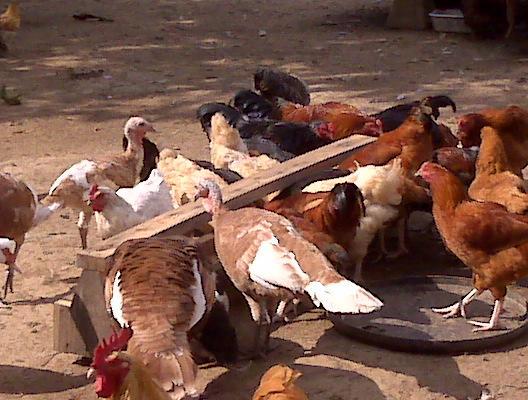
These were made from Free recycled wood. My animals free range on a lot of area, so I have feeders placed in different locations for them to eat. Some are 4 feet long and some are 5 feet long.
mtnpull, I like your feeders. They seem like there will be less waste. Thanks for posting your pix. They are a great help! (I am a newbie with 5 chicks- 3 wks old--in the process of planning the coop and all the accoutrements). yikes! (is there a smiley for that word?)
I don't have a feeder made yet but I made my waterer out of a simple plastic pitcher and the push in nipples I bought on ebay. It hangs from the handle inside my run and is poop freeeeee!! (just about the only thing that is
) Cost 9 bucks total. 3 for the pitcher and 6 for 3 nipples. Worked in my brooder as well as outside. Because its just a pitcher its easy for me to move around and clean regularly, plus the lid on top allows me to dump in ice on hot days.
Quote:
i've been pondering the same idea since last night, wondering if it would work without it being connected to the plumbing. i'm glad to know it works
right now, my dozen chicks are only 3 weeks old and this morning, i rigged them something with a small ziplock type round container a piece of tube, a dish soap cap and a 1L soda water bottle. i was fed up with the water dispenser i bough at the farm supply store. the jar didn't stay screwed solid and it made a lot of mess, not to mention they were pooping in it.
the only thing i'm worried about with the type of set up you have is how to keep it from freezing in the winter. i should probably avoid any set up with tubes for the winter
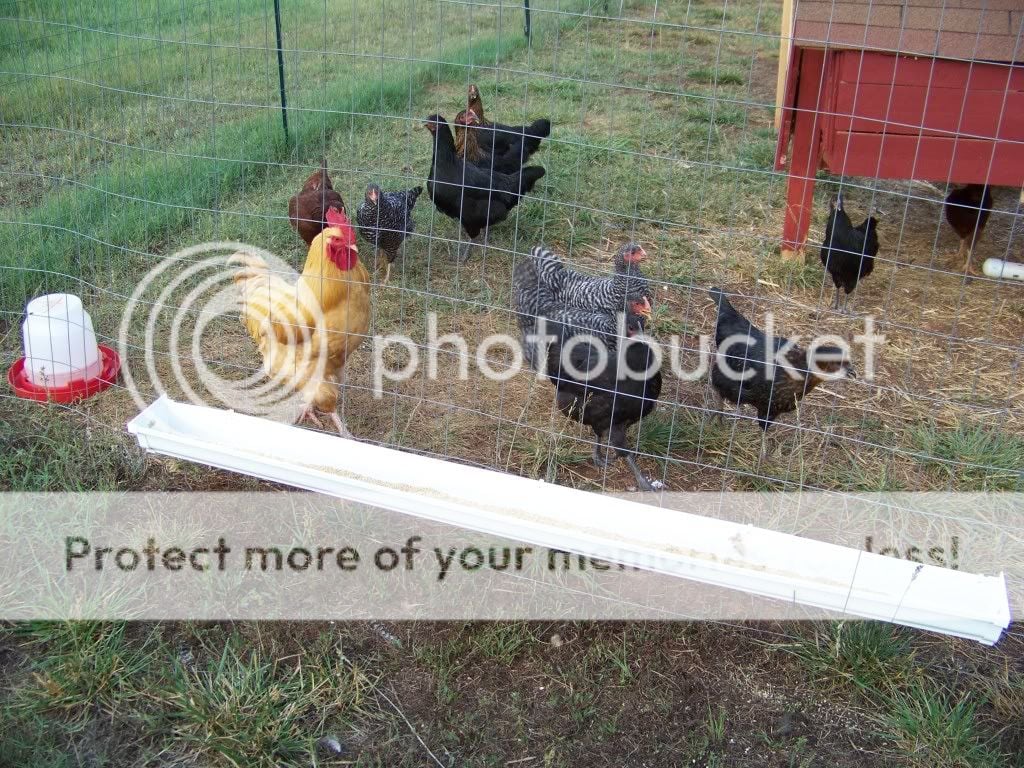
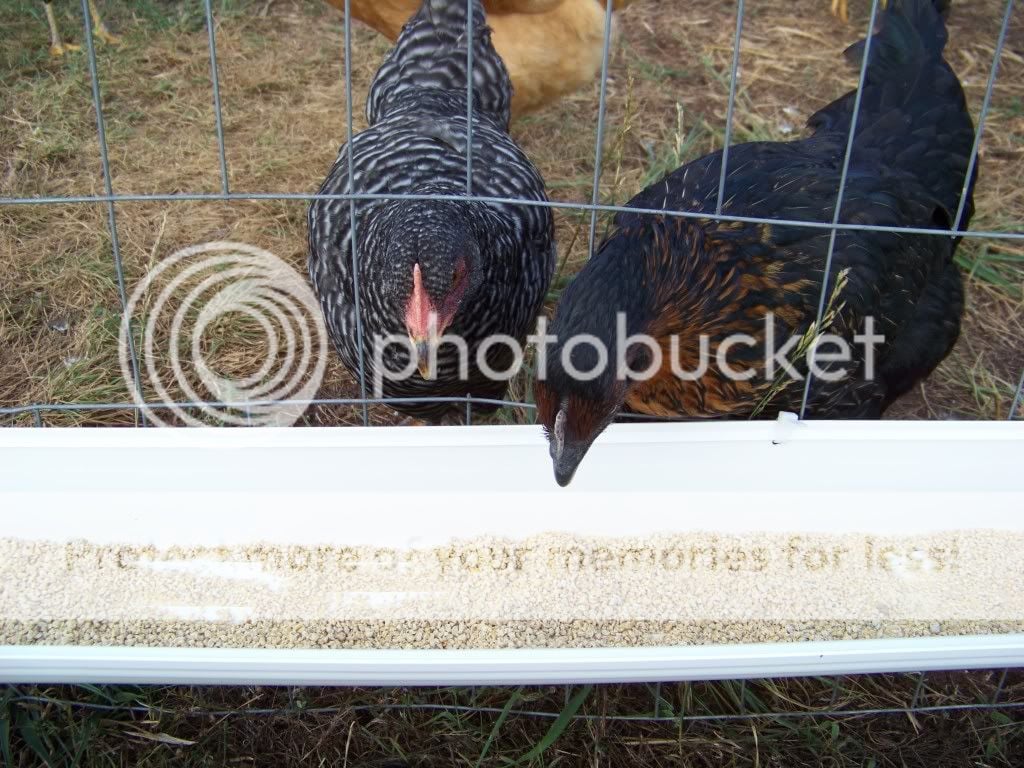
We made ours out of gutters. My children wanted to be able to feed them but I did not want them going in the coop as much. They enjoy just standing outside the run feeding them so we wanted something outside. We actually got this idea when we built bookshelves for our house. The idea seemed so simple.
So, I bought a piece of vinyl gutter and two end caps. Screwed some holes in it, zip tied it to their run fence and then cut out every other piece of their fencing so they could easily stick their head through. It works great. I only give what I know they will eat in one day. At night when I lock them up I just take the right cap off and spray it out with a hose, refill the next day. Cost about $6 to make. It originally was going to be 8 feet but on the drive home my daughter let it sit all twisted and the gutter was warped on one end, so I had to cut it off and make it 4-5ft, can't remember.
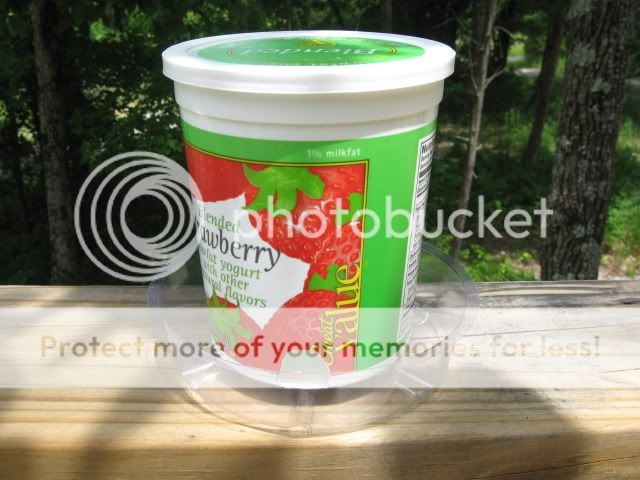
Today I managed to rummage around my house and find some good materials for chick feeders and waterer!!
~Materials I used for feeder:
-1 quart (16 ounces, or 2lbs) plastic yogurt jar
- 1 small plant tray
-1 nut and bolt
~Tools used to make feeder:
- Anything sharp (used a nail)
- Kitchen scissors
-Cordless drill
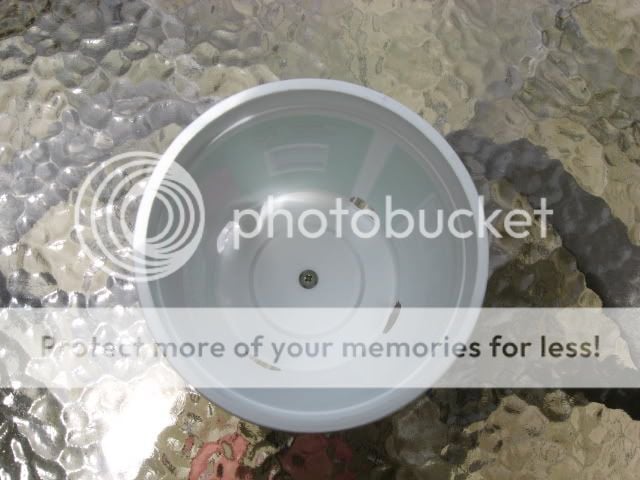
Inside view
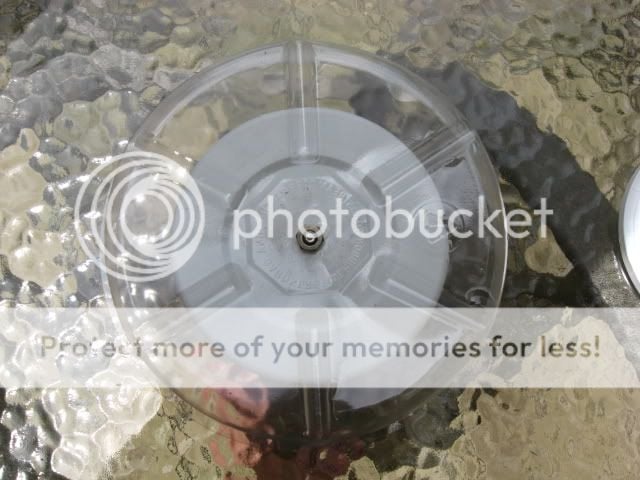
Bottom view
~Materials for waterer:
- 1 quart plastic yogurt jar
- 1 plastic TV dinner bowl
- Hot glue
~Tools used to make waterer:
- Kitchen scissors
- Hot glue gun
I made the feeder by cutting out four holes on separate sides of the jar.
I drilled a hole through the jars bottom and the plant tray, then screwed the nut and bolt in. Already tested this, it works great!
As for the waterer, I only cut out one tiny hole on one side and super glued the yogurt jar to the TV dinner bowl. (which I trimmed back a bit because it was too deep of a bowl.) This works well, too. On the inside of the waterer, I marked were the water level should be so it wont over flow.
Today I managed to rummage around my house and find some good materials for chick feeders and waterer!!
~Materials I used for feeder:
-1 quart (16 ounces, or 2lbs) plastic yogurt jar
- 1 small plant tray
-1 nut and bolt
~Tools used to make feeder:
- Anything sharp (used a nail)
- Kitchen scissors
-Cordless drill
Inside view
Bottom view
~Materials for waterer:
- 1 quart plastic yogurt jar
- 1 plastic TV dinner bowl
- Hot glue
~Tools used to make waterer:
- Kitchen scissors
- Hot glue gun
I made the feeder by cutting out four holes on separate sides of the jar.
I drilled a hole through the jars bottom and the plant tray, then screwed the nut and bolt in. Already tested this, it works great!
As for the waterer, I only cut out one tiny hole on one side and super glued the yogurt jar to the TV dinner bowl. (which I trimmed back a bit because it was too deep of a bowl.) This works well, too. On the inside of the waterer, I marked were the water level should be so it wont over flow.


 You have helped me &' my baby chicks out by a LOT!!