I live in a good sized city, about 14 million registered residents, but I thought having some chickens in the apartment would be an interesting thing to try.
We bought two to try it out, never expecting them to live past a few weeks.
Well, they did... Then chicken math took over and now we have 23 chickens and 2 turkeys.
As you can imagine that number of birds takes a good sized coop. However, we live in an apartment on the 18 & 19th floor. So we had one option, the roof. Luckily our apartment had the 19th floor walk out garden and a little space where they put some decorative concrete "fins" on the building.
I bought a concrete drill and decided to go to work on turning that space into a coop.
The coop space is about 5 by 23 feet (1.5 by 7 meters) and slopes up from about 4 feet by the window to 8 feet at the end of the building. So we are really lucky to have that dead space right next to our garden to use.
It started by drilling holes in the wall that was about 1 foot thick to make a door between the garden and dead space, then pouring some concrete to make an even floor that wouldnt get wet in the rain. After some help with that part I was left with this:
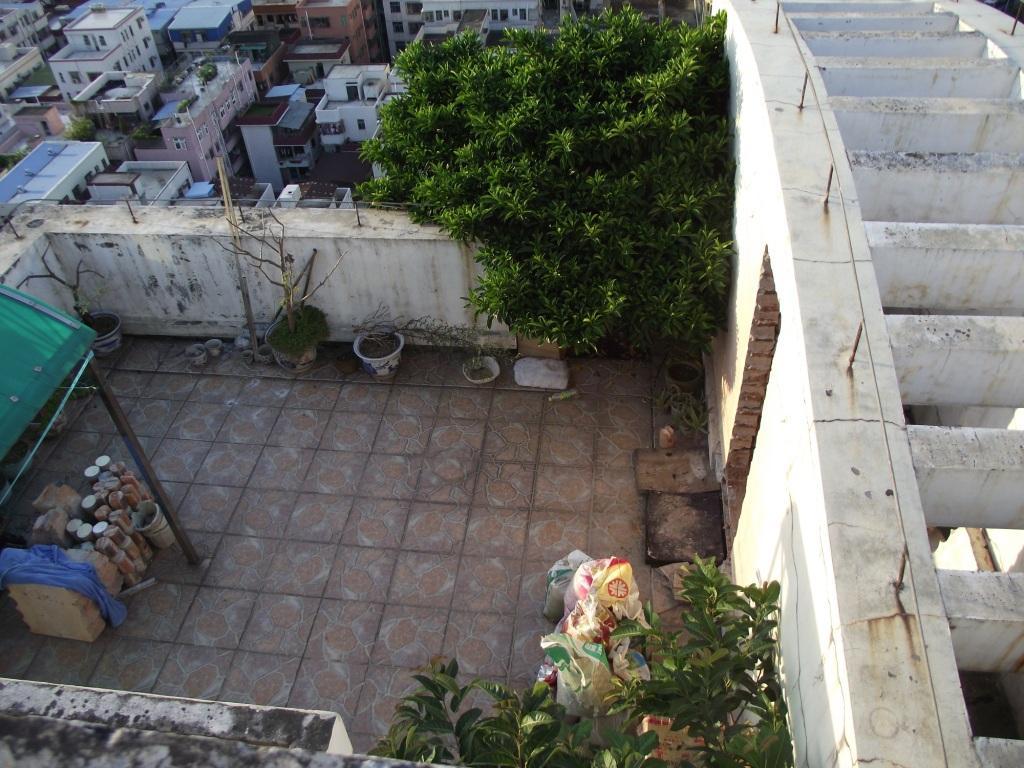
From the elevator roof showing the door cut and dead space "roof".
The new door from our house door.
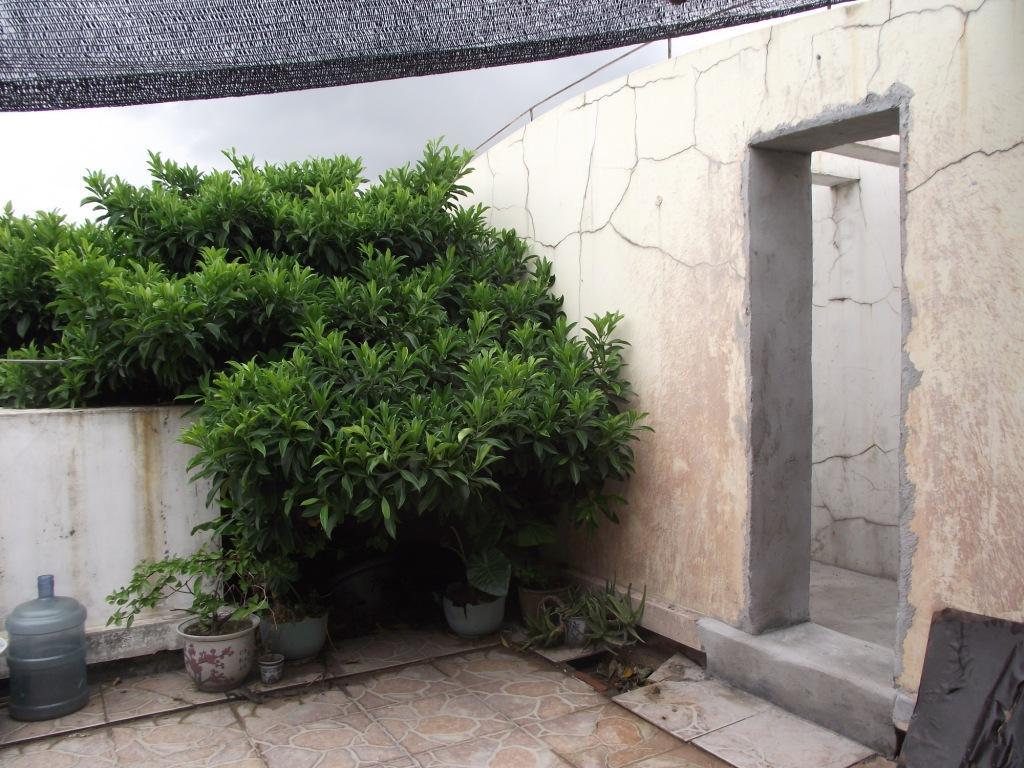
Looking away from the building. The yellow crossbeams are out in the air, the white ones are over the floor.
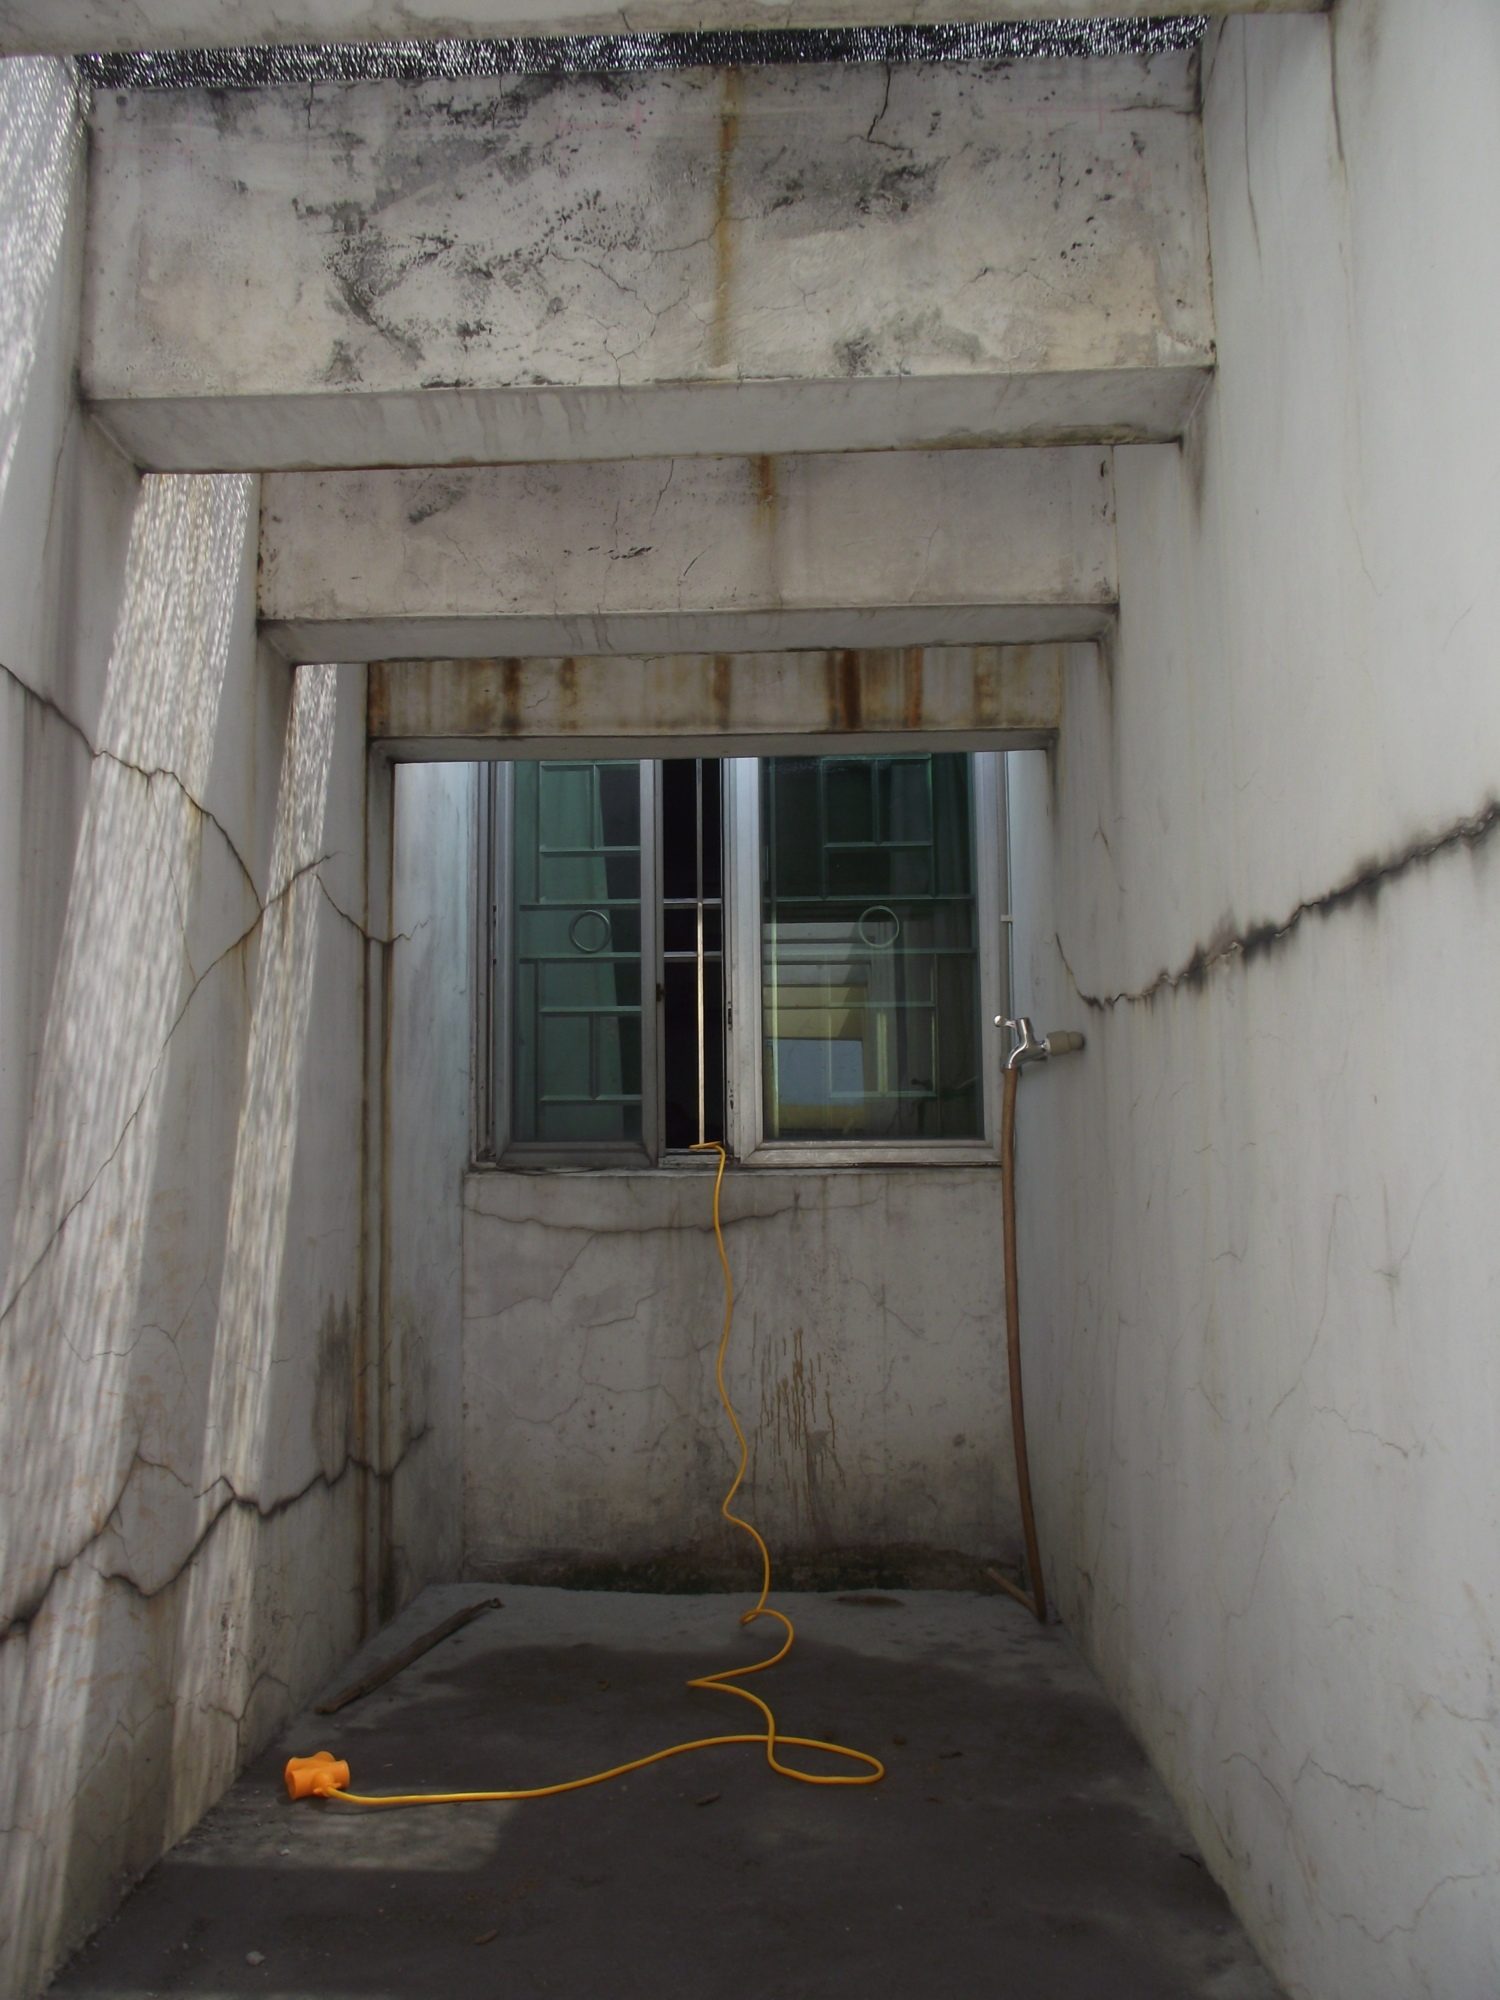
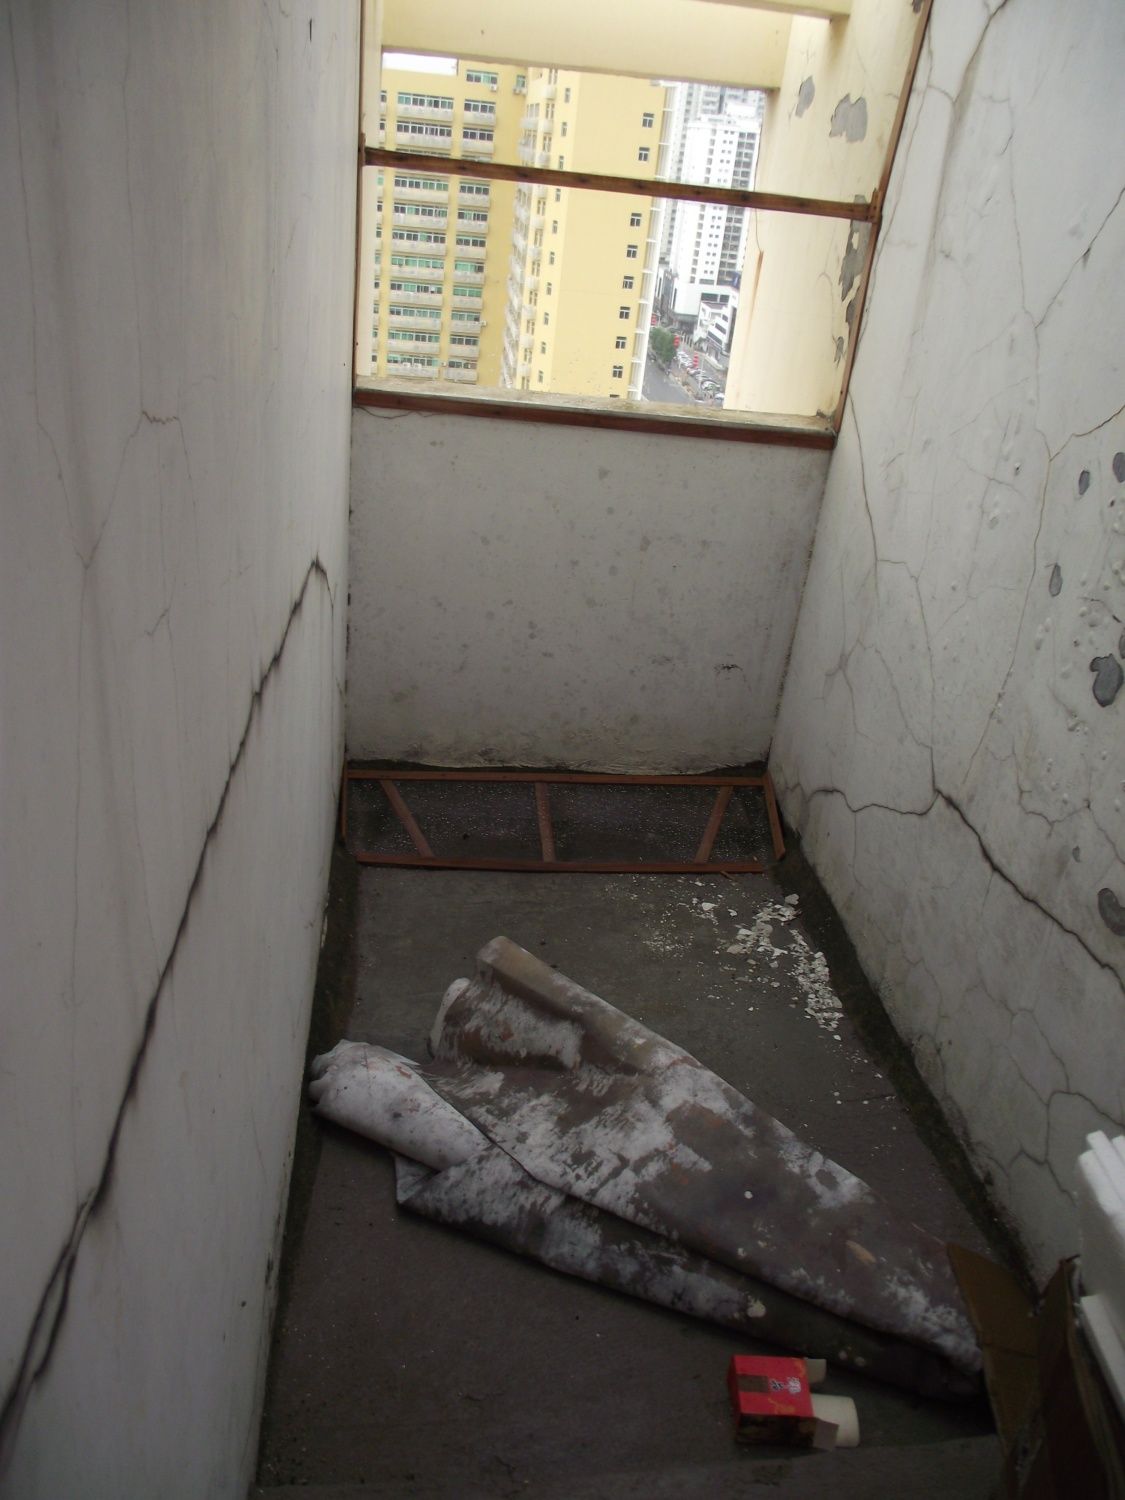
This is a window to a spare bedroom in our apartment. It will have quite a view when I'm finished. The previous view of dead concrete box was quite unimpressive.
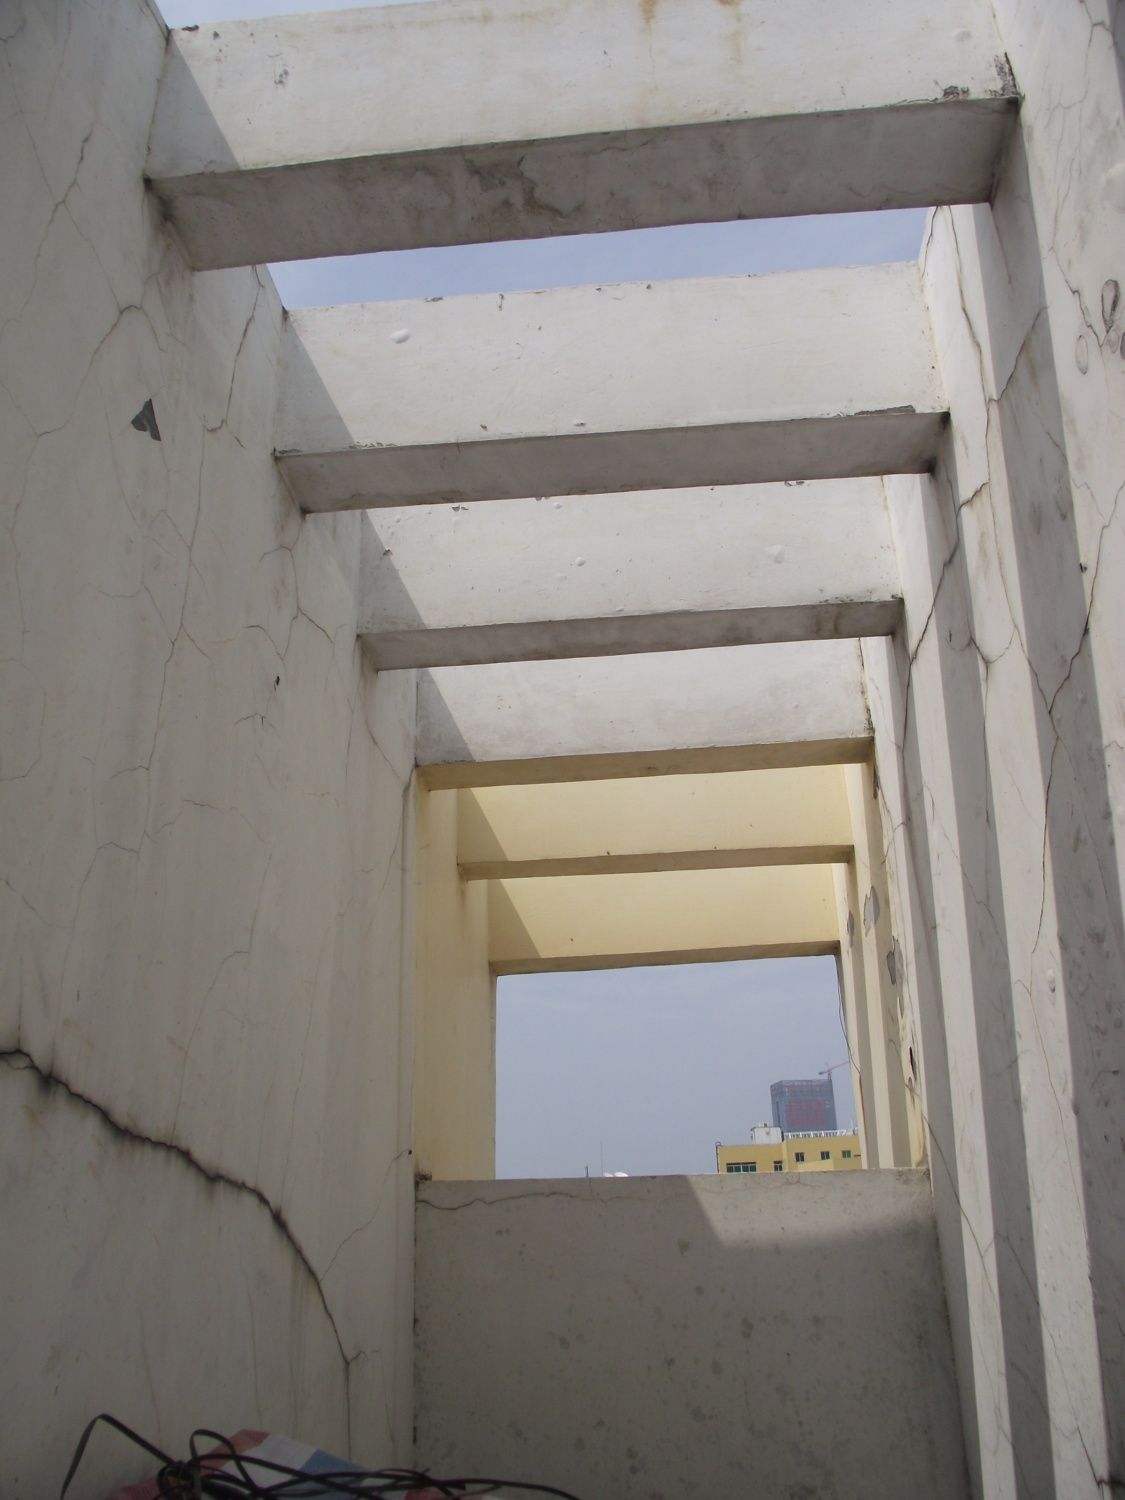
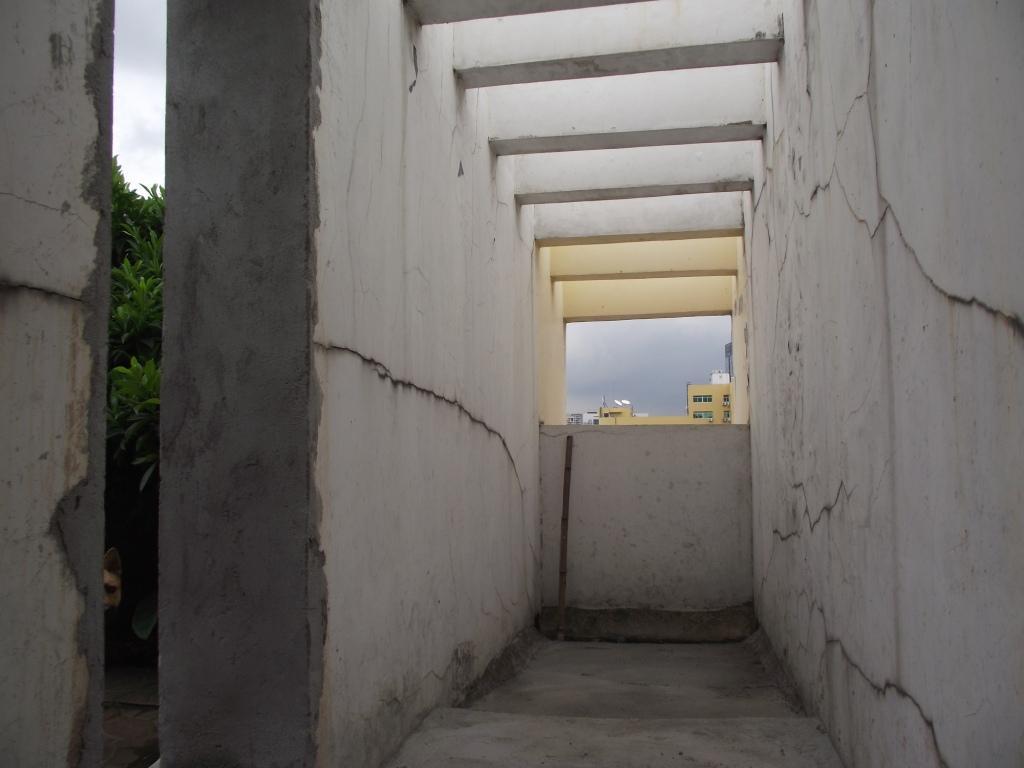
Here's a better view of the "roof" area.
These crossbeams presented a problem as I had no real idea how to secure a roof to the concrete that would allow airflow, but withstand hurricane force winds. We live almost in Hong Kong and we get at least 4 tropical storms and about two hurricanes a year.
You can see in the first picture there is a lighting rod type rebar that goes along all the roof surfaces, so I decided to attach the real roof to that rebar.
That roof has yet to arrive, it will be the tinted all weather plastic.
The big problem was what to do about predators. There arent any birds of prey, dogs, etc. here, but because of the dirty workers living in the elevator stairs we have MANY rats crawling around the building.
We took a long time de-ratting our house and while I was building this coop one rat attacked out chicks, we lost 3 chicks to that. 1 Houdan and our only two Guinea Hens. So predator proofing was a big issue.
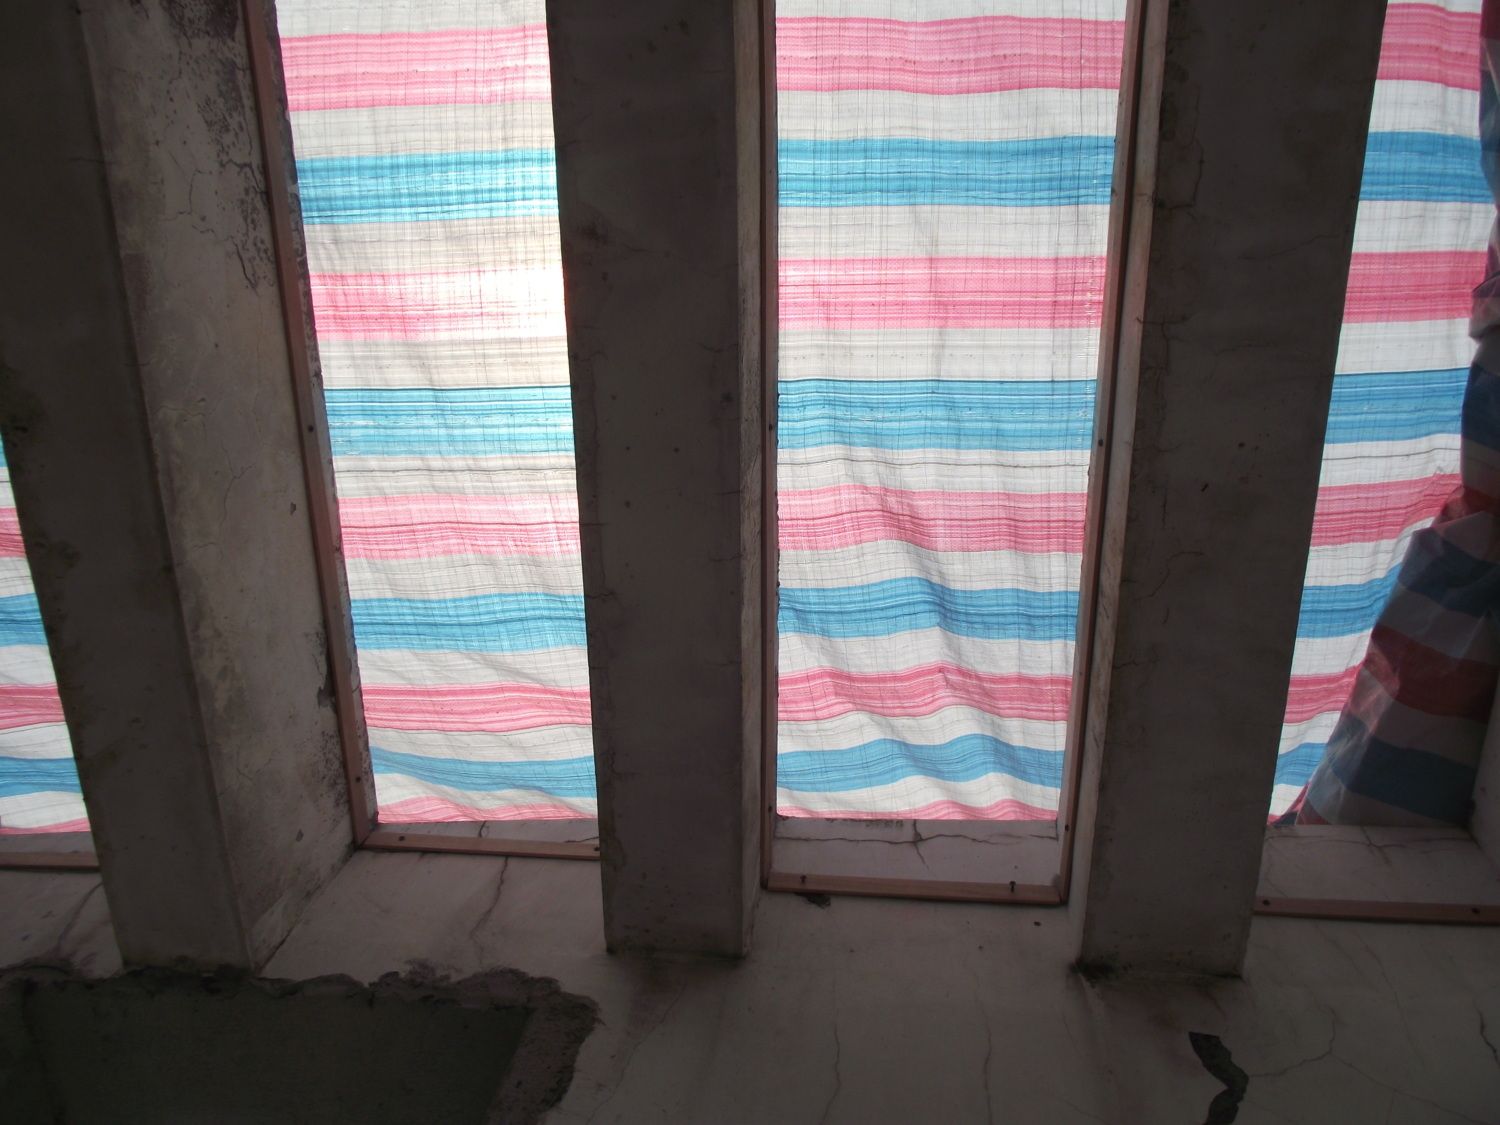
What I settled on was good old wire screens. Not the cheap plastic bug guards in windows, the old grandpa style solid wire ones. Unable to find a roll with the proper width I settled on making little boxes to put up inbetween the concrete cross bars.
I ended up with this:
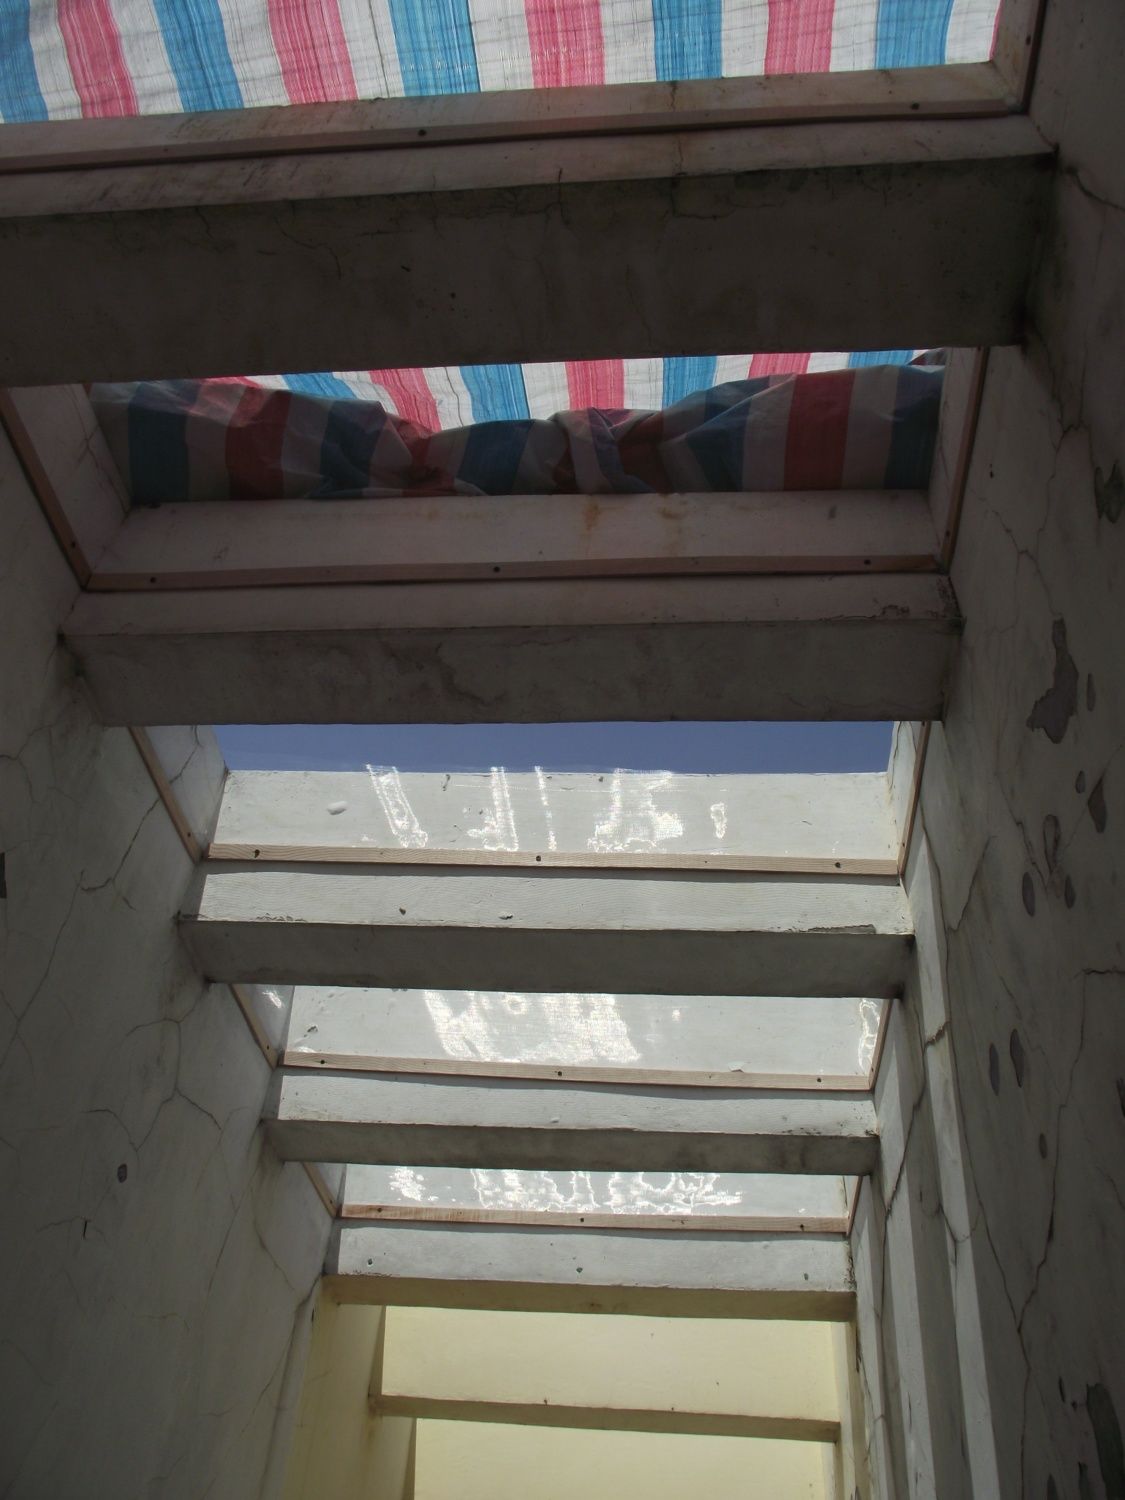
You can see a tarp put up as a light rain guard that was an "all weather outdoor" tarp...
It lasted about 2 weeks in the sun before you could poke a finger through it.
Luckily I've found a reputable hardware shop since then, and its their loss. Although its has been cheap to build, the hardware guy has certainly ate well this past month.
There's a good view of how I installed the screen boxes. I dont think it would keep anything larger than a badger out, but I needed the density to keep rats big and small far away from my girls, and boy or two.
Now the coop is predator proof. I even added some guards over the drain area to keep mosquito populations down and my chickens from drinking any crappy runoff water.
I'm about 3 weeks into the project at this point.
The next step is to build the interior furniture and doors for the girls. In the long run I plan to have 3 compartments that can be separated from each other, but that will happen over time. As you can see in the next set of pictures I'm building what I can when I can.
The whole process is extremely rewarding and if I have a day off school then I spend the whole day working on whatever I can. Except today, after a two day holiday, continuously making doors and roosts my soft supple teachers hands need a break.

Here's the finished door to the coop. Nothing fancy just a bunch of scrap wood we picked up cheap.
Everything is recycled here, so there's no free lumber scraps or pallets up for grabs.
Not as clean anymore either, the other project is building a garden bed, the corner can be seen under the tree.

*Sorry I dont know how to turn this photo back, it auto turned it sideways.
Still, you can see the first interior door. I figure its nice to be able to separate birds and have breeding area and laying area, or what have you.
For now its really nice to keep them out of the work area when I'm moving the furniture in.
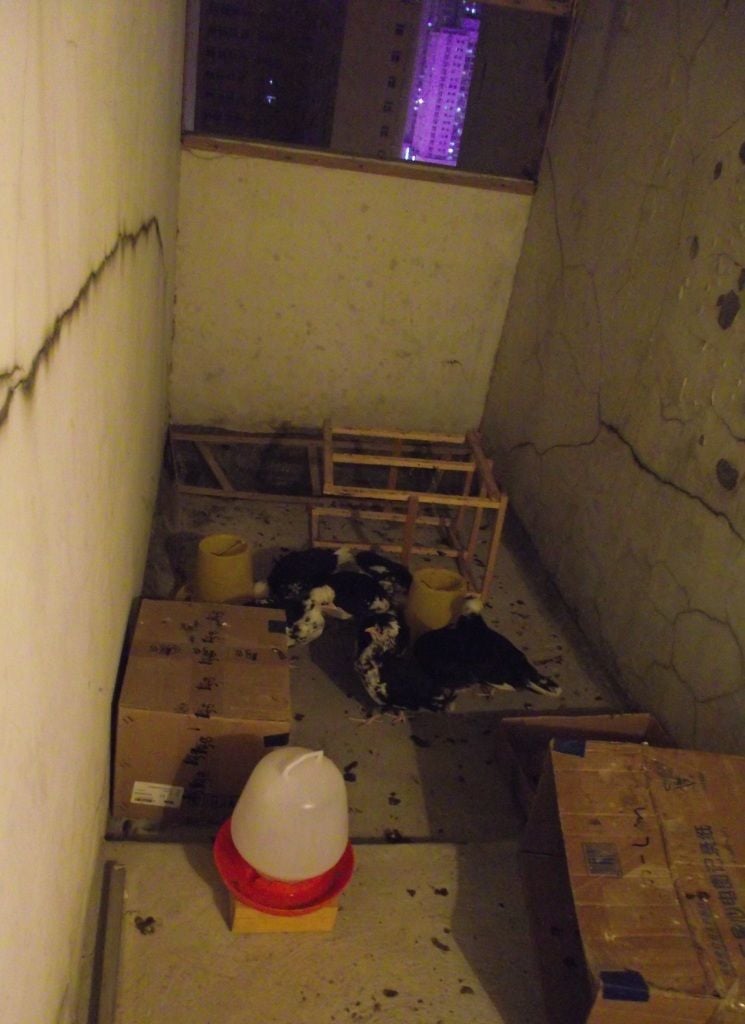
You can see the largest of our 3 groups moved into the coop, 11 Houdan and 2 Araucana? Not sure what breed they are, but they should be laying green eggs in 2 months.
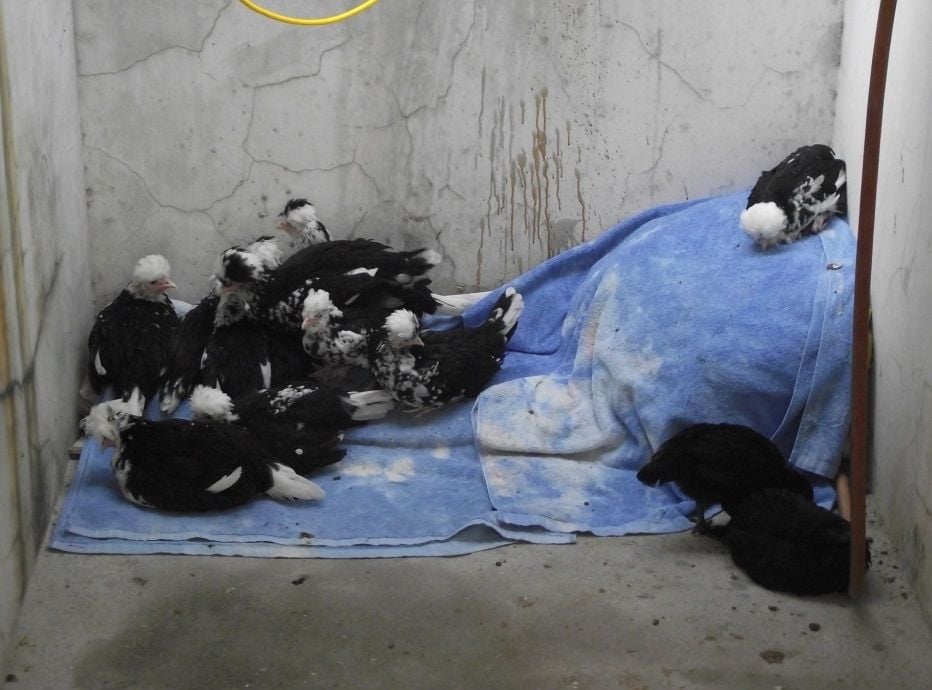
They're still using their recycled boxes and mini roost in this photo, but in the next few photos you can see they have a much nicer layout today. I "installed" some lighting temporarily and will go back and wire it in properly once I'm done with all the drilling and such.
Wake up call. They all decided that the nice towels over the tools and bags was a better place to sleep than their silly old cardboard boxes.
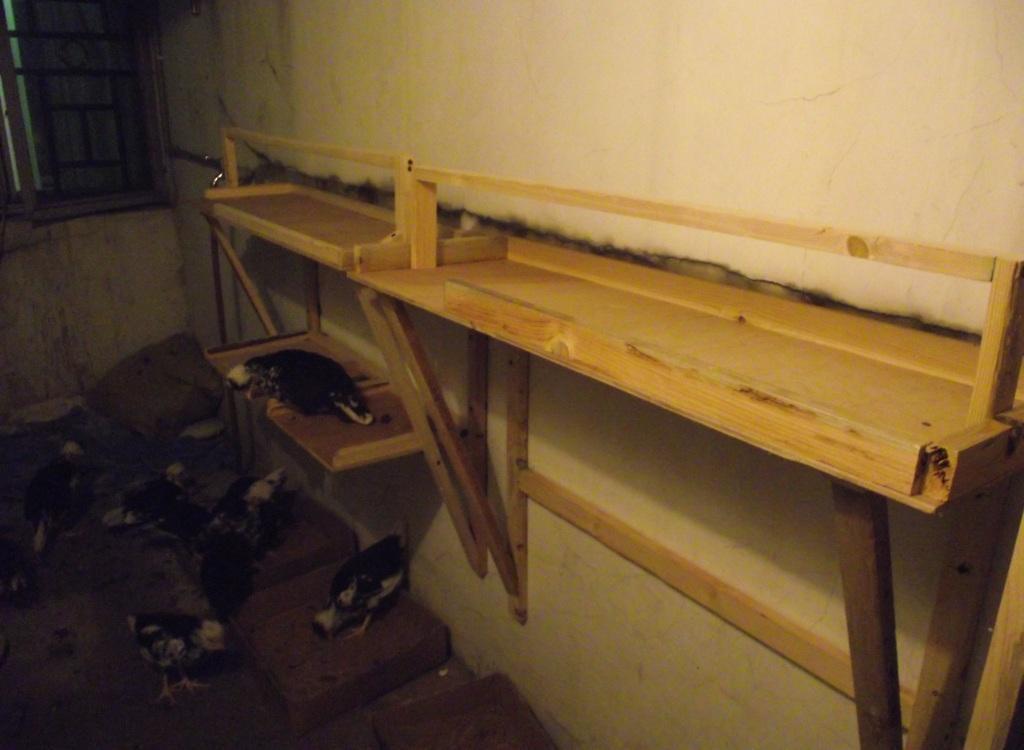
My roosts and poop boards.
You can see under the further roost I have set up two small trays. In the future I plan to turn the under area into nesting boxes.
I'm thinking its a great way to conserve space, a 3 tier chicken apartment building in our apartment building.
Your thoughts?
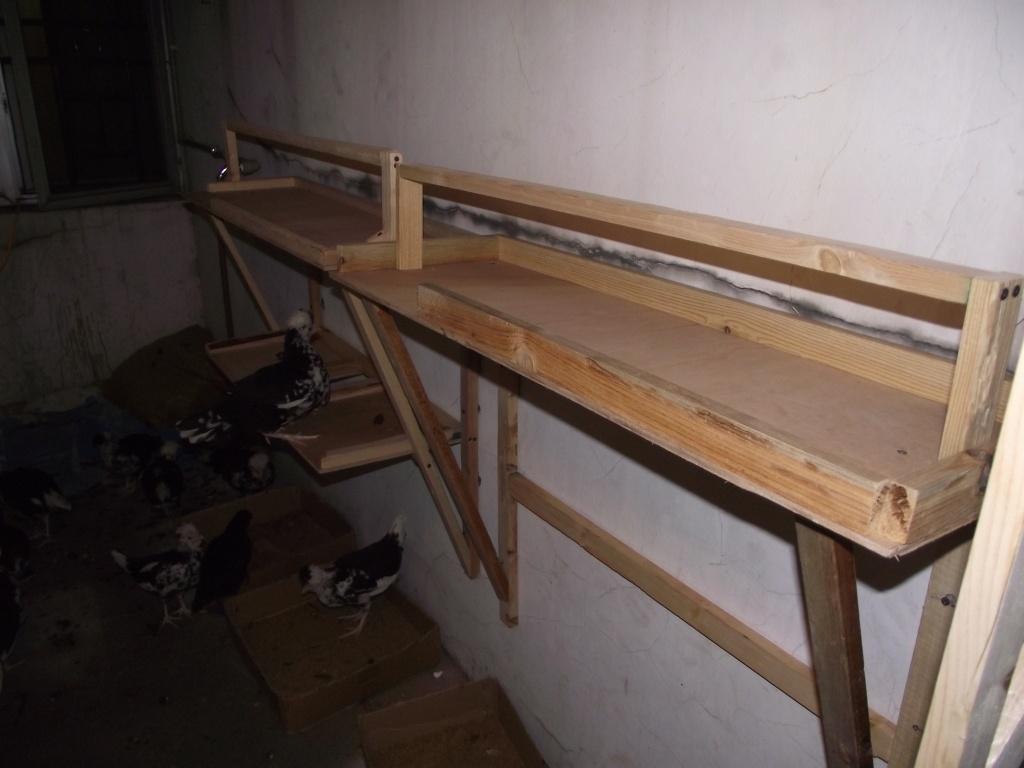
A second picture with flash, although it doesnt change much, still hard to see anything.
So that's where my apartment coop stands.
I also put up some training roosts made of recycled PVC that I managed to get for FREE today. I need to take a couple more pictures of everything so that the coop can be seen properly, but I'm having a real day off, pictures come later.
My roof will be arriving within the week and I get to spend another day peering over the edge of 19 floors, Wheee~
The real issue will be the floor. I'm at a loss about what to do for long term poop control.
I'm way up and have no compost pile so pine shavings and classic methods are kind of impossible. The humidity and tropical storms have ruled out sand which must stay dry.
The concrete is holding up well and there's no smell if I clean it out once daily, I just dont like them having to run on their poop. It would be nice to have some kind of absorbent material I can leave in for a week or so.
For the moment its morning cleanings with a stiff brush on concrete. No poop has build up under their nails and with some scratch boxes their feet get cleaned more than enough.
Long post and hopefully it was interesting.
It's been an amazing experience and I'm really happy I made it this far.
Please feel free to comment on, or about anything you see here. I'm starving for good information and really hope to make raising Chickens into a business in the future.
If I had my dream come true I'd export some of these interesting heritage breeds I found here in China that seem to be like lost time capsules of old Europe and even older Asian breeding traditions.
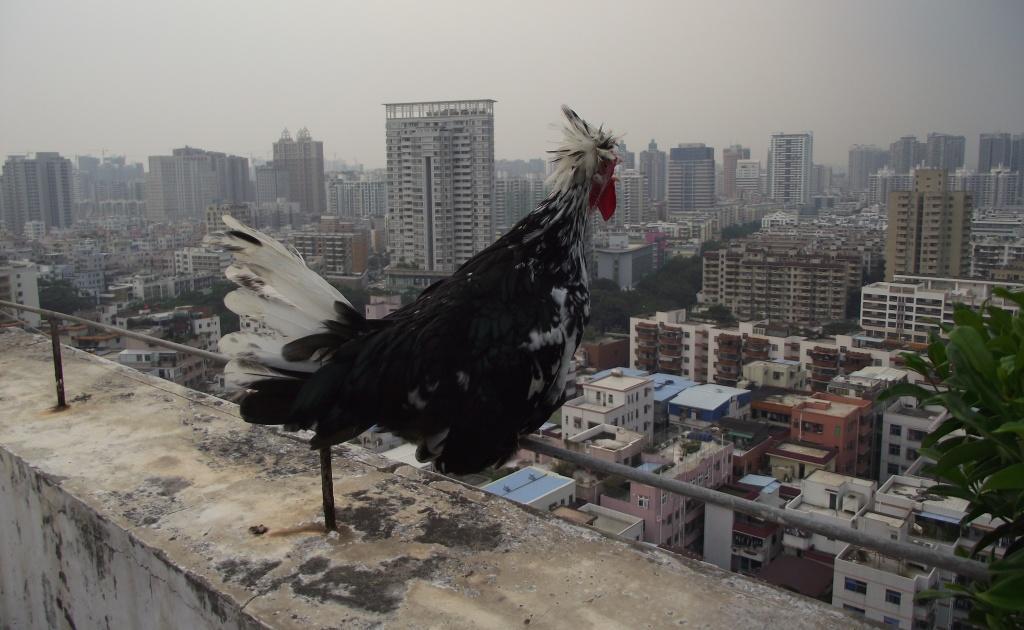
Again thanks for reading, here's a fun picture to end with:
We bought two to try it out, never expecting them to live past a few weeks.
Well, they did... Then chicken math took over and now we have 23 chickens and 2 turkeys.
As you can imagine that number of birds takes a good sized coop. However, we live in an apartment on the 18 & 19th floor. So we had one option, the roof. Luckily our apartment had the 19th floor walk out garden and a little space where they put some decorative concrete "fins" on the building.
I bought a concrete drill and decided to go to work on turning that space into a coop.
The coop space is about 5 by 23 feet (1.5 by 7 meters) and slopes up from about 4 feet by the window to 8 feet at the end of the building. So we are really lucky to have that dead space right next to our garden to use.
It started by drilling holes in the wall that was about 1 foot thick to make a door between the garden and dead space, then pouring some concrete to make an even floor that wouldnt get wet in the rain. After some help with that part I was left with this:
From the elevator roof showing the door cut and dead space "roof".
The new door from our house door.
Looking away from the building. The yellow crossbeams are out in the air, the white ones are over the floor.
This is a window to a spare bedroom in our apartment. It will have quite a view when I'm finished. The previous view of dead concrete box was quite unimpressive.
Here's a better view of the "roof" area.
These crossbeams presented a problem as I had no real idea how to secure a roof to the concrete that would allow airflow, but withstand hurricane force winds. We live almost in Hong Kong and we get at least 4 tropical storms and about two hurricanes a year.
You can see in the first picture there is a lighting rod type rebar that goes along all the roof surfaces, so I decided to attach the real roof to that rebar.
That roof has yet to arrive, it will be the tinted all weather plastic.
The big problem was what to do about predators. There arent any birds of prey, dogs, etc. here, but because of the dirty workers living in the elevator stairs we have MANY rats crawling around the building.
We took a long time de-ratting our house and while I was building this coop one rat attacked out chicks, we lost 3 chicks to that. 1 Houdan and our only two Guinea Hens. So predator proofing was a big issue.
What I settled on was good old wire screens. Not the cheap plastic bug guards in windows, the old grandpa style solid wire ones. Unable to find a roll with the proper width I settled on making little boxes to put up inbetween the concrete cross bars.
I ended up with this:
You can see a tarp put up as a light rain guard that was an "all weather outdoor" tarp...
It lasted about 2 weeks in the sun before you could poke a finger through it.
Luckily I've found a reputable hardware shop since then, and its their loss. Although its has been cheap to build, the hardware guy has certainly ate well this past month.
There's a good view of how I installed the screen boxes. I dont think it would keep anything larger than a badger out, but I needed the density to keep rats big and small far away from my girls, and boy or two.
Now the coop is predator proof. I even added some guards over the drain area to keep mosquito populations down and my chickens from drinking any crappy runoff water.
I'm about 3 weeks into the project at this point.
The next step is to build the interior furniture and doors for the girls. In the long run I plan to have 3 compartments that can be separated from each other, but that will happen over time. As you can see in the next set of pictures I'm building what I can when I can.
The whole process is extremely rewarding and if I have a day off school then I spend the whole day working on whatever I can. Except today, after a two day holiday, continuously making doors and roosts my soft supple teachers hands need a break.
Here's the finished door to the coop. Nothing fancy just a bunch of scrap wood we picked up cheap.
Everything is recycled here, so there's no free lumber scraps or pallets up for grabs.
Not as clean anymore either, the other project is building a garden bed, the corner can be seen under the tree.
*Sorry I dont know how to turn this photo back, it auto turned it sideways.
Still, you can see the first interior door. I figure its nice to be able to separate birds and have breeding area and laying area, or what have you.
For now its really nice to keep them out of the work area when I'm moving the furniture in.
You can see the largest of our 3 groups moved into the coop, 11 Houdan and 2 Araucana? Not sure what breed they are, but they should be laying green eggs in 2 months.
They're still using their recycled boxes and mini roost in this photo, but in the next few photos you can see they have a much nicer layout today. I "installed" some lighting temporarily and will go back and wire it in properly once I'm done with all the drilling and such.
Wake up call. They all decided that the nice towels over the tools and bags was a better place to sleep than their silly old cardboard boxes.
My roosts and poop boards.
You can see under the further roost I have set up two small trays. In the future I plan to turn the under area into nesting boxes.
I'm thinking its a great way to conserve space, a 3 tier chicken apartment building in our apartment building.
Your thoughts?
A second picture with flash, although it doesnt change much, still hard to see anything.
So that's where my apartment coop stands.
I also put up some training roosts made of recycled PVC that I managed to get for FREE today. I need to take a couple more pictures of everything so that the coop can be seen properly, but I'm having a real day off, pictures come later.
My roof will be arriving within the week and I get to spend another day peering over the edge of 19 floors, Wheee~
The real issue will be the floor. I'm at a loss about what to do for long term poop control.
I'm way up and have no compost pile so pine shavings and classic methods are kind of impossible. The humidity and tropical storms have ruled out sand which must stay dry.
The concrete is holding up well and there's no smell if I clean it out once daily, I just dont like them having to run on their poop. It would be nice to have some kind of absorbent material I can leave in for a week or so.
For the moment its morning cleanings with a stiff brush on concrete. No poop has build up under their nails and with some scratch boxes their feet get cleaned more than enough.
Long post and hopefully it was interesting.
It's been an amazing experience and I'm really happy I made it this far.
Please feel free to comment on, or about anything you see here. I'm starving for good information and really hope to make raising Chickens into a business in the future.
If I had my dream come true I'd export some of these interesting heritage breeds I found here in China that seem to be like lost time capsules of old Europe and even older Asian breeding traditions.
Again thanks for reading, here's a fun picture to end with:
Last edited:


