beegirl950
Chirping
Every time I run into another chicken person, our conversations always come down to coops after we have gushed about our chickens. So I think I have this forum stuff mastered enough to tell the tale with pictures. First off, I cannot take credit for the design of this coop. That credit goes to April Wilkenson and you can find her on YouTube with links to purchase her plans. My hubby, myself and my master carpenter brother built this coop 3 years ago and its as sturdy and safe today and it was when it was built. So here it goes.
To start off, we used our tractor auger and sunk (6) 4 x 4's in concrete as the foundation. Then we added the footers between the posts. These 4 x 4's and footers were the only place in the construction that we used pressure treated lumber and it was specifically ground contact pressure treated. Yes there is a difference if you were not aware of this. The rest of the construction was typical lumber.
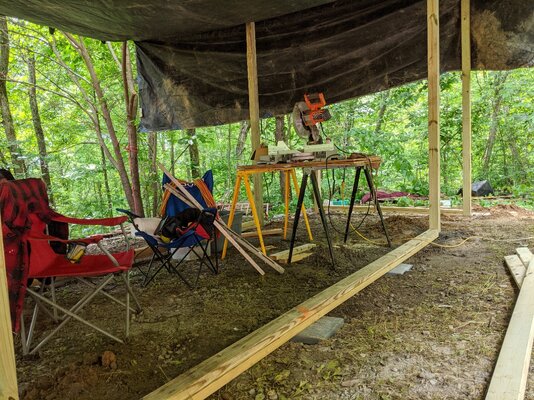
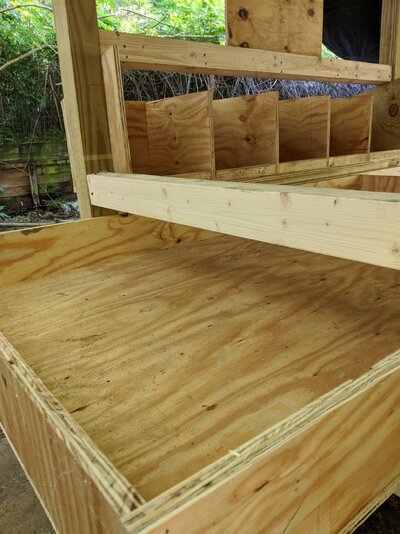
Then we set off to start framing the raised coop house and the run. My hubby is an OTR Professional Driver so we always have huge tarps, and it was late May, so to keep working in rain or shine, we put one up. If you notice on the floor of the coop is a divider board. This coop is equipped with deep fluff method drawers that can be pulled out to clean.
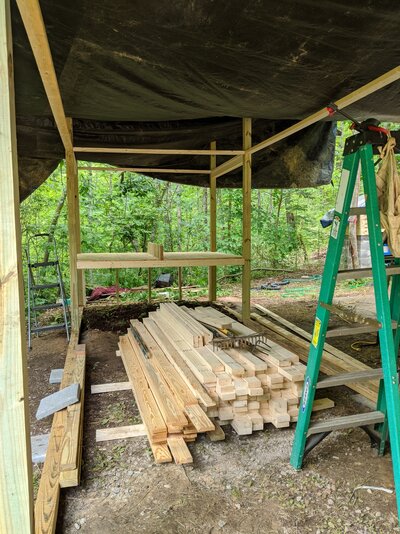
In these next few photos you can see more of the framing, the drawers installed and the nest boxes attached. You can also see the roof trusses that we built and a run door.
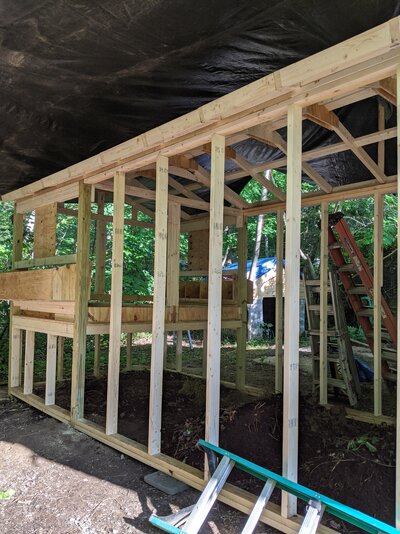
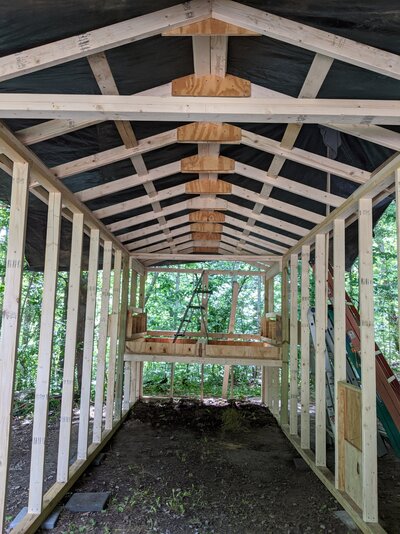
When we got to this stage, we took down our big tarp and and sprayed the first and second coats of paint on everything. We also took the time to use the tractor front loader before we put the door end on to dump 6 or 7 loads of mulch inside the run. Easier with the front loader than trying to wheel barrow that stuff in. Work smarter not harder is our motto. All of us old geezers know this by now.
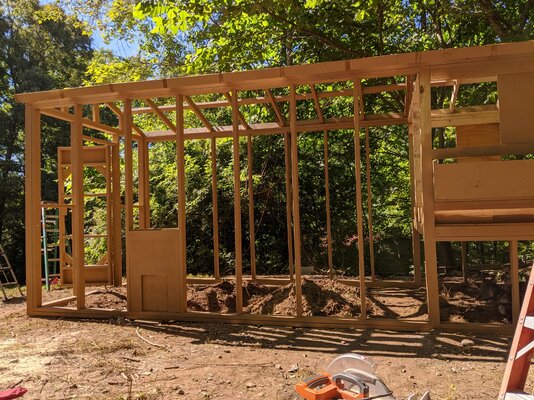
Next we set on installing all the outside T1-11 siding on the coop. The first photo is the back, and the next two are the sides. The last is the front of the coop.
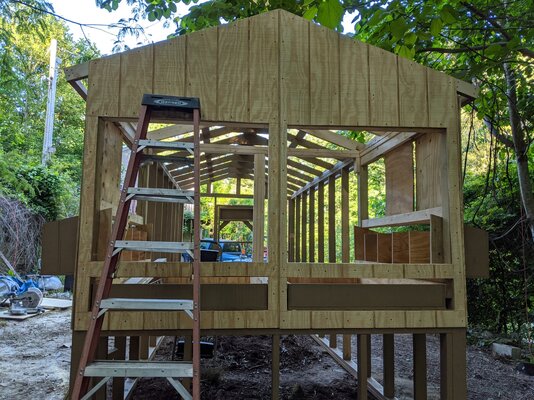
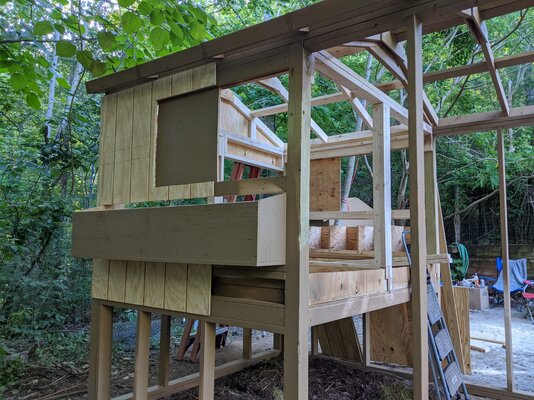
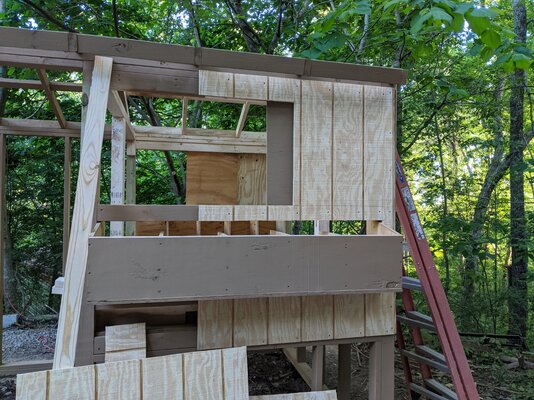
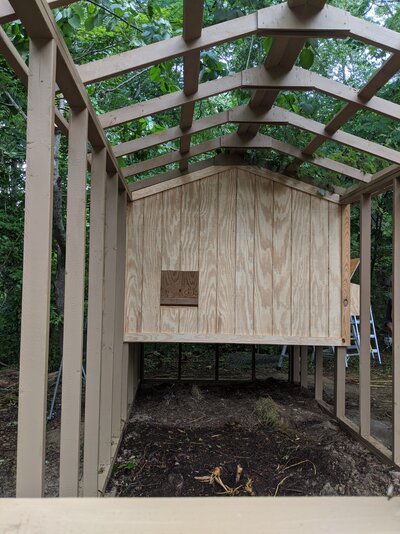
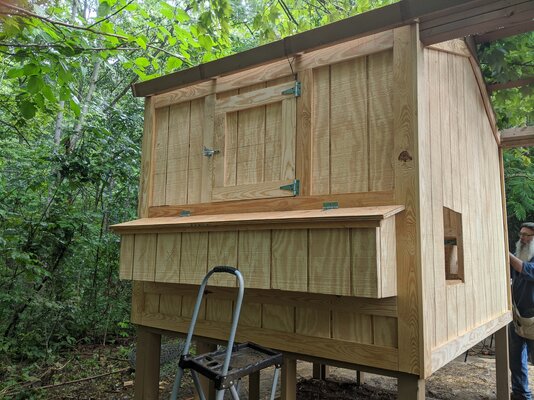
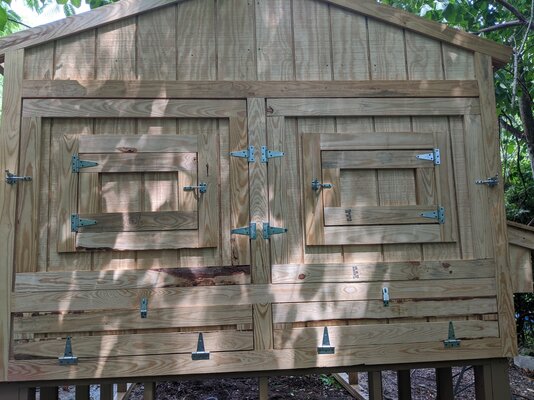
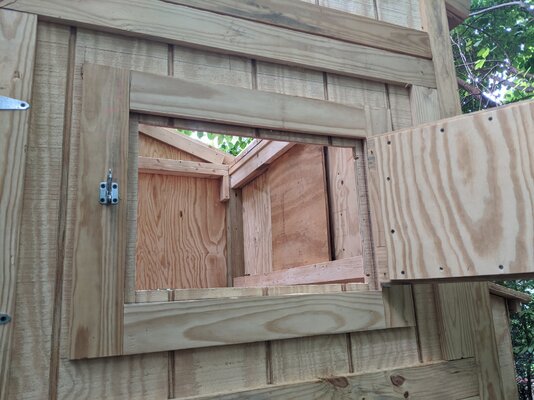
After all of the T1-11 siding was installed, we got to work on all of the doors. Each side of the coop has a door for ventilation. The back of the coop has 6 doors. 2 doors for the slide out fluff drawers. 2 doors that open up completely to access the inside and 2 mini doors in the big access doors for ventilation. These next photos show the side and the back of the coop to illustrate this.
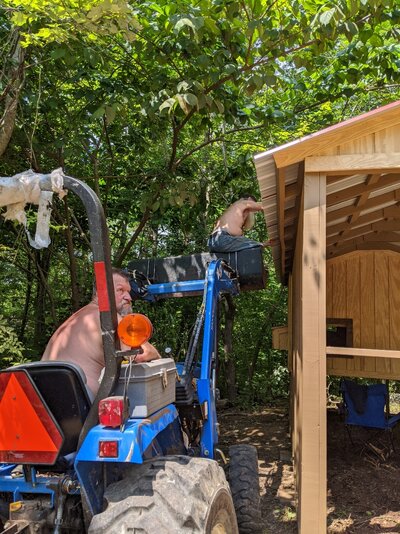
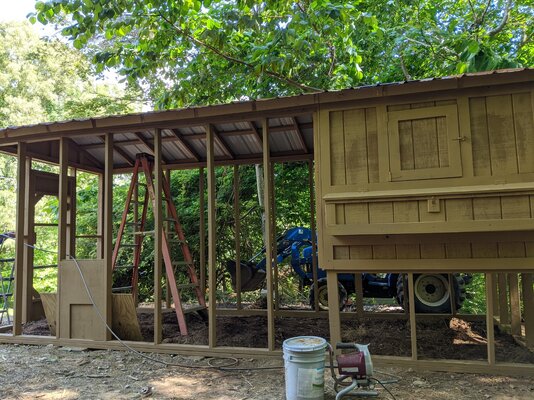
Next, we installed the metal roofing. A very easy and inexpensive roof choice. My hubby and brother got very creative screwing the roof to the rafters as you can see. Jim is driving and Alan is riding the front loader to access the roof instead of using ladders. After the roof was installed, the coop got 2 coats of paint, hardware and all. Sprayed of course.
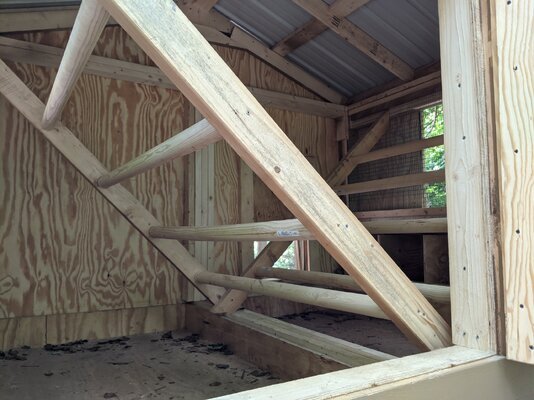
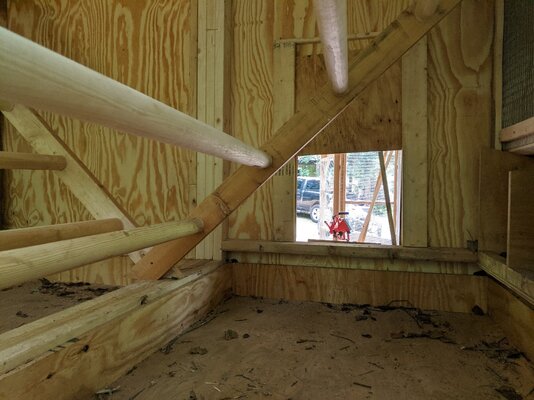
Next Alan installed my roost bars with 2" dowels in a V configuration.
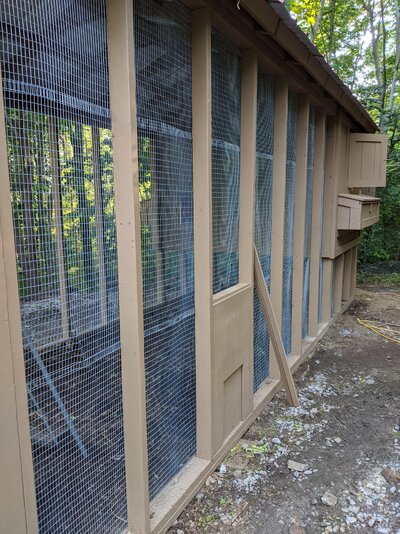
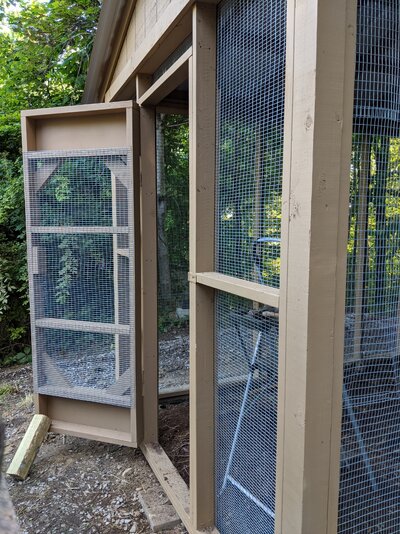
After all that was done came the fun part. Installing the metal cloth. We live here on the side of a mountain and we have lots of wildlife around here that would love a tasty meal of a chicken so this part was important. Chicken wire is great at keeping your chickens in but not great for keeping out what wants to eat them. My brother had to go back to Virginia for a job. So the metal cloth was installed by my hubby and I. I won't show you pictures of these hot, sad and tired people doing it but I will show the afters. and some neat features like the ventilation door in a door on the back of the coop and the pull out deep fluff drawers.
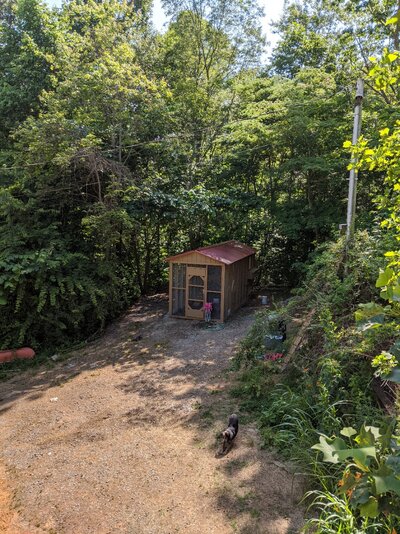
And last but not least the overall pic taken from the deck and my chickens actually in it. The chickens made short work of sorting out the mulch
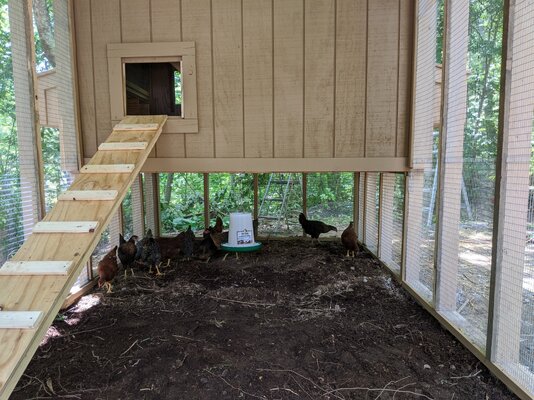
My coop cost me roughly $1500 (pre-COVID) but its built strong and I have never ever lost a chicken while they were in the coop or run. Sometimes I lose one when they free range, but not that often. I can't blame Ma Nature for getting her due once in awhile. I hope that everyone understood my humble attempts at composing and understanding forums, and telling the tale of of how the Taj Mahal (as hubby calls it) was built. Hopefully when I hit this Post thread button, it will look like I am telling the story and not gobbley goop. LOL
To start off, we used our tractor auger and sunk (6) 4 x 4's in concrete as the foundation. Then we added the footers between the posts. These 4 x 4's and footers were the only place in the construction that we used pressure treated lumber and it was specifically ground contact pressure treated. Yes there is a difference if you were not aware of this. The rest of the construction was typical lumber.

Then we set off to start framing the raised coop house and the run. My hubby is an OTR Professional Driver so we always have huge tarps, and it was late May, so to keep working in rain or shine, we put one up. If you notice on the floor of the coop is a divider board. This coop is equipped with deep fluff method drawers that can be pulled out to clean.

In these next few photos you can see more of the framing, the drawers installed and the nest boxes attached. You can also see the roof trusses that we built and a run door.


When we got to this stage, we took down our big tarp and and sprayed the first and second coats of paint on everything. We also took the time to use the tractor front loader before we put the door end on to dump 6 or 7 loads of mulch inside the run. Easier with the front loader than trying to wheel barrow that stuff in. Work smarter not harder is our motto. All of us old geezers know this by now.

Next we set on installing all the outside T1-11 siding on the coop. The first photo is the back, and the next two are the sides. The last is the front of the coop.


After all of the T1-11 siding was installed, we got to work on all of the doors. Each side of the coop has a door for ventilation. The back of the coop has 6 doors. 2 doors for the slide out fluff drawers. 2 doors that open up completely to access the inside and 2 mini doors in the big access doors for ventilation. These next photos show the side and the back of the coop to illustrate this.


Next, we installed the metal roofing. A very easy and inexpensive roof choice. My hubby and brother got very creative screwing the roof to the rafters as you can see. Jim is driving and Alan is riding the front loader to access the roof instead of using ladders. After the roof was installed, the coop got 2 coats of paint, hardware and all. Sprayed of course.


Next Alan installed my roost bars with 2" dowels in a V configuration.


After all that was done came the fun part. Installing the metal cloth. We live here on the side of a mountain and we have lots of wildlife around here that would love a tasty meal of a chicken so this part was important. Chicken wire is great at keeping your chickens in but not great for keeping out what wants to eat them. My brother had to go back to Virginia for a job. So the metal cloth was installed by my hubby and I. I won't show you pictures of these hot, sad and tired people doing it but I will show the afters. and some neat features like the ventilation door in a door on the back of the coop and the pull out deep fluff drawers.


And last but not least the overall pic taken from the deck and my chickens actually in it. The chickens made short work of sorting out the mulch


My coop cost me roughly $1500 (pre-COVID) but its built strong and I have never ever lost a chicken while they were in the coop or run. Sometimes I lose one when they free range, but not that often. I can't blame Ma Nature for getting her due once in awhile. I hope that everyone understood my humble attempts at composing and understanding forums, and telling the tale of of how the Taj Mahal (as hubby calls it) was built. Hopefully when I hit this Post thread button, it will look like I am telling the story and not gobbley goop. LOL


