I've had the same concern! Lots of waste due to the finer parts of the mix. However, I have learned to ferment the dust and small remnants, so at least I'm able to salvage some of it.
Nutrena owns the mill where F&F feed is made and I agree. It is the other mill that I tried that is the problem, and I also have a mill several miles away that also grinds their own feed and it is also fine. I've tried it before and I do have a bag to try again, so knowing how to ferment the "waste" will be very helpful.
there some directions on left when starting hole use reverse with drill counter clockwise, this will start hole. This will prevent the holesaw from grabbing so hard. Grab and want to twist your wrist.
A friend of my wife they have chickens and put these in a rubber garbage can.
It is not mess free, but heck of alot better than the galvanized one I had from Farm Fleet.
Dont lose nearly the amount of feed as before.
There are videos on youtube for installing these ports in pales.
For feed I use cracked corn, cracked roasted soybeans, chicken feed, bit winter rye and sunflowerseed ( if I have it) mixed
The chickens wiill go after the corn, hence it is not mess free. The roosters with large comb have problems with this feeder. Like I say not totally mess free roosters clean up they eat around the feeder plus I free range.
Winter I throw little corn out, make sure roosters get enough feed, corn is energy for cold weather.
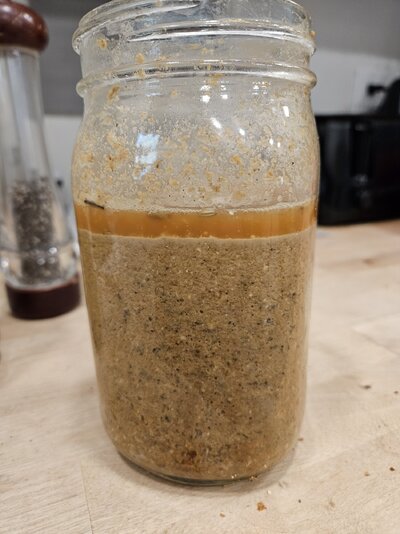
I start with about 1/3 of a quart jar of feed, stir in enough water to cover it a couple of inches, put a cover partially over it so some air can escape. Once or twice a day, I stir it and add more water if needed. The feed expands! And you always want to make sure it's covered with water. Also, it won't work if the temperature is cold, so my family gets to deal with me making this in the house. Usually by day 3 it is ready...it will have, what some call, a yogurt-type smell. My kids gag if I mix it when they are standing next to me - they certainly don't think it smells like yogurt! Drain the liquids to be used for fermenting your next batch. I was nervous about doing this at first, but it's really quite easy. There's lots of info online about the health benefits and different ways of doing it. (Great videos, too!) I love that it promotes gut health, fills the girls up, and helps with minimizing waste as I mentioned earlier. Oh, and it's easier for them to digest. The girls picked here and there at it in the beginning, and now they all come running. From what I understand, after 30 minutes or so of it sitting out for your chickens, it starts to lose it's health benefits (the live bacteria), so it's good to start off small and see how they do. (In my picture of the 3 jars, I will be adding more feed to the one jar tomorrow and then I will stir in an appropriate amount of water to make sure the grain is covered.) Hope you get a chance to try it!
I start with about 1/3 of a quart jar of feed, stir in enough water to cover it a couple of inches, put a cover partially over it so some air can escape. Once or twice a day, I stir it and add more water if needed. The feed expands! And you always want to make sure it's covered with water. Also, it won't work if the temperature is cold, so my family gets to deal with me making this in the house. Usually by day 3 it is ready...it will have, what some call, a yogurt-type smell. My kids gag if I mix it when they are standing next to me - they certainly don't think it smells like yogurt! Drain the liquids to be used for fermenting your next batch. I was nervous about doing this at first, but it's really quite easy. There's lots of info online about the health benefits and different ways of doing it. (Great videos, too!) I love that it promotes gut health, fills the girls up, and helps with minimizing waste as I mentioned earlier. Oh, and it's easier for them to digest. The girls picked here and there at it in the beginning, and now they all come running. From what I understand, after 30 minutes or so of it sitting out for your chickens, it starts to lose it's health benefits (the live bacteria), so it's good to start off small and see how they do. (In my picture of the 3 jars, I will be adding more feed to the one jar tomorrow and then I will stir in an appropriate amount of water to make sure the grain is covered.) Hope you get a chance to try it!
")

 Usually by day 3 it is ready...it will have, what some call, a yogurt-type smell. My kids gag if I mix it when they are standing next to me - they certainly don't think it smells like yogurt!
  Drain the liquids to be used for fermenting your next batch. I was nervous about doing this at first, but it's really quite easy. There's lots of info online about the health benefits and different ways of doing it. (Great videos, too!) I love that it promotes gut health, fills the girls up, and helps with minimizing waste as I mentioned earlier. Oh, and it's easier for them to digest. The girls picked here and there at it in the beginning, and now they all come running. From what I understand, after 30 minutes or so of it sitting out for your chickens, it starts to lose it's health benefits (the live bacteria), so it's good to start off small and see how they do. (In my picture of the 3 jars, I will be adding more feed to the one jar tomorrow and then I will stir in an appropriate amount of water to make sure the grain is covered.) Hope you get a chance to try it!