HER PRESENT
It started in early August this year, when I asked, "What do you want for your birthday, honey?"
She didn't answer immediately. It took several hours and deep comtemplation before she landed on her most pressing need: "Chickens."
"Say what?" I asked, a little bewildered. I mean, Bev isn't a diamond and jewelry woman, but she does treasure nice things. I probably heard wrong.
"I want chickens for my birthday."
I hadn't mis-heard anything. What could I say? She is my wife and her dreams are my dreams, right? So I answered. "Okay."
In less than an hour, we had found someone on Craigslist who had chicks for sale. "How many do you want?" I asked.
"Three should give us a steady supply of eggs."
So we left the breeder with 5, three-week-old chicks. They were of differing breeds; some were to become prolific layers, others would lay smaller eggs but would taste good if we ever needed to provide meat. Oh, and we needed a rooster -- just one rooster.
We also left the breeder with food, a watering tower, and plenty of instructions (keep them warm, feed them medicated food, domesticate them by talking softly and rubbing them gently, don't let them get too hot, give them names and you can teach them to come when they're called, and so on, and so on).
So in typical fashion, we had once again put the cart before the horse -- we had the beginnings of our flock (Lucy, Ethyl, Gerdie, Mert, and Buster) but no place to put them. These little peepers were going to need shelter, and fairly soon. The only problem with that was the minor detail that I work out of town for two-week hitches and I was leaving in two days. The birds didn't need a coop ... yet, but the day was fast approaching.
And so it began.
I left for work, but not before we suffered our first casulity: Lucy was gone before we barely had time to bond. Soon after, Ethyl, Mert, and Buster died as well. What the heck are we doing wrong? i joined BYC and started asking for answers. Had we messed up somewhere? Was it too hot? Did I have some weird disease, like bird flu, but in this case I was infecting them? We were sad to lose so many chicks, but Gerdie carried on and started growing. Bev found a brooder and bought that, hoping the change in environment, with plenty of fresh air, might make the difference.
Meanwhile, Bev and Jamie (our daughter) found a different breeder and replenished the stock. Unfortunately, the woman didn't speak english very well. When asked if they were hens or roosters, the lady just said, "Yes. These good chickens!" "Yes, ma'am, but what breed are they?" To which she said, "These good chickens! You take!" These looked to be older, and they were going to ask the woman how old they were, but decided against it. After all, they were good chickens. They took. 5 more.
Of the second batch, 3 have died, leaving us with 4 total. Turk, Gloria, and Frieda joined Gerdie and all and going strong and doing well. We do have some questions about Frieda, though. We think she may be a Fred instead.
To make matters worse, we had each of our children pick out a family chicken and let our grandkids name them. That sounded like good fun, but when the chicks started dying off once more, the fun wore off. Oh, well, I guess even the youngest members of our clan will benefit by understanding that life is not a given and even the cutest little chicks don't come with a guarantee.
But four total chickens is not enough (not when we originally started out wanting only three -- I mean, we have grandchildren who need their own bird!). So off we went, to yet another breeder, to get three more chicks. Came back with 5. And since Frieda is probably a rooster, all we needed were hens. I'm pretty sure we ended up with two more roosters.
Can't anything ever be easy?
At least we think we've solved the mystery as to why we suffered so much loss -- mites. Jamie found out about it online at BYC, after she saw some tiny bugs on her arm while holding one of the chicks. The dust power we bought looks to be working, and the birds all seem to be doing pretty well now. We still have them separated because the older birds aren't tolerating the tiny ones just yet. And those older birds are getting big. They need a coop!
So here we go. I designed my own coop, but not until I looked at dozens on BYC. What a fabulous web site; it truly is the only one we need. I wanted our coop to have several important features incorperated into it:
1) I'm not bending over in the coop. It has to be tall enough for our family.
2) It has to have windows and ventilation.
3) We live in the Pacific NW, so I wanted a covered portion of the run where the birds could still go outside but stay dry when it rains.
4) I wanted to build it once ... to last.
5) I wanted external egg retrival from the nesting boxes.
6) I wanted a guillotine door to make closing them up at night easy.
7) It had to have storage inside for food and other chicken stuff.
8) It had to be easy to clean -- How could I capture the bulk of the poop which I assume happens then they roost?
Here's how it came together.
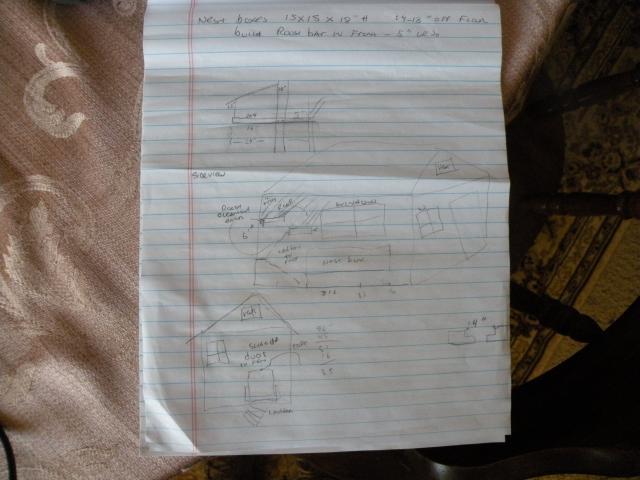
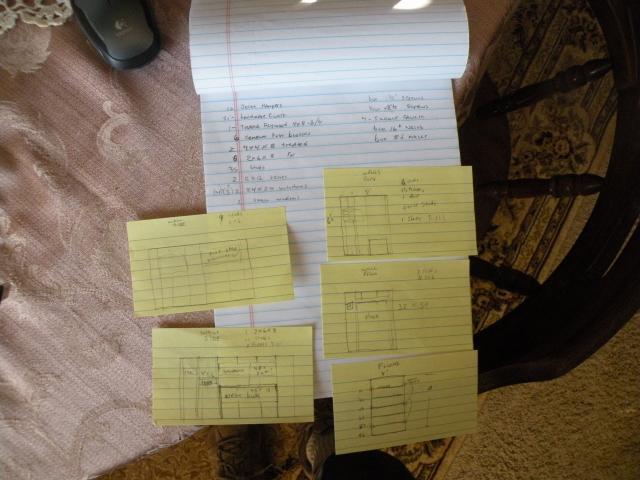
I figured, why not start a chicken coop with chicken scratch? This was my blueprint, and this was my original parts list, wall-by-wall. This coop would be 6' X 8", 6' 6" tall, with an additional 6' overhang for rain protection.
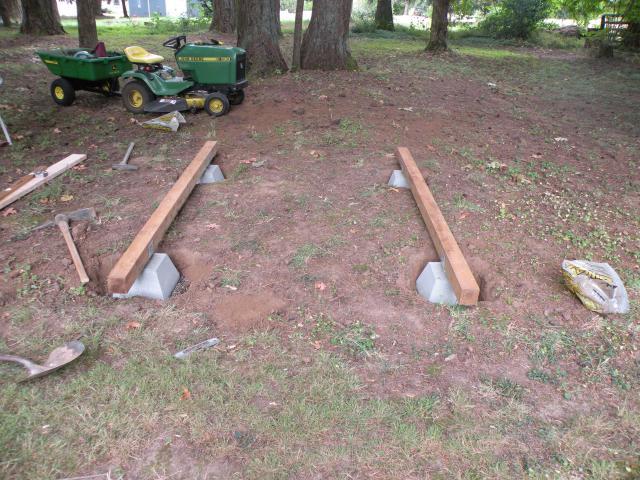
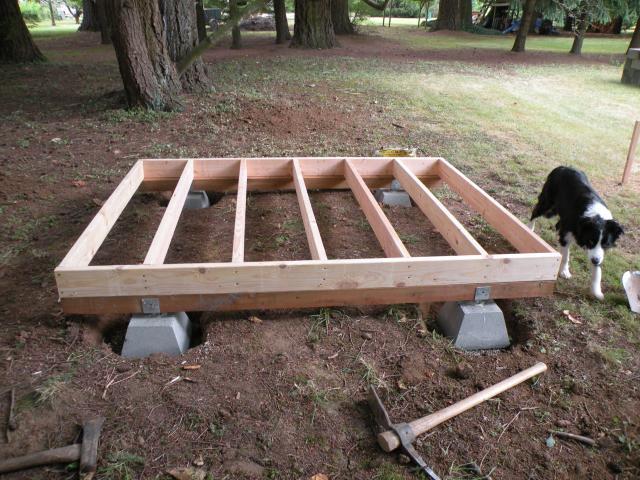
The picture on the left shows the foundation. I dug holes in the ground, then back-filled with gravel to give a sturdy base for the cement blocks. You can see that I used the blocks with the built-in brackets and used pressure-treated 4 X 4s as the foundation. The picture on the right shows the floor joists, squared and level, ready for flooring material. I used 2 X 6s for this, which is more than strong enough. I did not want any bounce in the floor. Also in the picture is the building inspector, Romie, who was ever-present during the entire construction.

The floor now screwed to the joists, I was ready to start framing. Before I did that, I filled the void around the blocks with more gravel to hold them firmly in place.
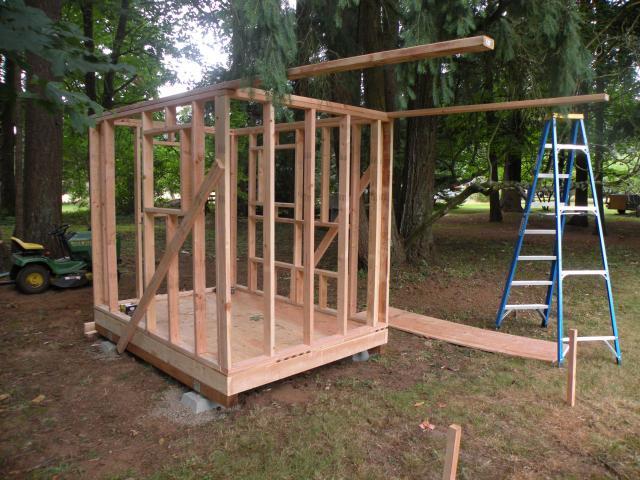
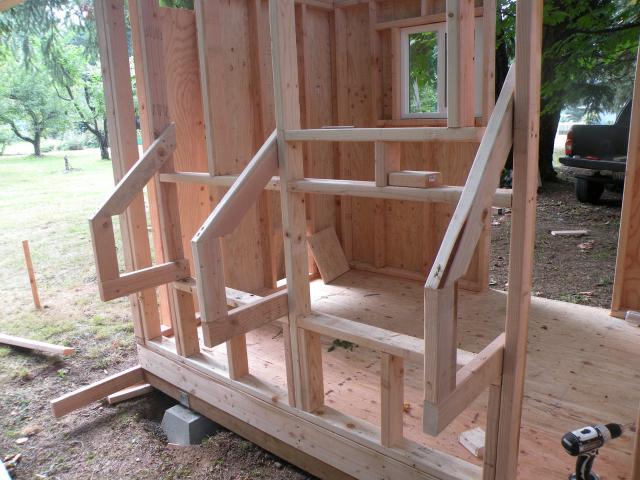
Here is the coop after completing the framing. Everything is set on 16" centers, which made framing easy for the egg boxes (on the ladder side of the coop). I used a full-length studs at 16", 48" and 80" and shorter studs inbetween, thus creating the box opening between studs. When done and partitioned off, there will be 4 nest boxes, each about 15" wide. The windows are also framed here as is the porch overhang. I had to buy 14" 2X4s for the overhang. The picture on the right shows the underlying framing for the nest boxes. I used 3" deck screws for this work, pre-drilling some of the holes to avoid splitting.
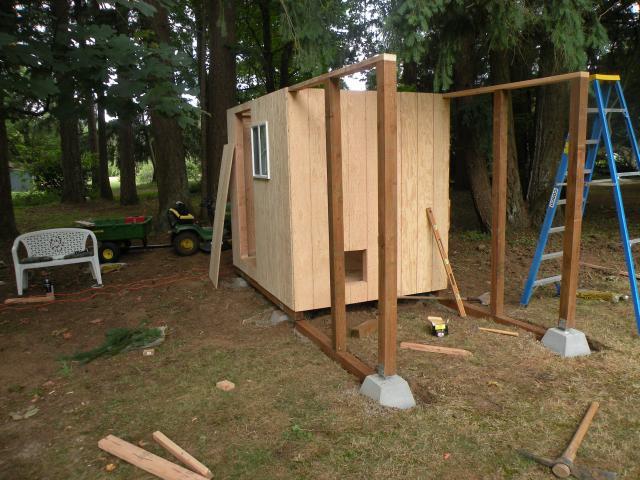
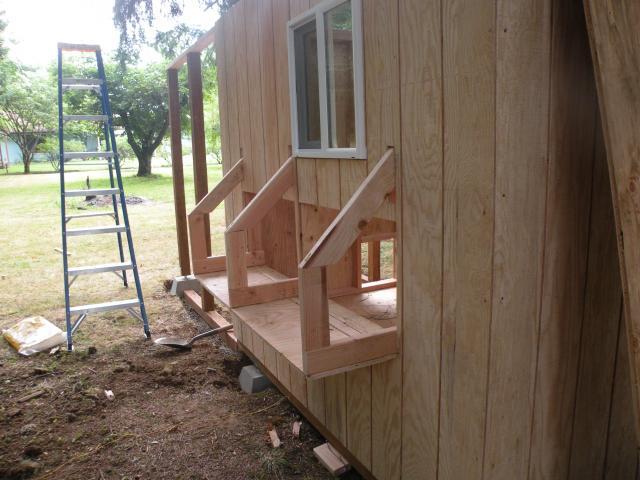
Next I sheeted the frame with T-111 siding. I took special care to make the main door cutout exactly as I wanted it to be. In this way it will fit perfectly in the hole when it comes time to mount it back in place. Note also in this picture how set 2 more cement blocks and pressure-treated 4X4s to support the overhang, thus accounting for the roof weight. Thie right picture shows the nesting boxes after framing the main structure. Before sheeting with the T-111 I installed the windows, which I purchased before framing the building (to ensure the correct framing dimensions).
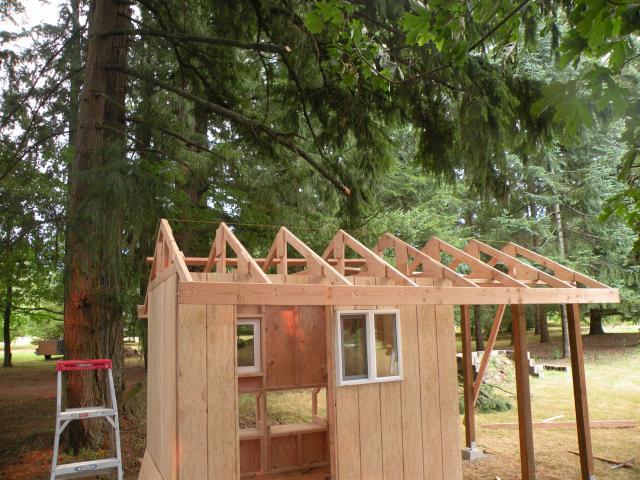
Now that the building is sheeted, I built roof trusses out of 2X4s (I made a single truss, then used it to form a jig for the other 7 trusses on a sheet of plywood). I made my own gussets from plywood scraps leftover from sheeting. The trusses are set on 24" centers, and I used 5/8" plywood to sheet the roof. Maybe I'm getting old, or fat, (or old AND fat), but this was the most difficult part of the entire construction. All that bending over while building trusses was a killer! Once I got this far, the next steps were sheeting the roof, finishing the next boxes, adding the roosts and interior structures, then painting. I wanted to paint the whole thing white, inside and out, so I rented a paint sprayer. in just 6 1/2 hours, I applied one coat of primer and 2 coats of paint, including all the drying time between coats.

After painting I put the shingles on the roof. I didn't have time to complete the entire chicken run, so I made a quickie run instead: I wrapped the covered porch with chicken wire. I'll do the run later, next time I'm home. You can see the guillotine door and egg retrieval boxes, which I shingled also. See how snugly the door fit back in to position. Taking the time to cut it neatly out of a sheet of T-111 paid off.
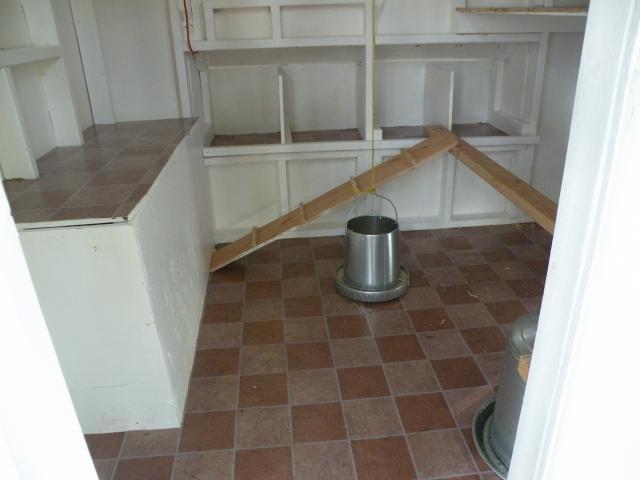
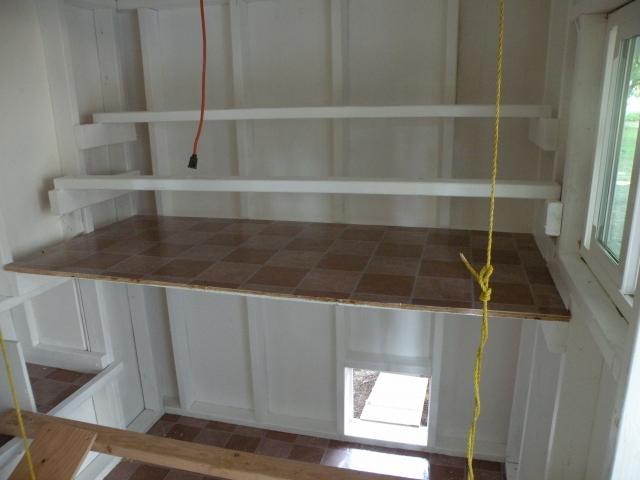
On the left, you can see the finished nesting boxes and storage bin for supplies. The unpainted 2X4 is a temporary roost because the birds can't get to the finished roosts yet, shown on the right. Below the roosts is a poop catcher, which we can squeege off as needed, keeping everything as neat as possible. Also note that everything is covered in vinyl, which also aids in cleanup.


The following week I started in on the run. It's 18' X 12', and 6'6" high (I refuse to have to bend over every time I enter the enclosure). I used treated wood for the entire fence, so I don't have to deal with rot in a few years. On the left is the 4X4s, set in concrete, curing for a couple of days. I placed these at 6' centers, which proved to be plenty strong. On the right, you can see that I've completed the fence frame, sides as well as the top, and strung wire around the outside. I buried the wire about 12" out from the fence base and about 6" deep to keep out the digging critters.
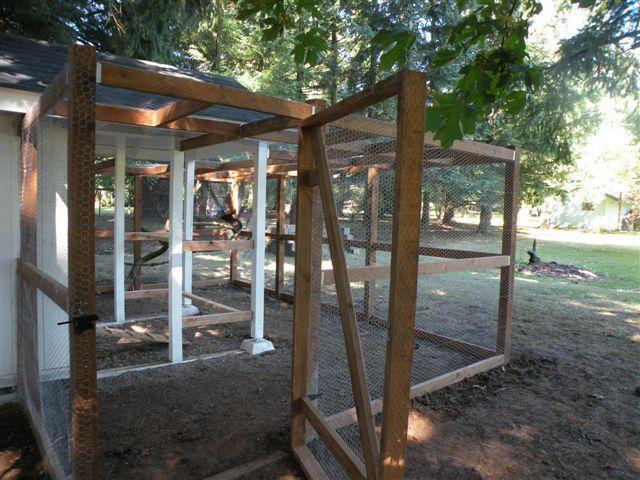
Here's the gate, which I made 4' wide so I can easily get a wheelbarrow through (I will add sand to the topsoil to eliminate mud during the rainy season).
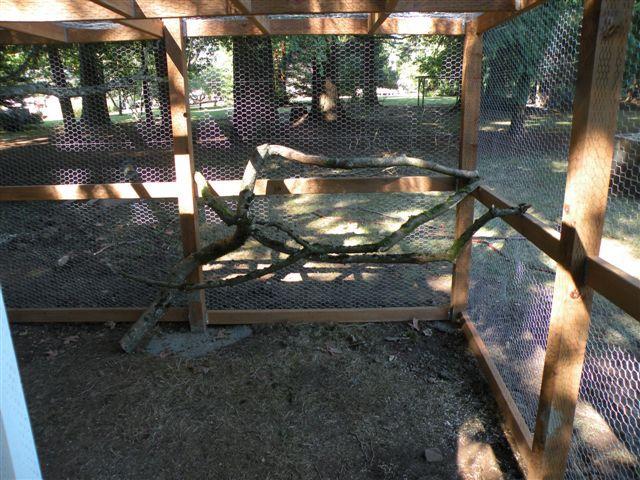

I built a natural wood area for the birds to roost. They like it!
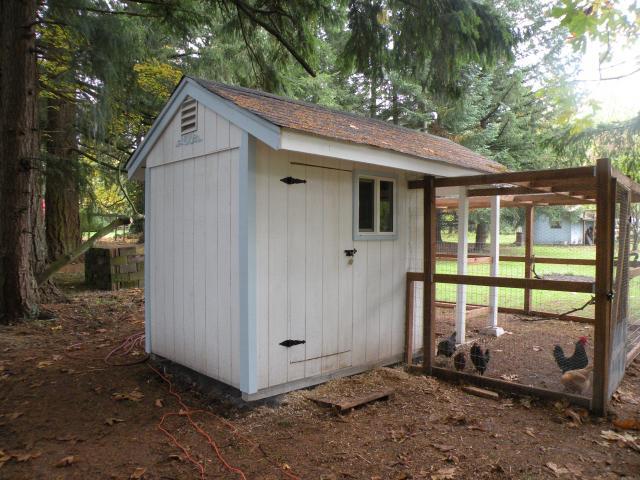
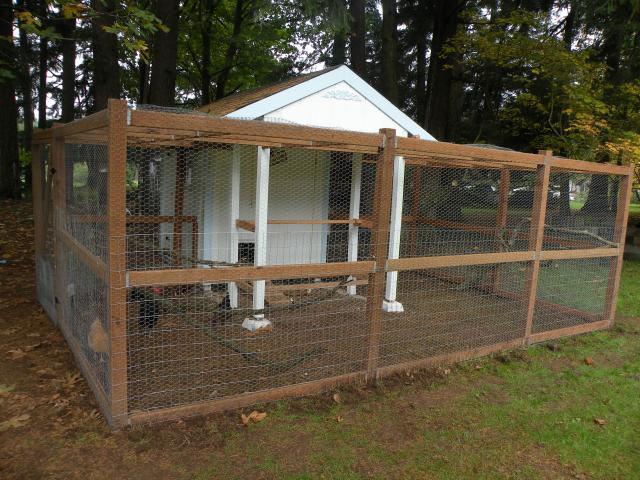
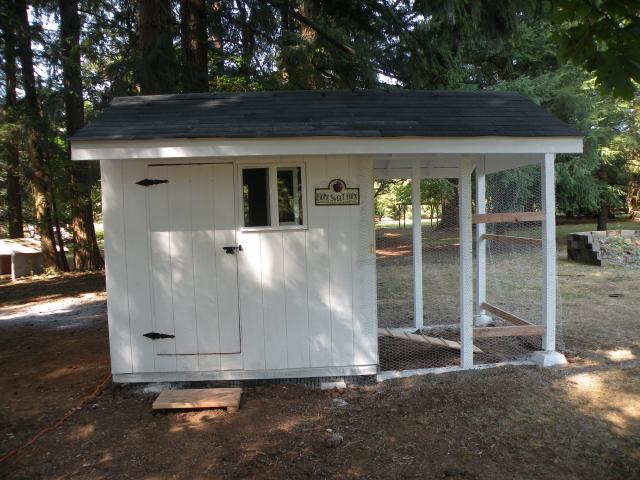
Here's the whole coop, completed. Notice that I also covered the entire run 'roof' with chicken wire as well. This will protect our flock from flying predators as well as crafty racoons. In the second picture you can see the heavy-duty livestock wire I put around the bottom 4 feet of the run. This will prevent dogs, coyotes, and racoons from breaking through the chicken wire.
The entire project cost about $2000 at Home Depot, but I used all new material and didn't cheapen anything. As I said earlier, I wanted to build it only once. It took me 63 hours to build the coop and another 23 hours to build the run, but I did have a little help. Harold, brother-in-law helped stand the trusses and lift the plywood sheeting onto the roof. And Lisa, my daughter-in-law, and Alex (youngest son) helped with the tar paper and shingles. Everything else I did by miyself. The 86 hour total includes trips to the store, breaks for lunch, and an occasional cigar.
All in all it was a fun project, but nothing compares to the enthusiasm I heard in Bev's voice when she called me at work and said, "This is the best birthday present I have ever received. Thanks!" To hear that made it all, indeed, worthwhile.
Who needs jewelry anyway?
What I would do differently:
I really wanted to make the poop catcher something I could access from the outside. I envisioned 2 smaller trays, one for each roost, that could be pulled out of the coop without going inside. This didn't work for me because when it came time to build it in, I realized my windows were aligned just wrong, in conjunction with the next boxes, and I didn't have space. Hence, the interior poop tray. To correct this, I should have put the main door on the end of the coop, not the side, slid the window down, leaving space for the tray.
I also should have allowed more time for the project. As it is, there is no trim yet and no permanant electricity -- I simply ran out of time and had to come back to work.
eggplucker

