
The original idea and rough plans for this coop come from the book (http://www.amazon.com/Fresh-Air-Poultry-Houses-Open-Front-Healthier/dp/097217706X) Open Air Poultry Houses. The idea and theory are sound and well tested. The plans are used by a few members of BYC with great success. Yes, even in COLD COLD climates.
So I settled on what I wanted, and I was off and running.
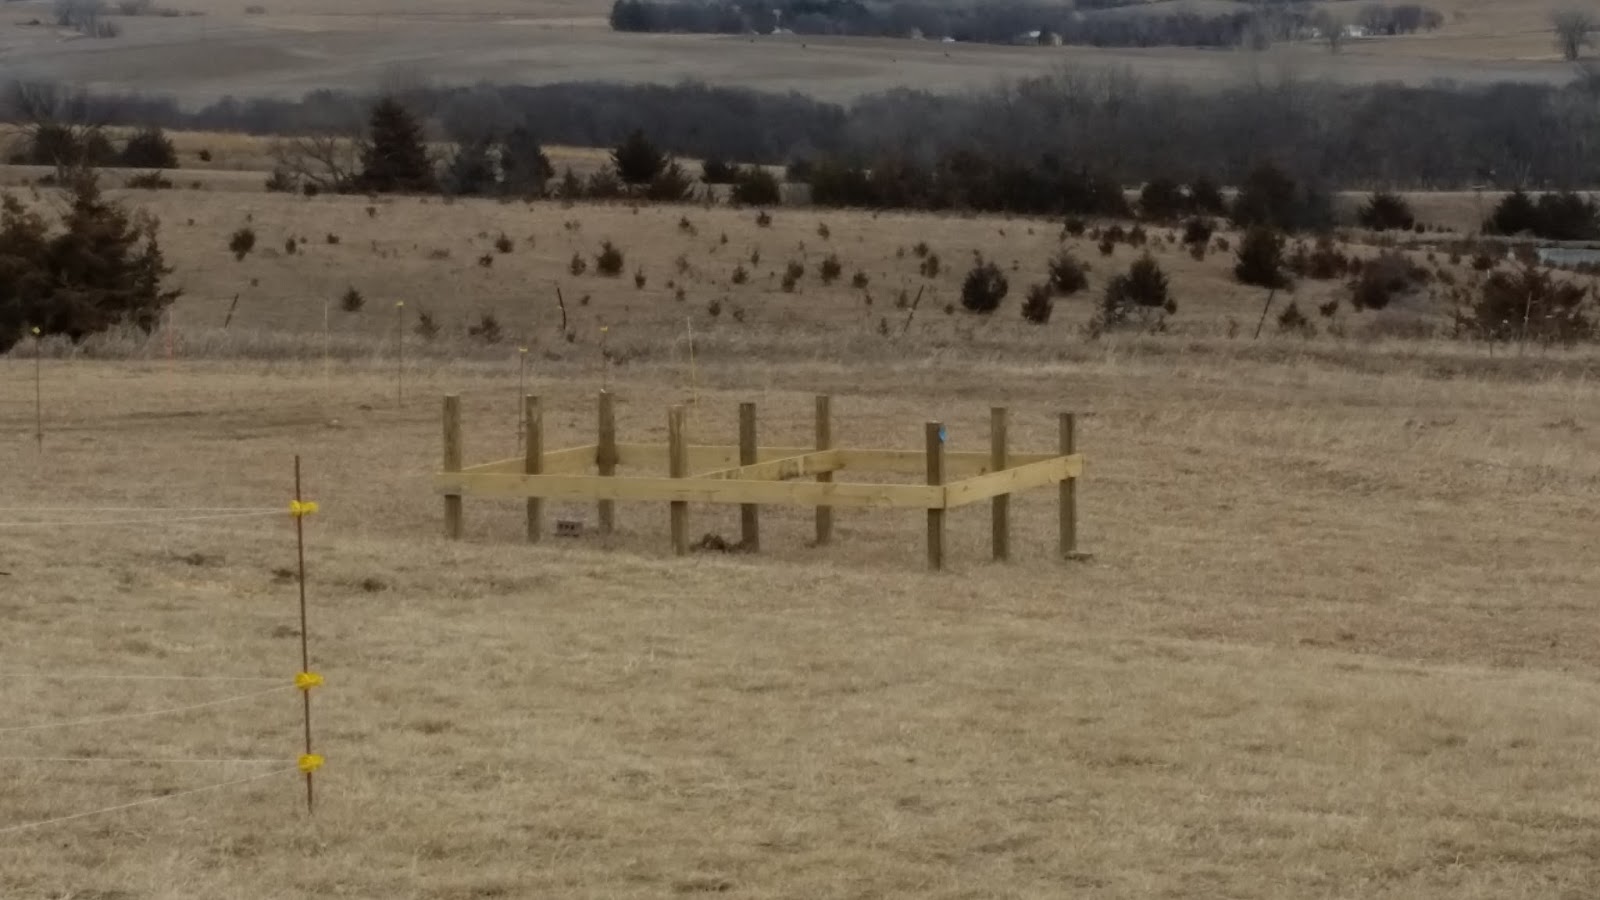
While I was waiting for my neighbors to get back from their Winter holidays in the warm sunshine, I figured no one could tell me I couldn't dig hole in my own yard. I decided that as long as it was over 20'F and the winds weren't howling, I could be out there working. So in the middle December, in Nebraska, before the ground gave way to permafrost, we plotted out the locations of the support posts so I could dig, and set concrete. (All with prior approval of the ladies, known as the survey crew.)

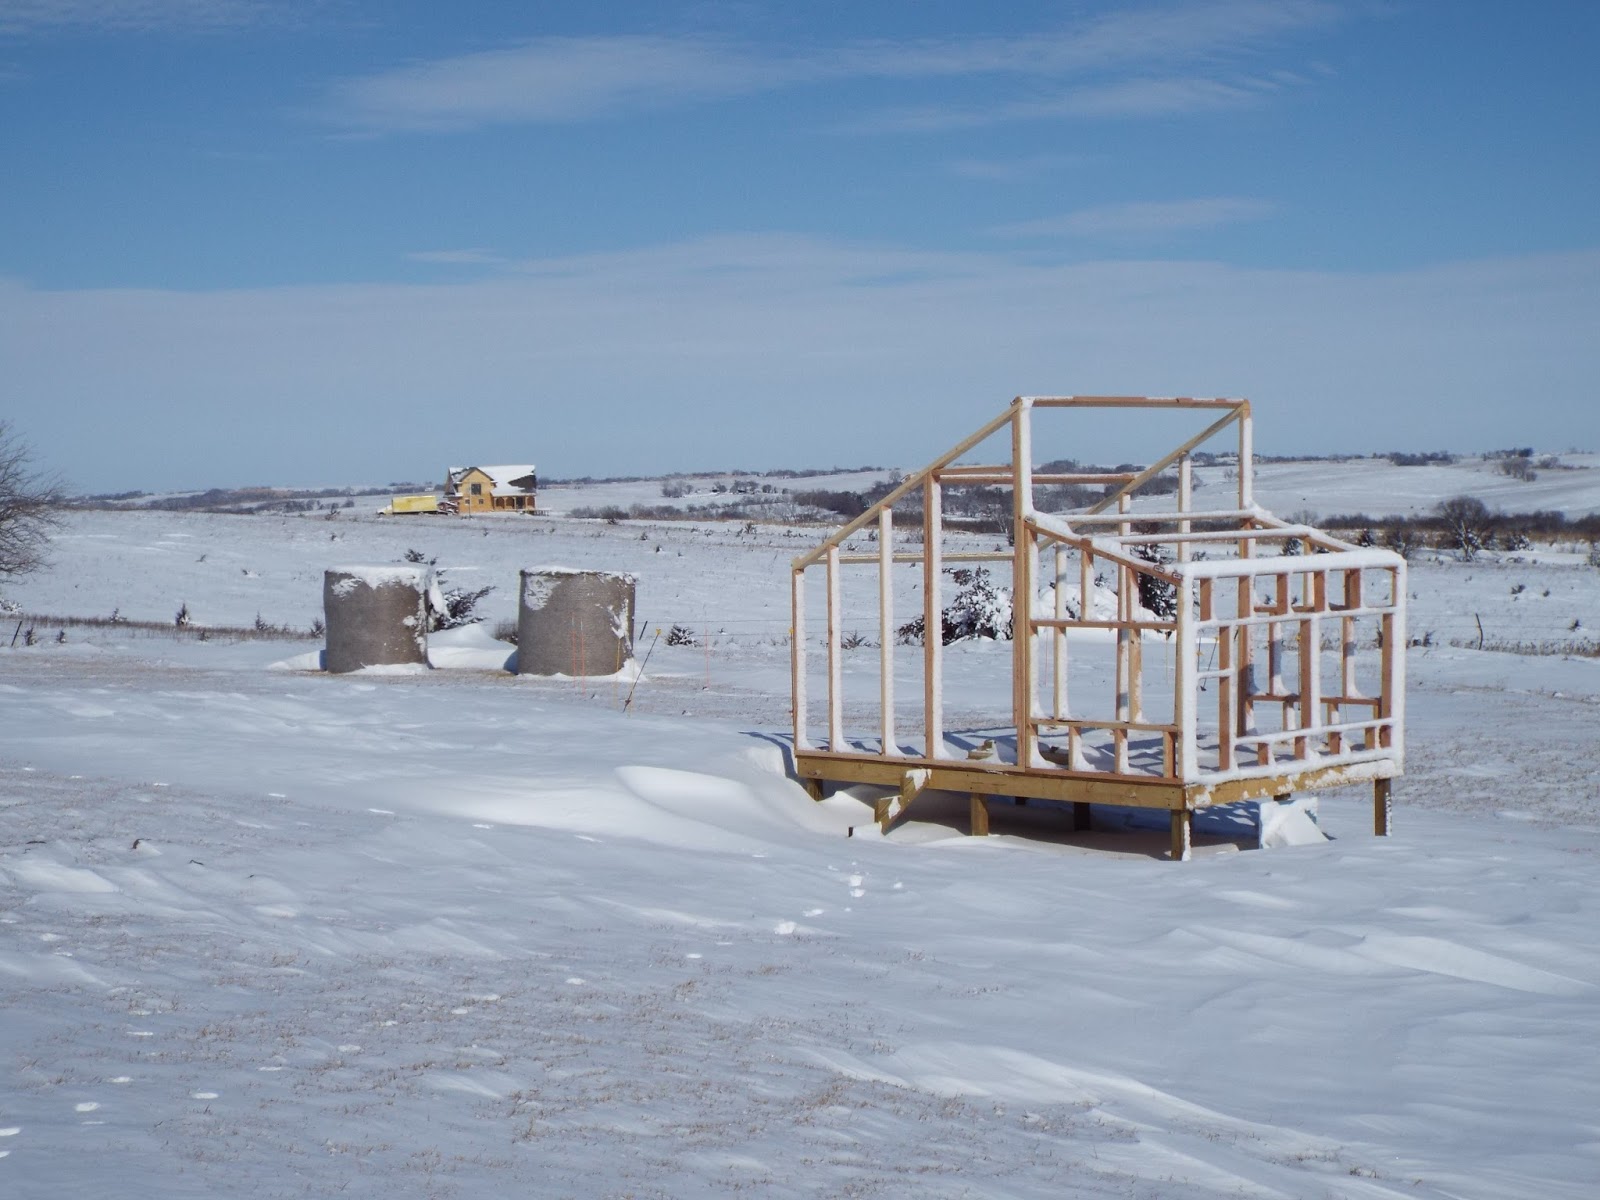
We had already had record low temperatures in November and December, which required us to cover the dig area with black landscaping fabric for a few days to help the top few inches of soil thaw enough for digging. (This coop was designed to be 8x12 feet to take full advantage of standard lumber.) We built the 8x12 inch deck skirt FIRST out of 2x8s and used that on the ground as a marker for locating the post positions and dug down 18-24 inches. As soon as the architectural committee came back from vacation and said "yes", we dropped the posts in the ground, set the concrete, and waited a couple of days for it to fully set. We then attached the skirt, making sure it was level all the way around and cut the posts at the correct height. We attached the skirt to the posts with self tapping, 5 inch, deck screw bolts. Seriously, you'd think two engineer types would have been able to whip that skirt up in an hour. But OH NO, it took at much more than that. I blame the cold and the wind freezing our brain cells, but we later dubbed it the hilltop anomaly, which turns out is a combination of cold, tired brains and the optical illusion created by some funky rolling knolls on our acreage. Don't look around, trust the bubble on the level. (Who calibrates level bubbles anyway?! If that little circle is set in that bar wrong, then the level, well, won't be.~ blog post for another day)

|
| Note the color swatch taped to the post. |

|
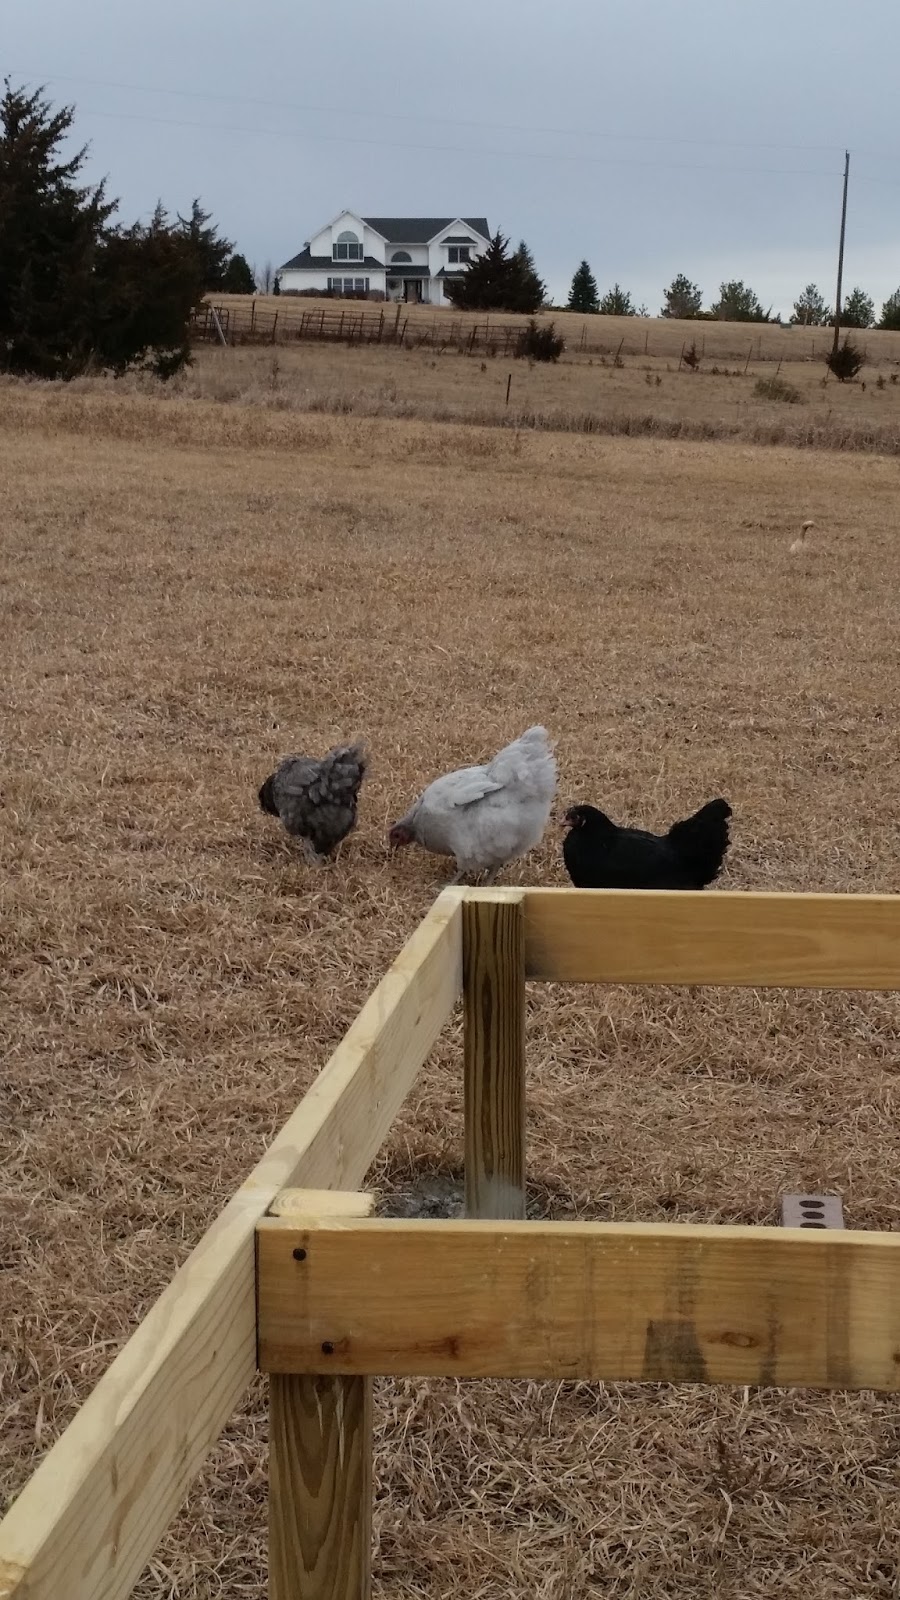
| The Survey Crew approves. |
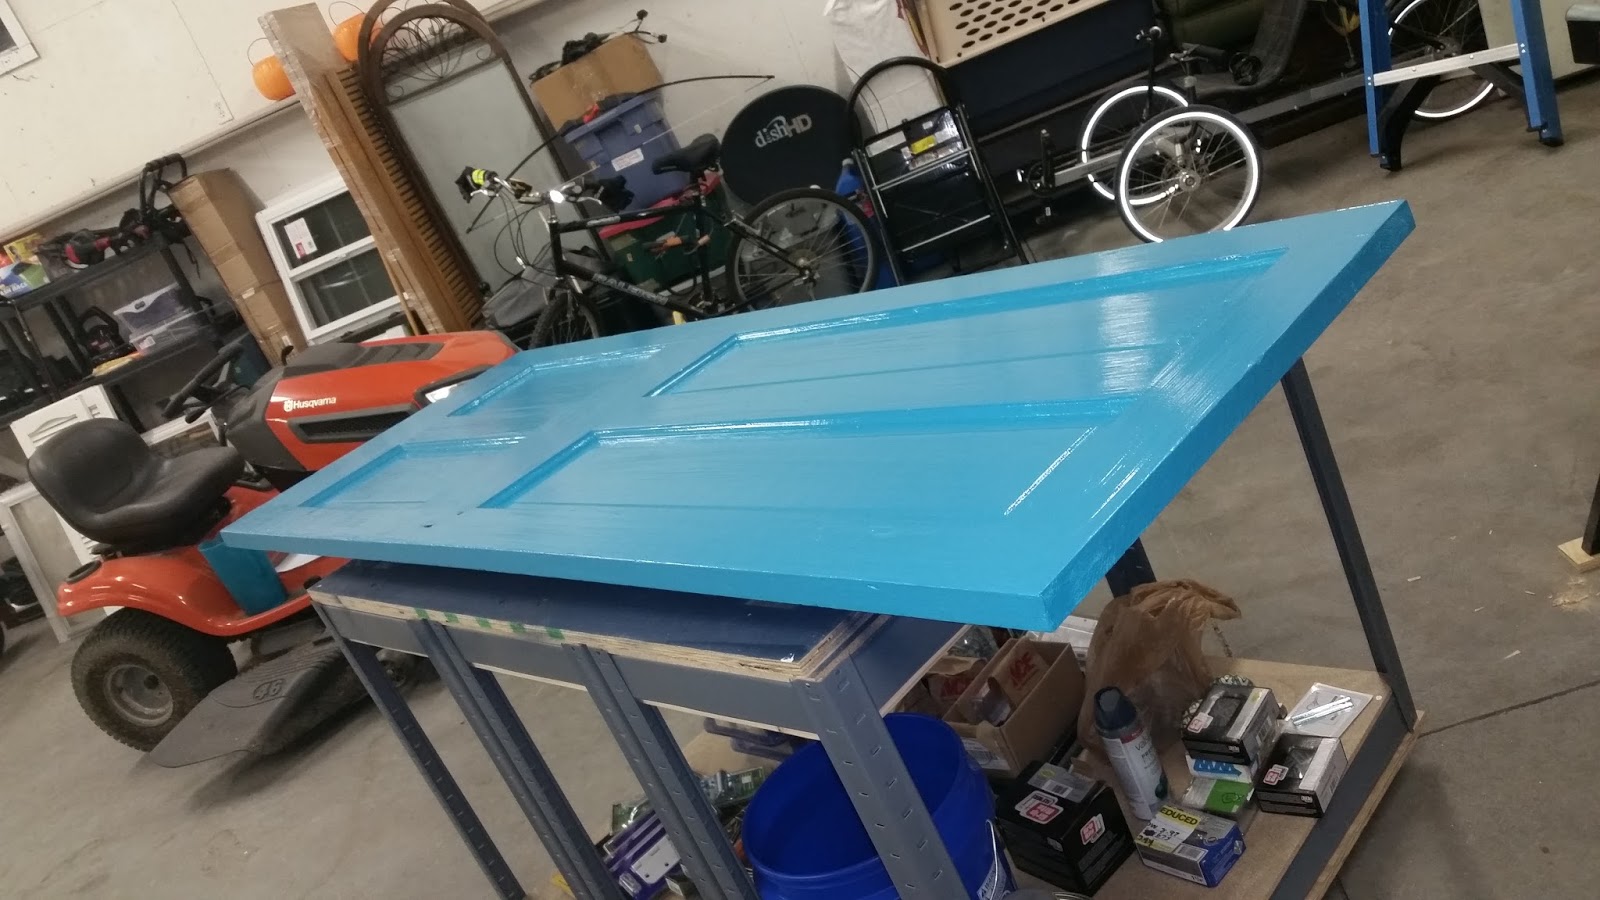
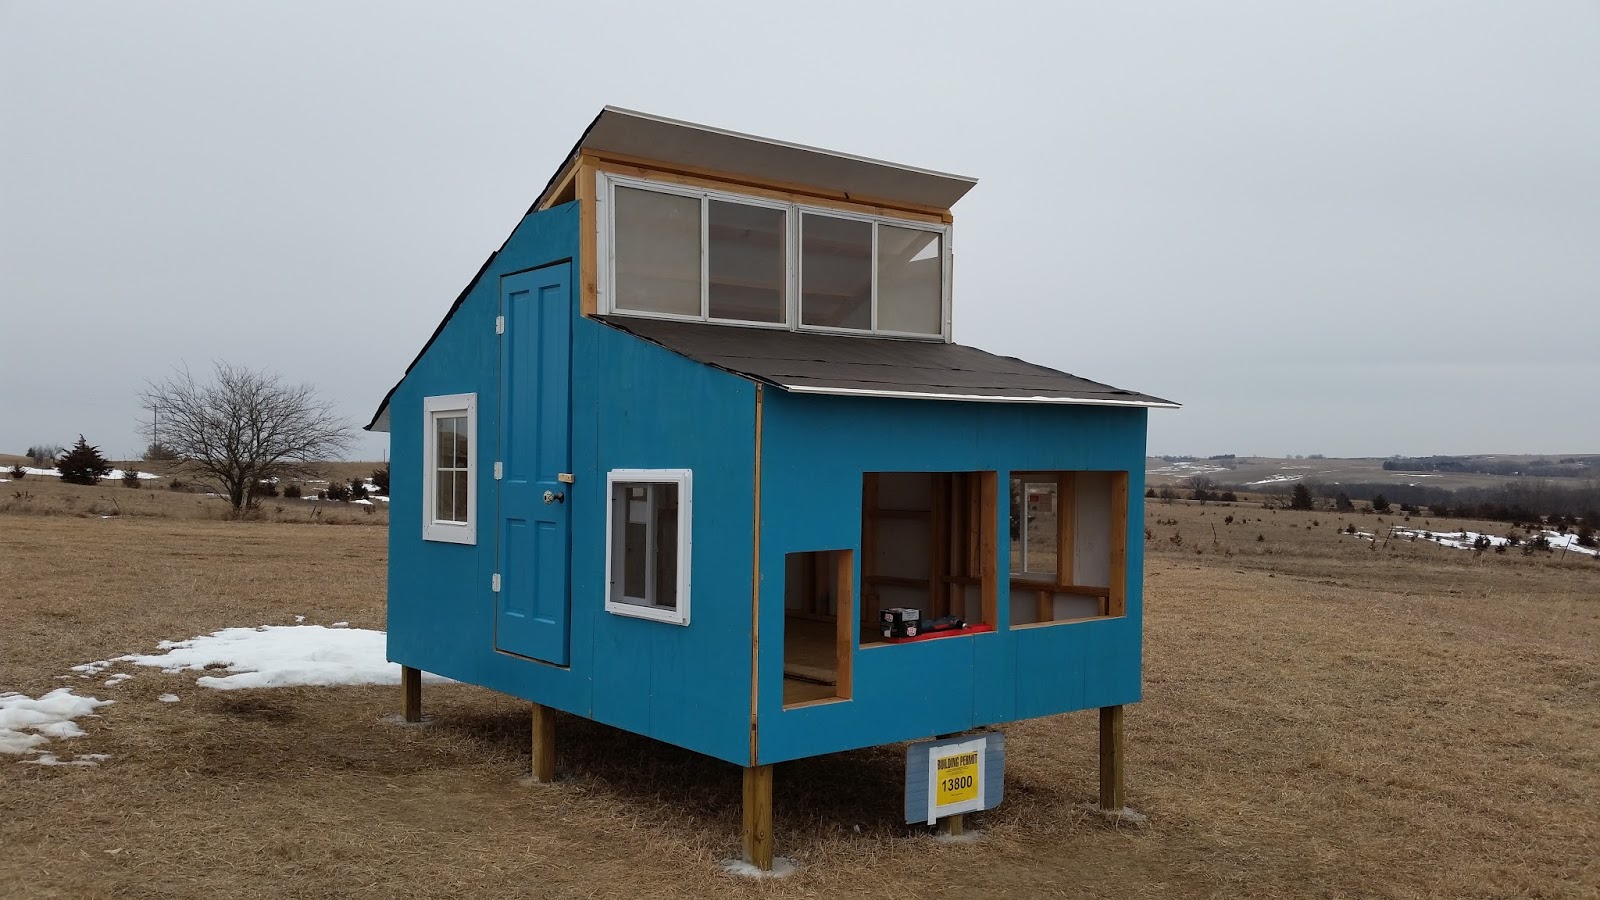
A note on the color swatch. We found a great way to pick the perfect color. I collect many, many (way TOO many) samples, every time I passed a swatch wall. As everyone knows, a swatch will never look the same in the store. It needs tested in the environment it will be in. I am SO sick of looking at white or red barns and out buildings. And around here most houses and out buildings are even going towards shades of brown. Well, to be honest, how boring is THAT?! And depressing, ESPECIALLY in the dormant months when everything seems to be the same shade of dead. Anyway, we used a large sheet of plexi glass and taped the swatches to that. This way we were able to see past the color swatch and see how it interacted with the surroundings. We'd slap 30 swatches up there and step back and pull off the offending ones. When we were down to about 5, we took a day to look harder and narrow it down to THE one, Valspar True Teal. WOW. What a color! In the winter it explodes from the landscape, and when the greenery does come to life, it shines like an Easter Egg in a basket of Easter Grass. Using bright white as a trim color, only makes it more amazing!
OK, back to work.
Keeping in mind the temperature rule, I was still out there 3 or 4 days in a row, all day - well, winter days 9am-4pm. I was wind burned (thank goodness for coconut oil), dehydrated, and good glory did I ache.
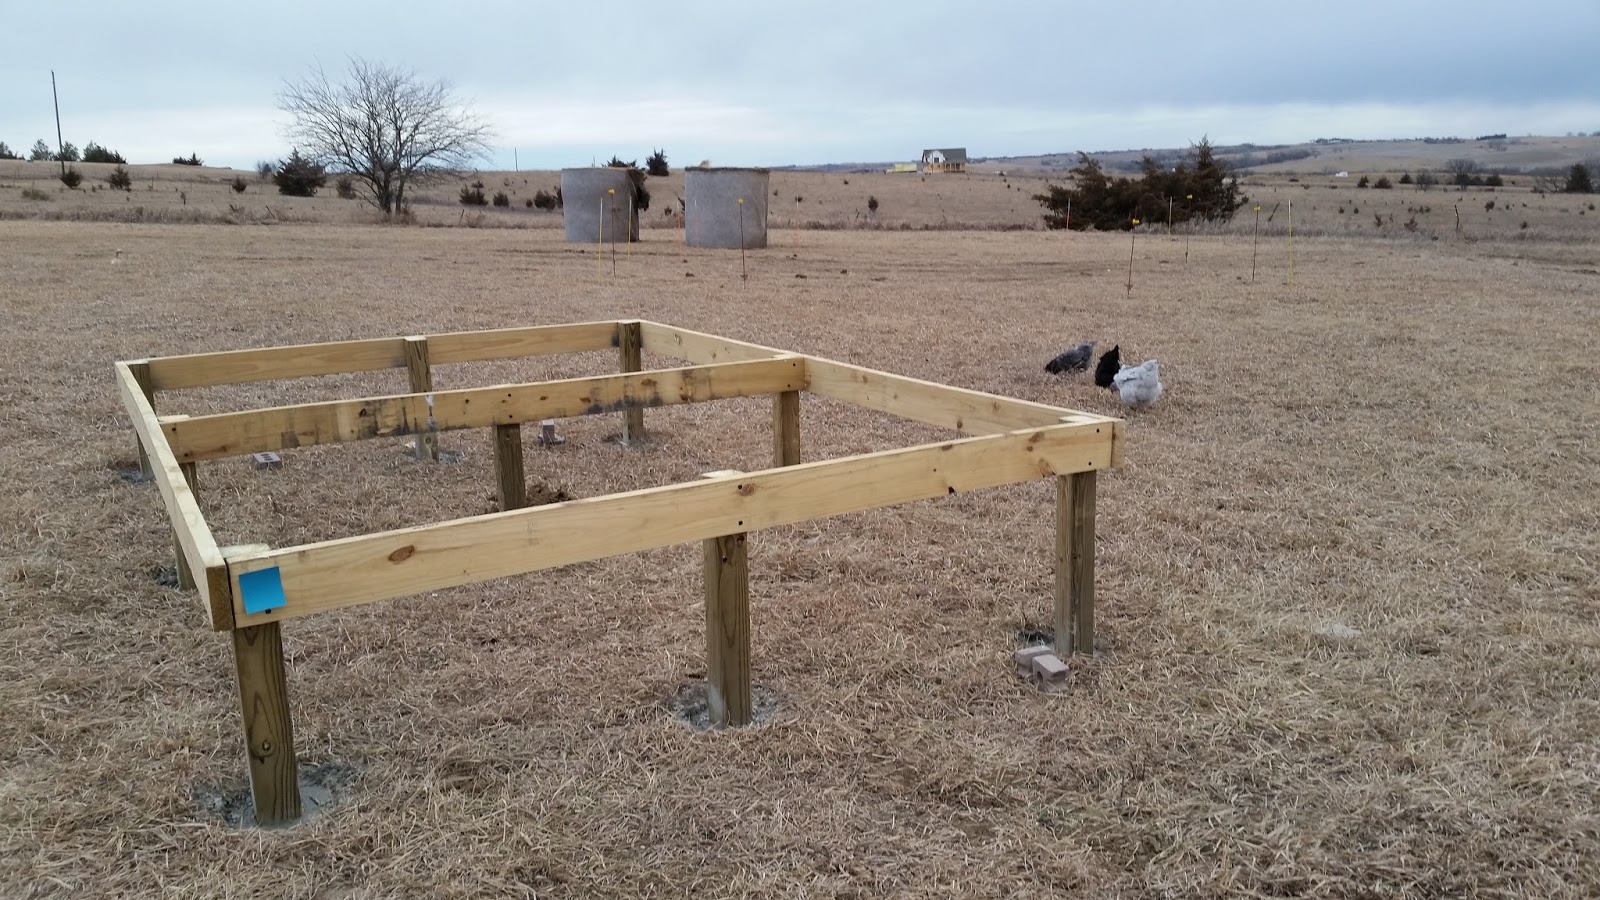
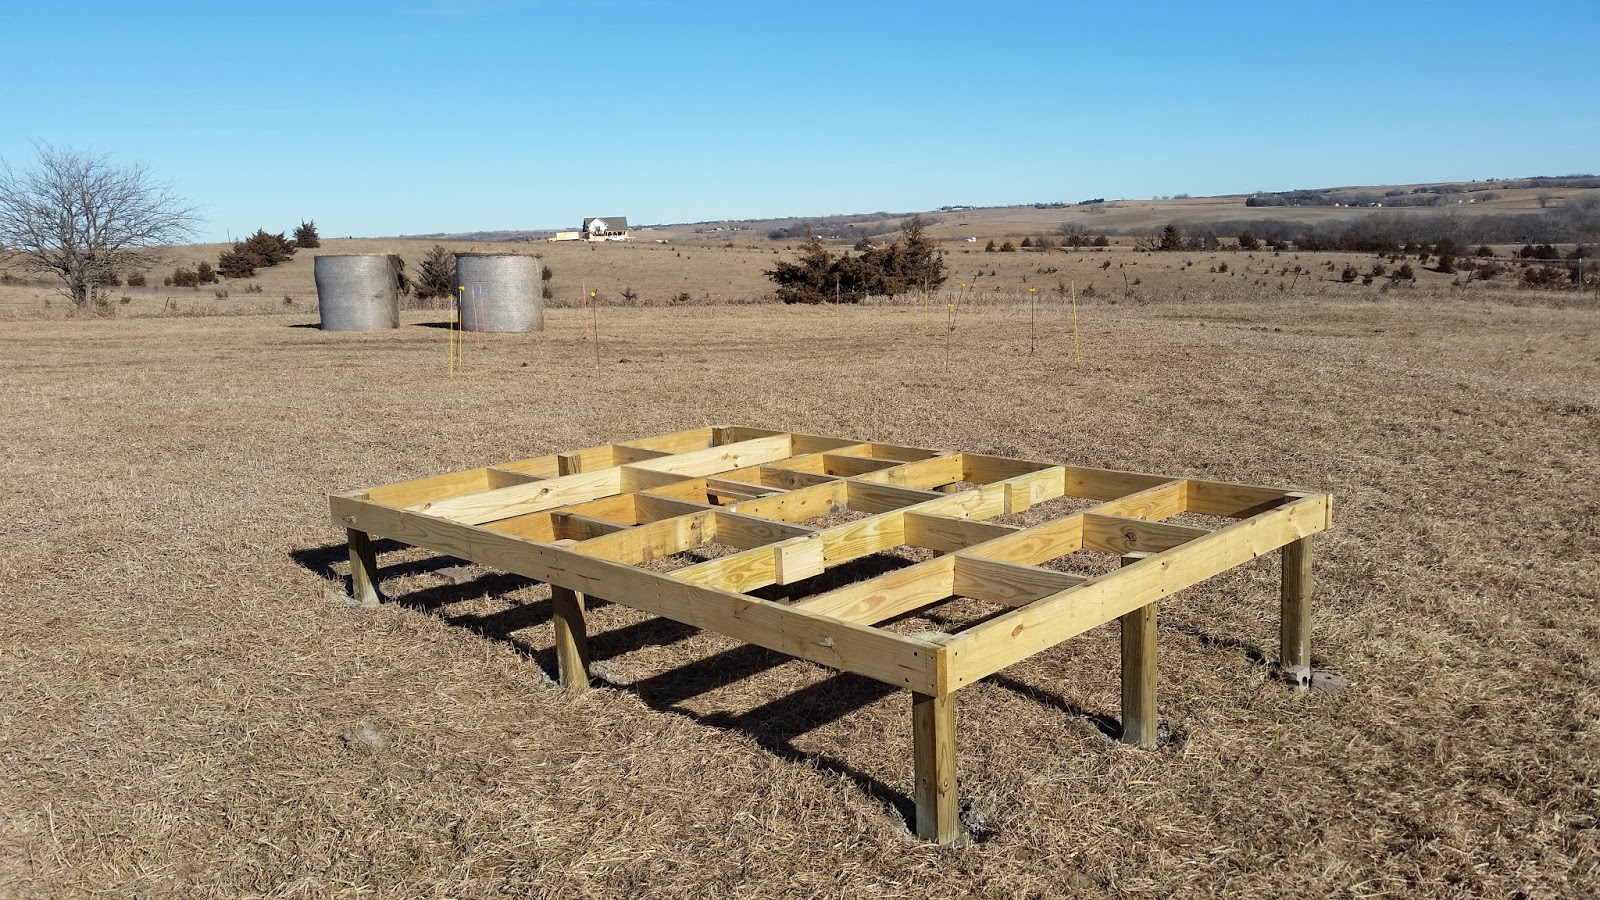
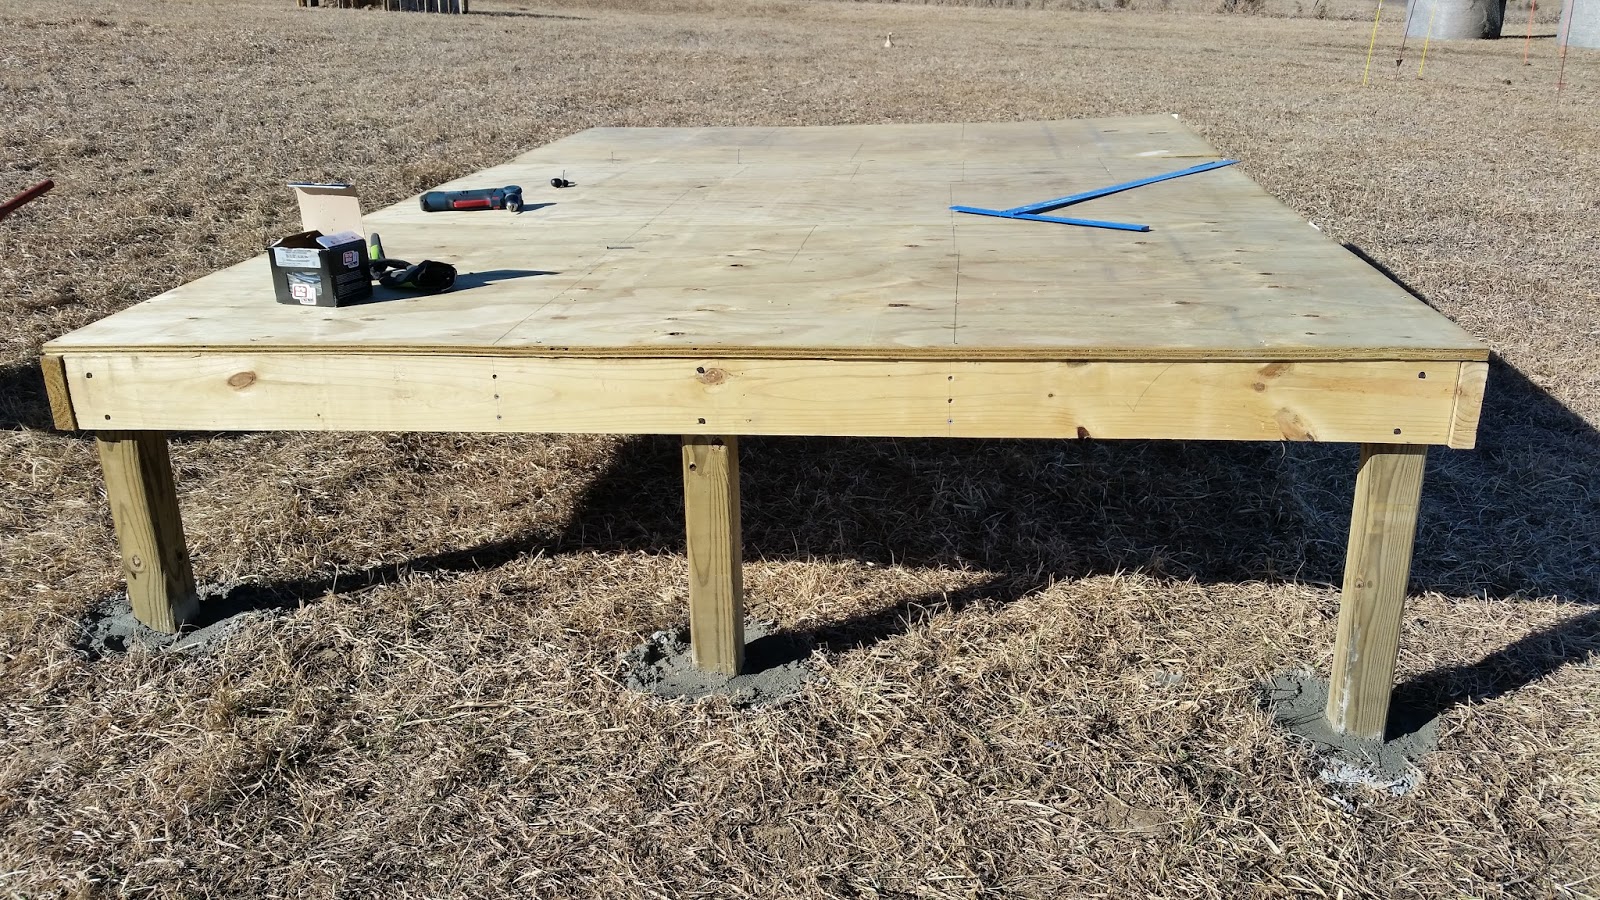
The next step was the decking and the flooring. I added several cross supports, using more 2x8s and 3" deck screws. Then, with my son helping we moved 7/8 inch treated ply to the skirting and with my trusty cobalt cordless screwdriver/drill, suddenly had a FLOOR! It was a cool moment
")
|
| Note the large bales of prairie hay waiting for the Spring Garden. AND again the Survey Crew. |


|
| This felt like a pivotal moment. I could either continue on an build a coop, or quit here and have a place for neighborhood hoedowns. Seriously, I was THAT cold and tired. |

This was a warm January day. They don't come very often, but I was happy to get every one of them. The flooring was warped off the roll. No amount of warm sunshine, begging, pleading, tacking, or tugging would fix it. It was also terrible quality. It was little more than printed cardboard. There was no way it would hold up to chicken toes. I rerolled it and hauled it right back to Lowes, who graciously took it back. A fellow chicken keeper and online friend, Jack, told me he had used a roofing coating called Blackjack 75 on his coop floor, and never looked back. That was the NEW plan. It needed a warm day of at least 65' and climbing for several hours. Obviously this product would have to wait for much later in the build.
The blessing of several warm winter days, and by that I mean in the 40s and 50s, were invigorating. I decided to abandon the dance floor idea and continue with the coop. With an enormous pile of lumber in the barn, an almost depressing and overwhelming pile for this OCD, I checked my sketches and made the first cuts for the walls. All of this took several days. Winter winds were relentless. Endless trips back and forth from the site to the barn became old really quick. I'd like to say that no mistakes were made along the way, but alas, this is the real world, and I'm NOT a carpenter. Building on site is interesting and certainly allows for adjustments. At one point I ran out of screws, and just did not have the gumption to drive to town and get more. I switched to nails. After a day of that, I found the energy to drive to town.
The blessing of several warm winter days, and by that I mean in the 40s and 50s, were invigorating. I decided to abandon the dance floor idea and continue with the coop. With an enormous pile of lumber in the barn, an almost depressing and overwhelming pile for this OCD, I checked my sketches and made the first cuts for the walls. All of this took several days. Winter winds were relentless. Endless trips back and forth from the site to the barn became old really quick. I'd like to say that no mistakes were made along the way, but alas, this is the real world, and I'm NOT a carpenter. Building on site is interesting and certainly allows for adjustments. At one point I ran out of screws, and just did not have the gumption to drive to town and get more. I switched to nails. After a day of that, I found the energy to drive to town.


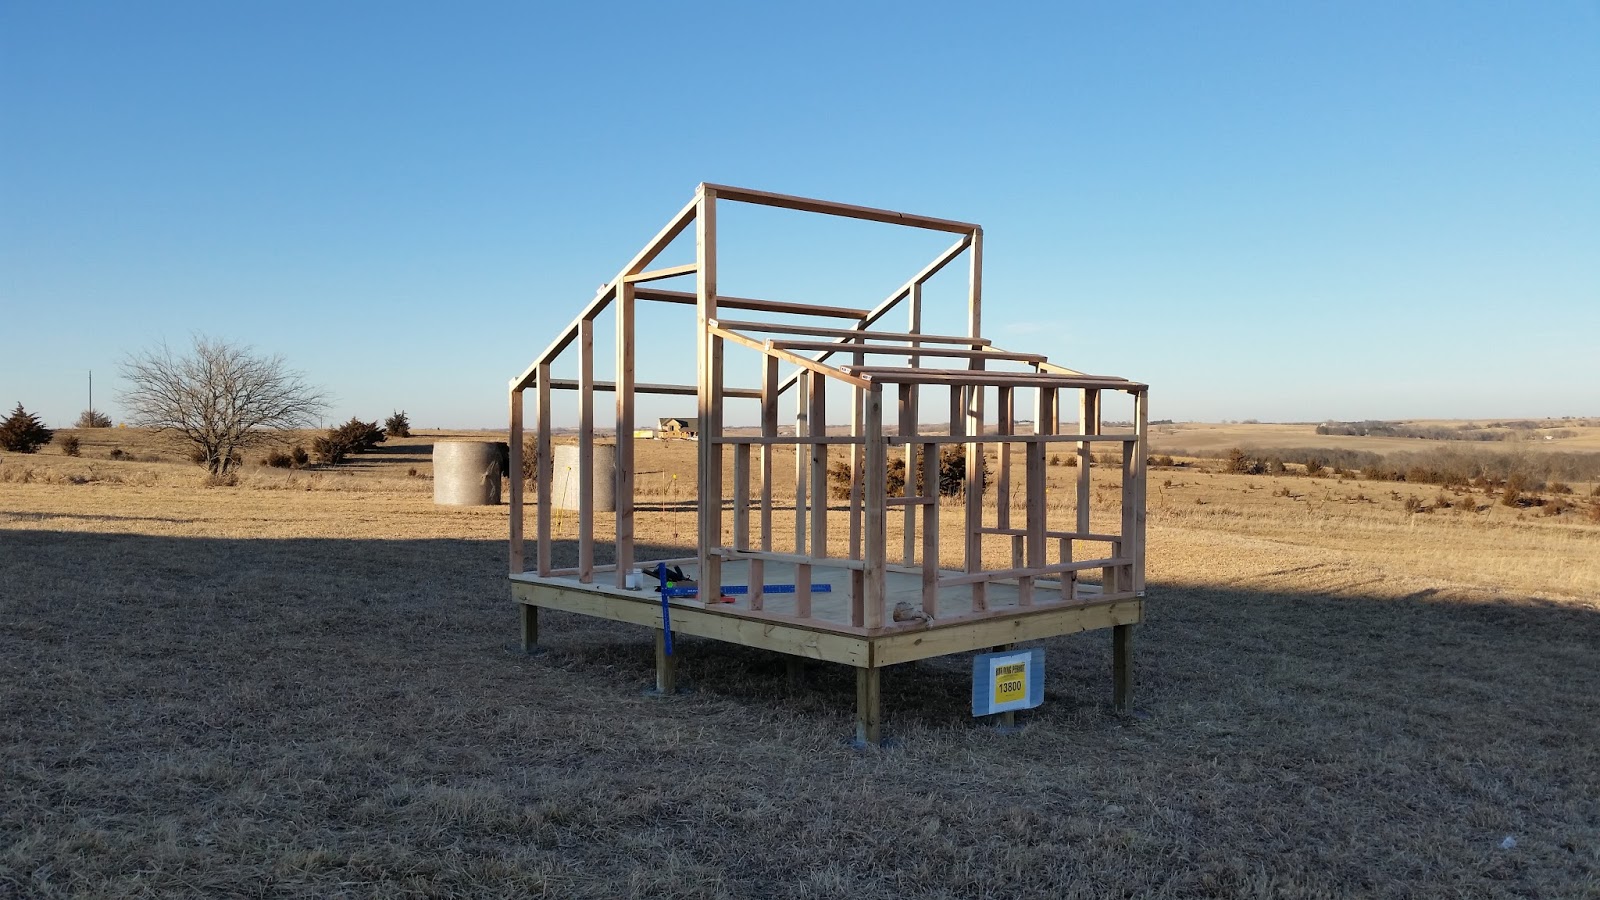
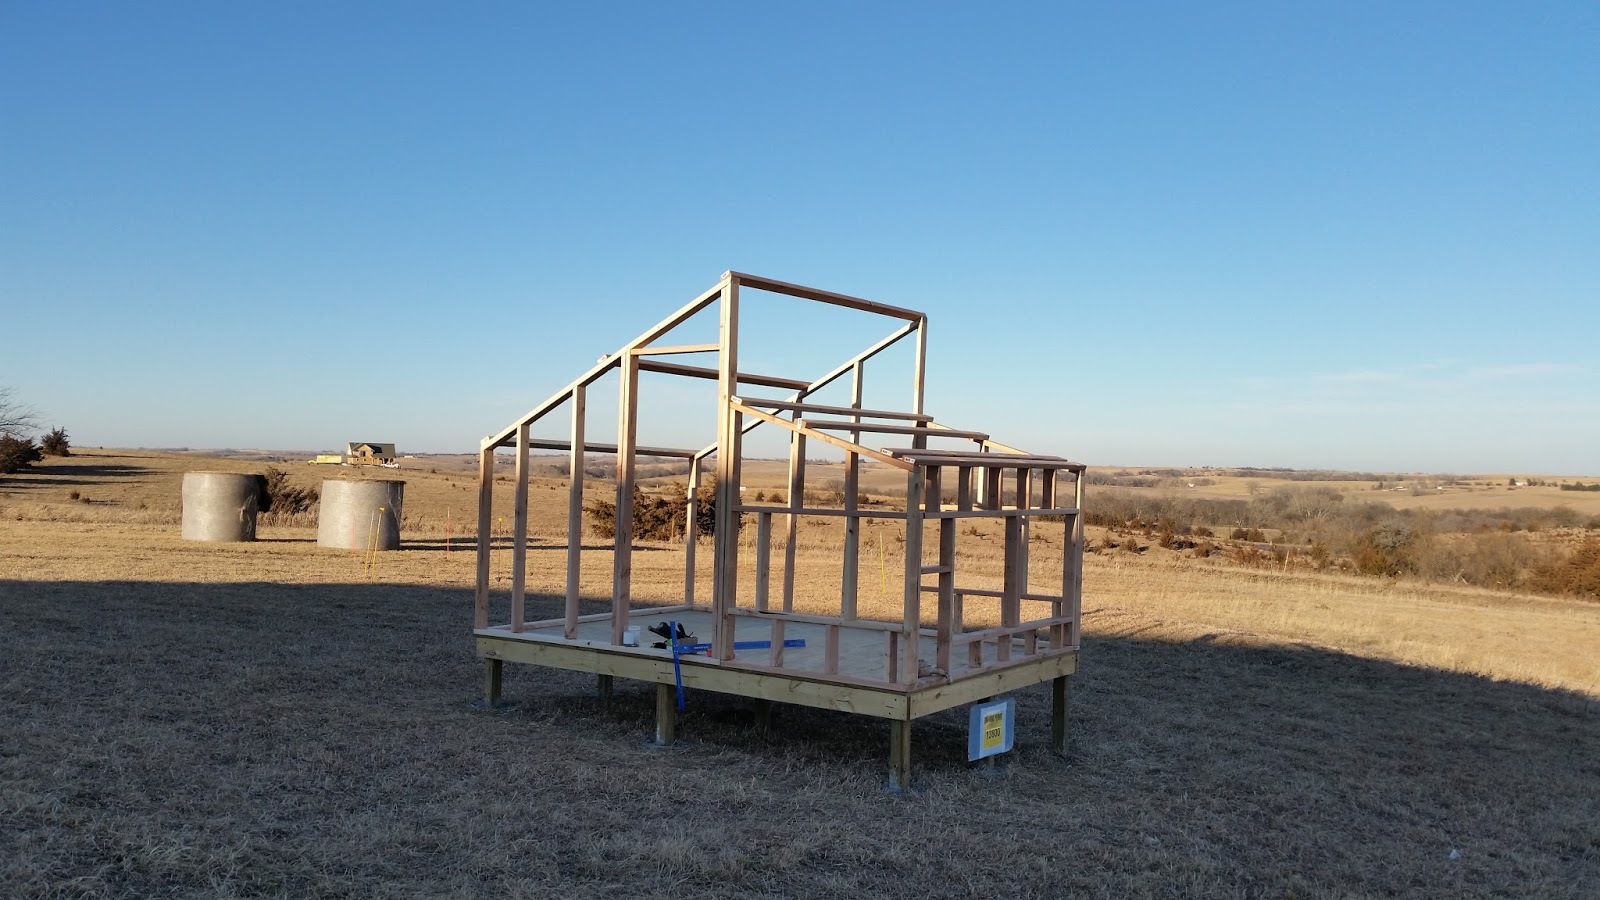

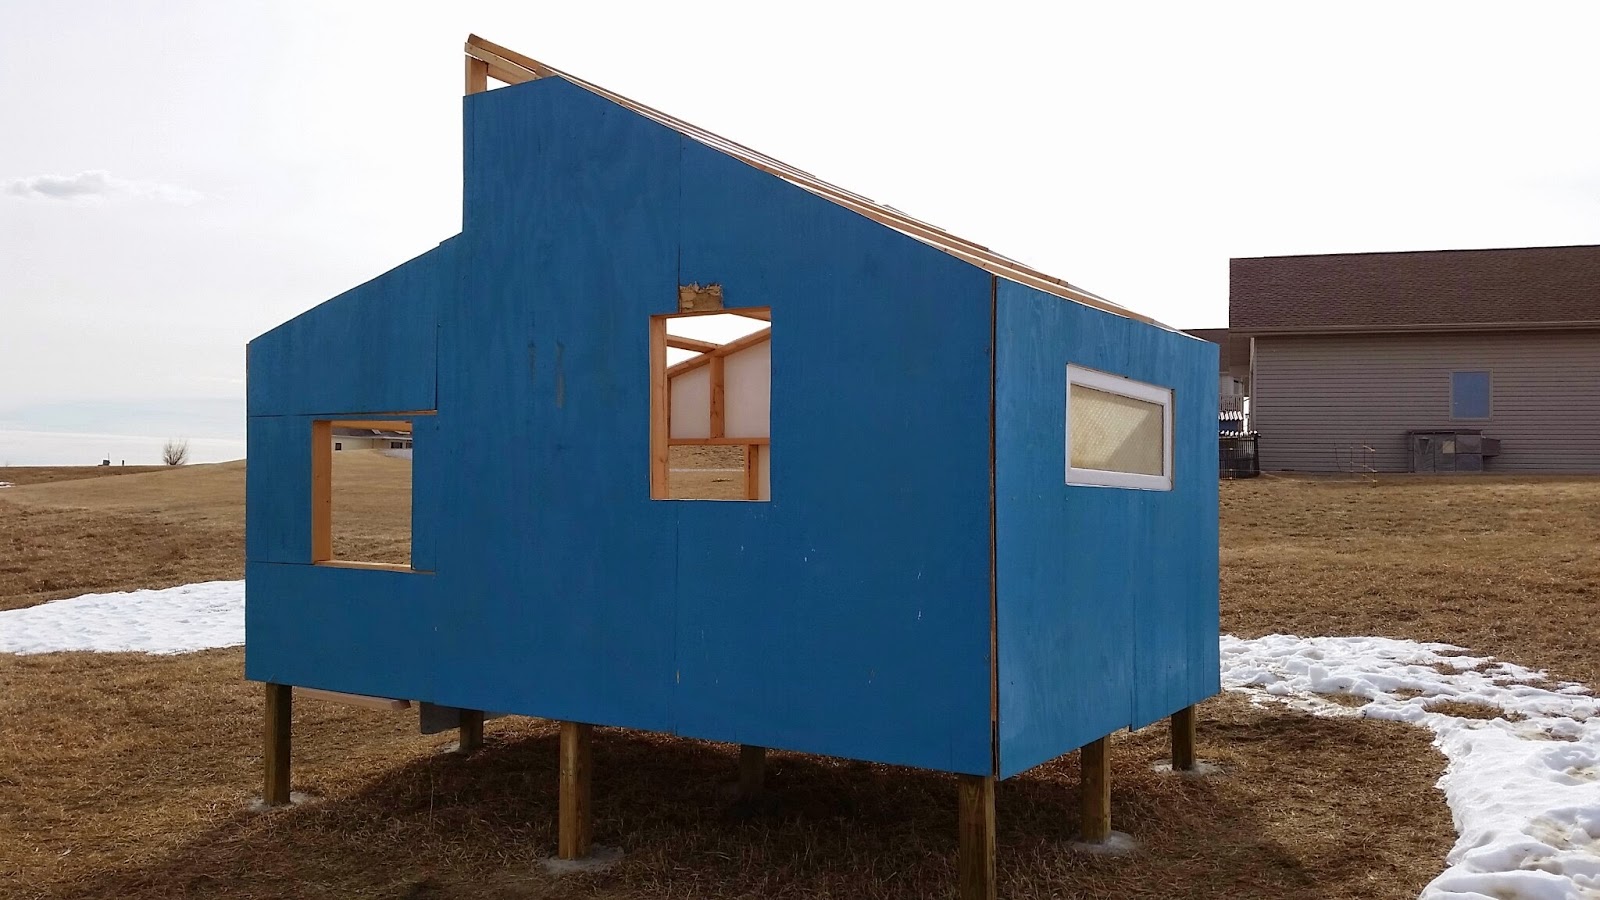
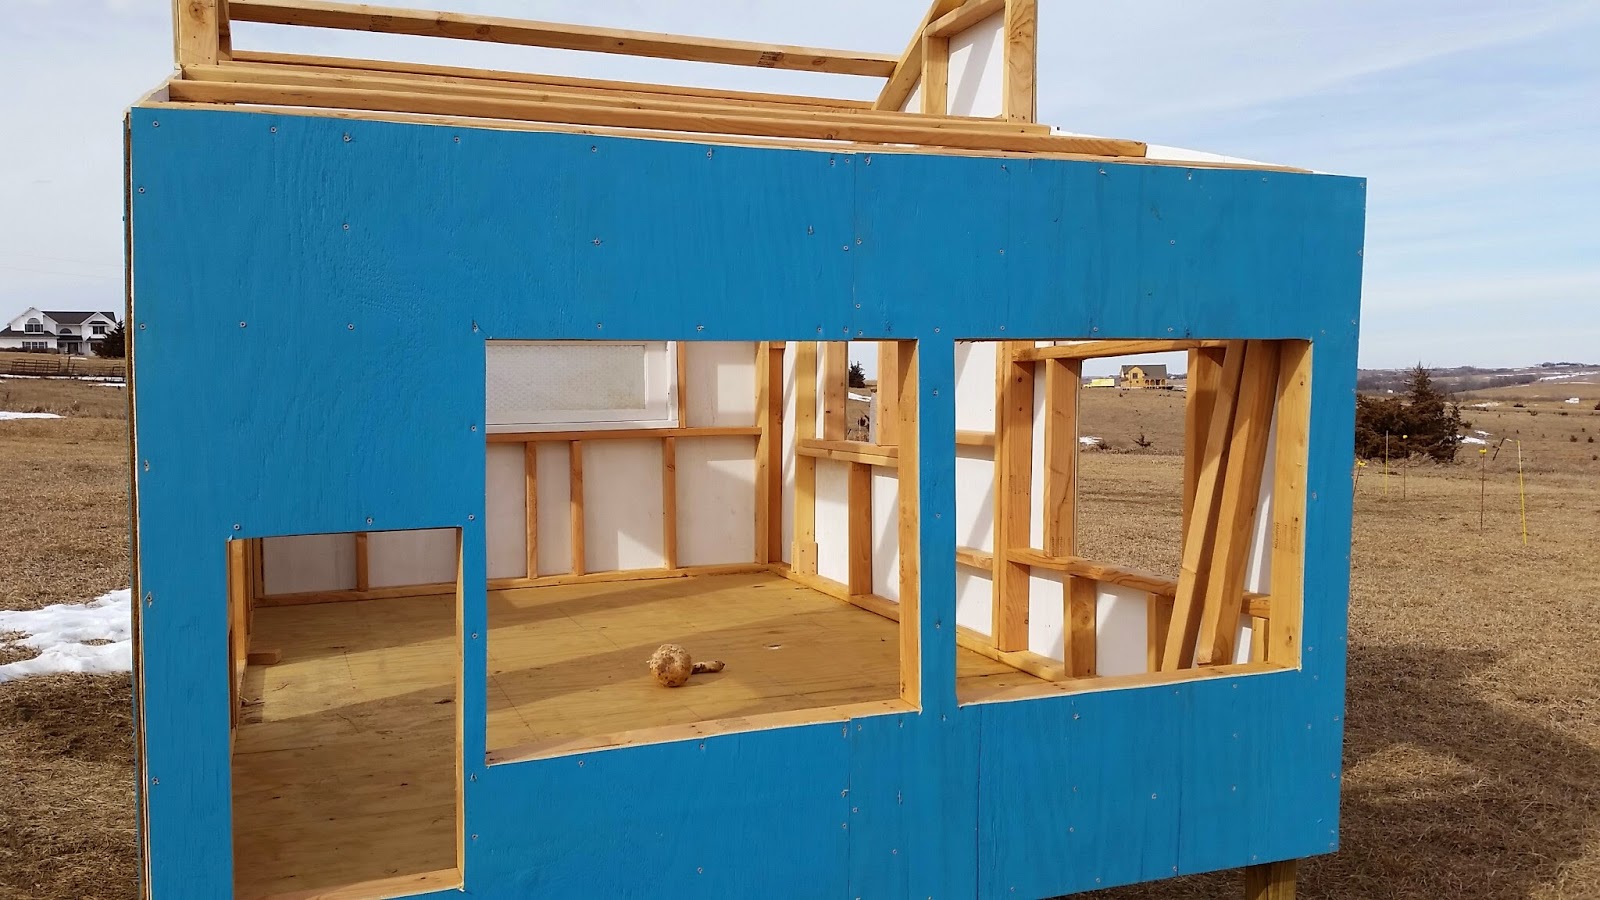
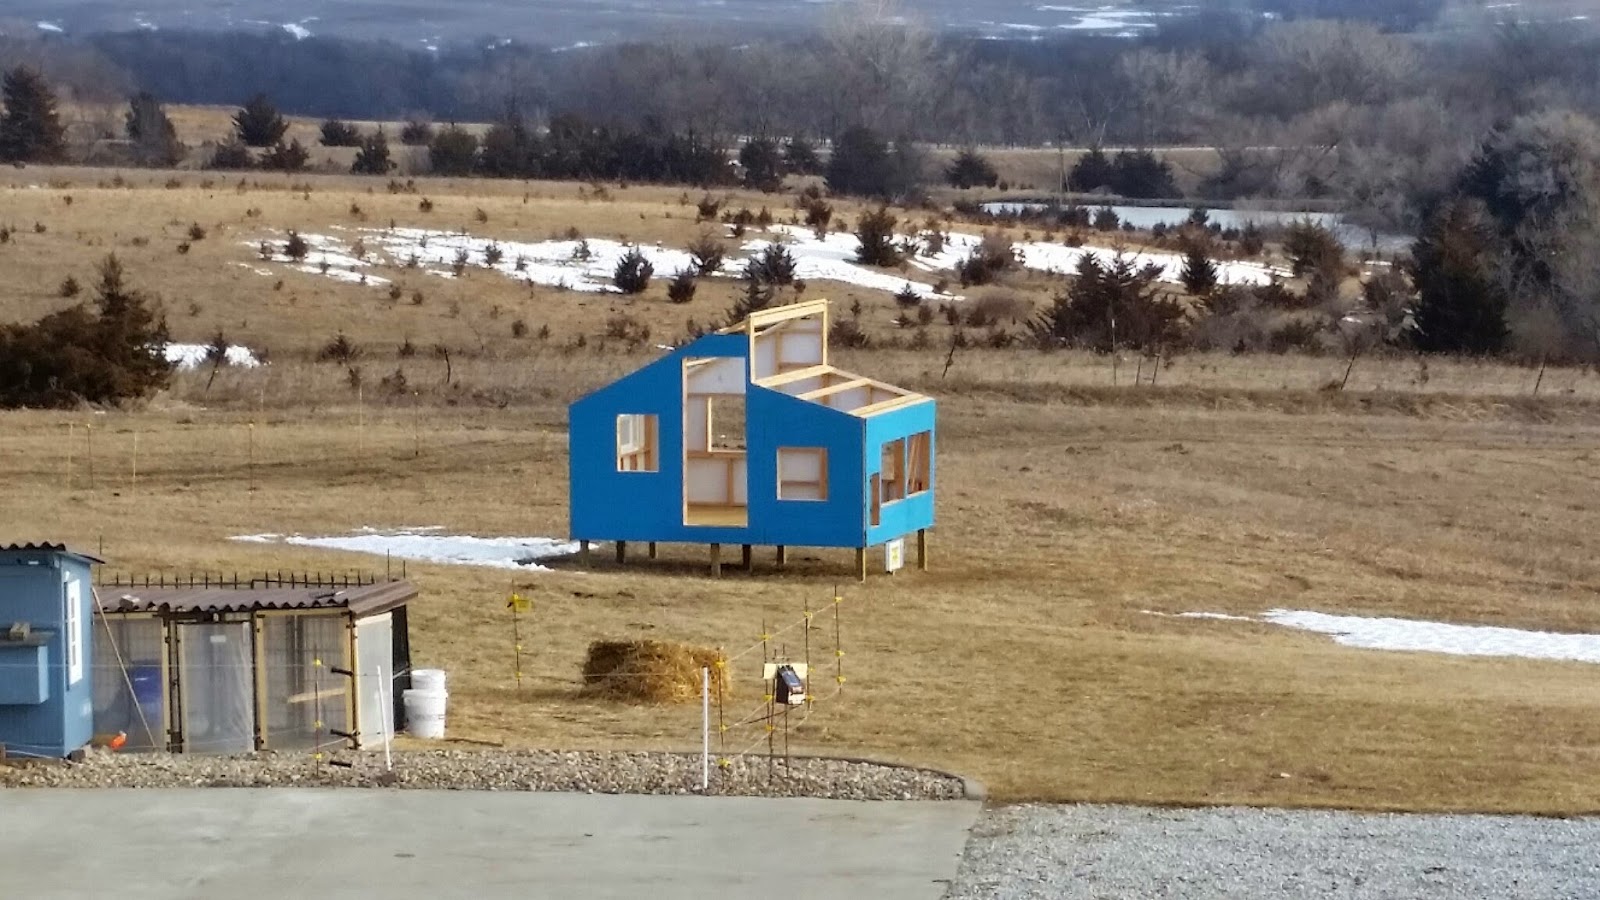
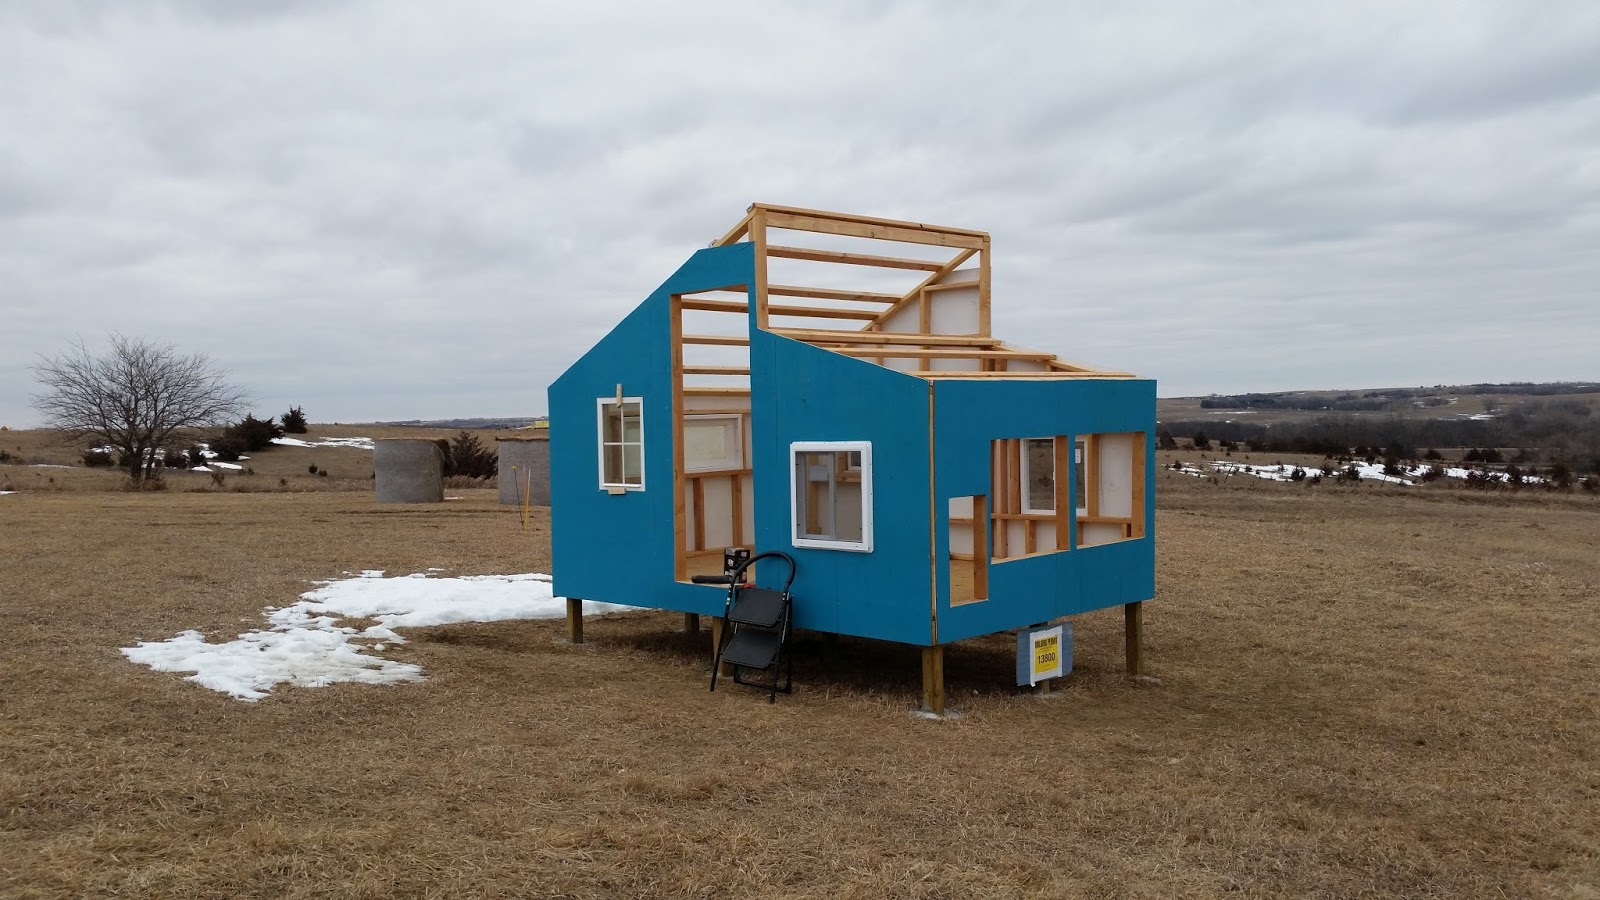
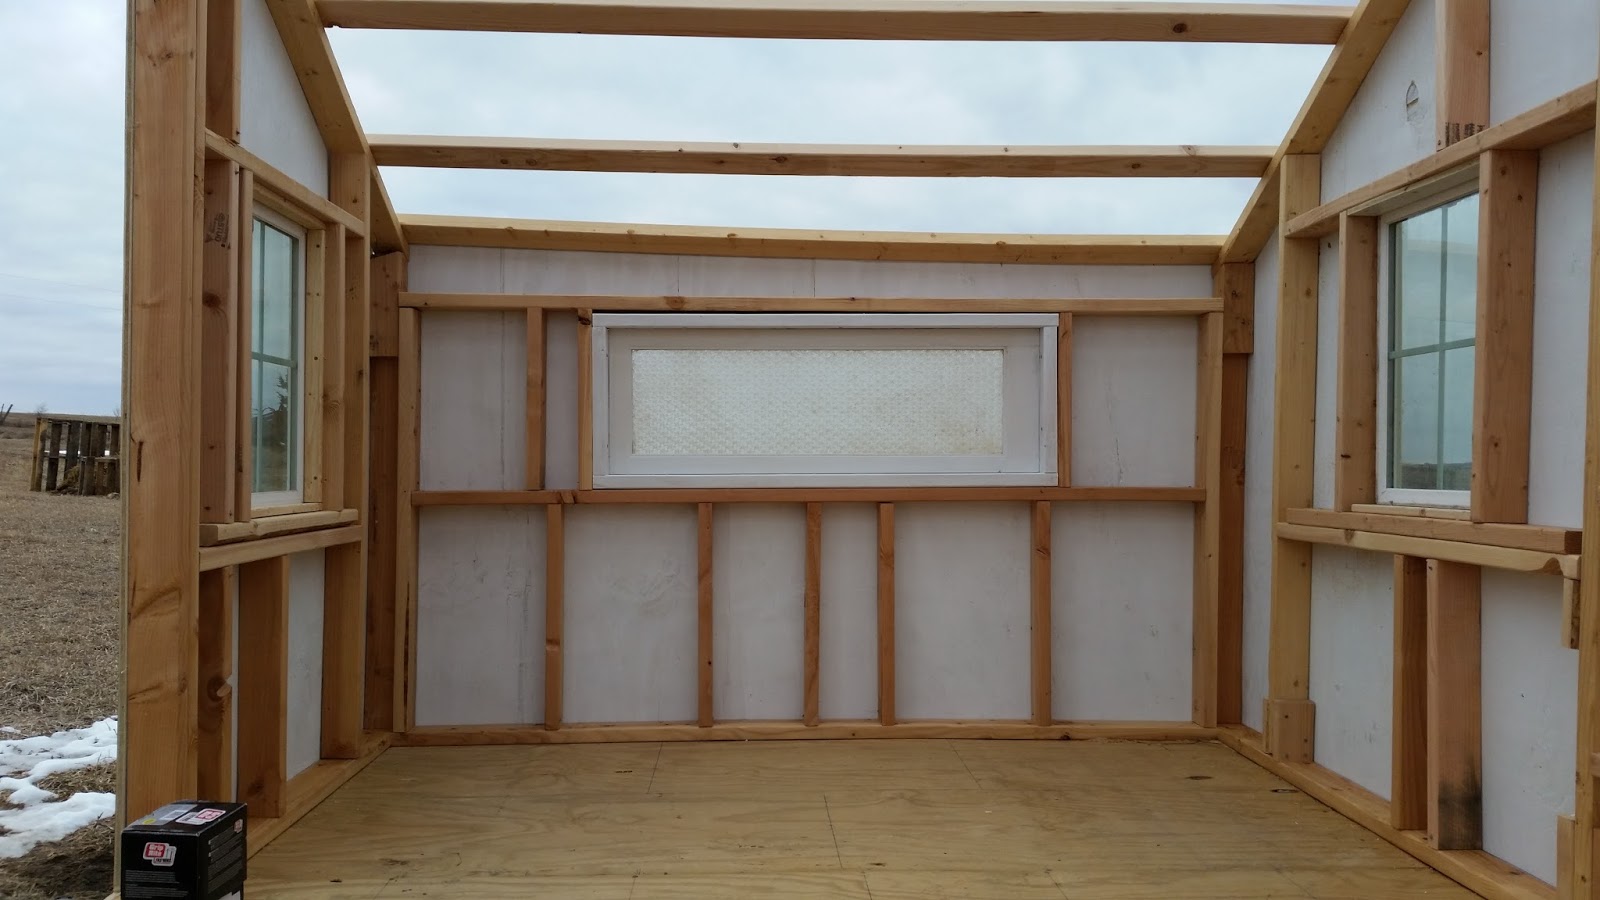
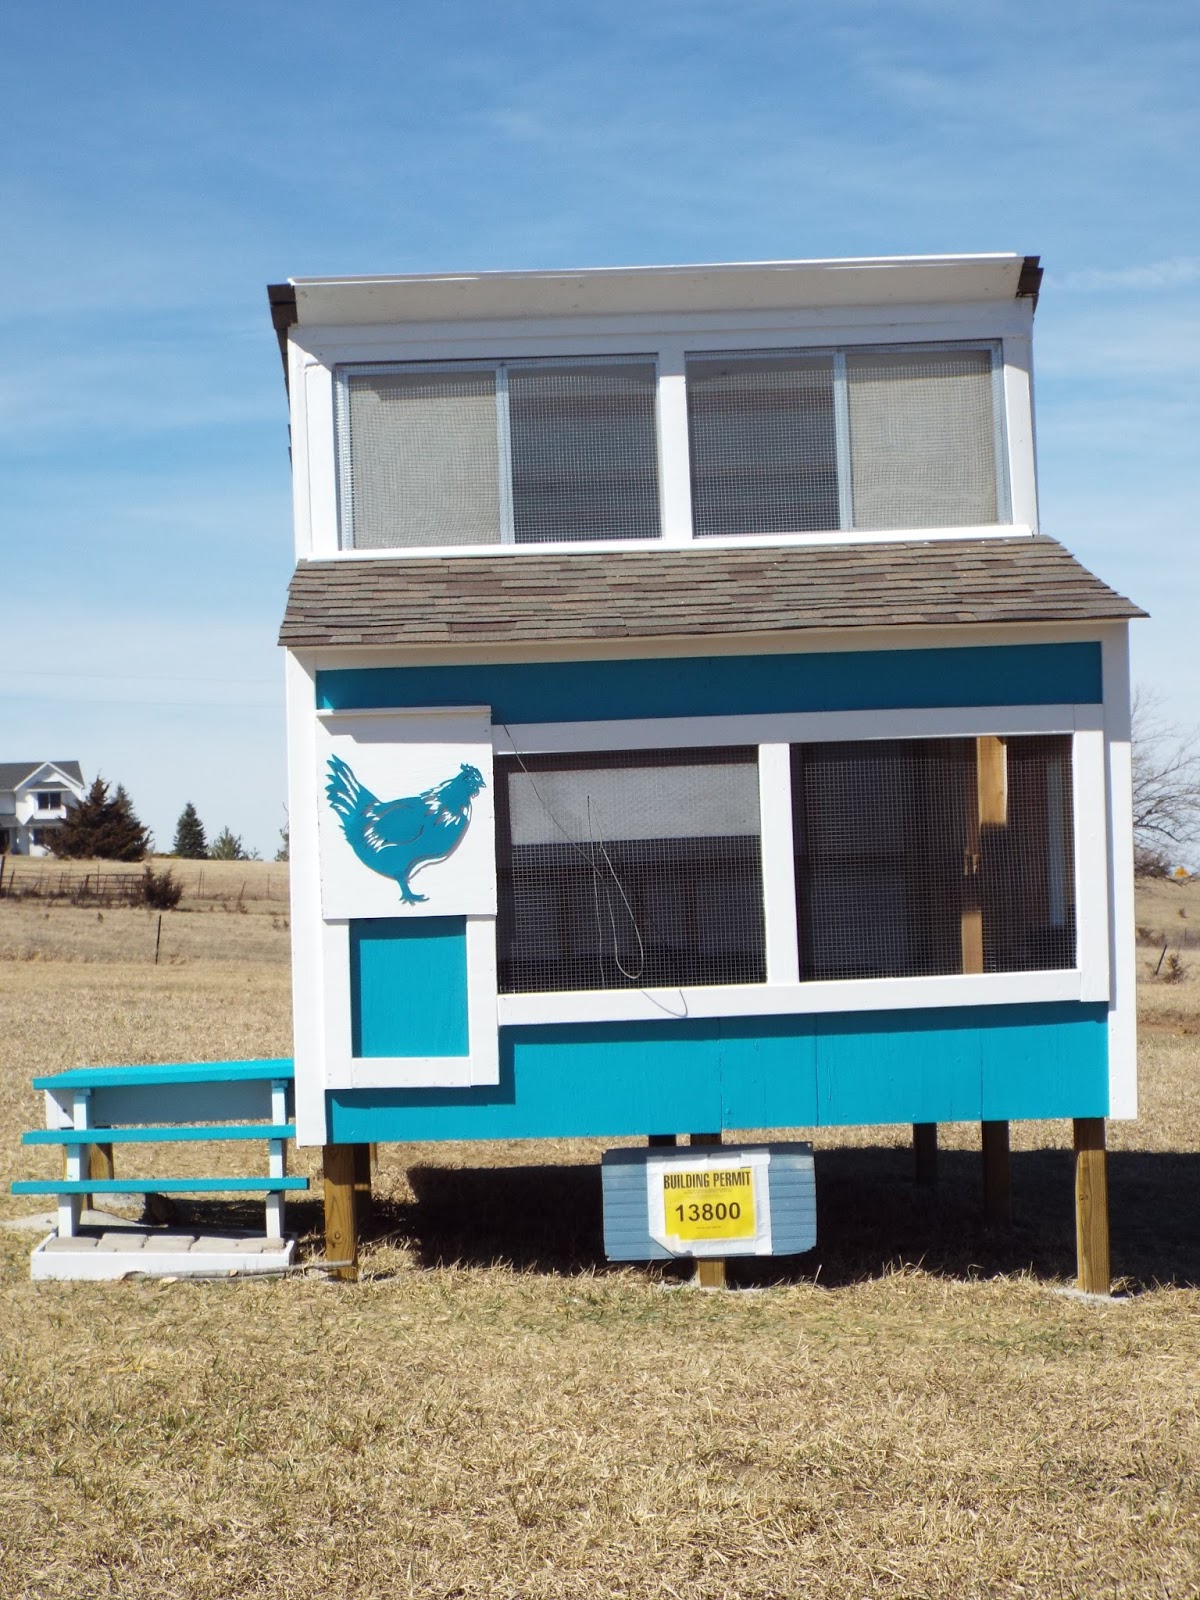
There it is. It's a skeleton of itself, but it's up. I purchased premade small windows from Lowes, so those are the rough openings on the right and left front sides. I found a small, but heavy solid oak door at a local architectural hardware store for $20 (this place sold salvaged hardware from torn-down buildings ~Doc), so that rough opening was set. I didn't have windows for the back or the top, yet. Then I found the local Habitat for Humanity ReStore. What a treasure! I loaded up on windows, hinges, Shingles, roofing nails, bits and pieces! All for a fraction of what you would pay at the hardware store. I added everything to the growing pile in the barn. Most nights I was so overwhelmed with upcoming details and the getting the order things needed done correct, that I thought sleep would never come. Luckily, the workload made that fear moot. FALLING asleep had a new meaning, asleep as soon as I hit the pillow most nights.
It was the 1st of February. It felt like I had been working on it for ages, but in reality it had been 13 days. It felt like ground hog day, every day: drag out of bed, put on warm clothes, drag out to the barn, work, come in for lunch, start dinner, head back to the barn, work, come in for dinner, plan the next day, make lists, fall into bed, repeat.
Then it happened.
I should have expected it. It WAS February after all, Groundhog day, of course.
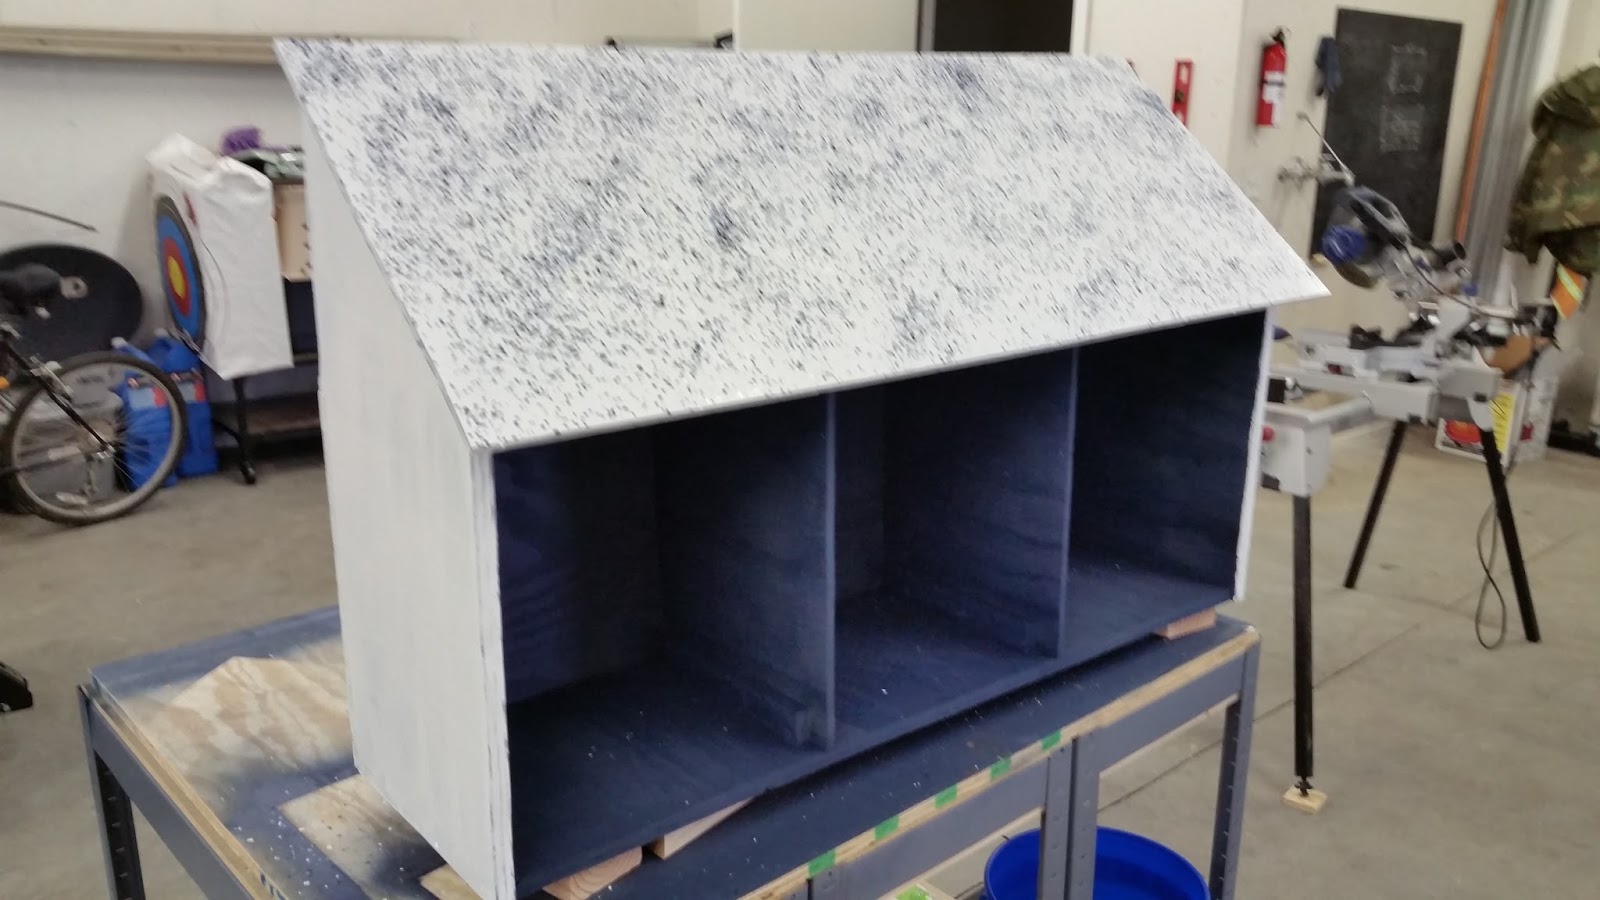
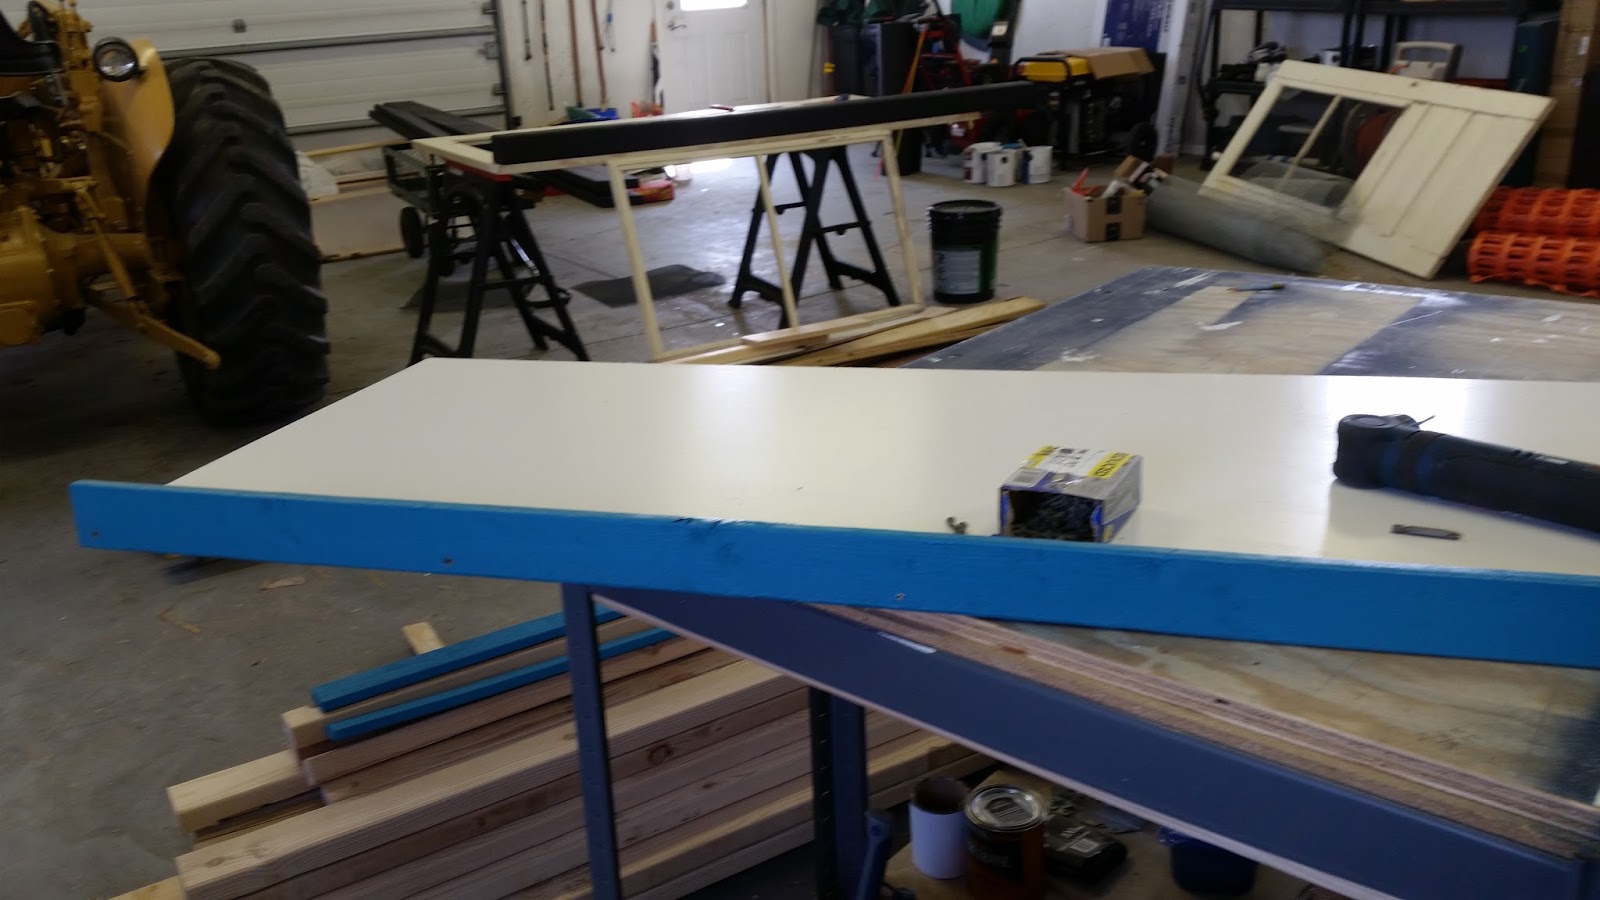
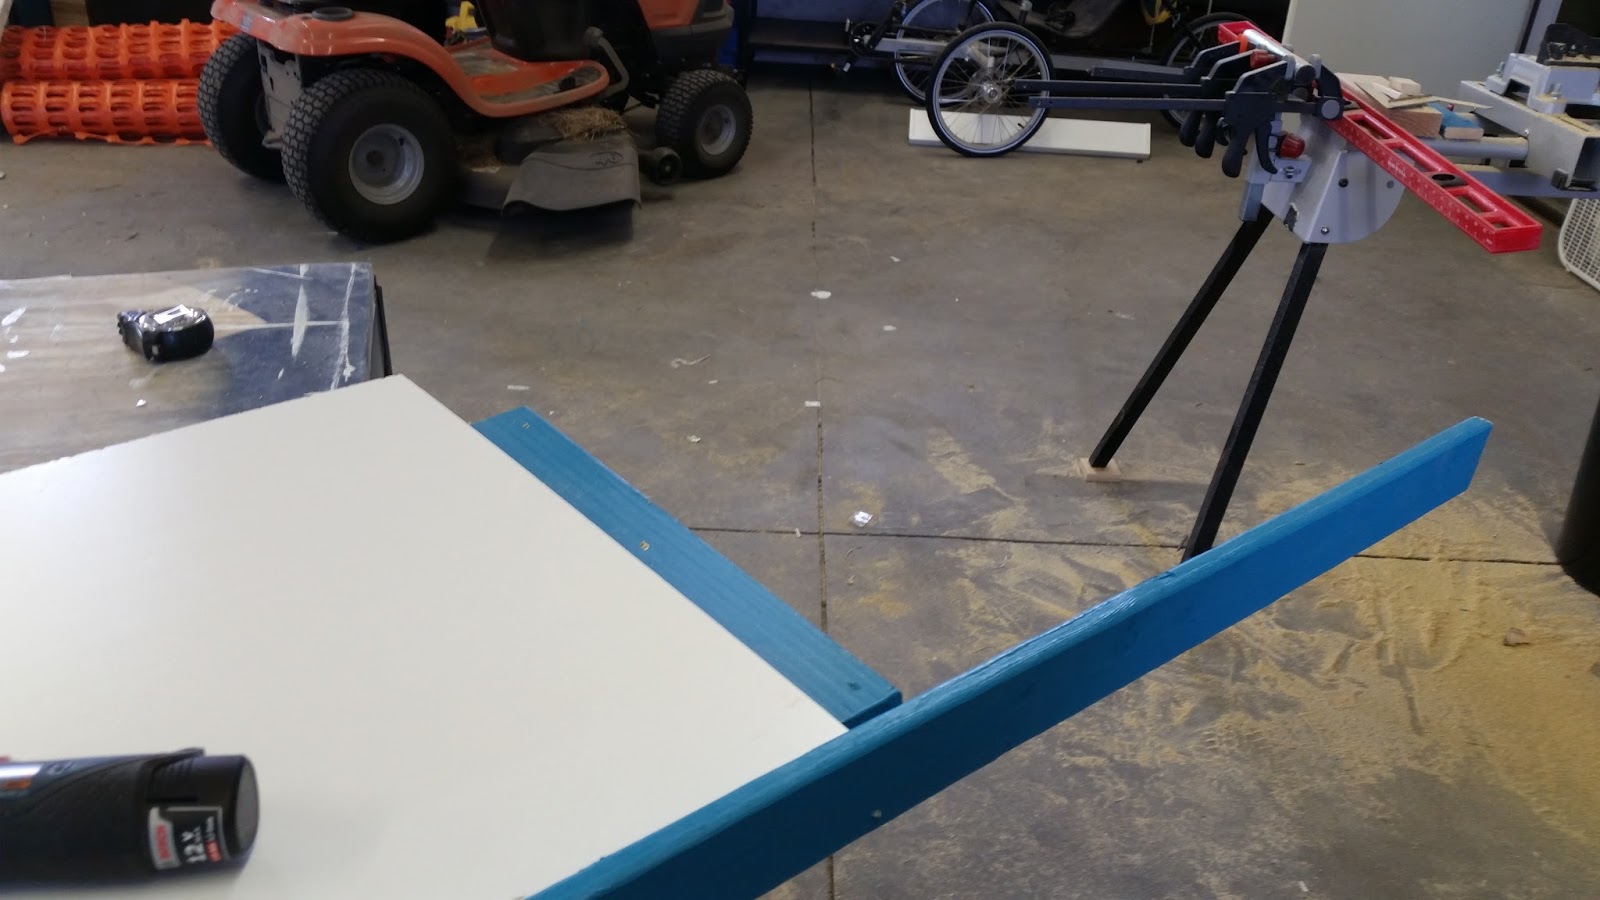
Well if you can't be 'em, join 'em. I moved work inside the cluttered barn. Why not work on the nest box? I dug up some plans on the internet and tallied forth.

|
| Many thanks to www.linnacresfarm.com for their online plans. |
This is a nest box for inside the coop. While I prefer the access from outside, where you just reach in and snag the eggs, honestly, I didn't feel that was the right fit for this coop. Any extra areas that can allow for draft in the wrong place of the wrong coop walls could cause wind draw in the winter. Plus, by going INSIDE to get the eggs, you can put eyes on the inside of the coop for cleaning or repair issues. This is a LARGE nesting box. Each hole is just over 12 inches square. Sure they make nice nesting boxes to purchase, but honestly, they aren't big enough. You see, I have an Orpington. They are HUGE. Her nickname is Turkey. While she CAN get into a smaller box, and I HAVE seen her crawl into one with TWO other chickens already IN it, she just doesn't look comfortable. This box has plenty of room, yet is still cozy. It can be mounted on the wall or you can make feet for it and set it on the floor. Mine is on the floor, on 3.5 inch skid feet. The ladies can just walk right in.
I painted the exterior in gloss white and tossed on some of those paint chip flakes for floors (I found a bag for 25 cents.)
I painted the exterior in gloss white and tossed on some of those paint chip flakes for floors (I found a bag for 25 cents.)
 It makes the top look like old enamelware. The interior is dark blue. For a splash of color, I purchased a sample of cut ruby colored paint from Lowes. A little jar for $4. I then coated the whole thing with water based sealer.

 It was to get so brutally cold, that I actually brought the girls into the barn for playtime. That little 4x4 coop was getting boring, and they refused to go outside in their run. I can't blame them.
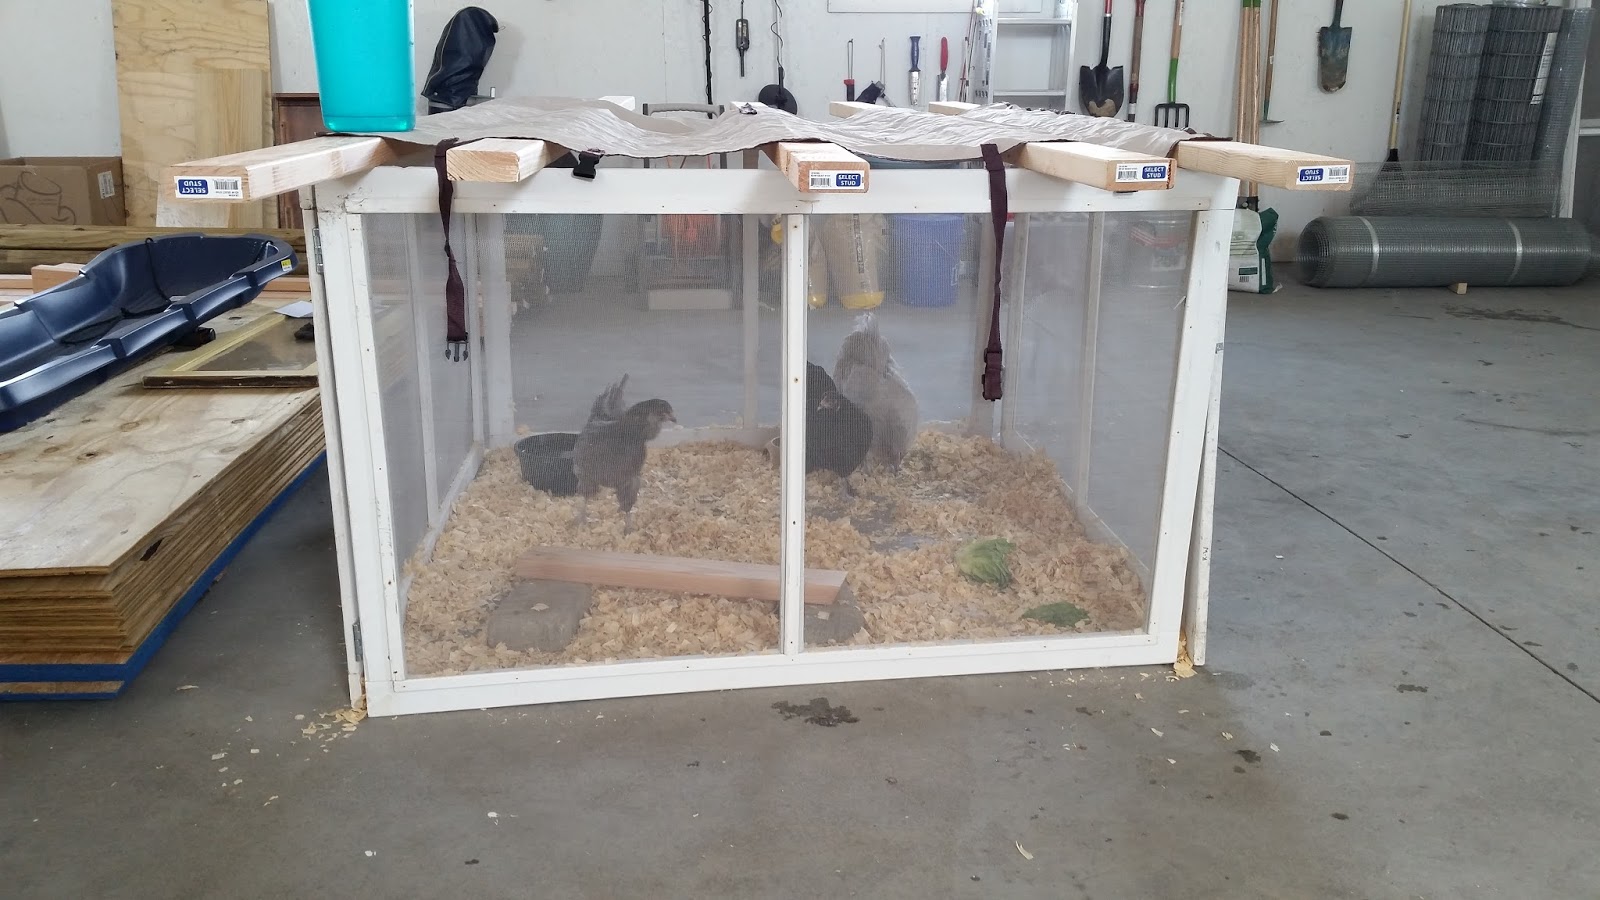
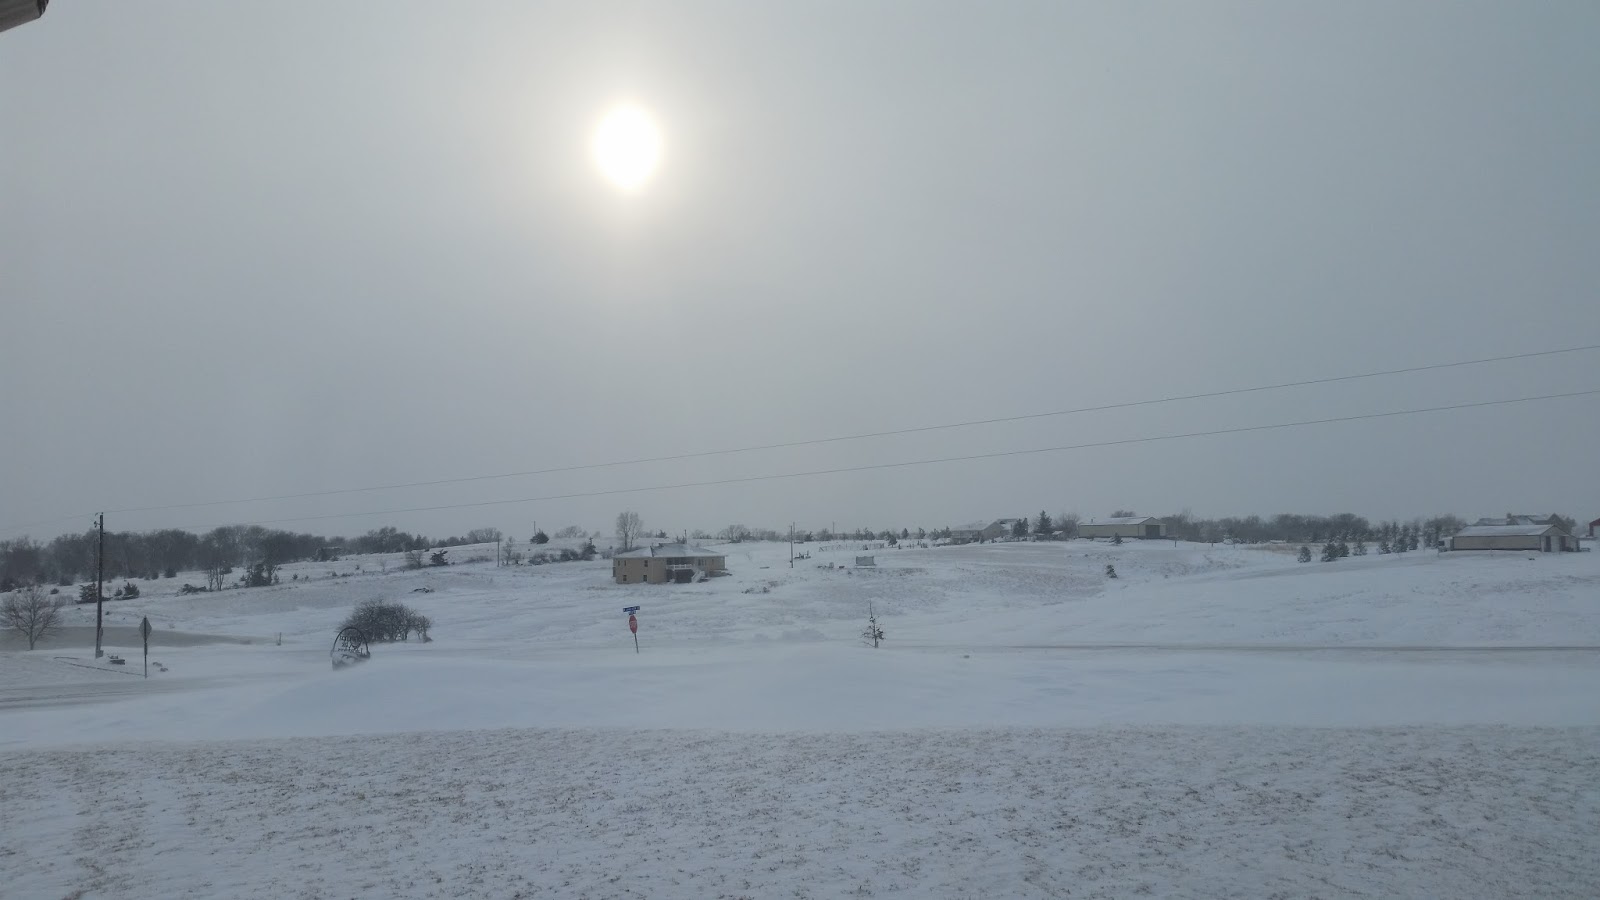
The next day, the sun came out and melted away the thinnest areas of snow. It was still too cold to go out and work.
On the upside, it let me see where I need to put up the snow fences next Fall.

Since I couldn't get outside again, I worked on the main coop door. I stripped paint, sanded, filled old holes, primed and painted - three coats.
By now I was itching to get back outside and work on the main coop. Sure, all the little bits added up to work on the main coop, but it sure didn't feel like it at the time.
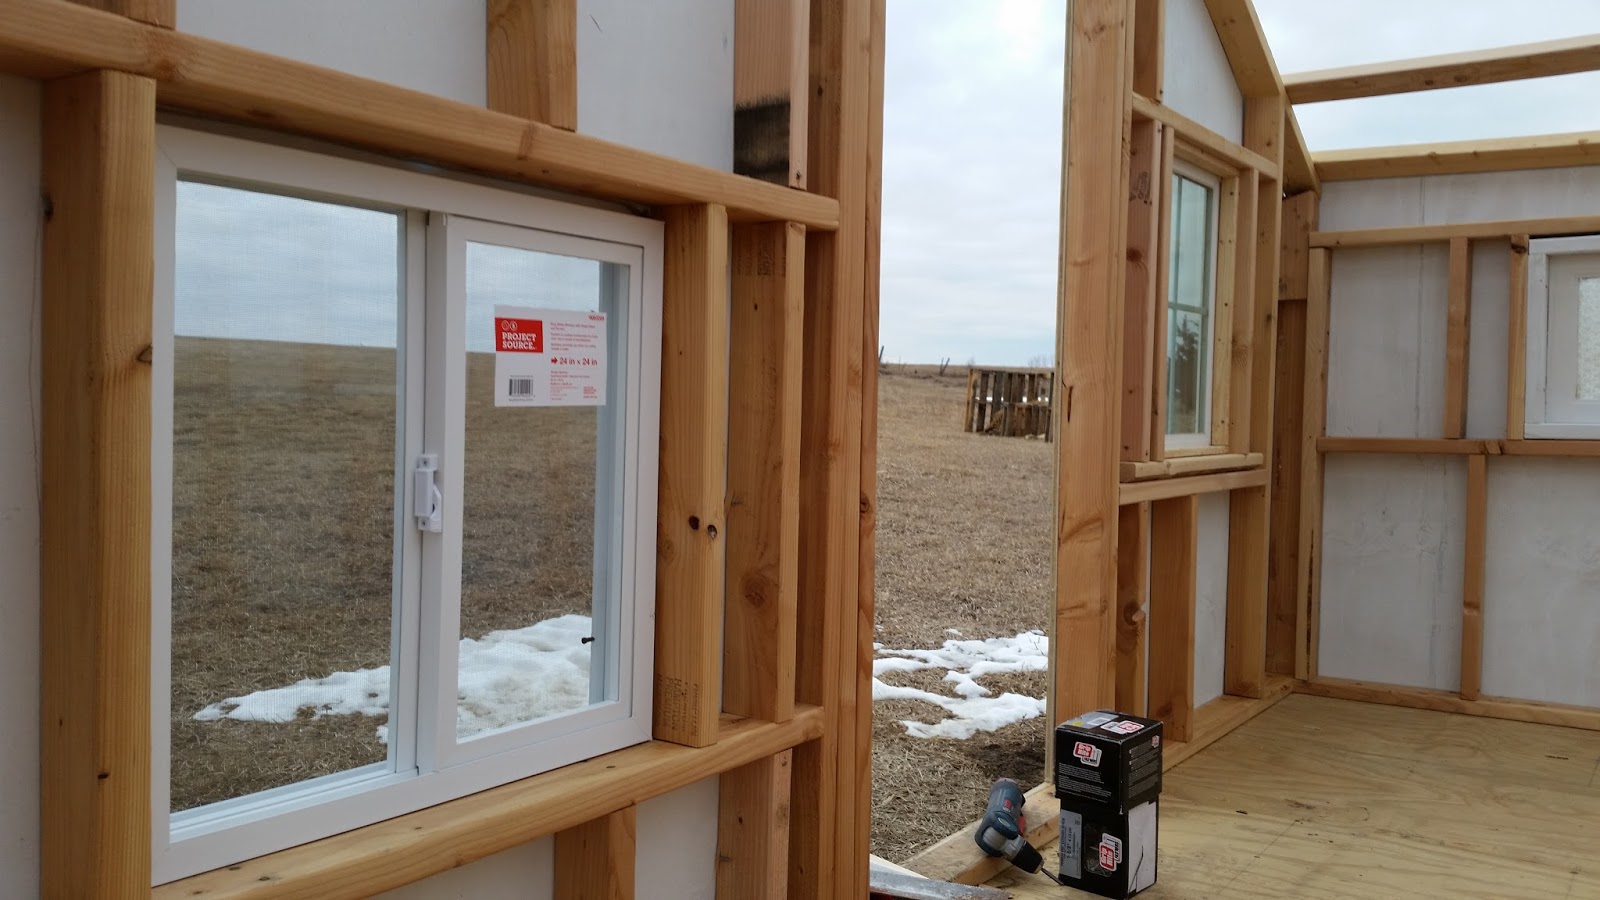
During the weather downtime, I found a fabulous antique pressed glass long window for the back wall. It would not be one that opened or closed, but it would allow for light to enter on the 4th wall. I also found the back two windows, also static, for the back half of the coop on the sides, AND the large upper Monitor windows, all from the Habitat Store. I still had more weather down time to fill. Working inside was getting old, fast. I had been listening to my Pandora station the whole time and show tunes were getting old. But they were mindless and allowed me to focus on the work.
I cleared out the entire barn floor and laid out all of my sheets of plywood for the exterior walls. Every piece got three coats of white semi gloss paint before I flipped them over to give them two coats of Teal semi gloss paint. I figured that by painting them now, in a heated barn, I could save myself a step outside, should the weather not cooperate. Boy am I glad I did. Some of the ply was warped. Some delaminated as I painted it. Some soaked up a silly amount of paint and needed more coats. It sure was easier painting with a roller on a stick as things lay on the floor, than it would have been tackling all that on the vertical!
On February 10th we got another surprise!
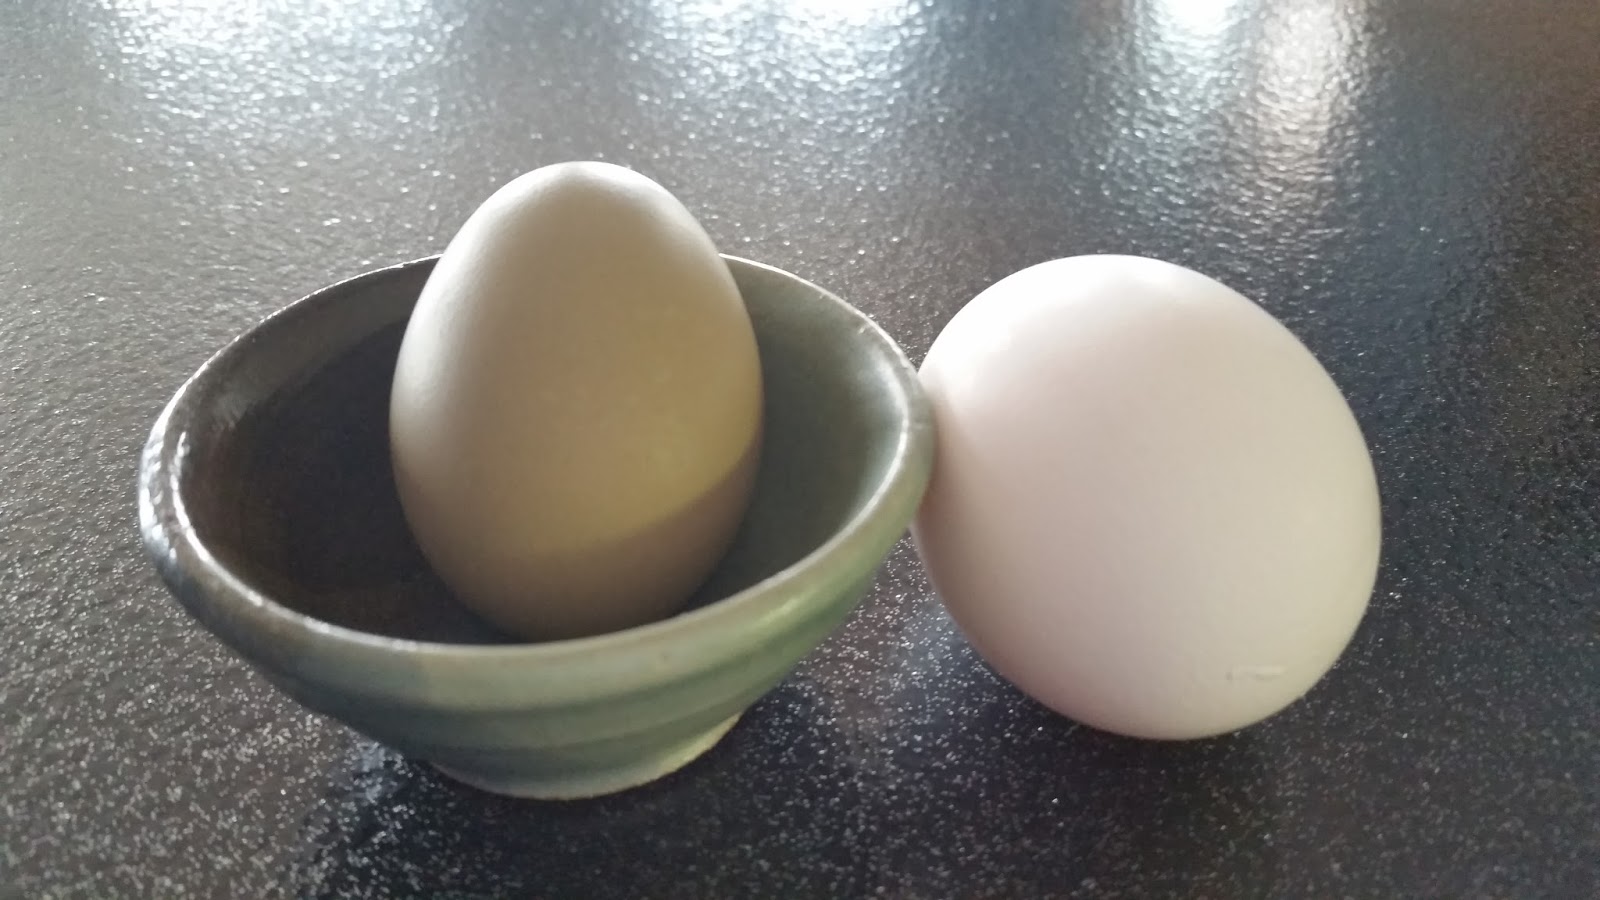
Olive gave us our first egg. It was little, but it was the prettiest shade of Olive green.
I guess Hyacinth just needed someone to show her how, because she joined in the next day.
It was just the motivator I needed. This project was getting old fast. On a good day, I have the attention span of a goldfish. With this project going on and on and on, and the gloomy cold weather, and other LARGE projects looming I was starting to get overwhelmed. But the new eggs set me back on the right path.
By February 15th, the snows had started to melt away. It was still cold, but at least it was above freezing, barely. The next step required me to wait for help. There was NO WAY I could move plywood down to the build by myself AND hold it up, and secure it, and mark it, lower it down, cut it, and put it back up in the same place. So Doc donned his polar bear suit and joined me for an afternoon of fun, and frolic in the great outdoor. Well, at least that's what I told him. Plus, I promised him roast beef for dinner. Whatever works, eh?
Melting snow plus stomping feet equals wet, squishy, mud. And it was cold. 40 degrees sounds ok, until you add in the wind. It never fails. If you need to work outside and don't want it, nature provides you howling winds on this hill. Which is ok, unless you are moving full sheets of plywood. I like to think that's how the Wright brothers got started.
Anyway, our plan was to lift the plywood to the coop walls, tack them in place with a couple of screws, mark the interior studs and roof line with a crayon, and then remove the wall to a saw horse. I would then predrill the screw holes for the stud screws, while Doc cut the roof line and cut out the window openings. Then we would simply lift the piece back up to the wall, use the predrilled holes, and attached the wall with screws. We actually got into quite the groove. 10 sheets took us several hours, but by the time the sunset, the coop had walls! Painted WALLS!


The neighbors now knew we were nuts. We were half frozen, but we had walls....and roast beef for supper.
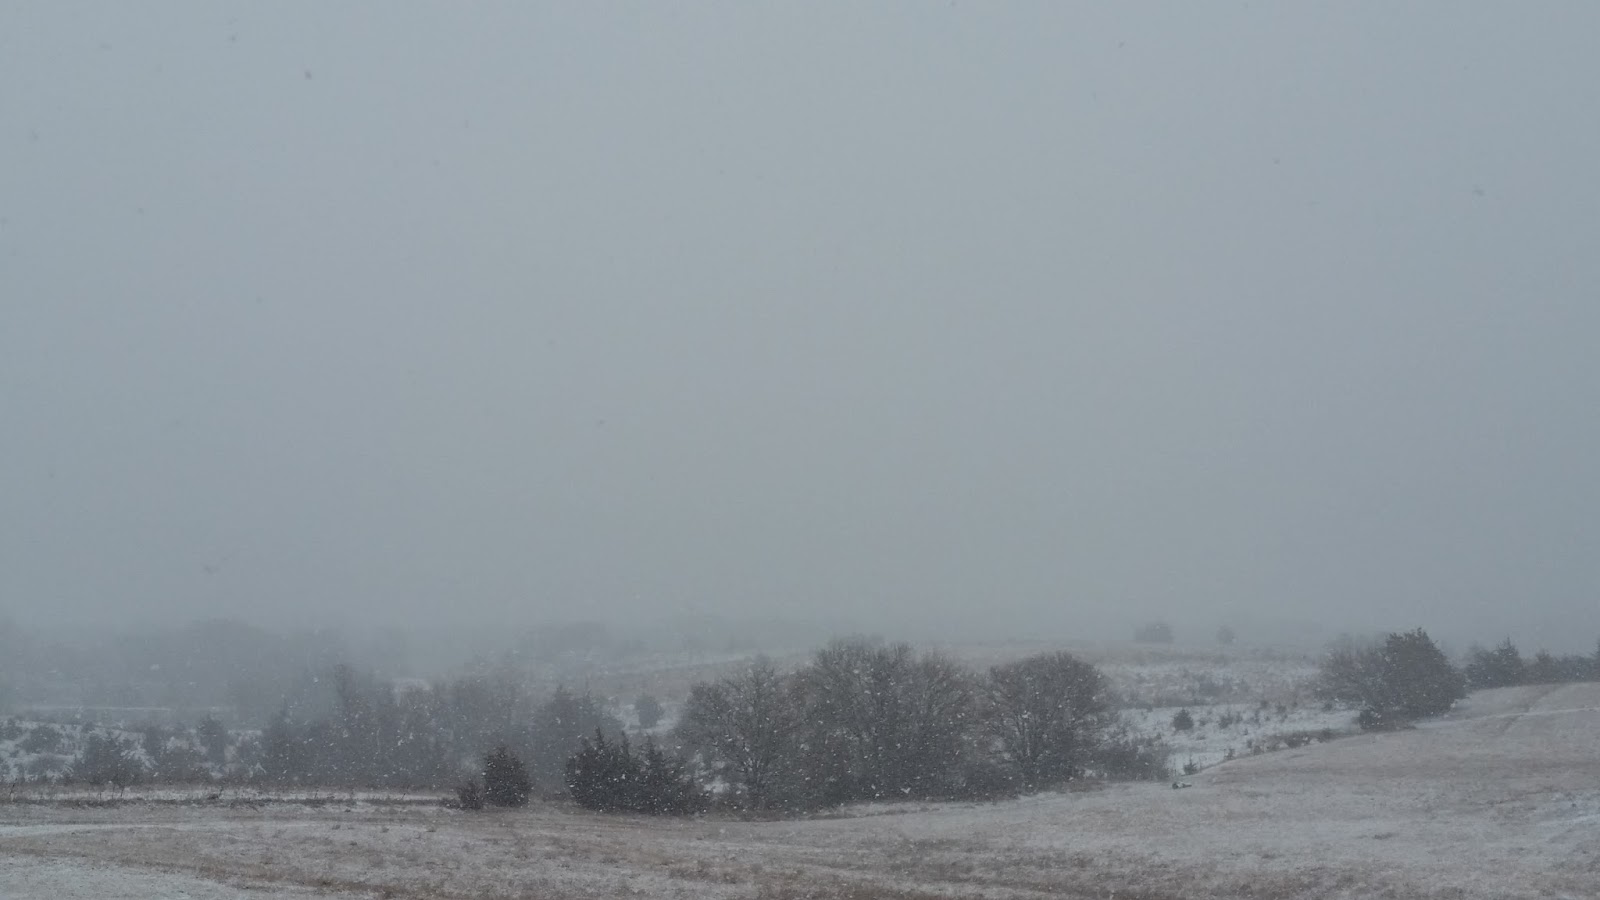
Since I now had walls and no roof, winter decided to arrive. After I would clear the driveway, I would walk down to the coop and shovel out the empty building. It was at this time that Merriweather decided to get in on the fun.
The roof would take more than just me working on it, so it would have to wait. In the meantime, I was able to do all the smaller projects, like the windows, rafters, and the pop door.


Was there swearing? Yes. Were there tears? Almost. I was tired of living in heavy winter outdoor clothes, heavy work boots, being cold, being sore, plus keeping house and taking care of schooling, and everything else that had to be done. I was just plain TIRED. But a partially done project to and OCD is more than a nagging project. It's a mission. So forward is the only direction.
One afternoon, as a study break, the boy helped me lift the large, upper windows into place, and held up the door while I attached the hinges. The next day, Doc covered the roof plywood with the drip edge and the tar paper and helped me lift that into place and secure it down. I felt the end of the project was just out of reach, even though I was no where close!


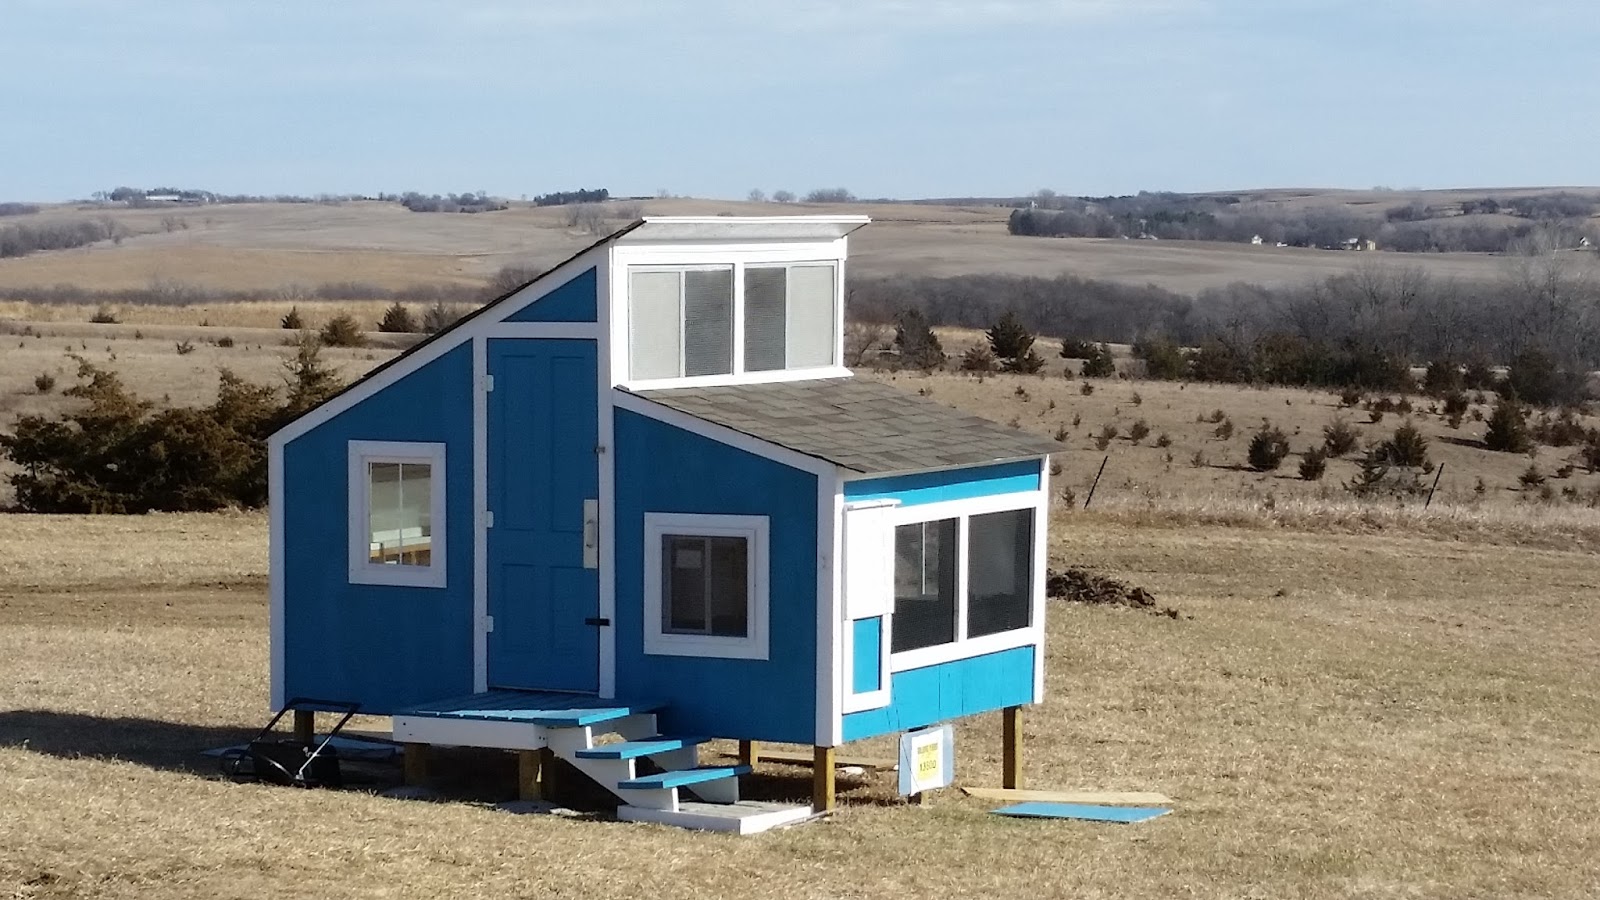
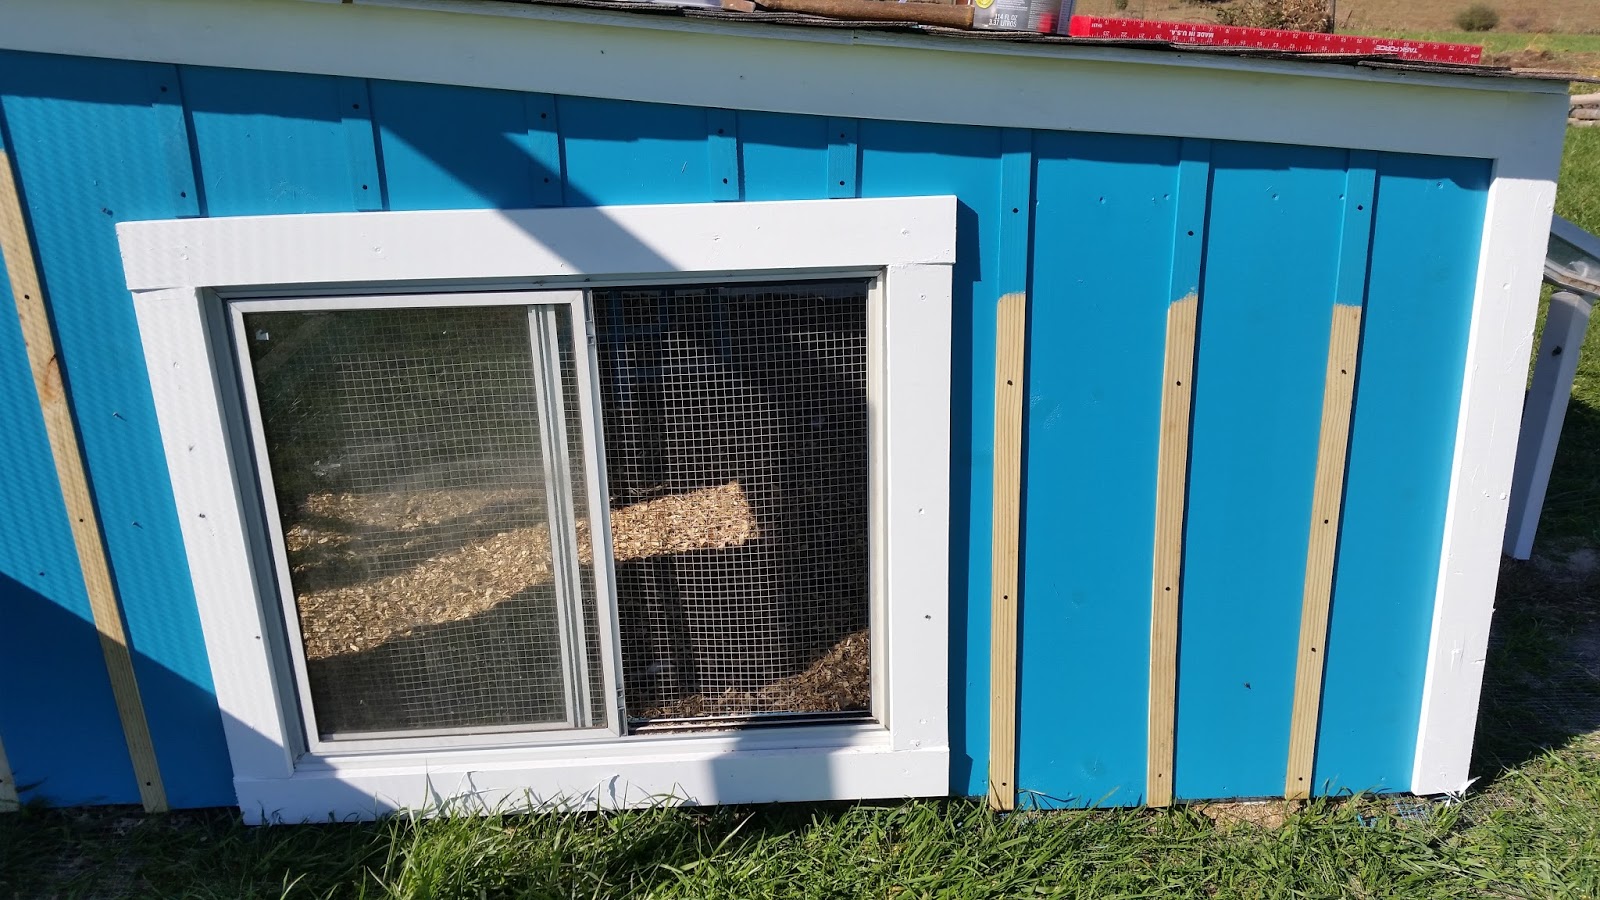
The roof was next, but Doc would have to help me with that one. So I continued on with the little things that I could do on my own. I worked on the trim I could reach with my small ladder ( I promised Doc no large ladders while he was away.) I covered all the windows with hardware cloth and trimmed them. I built a simple pop door, a LARGE pop door. (Now Hyacinth doesn't have to squeeze herself out.) I even built a porch and steps to the door.

The scale of this project was amazing. Mostly because I was the entire work force for 98% of it. The big stuff goes up quickly and seems like a lot, until the little projects - the finishing projects, eat you alive. Killed by a shark, or pecked to death by chickens? You decide.
But onward and UPwards.
Upwards. The roof. I don't mind heights. UP is cool. UP is a great view. UP is a super cute kids movie.
It's down that's no fun. More specifically, falling. I've done it on several occasions. I did not care for it. So while working on the roof of the coop didn't bother me, the act of getting up there, and more importantly, STAYING up there was a huge deal. It absolutely, positively could NOT be done on a windy day. The day had to be perfect. The first day up, we decided to tackle the lower roof first, as it is not only smaller, but has a more gentle pitch.
I was using these great dimensional shingles I picked up at the Habitat Store for only $4 a bundle, instead of $45 a bundle new. They are great! OC I didn't buy enough, and had to make another trip, but they had plenty. Armed with a ladder, a good 20oz hammer, these cool roofing nails that had a metal ring instead of plastic, and a good wingman.....see I'm even stalling going back up on that ladder describing it to you. OK, UP I went. Phew not so bad. The first couple of rows could be done from the ladder, but remember this coop is built on a hill, so one side of the ladder had to be propped up 4 inches. ("propped up" = we made a level, stable plywood platform, nothing wibbly-wobbly ~Doc) Oh joy. But there was simply no escaping it. It was time to get ON the roof.
This is where I know the Universe has a sense of humor. I no sooner get ON the roof and the winds pick up. And not just a little, but now gusting to over 35mph. And the sun, as weak as it is, is now heating the lower shingles, burning my knees through my jeans. An hour later and it is time for lunch and the shingles are done. After lunch I climb back up on to the lower roof, emboldened by my earlier success, and put up the exterior trim and metal hardware cloth on the upper window. Then it was time for IT.
The back roof. The super scary, super angled, super high, super slippery, back roof. What was I thinking?! Who built this abomination to nature?! Who?! Oh wait... UGH.
Again I was able to manage the first two rows from the propped up ladder. I kept asking Doc over and over again if he had a hold of the ladder. I knew he did. Where was he going to go? Well, ok, he COULD have gone somewhere. I bet he wished he HAD been somewhere, but he was there, holding tightly. He wasn't going to let that ladder go. I knew that. He knew that. But my brain wasn't so sure that gravity has received that memo. SO I kept asking anyway.
Once I was on the ladder it was even more apparent HOW steep this roof was. The tar paper, or roofing felt, wasn't making it any easier. I swear it was coated in Teflon. I made a command decision. It had to come off. I ripped great sheets of it, tossing it to the ground. I kept repeating to myself, " I will not fall. I can do this." Then about half way up the roof...I ran out of shingles. AHHHHH!
Which meant not only the dreaded trip to town, but that I was going to have to go up on that roof, AGAIN! You'd think the emboldened thing would kick in again. Apparently, I reached my quota for that and it was almost as hard to get up on the back roof the second time. But I did. I would nail full shingles down as Doc would cut me partials. And the winds started to howl again. By lunch time on the second day, the roof was done.
My wrists felt like maracas, my knees burned and bruised to being bloody, but my coop had a roof. A 30 year roof, maybe a few years less by the lack of tar paper underlayment. But I don't think the girls will care.
By now it's early March. The Earth is starting to shake off it's winter blues, the days are getting noticeably longer, the days are getting warmer. Heck, a couple of work days even made it into the 60, and I had to trade my winter coat, for a jacket, and loose the jacket and trade the jeans for shorts.
The on and off blizzards, cold spells, and snow storms were finding it harder and harder to keep a firm hold on the passing season and began to give up altogether.
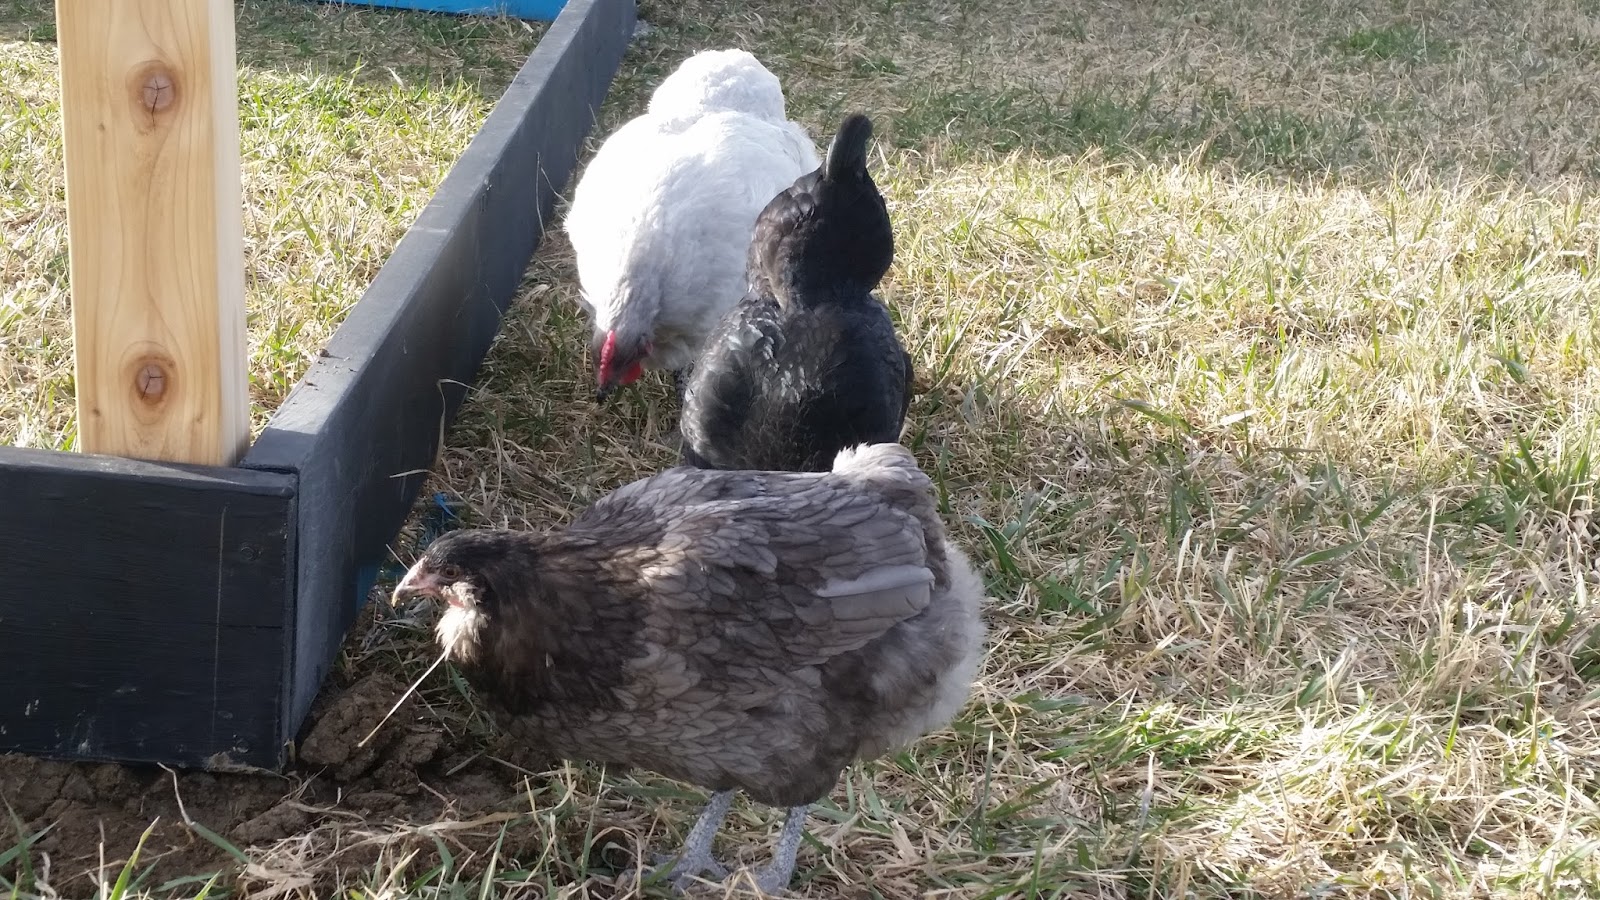
As the ground began to really thaw, my thoughts drifted to the non-existent garden and getting that project under way. I was tired of the build. The girls were tired of their little coop. So I let them out to play while I worked. (By now we had purchased a 1962 massey ferguson mf204 tractor and I started tormenting the sod for the garden.)
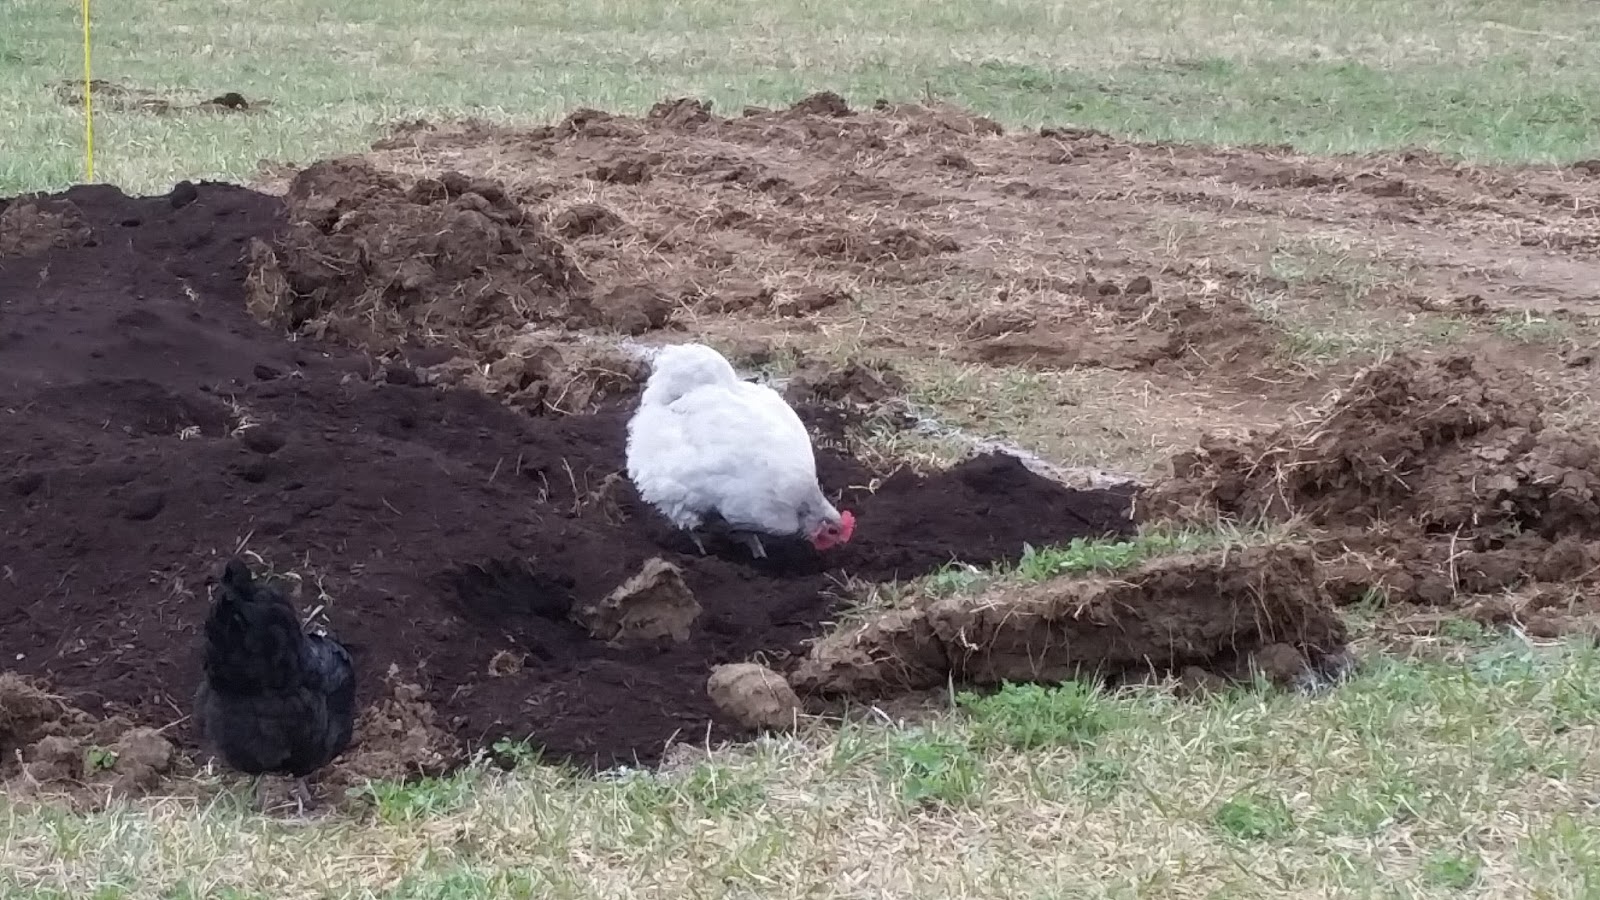
Just look at the survey crew in action. Ya, black compost soil and a white chicken. I didn't think that through. But she had SO much fun.
When I didn't work, I planned or shopped. Because every coop needs bling.
And honestly, to borrow from Ferris Beuller, "who could possibly expect me to handle work on a day like this?!"
When I didn't work, I planned or shopped. Because every coop needs bling.
And honestly, to borrow from Ferris Beuller, "who could possibly expect me to handle work on a day like this?!"
LOL.
Coop Décor. I found these great metal rooster and hen cut outs at Hobby lobby and spray painted them white, and lagoon blue and attached them. I also picked up solar deck lights to illuminate the steps, pop door, people door, and back metal art/window. I purchased locking jars at a closeout store for mealworms, and coopouri (which I make and might make available to others), and chick grit. I also found large, metal, red sugar and flour canisters which fit on the exposed studs inside to hold grit and calcium for refilling the PVC supply tubes.


More than anything, I felt like I was puttering on the project. I still had a deadline. Remember, I had birds coming. But I also felt like I had Spring fever. Remember that from school days? Your heart just isn't into it anymore, but you keep putting one foot in front of the other. Funny thing that. Usually that feeling makes you want to get OUTSIDE and play, but I WAS outside, all day, everyday! LOL.
Worse than Spring fever though, I caught the dreaded chicken fever! Chick fever to be precise. It's a horrible thing all chicken people get. You don't know when it will strike, but it's usually in February to Mid March. You'll be minding your own business, walk into the feed store and hear that tiny little "CHEEP, CHEEP" from deep within a store. Like a nursing mother who can tell in a room full of babies, her own child's cry, you hone in on those giant metal tubes full of cute little, fluffy, wittle, teeny, poofballs. AGH! I blame my hen Merriweather. She chose March to go broody. The sweetest, cutest, sit on your hand, doll of a hen, turned overnight into something that would make Freddie Kruger curl into a ball behind a door and start weeping and sucking his thumb.
Having no rooster at the time, I thought I'd swap her eggs out for 5 cute little chicks. She's have none of that. So I ended up raising 5 fluff butts, dealing with a hormonal hen sitting on fertilized eggs I bought from another friend up the road (Thank you Frank!), and trying to finish this build.

"Here a chick, there a chick, everywhere a chick, chick", now has new meaning to me. I had the main coop (still under construction), the small coop, a broody coop, and a chick coop all going at once. I was wondering if I was starting to loose my sanity. (Who am I kidding? It was gone long ago.)
March is also burning season. Usually it comes the first decent evening of the year. You know the one, you can finally crack your windows open for a night's sleep, breathing in that cool, crisp refreshing air, until a skunk -"fresh" out of hibernation wanders by your window at 3am? Ya, that day. So it's finally warm enough to open windows during the day and it's burning time. Farmers burn the stubble in their fields, their rubbish piles, their piles of old trees and shrubs from pasture cleaning, and burn their pastures. Prairie grass thrives on fire. It is far more healthy for the grasslands to let it grow for a few years, and then let fire fly through and burn out all of the old grass and thatch that has built up. Within a week, you can't even tell an area has been burned. It comes up that fast, and new and fresh. It was doing it naturally LONG before people were here. The benefit now is that YOU set the time it burns. Usually, you pick a nice day, with little or no wind and go for it. Usually.
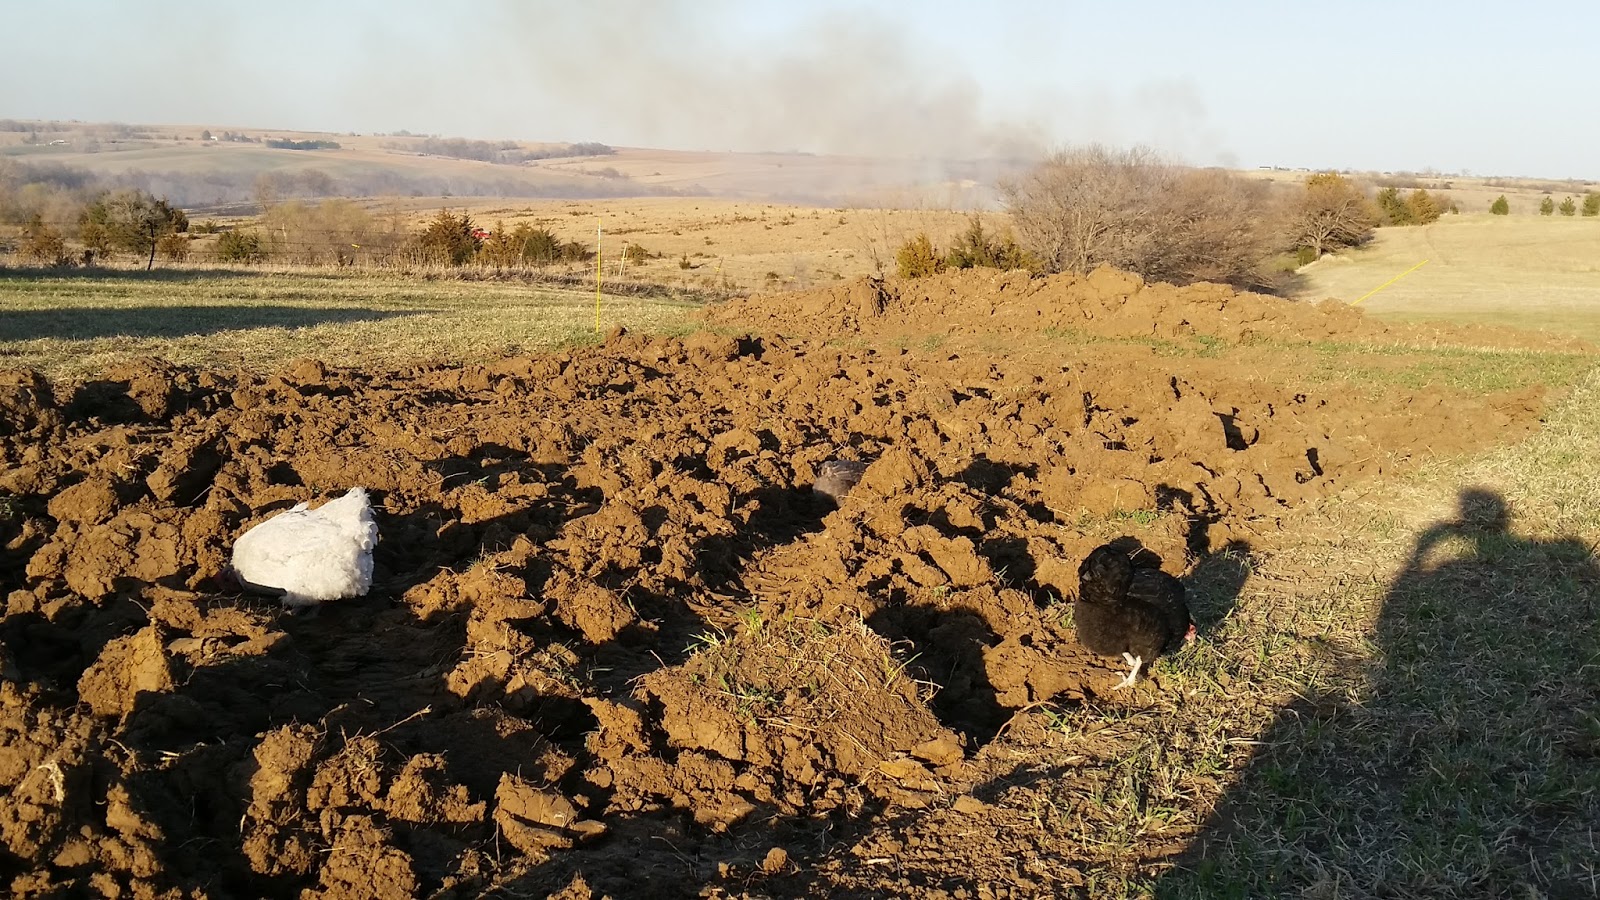
You know that feeling when you are on the way home and you see fire trucks, and you say to yourself, "don't turn, don't let them turn..." and then they turn towards your place? Ya, not a good feeling. That happens a lot here. Wild fires happen. Accidents happen. Controlled burns get out of control. One day, coming back home I saw black smoke rising from the neighbor's pasture. He was clearing, when he hit a rock with the loader bucket and set half the acreage afire. Another day, I was working on the coop and kept brushing snowflakes from my hair and eyeglasses, before I remembered it was 65 and I was in shorts. The flakes were ashes from a wildfire on the next acreage.


The state has been in drought so many years that fire is common, and dangerous, and unpredictable. Like I said in an earlier post, the Universe has a sense of humor.
The way I look at it, people can worry the first year there is little rain. By the second year, prayers start heading upwards for water to fall downwards. The state was in drought for three years. We have just had a record setting wet Spring. So where ever they go, prayers take two years to get there. April showers usually bring May flowers, but this year April showers brought May's deluge. The amount of rain has been insane.
Anyway, let's get back to the coop shall we?
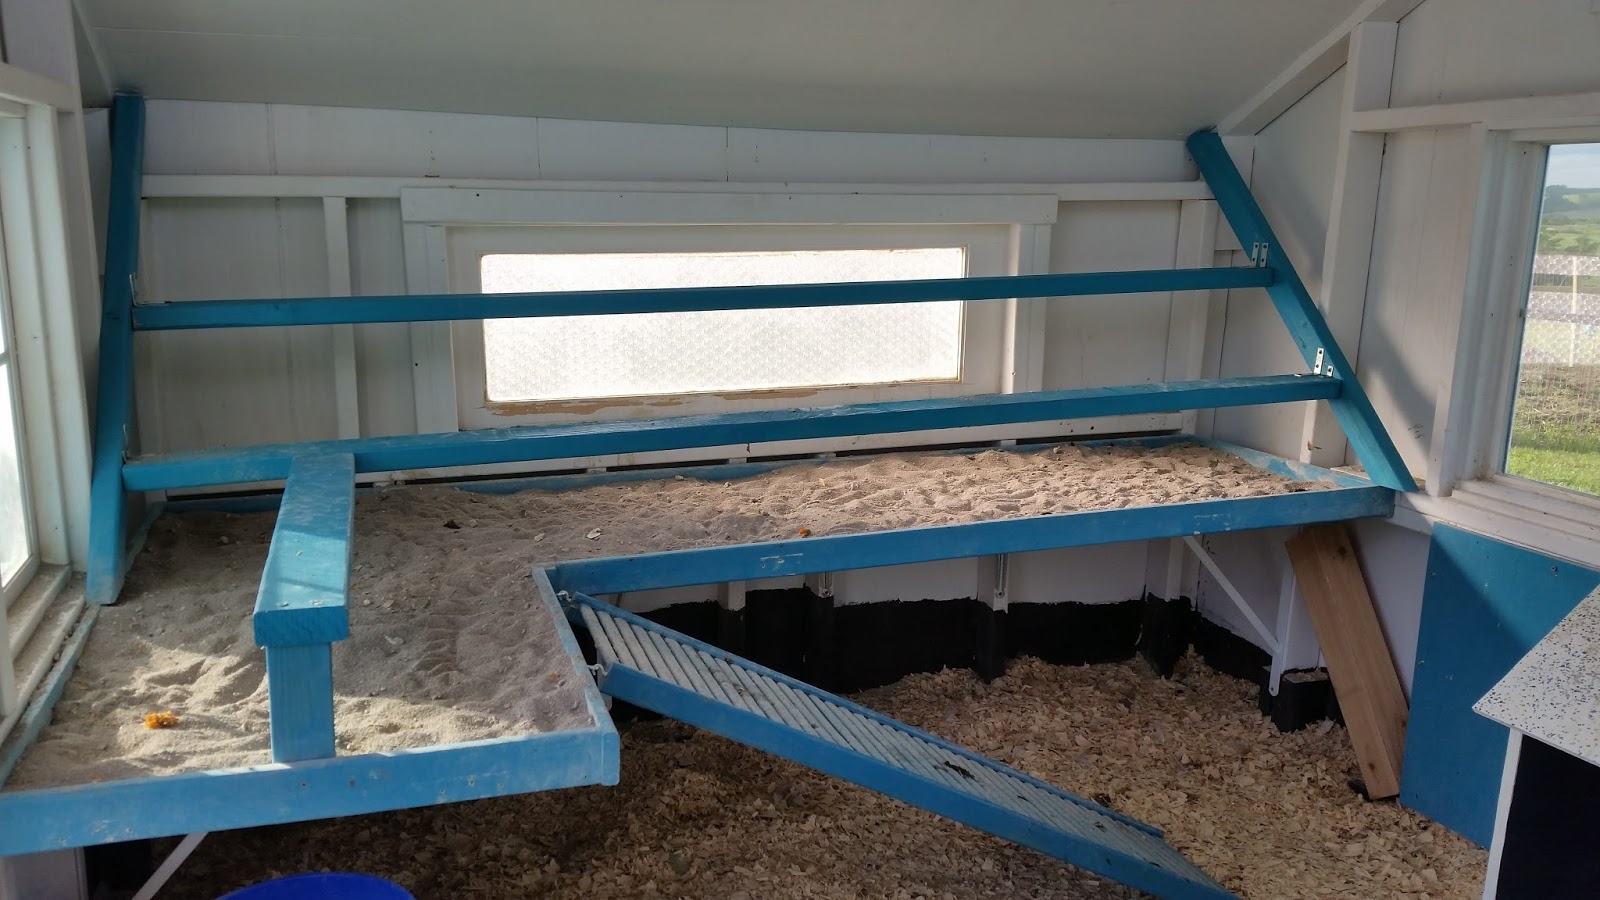
The exterior is DONE! I have moved work to the inside. The projects just never seem to end. I swear I owned the only "to do" board where I would scratch one item off and add two more. I moved the nesting box inside so that I was better able to see where, and how high to make the poop board and roost. I decided on an "L" shaped board and roost beside the door and along the back wall. I used simple shelf brackets from the ReStore to hold up the weight of the poop board. This allowed me to keep all of my floor space.
The way I look at it, people can worry the first year there is little rain. By the second year, prayers start heading upwards for water to fall downwards. The state was in drought for three years. We have just had a record setting wet Spring. So where ever they go, prayers take two years to get there. April showers usually bring May flowers, but this year April showers brought May's deluge. The amount of rain has been insane.
Anyway, let's get back to the coop shall we?
The exterior is DONE! I have moved work to the inside. The projects just never seem to end. I swear I owned the only "to do" board where I would scratch one item off and add two more. I moved the nesting box inside so that I was better able to see where, and how high to make the poop board and roost. I decided on an "L" shaped board and roost beside the door and along the back wall. I used simple shelf brackets from the ReStore to hold up the weight of the poop board. This allowed me to keep all of my floor space.
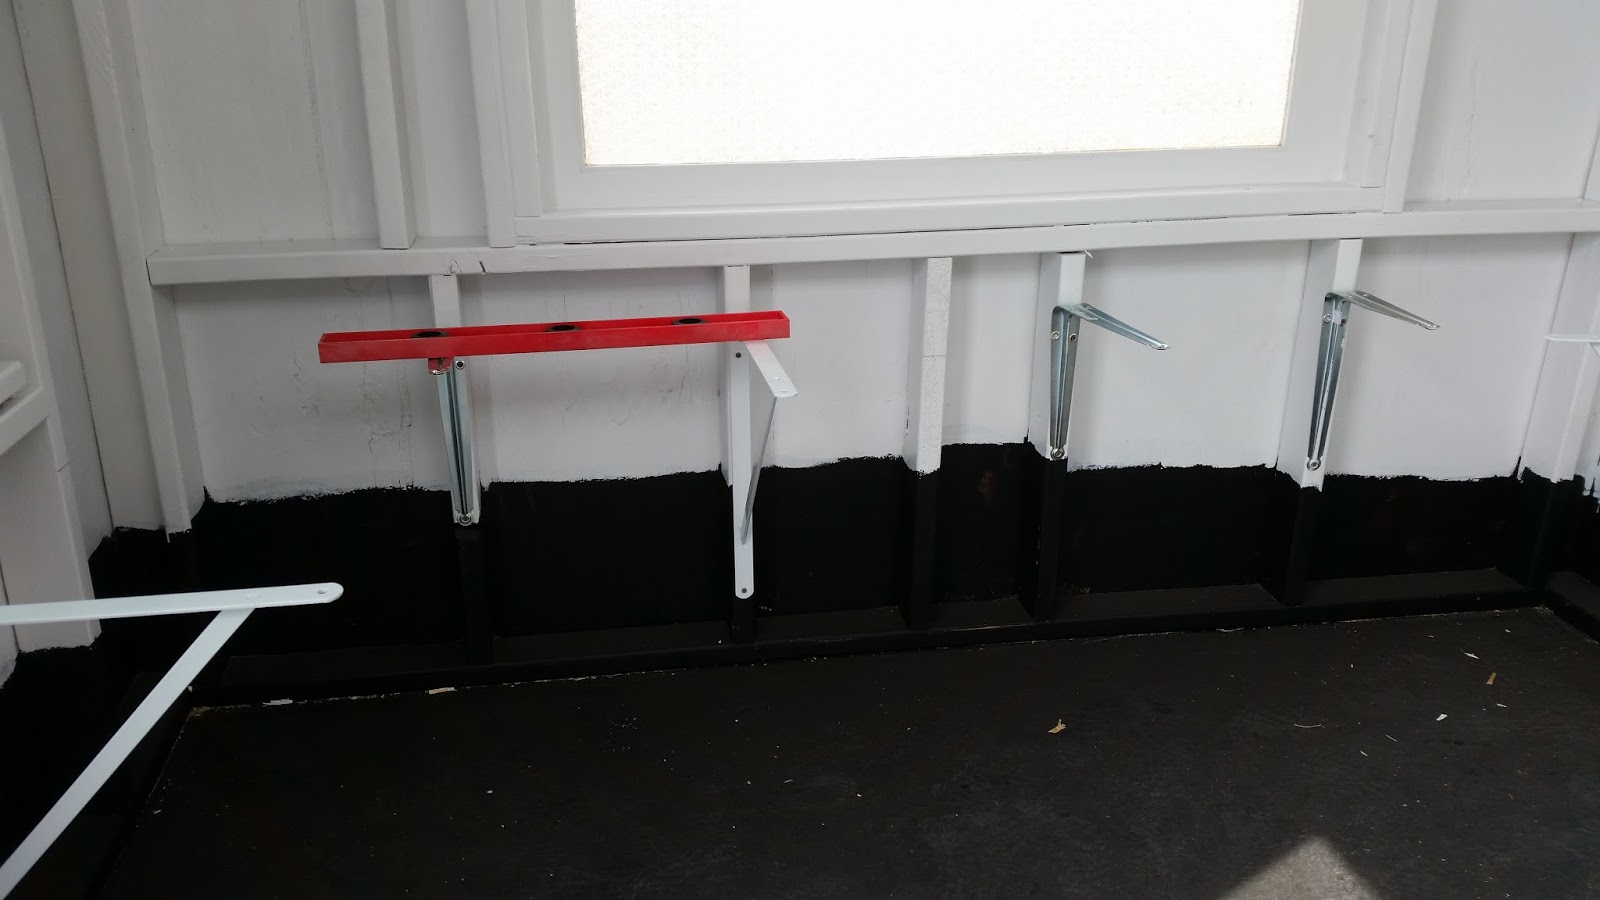
I used a wide, prefabricated shelf board, MDF, from the hardware store, as it was 24inches wide, and was straight and hearty.

Here you can see the waterproof blackjack 57 floor coating, which I took 12 inches up the walls as well. The floor needed sealed, I lucked out on two days in the 70s for that to go down and cure. Treat yourself to one of those metal paint stirring sticks that goes on an electric drill. Get the one that has a squared insert for the drill, so it doesn't spin in the drill head.
When you open your bucket, it will look like black water. In the bottom half of the bucket will be a very thick tar blob. A stick will not mix that mess. When you start mixing it, the blob will break down and look like you are trying to mix oil and water, and it will look like it will NEVER come together. It does and looks like thick black cream. Like a thick black paint. Then you can simply pour it on the clean wood floor and spread it with a roller or a brush ! I did two coats.
When you open your bucket, it will look like black water. In the bottom half of the bucket will be a very thick tar blob. A stick will not mix that mess. When you start mixing it, the blob will break down and look like you are trying to mix oil and water, and it will look like it will NEVER come together. It does and looks like thick black cream. Like a thick black paint. Then you can simply pour it on the clean wood floor and spread it with a roller or a brush ! I did two coats.


The roost is 8 inches above the poop board and has since changed. But I will post that change later. I didn't want it too high for the sake of my heavier breeds. It is a 2x3 turned on it's side.

I also gave the interior two quick coats of paint.
For the ramp, I used one of those slatted wood shelves you can find at the hardware store. It was on clearance for $5, it's teak, LOL. I spray painted it to get all the nooks and hidey holes, and then put on a quick coat of paint with a roller and tossed on a bunch of sand. I let that dry, and repeated for a non skid walking area. It is attached simply with eye hooks on the poop board and cup hooks on the end of the ramp. I filled the poop board with sweet PDZ and the back half of the coop with pine shavings. The cool thing about this poop board, besides the easy clean up, is that I can hang wood frames with hardware cloth on them, and create a broody coop area in the main coop.

The front, open area, of the coop has a blackjack-coated 4x4 post as a divider. The front portion was filled with sand. After a week of use, I decided I didn't like sand, and filled the area with sweet PDZ. It is more pricey, but it is lighter, easier on the floor, and dries much faster than sand. It is also cooler than sand.

Now we move OUTSIDE.
Now that the inside is done, let's move outside. The run needs to be just as much a fortress as the coop. There are critters everywhere. And except for bugs and earthworms, chickens are pretty much the bottom of the delicious food chain. We have foxes, coyotes, curious people, stray dogs, dogs that belong to lazy owners, abandoned cats, cats that belong to lazy owners, hawks, falcons, raccoons, mink, opossums, owls, snakes, and bald eagles.
While I can't protect them all the time, you can do your best. We lost one to a fox while free ranging in November, almost lost the whole flock to a dog that was allowed to roam (more than once), and just two weeks ago spied a fox - a large male fox- checking out the run. And that's just what we happen to see. What goes on when I'm not looking. We have a game camera, but even that doesn't catch it all.
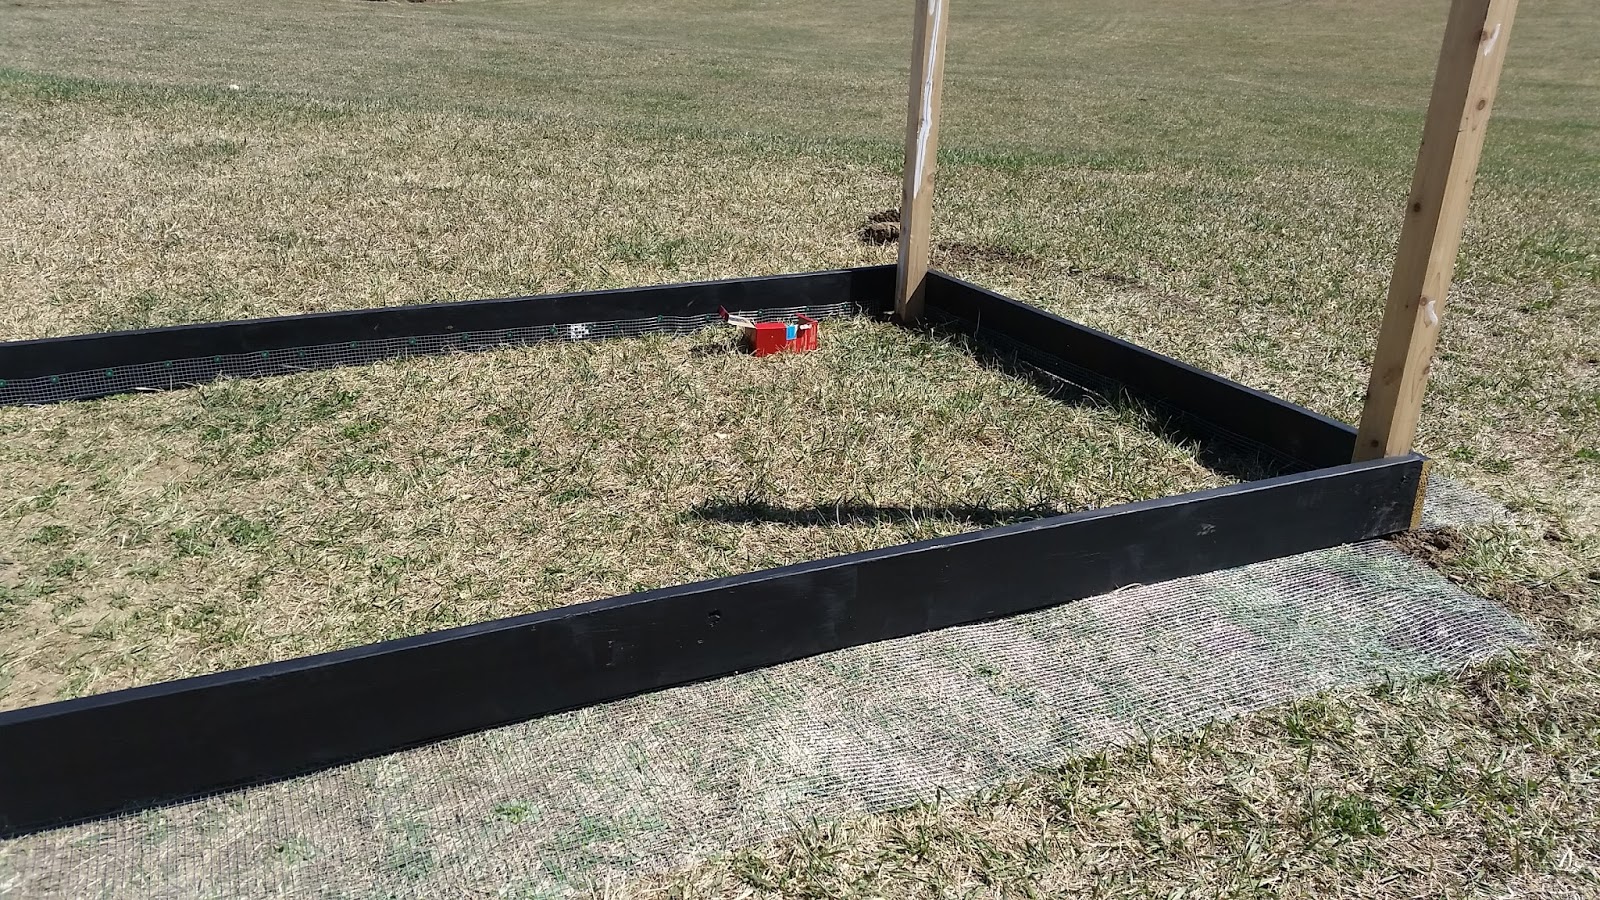
Our run needed to be large, covered in hardware cloth, provide shade, and easy enough for me to build. A sturdy box frame with hardware cloth. Check.

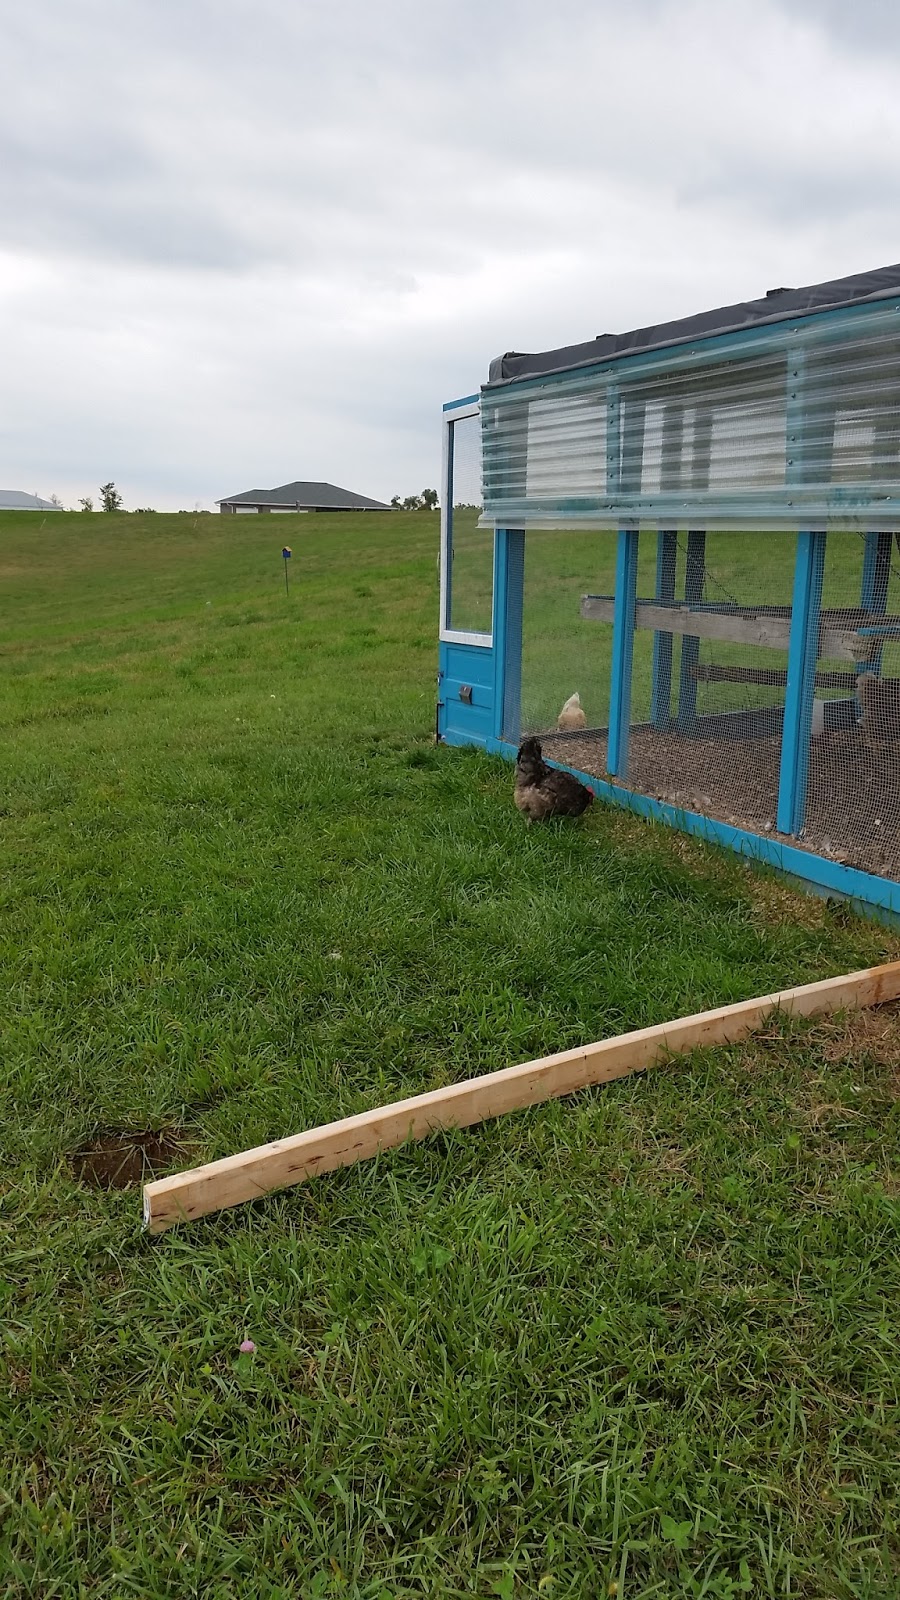
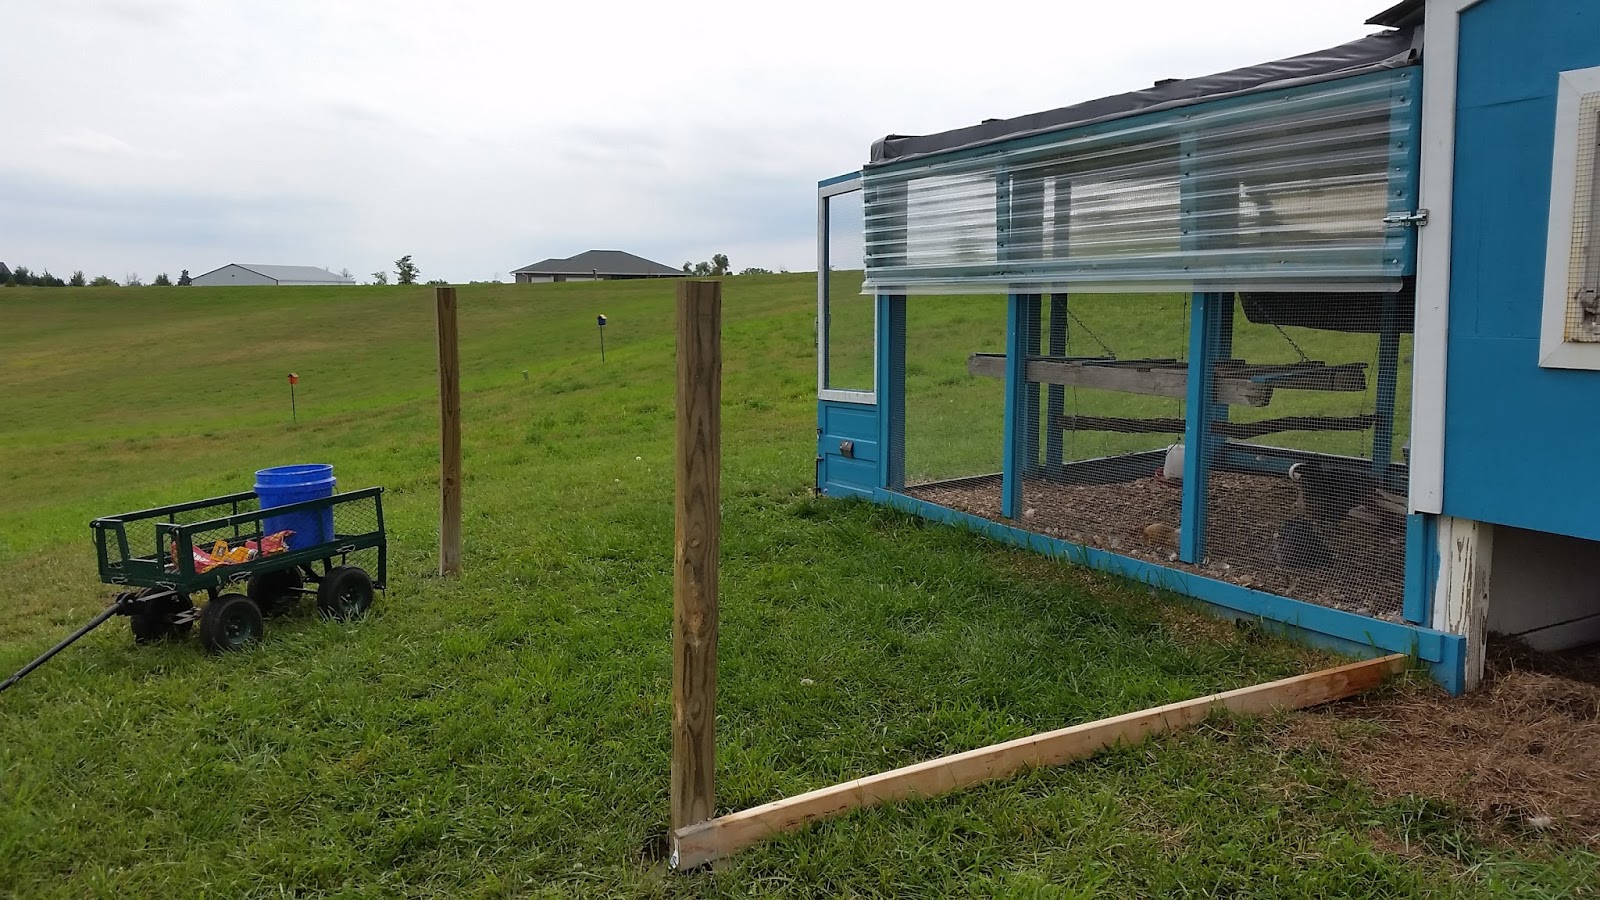
I began by coating the wood that would be on the ground, even though it was treated, with blackjack. More coating couldn't hurt. I made a box frame with long self tapping bold screws and attached this to the coop. I used this box as a guide for where to dig my post holes for the end supports. This is about the time I discovered that big box wood stores have a clearance bin. I know! Who knew?! It might be slightly crooked over the span of 10 feet, but if you cut that down in to smaller pieces, they are straight! Or over run orders, or refused delivery, or cracked! LOL. I just cut that bit off and paint. $2 for a 4x4x10foot cedar post is better than $20! Anyway...
|
| The survey crew arrives. |

I also covered the front underside of the coop with plywood to which I attached a hardware cloth skirt. It is anchored to the ground under the coop with lawn staples. The box frame has a similar skirt that flares out from the coop base 2 feet from the coop. The idea is that a predator is not smart enough to hit the cloth near the coop edge, not be able to get in, and back up 2 feet and try again. I'm not a fan of working with this 1/2 inch wire cloth, but it is a necessary evil. On the inside backs of the boards, I attached the cloth with roofing nails and disks.
I painted as I went, instead of painting around hardware cloth. The vertical 2x4s simply screwed on and then the top box frame added with deck screws.

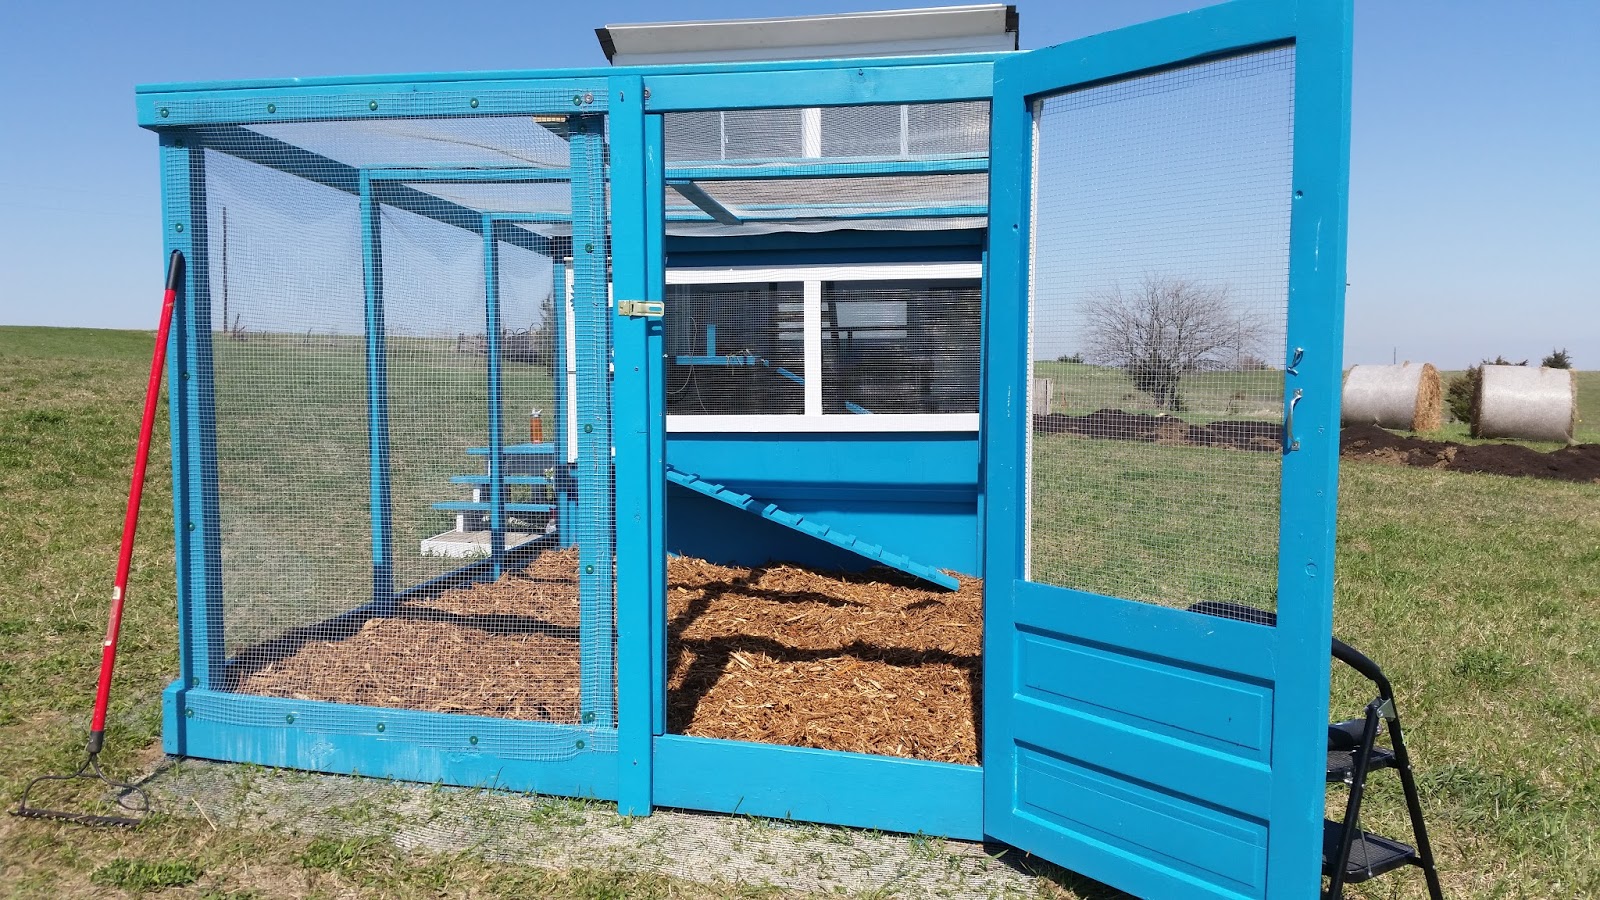
Once the frame was up, I added the hardware cloth with roofing nails with disks and then sandwiched that with a piece of painted 1x3 using deck screws. The door was a ReStore find and cost me $10. I took out the old metal screen and replaced it with hardware cloth and white trim. It has a hook and eye INSIDE, for working inside, and two hasps on the outside to prevent low prying critter hands. The roof frame is also covered and secured with hardware cloth. Then the entire roof was covered in opaque white corrugated panels.

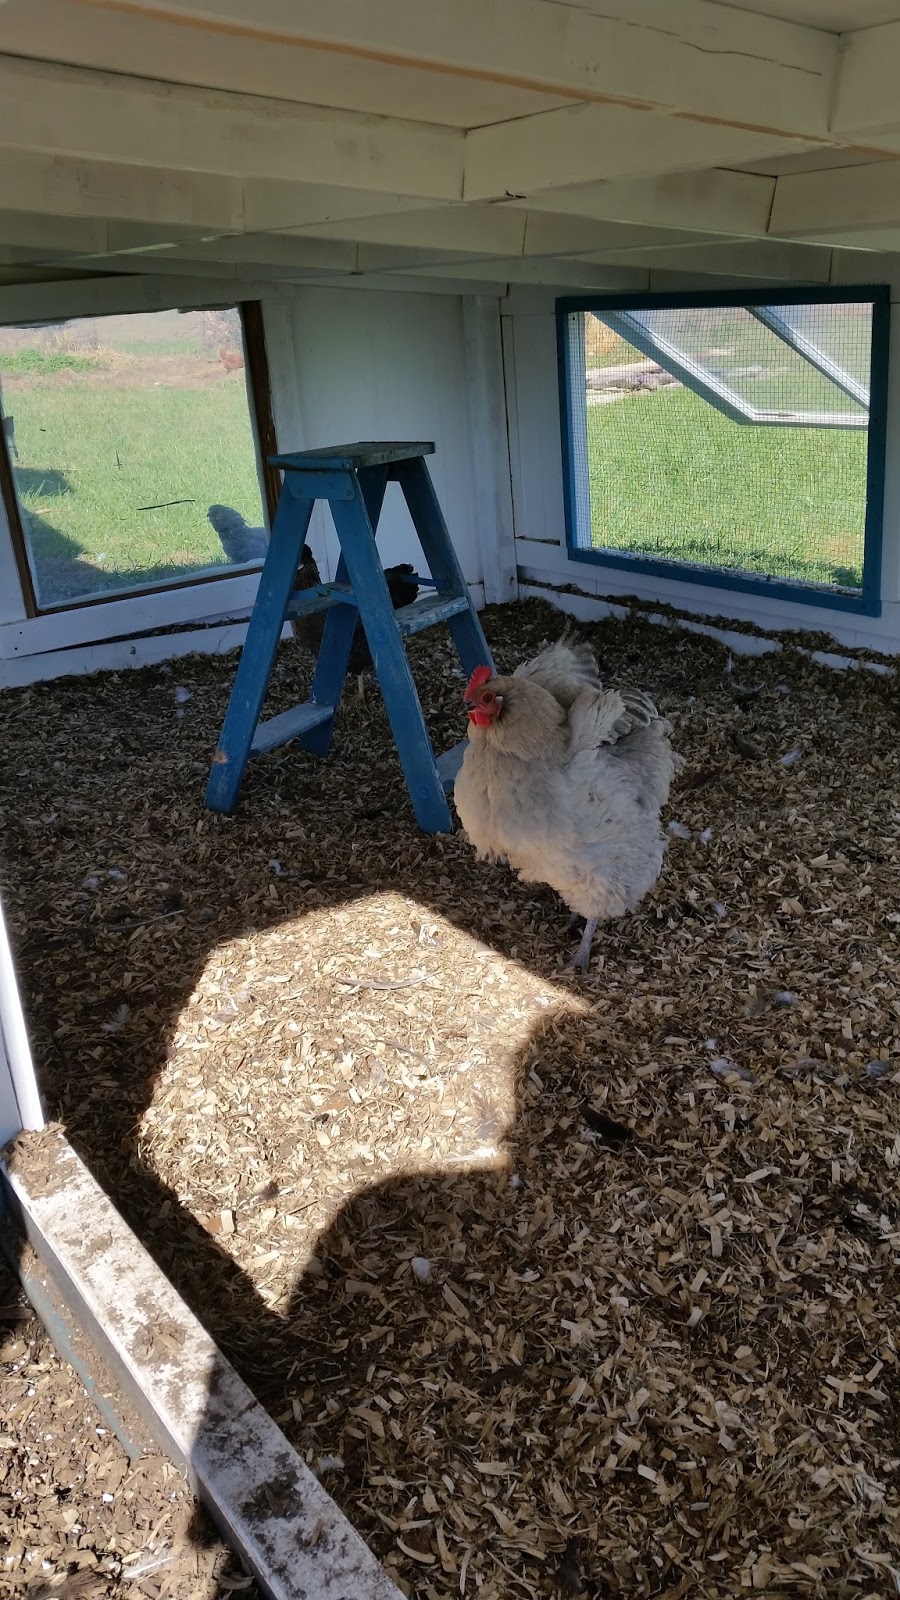
In the run I have a wood limb low perch, a small climbing ladder, an old barn ladder mounted up high for a roost, water bucket, pvc feed bucket, and a ramp with patio. Some climb up, some fly up.
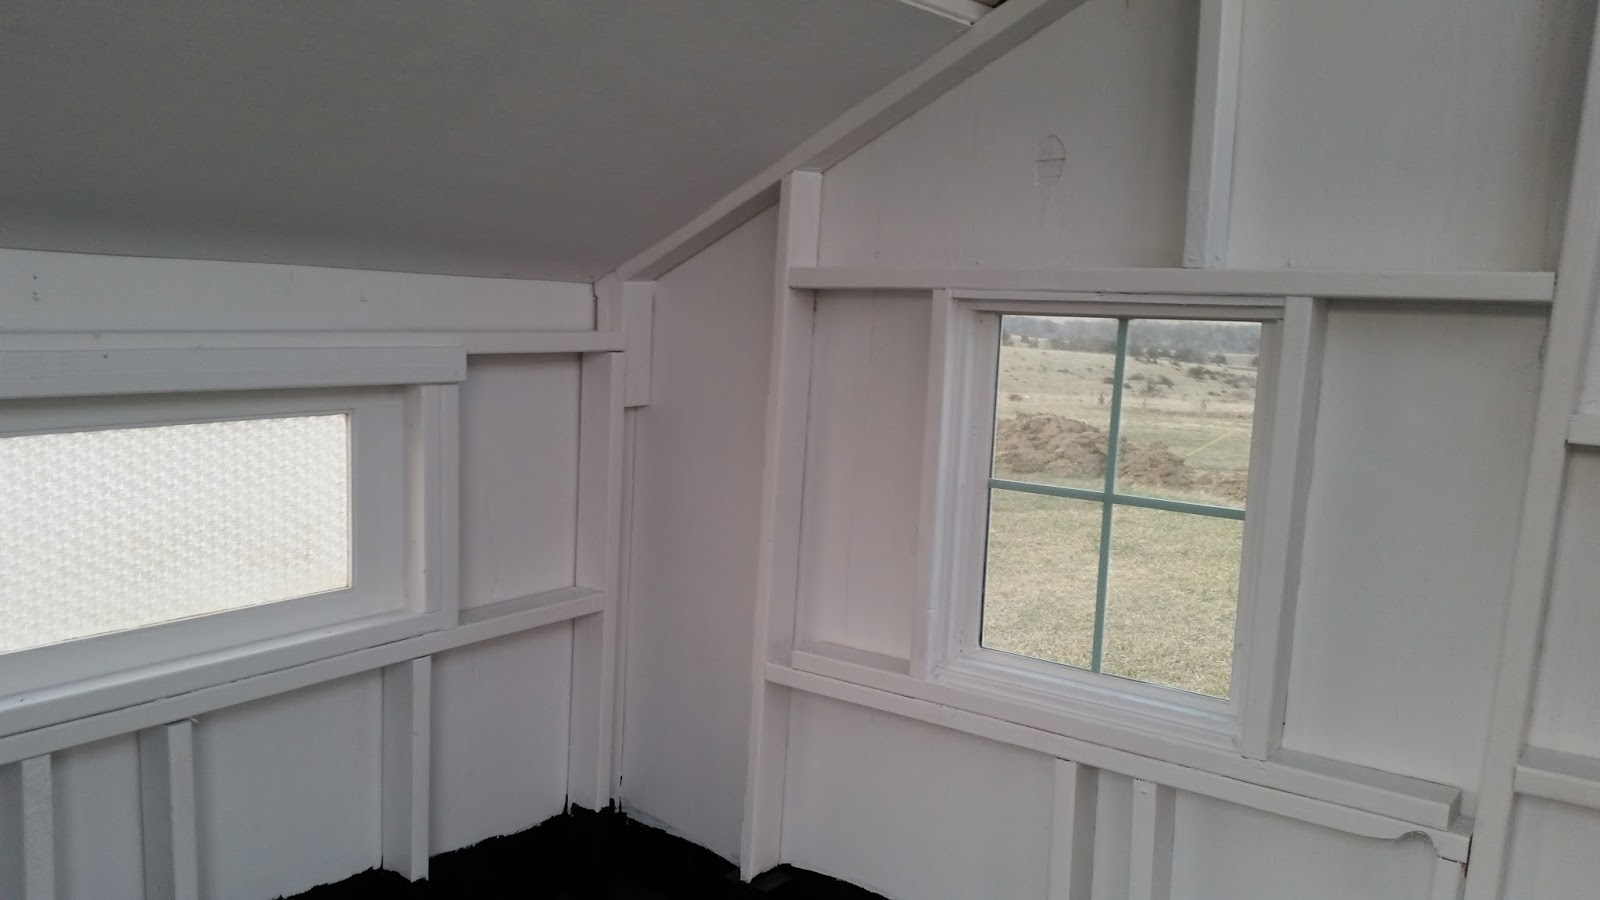
The new double/ single row perch allows for everyone to have a space, with room to spare. I did add a large 12inch square vent on the bottom corner (our right) below the poop board. This allows for even more summer air exchange. In the cold months this will be fully sealed and weather proofed to stop the exchange.
Even on the windiest of days, with all the windows shut, it is a full 10-15' warmer inside the coop than out, and very little air is lost from the front windows. Open the first row of windows and you drop the temp a few degrees and increase air flow. Open the upper windows and you almost match the outside temp and create a nice breeze.
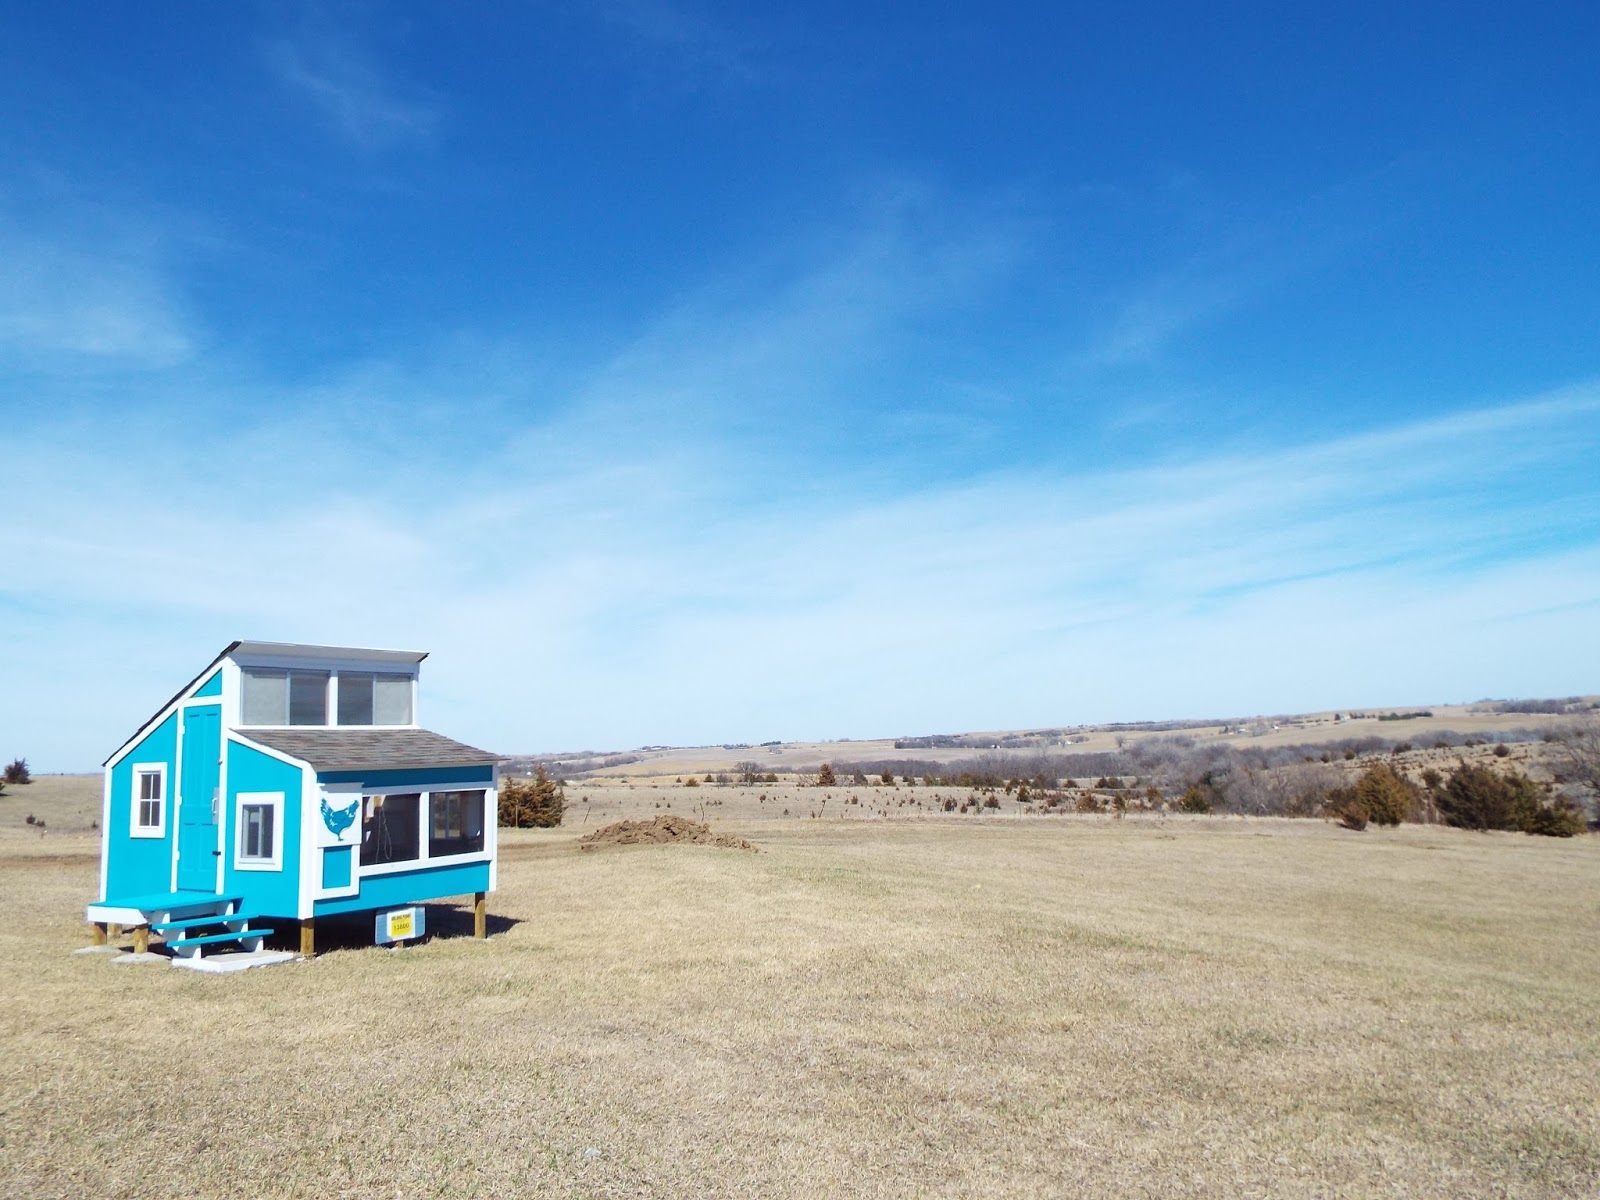
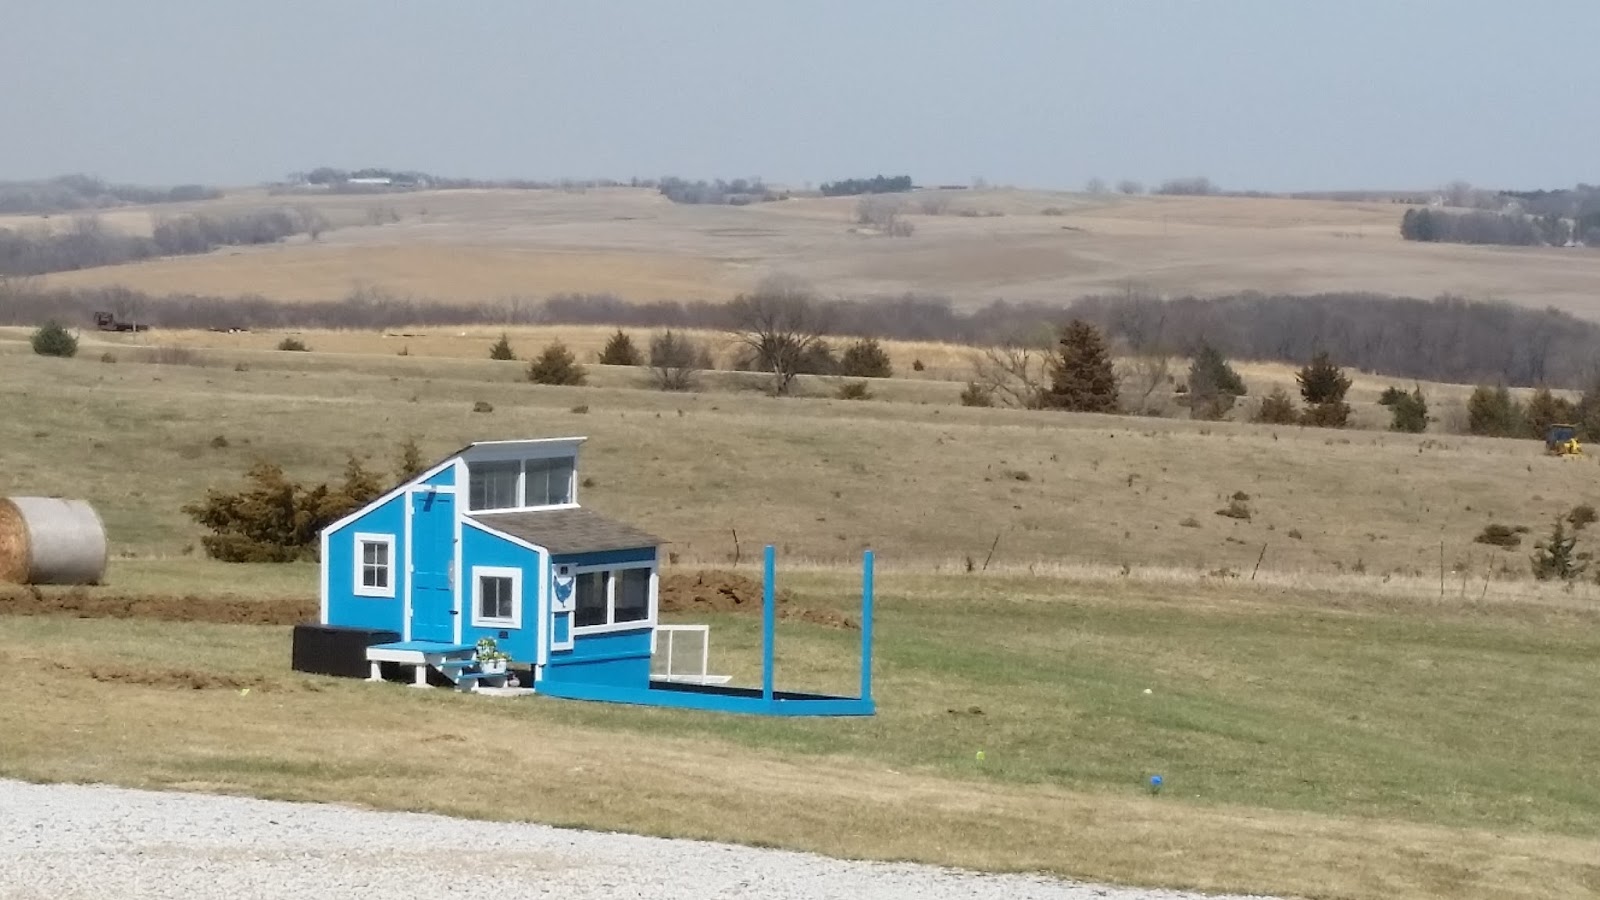
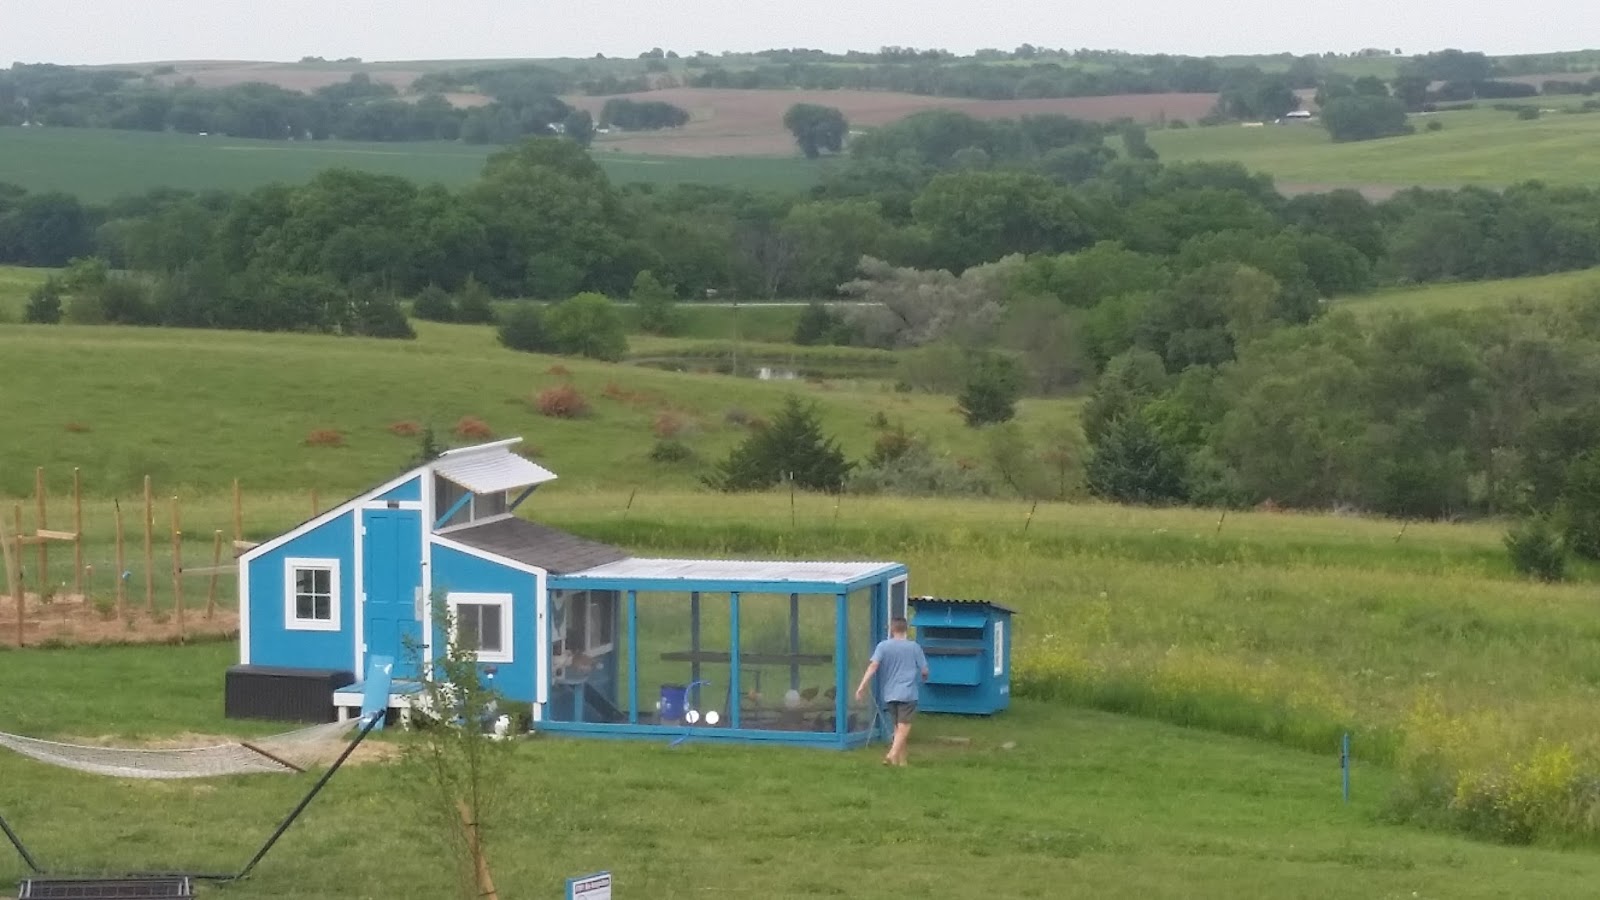
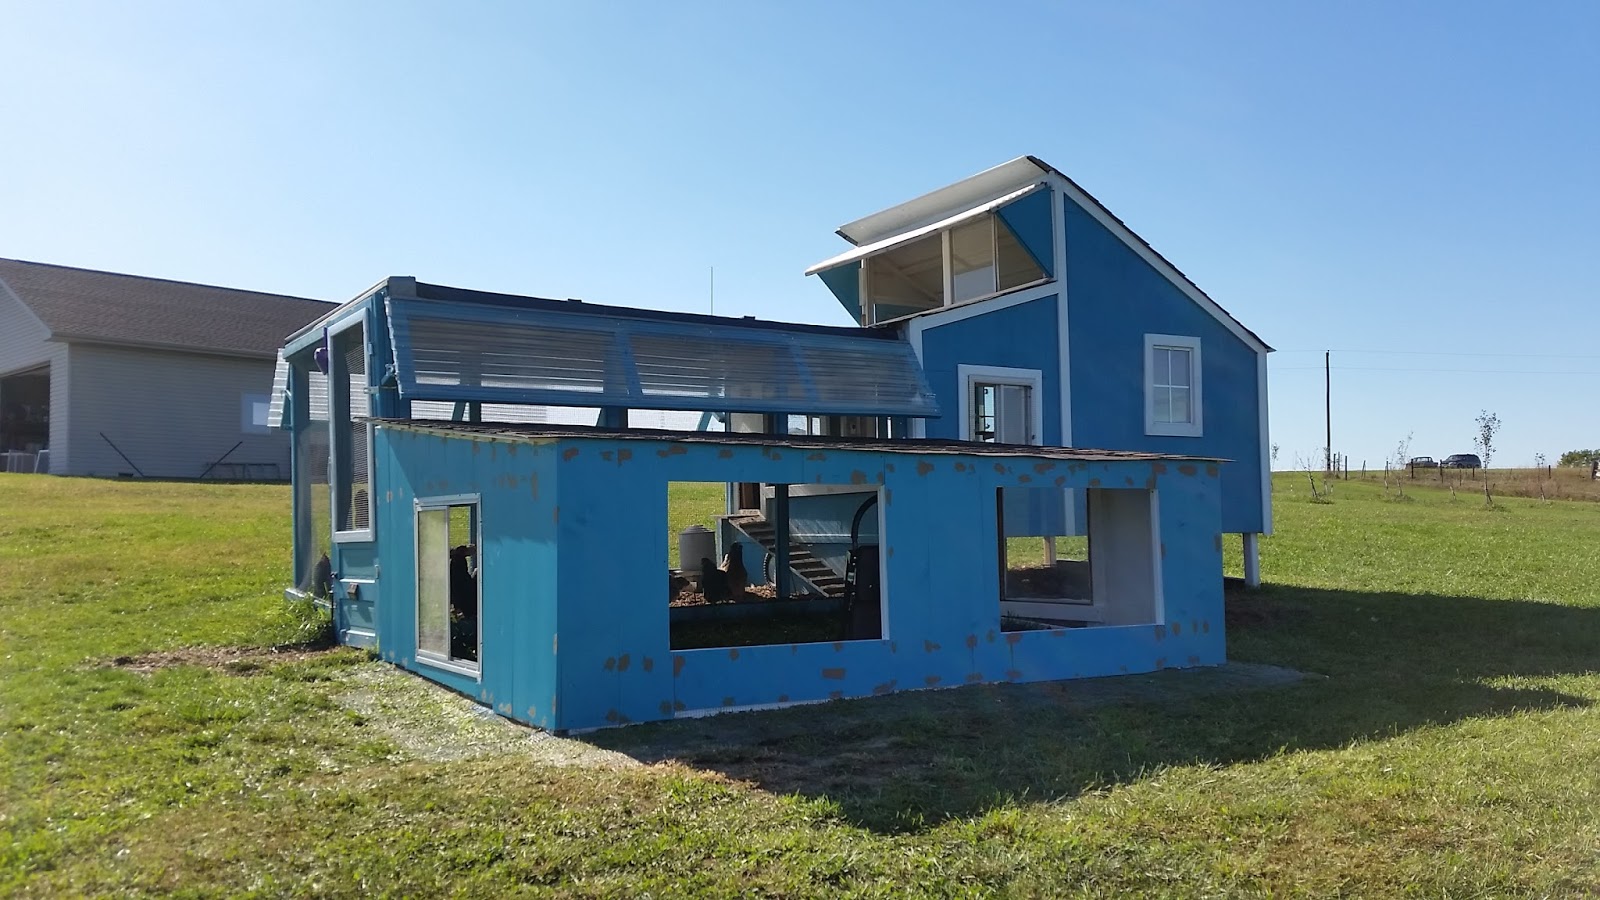
The old little coop has been repainted to match and moved closer to the new place, so I can use it for whatever. LOL.

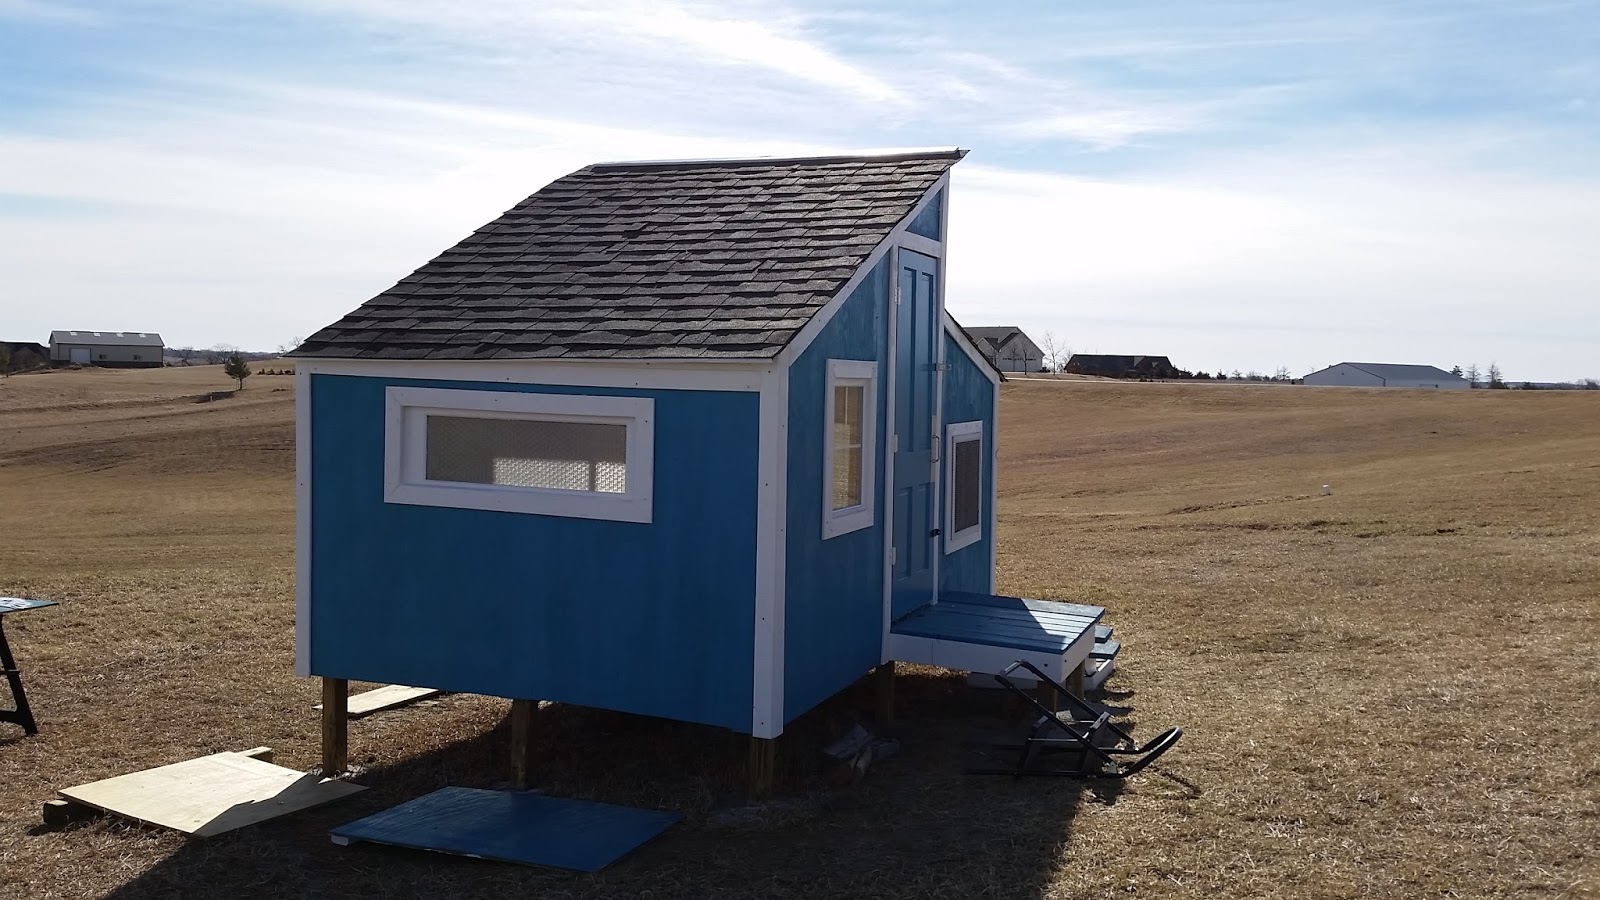
I have added an overhang above the top monitor window to help with blowing rain.
So there you have it. Almost 200 square feet, inside and out. Room for 20, but I am happy with my 15 pullets, and two cockerels.
It took me three full months, a silly amount of lumber, and almost $2500.
I have also just assembled a screen door for those really hot days and night. I purchased a solid oak door at the Restore, and removed the window panel and covered with hardware cloth using large nail in staples. The white board trip screws through the cloth and into the door, further securing the wire. It has two critter proof locks on it. OH, and it is upside down, so that fresh air comes in near the floor, where the chickens are and then freshens the coop as it exits through the upper windows.

UPDATES***
I will be putting on a solid roof, as the pvc waffle roofing stuff cannot hold any water weight at all. So forget about snow. On each side of the upper wing awning, I have added shield wings, blinders if you will to help with our insane blowing winds, driving the rain. I also plan to make a drop down awning for the long west side of the run, which will be a sun roof for the summer, and drop down wall for the winter.
AND there's MORE!!!!!!!
Some things should never be finalized in either spoken or written form:
1. I have plenty of chickens. (LOL, we all KNOW where that is going in a hurry. We're already talking about letting the first hen to go broody in February hatch a small batch of chicks, from our own eggs.)
2. I'm going to give up coffee/tea/soda/chocolate. Uh huh.
And the really big one...
3. I am DONE building the chicken coop.
In a brief moment of overwhelming emotions, mixed with pure exhaustion, blood sweat and tears, we may, in a blind fit of stupidity, put our hands on our hips, puff up with pride, smile, and announce loudly to the world, " The CHCKEN COOP IS DONE!"
If you are truly lucky, the only ear things in earshot are those little fluffy butts scratching and pecking at the ground, and even THEY are quietly laughing at you. A little higher up the scale would place your Significant Other, children, or possibly nosey neighbors. Not knowing any better, they too will share in your misguided triumph. At the top of the scale, you cannot possibly contain your enthusiasm and you take a million photos and (GASP) Post them online. And not just anywhere online, you go to the nations largest Back Yard Chicken Forum, where you've been lurking and playing for months on end.
Sure, no one posts it online, or says it outright, but all the other posters are thinking it. ... " Suuuuure you are." Then they giggle to themselves, a little snort escaping their nose.

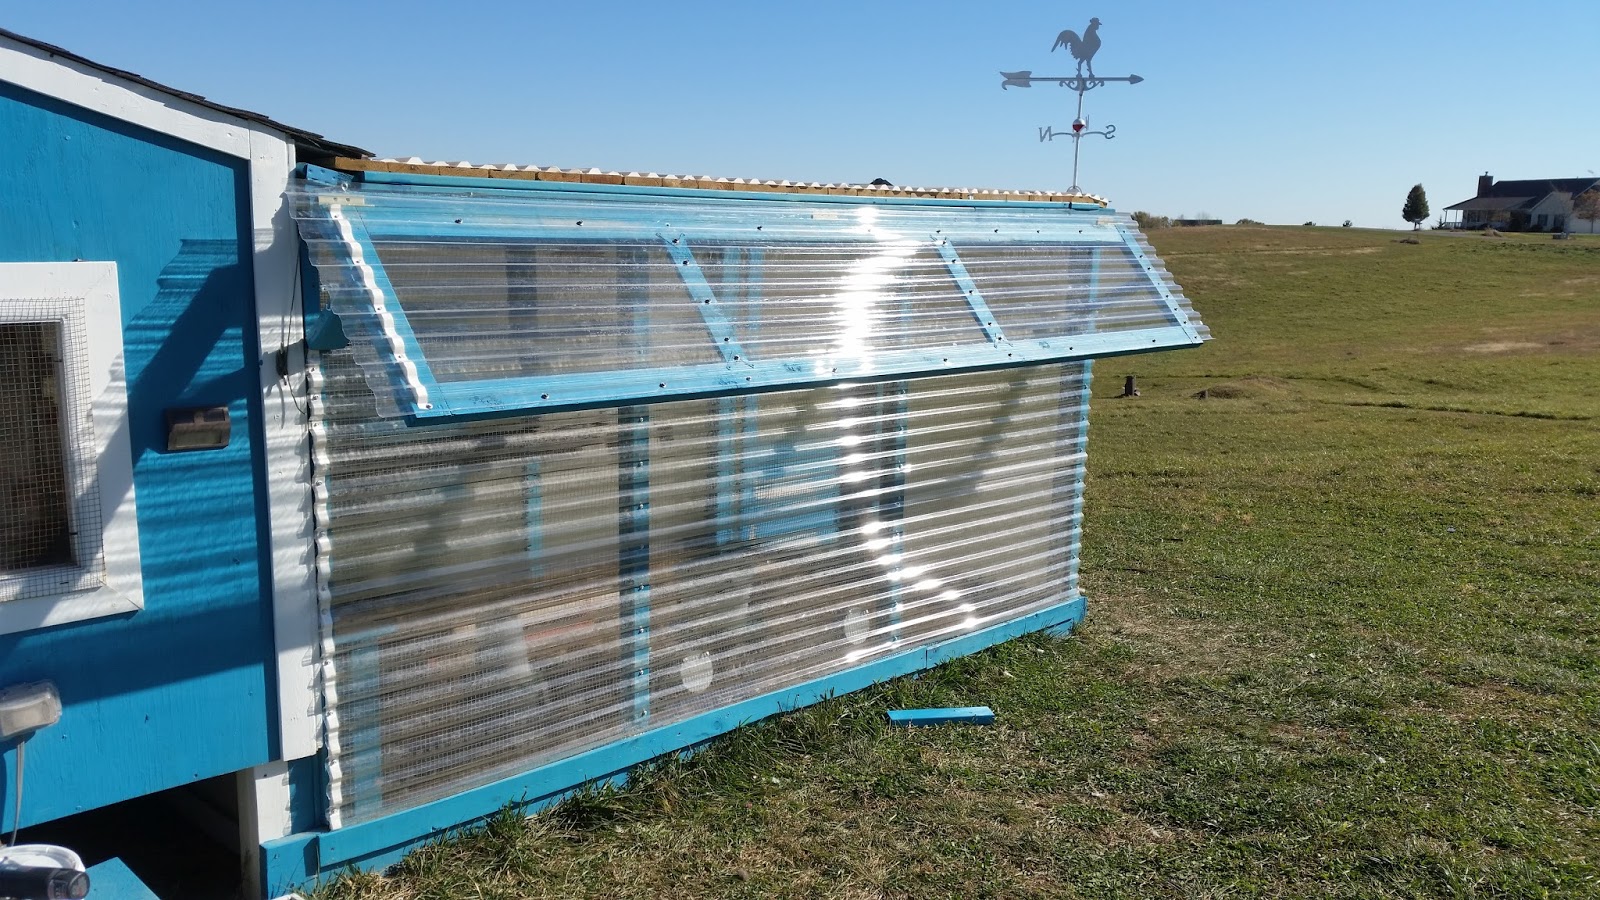
That's where I'm at. Sure I THOUGHT I was done with the coop. Then I had to build the run. Then the coop needed more ventilation. Then it needed a fan. Then it needed a summer perch. The roosts needed rearranged. I didn't have enough nest boxes. The run needed a stronger roof. The new roof needed a new waterproof cover. Well as long as I was up there, wouldn't a rooster weather vane look adorable up there? The girls needed a ladder to play on in the run. The run door needed a drop pin to keep it from blowing in the wind (as much as I loved using logs, NOT!) I wanted to try fermented feed, so I needed Doc to build me a trough. The upper window needed a rain shield. Lights, both in the run and the coop, needed installed. A timer needed installed. Another webcam needed installed. The list just keeps growing.

When Fall was at its peak, the lower sunlight caused me to realize the sunshield was blocking too much sun, so a clear shield needed put up instead. At this point I realized that, HOLY SMOKES, winter is JUST around the corner and I still need to Winterized the run!! Small wood frames with shower curtain stapled to them would NOT cut it this year. The wheels of thought and process kept me up nights trying to figure out what I was going to do to block the wicked prairie winds, yet allowed air to flow and still keep out the snow. It also had to be reusable and hearty.
What I came up with is nothing short of brilliant. The same corrugated pvc panel that I used as a sun and rain shield on the upper windows also comes in clear. It is easy to install, simply rubber washer and self tapping screws. It also trims easily with scissors. My plan was to use three long, 12 foot, panels to completely block off the north west side of the run, leave the south east short end totally open, and cover the lower 2/3rds of the north east wall.
Of course as you work, your plans change as you go along. I did cover the entire north west side, but decided to put one 2 foot tall panel along the bottom of the south east end. This would block the wind at the chicken level should it happen to be blowing from that rare winter direction. As I was putting up the north east panels, just before I put up the last, upper panel, I had a great idea. Why not build a 2x4x12 frame and mount the panel to it, and hang it from the run on hinges? Then I could prop it open on nice winter days for fresh air and close it on snowy/windy/rainy days as needed?
Well that set off a whole set of projects, since you cannot just build a frame, you have to get the hardware (LOVE habitat for humanity RESTORE), then it needs hardware to keep it from blowing in the wind. Then you find out that the wind on your hill is strong enough to lift a ridiculously heavy panel and frame and release the prop, which allows the panel to fall and slam shut, loudly. Sigh, redesign. But before I decided to redesign the props, I decided that the north west side of the coop would really benefit from a lift window as well. More screws, more hardware, more custom cuts, more planning, another panel frame, more painting, and another trip into town.


I now had all of my supplies. Doc made me yet another frame, which was now screwed, glued, and painted. Now all I needed was a day where the wind was NOT howling. I used one of those rare days to move 3200 pounds of hay, pitchfork by pitchfork, into the garden for the overwintering soil. Where I had the hay stored outside, the ground underneath was rich, black and WET! Even though we haven't had any real rain for almost 7 weeks.) Sure, I cannot feel my arms or my back, but as long as the earthworms are happy, isn't that what really matters?
I digress.
Today was the day. Winter is coming. There is a blizzard warning for the panhandle, and a high wind warning for the midlands. While both of those areas are quite far from here, it is just another reminder that the season waits for no one. Today was almost 65', and the winds never made it past 25 mph. It had to be today. I got to work first thing in the morning. The panels on their frames and hinges were already up, and their end locks were installed. I still needed to install the extra panel supports, and figure out how on earth to make and fit the props. To make matters MORE interesting, each one was a different size. But once I got the design down, it was just a matter of changing the size.

I installed pieces of 2x4 on hinges that can be flipped up, the panel dropped and locked when the winds or weather come. On fair days, you can flip them down and lock them into place with a clip to keep the winds from lifting and dropping the panels. A bonus is that they, the top window, panels, can stay up all year! They will act as extended rain shields for the run.
Of course no project is adventure free, and mine certainly are no exception. My two sets of roofing screws needed two different hex heads. I had two different types of screw heads going, Phillips and star. I kept needing more screws, or different screws. Wood pieces needed multiple trips to the drop saw. I can't tell you how many trips I made from the barn to the coop.
In the midst of all this are the fluff butts, including a rooster who as an odd attachment to my shoes. I had hens laying eggs, and as we ALL do, I put them in my shorts pocket. At one point, while removing a stubborn screw, the screw stayed and the wood spun counterclockwise. Yup, you guessed it, slamming right into my pocket - the one full of eggs. UGH. Needless to say, this required a wardrobe change.


Mishap over. All the props were installed. The hens were wandering the hayfield and the run and I heard the egg song again. So I stepped out of the run and was walking towards the coop door. Simple right? Two strides to the left, turn and four strides and up the stairs into the coop. UH HUH. Two strides left, and WHAMMO! Full force, smack in the nose, right into the window panel wing I had JUST installed, and forgotten about. Oh ya, stars. I saw stars. Pretty, pretty, sparkly stars.
My sunglasses frame took the full brunt of it. They are flex frames, so they didn't break, but the forward momentum of a human into a 2x4 frame attached to a concrete anchored coop simply refused to move, so the frame was shoved into the bridge of my nose. Did I mention I saw stars? I cannot remember. Now my nose is puffy and stuffy and bruised. But the coop is DONE!
OH wait! No, I did NOT say that out loud!
UPDATE: December 2015
I decided, after a 3" rainfall in a few hours, that the roof on the run HAD to go! With everything that used to be green, deep in winter dormancy, and the topsoil frozen, all of that water ran from the upper hill, down, and THROUGH the run. If that wasn't bad enough, the corrugated PVC roof leak, A LOT!
The girls have a deep mulch litter floor over dirt in their run. I've been mucking it out and replacing the hay while I had it and while it was dry. They loved it. I loved it. Until it rained that is. Their scratching and pecking just made a muddy mess. The hay got mixed in, stayed wet, started to smell, and would actually float on the puddles. YUCK. It was like the brick making scene from The Ten Commandments.
I had hoped it would get better when everything froze. But the freeze was followed by a snow, and a thaw, and a snow and a thaw. The run was literally raining IN the run. Nope it had to come off. The trick was the weather. It had to be warm enough to work, NOT windy, and it all had to be done in ONE DAY!
I took of the PVC top and left the decking on underneath. We purchased a 10x12 foot, extra heavy duty tarp, black on one side and silver on the other. We screwed it down just under the eave of the coop roof and screwed the other end to another deck board. We held that board on the door end of the run and used that to put even tension across the whole roof and then screwed that deck board to the roof. We pulled the sides of the tarp down over the sides and attached them to 1x2s and then to the tops of the wing windows. We spray painted 1x4s black and screwed them down across the top of the tarp to hold it down. As tight as it was, the wind was still able to blow in through the open run and lift the tarp.
Fast forward to the next day. We had 6 inches of snow coming, to be preceded by half an inch of ice. I decided to make a plastic covered frame for the open screen run door to keep more moisture out.
So there you have it. Still TONS of fresh air, but none blowing on the birds.
It's an open coop, uninsulated, and unheated. So far they've been down to 5'F with no ill effects.
This weekend, 2nd weekend in January, we'll be down to 0' at night all weekend.
NO PROBLEM!
==================My sunglasses frame took the full brunt of it. They are flex frames, so they didn't break, but the forward momentum of a human into a 2x4 frame attached to a concrete anchored coop simply refused to move, so the frame was shoved into the bridge of my nose. Did I mention I saw stars? I cannot remember. Now my nose is puffy and stuffy and bruised. But the coop is DONE!
OH wait! No, I did NOT say that out loud!
UPDATE: December 2015
I decided, after a 3" rainfall in a few hours, that the roof on the run HAD to go! With everything that used to be green, deep in winter dormancy, and the topsoil frozen, all of that water ran from the upper hill, down, and THROUGH the run. If that wasn't bad enough, the corrugated PVC roof leak, A LOT!
The girls have a deep mulch litter floor over dirt in their run. I've been mucking it out and replacing the hay while I had it and while it was dry. They loved it. I loved it. Until it rained that is. Their scratching and pecking just made a muddy mess. The hay got mixed in, stayed wet, started to smell, and would actually float on the puddles. YUCK. It was like the brick making scene from The Ten Commandments.
I had hoped it would get better when everything froze. But the freeze was followed by a snow, and a thaw, and a snow and a thaw. The run was literally raining IN the run. Nope it had to come off. The trick was the weather. It had to be warm enough to work, NOT windy, and it all had to be done in ONE DAY!
I took of the PVC top and left the decking on underneath. We purchased a 10x12 foot, extra heavy duty tarp, black on one side and silver on the other. We screwed it down just under the eave of the coop roof and screwed the other end to another deck board. We held that board on the door end of the run and used that to put even tension across the whole roof and then screwed that deck board to the roof. We pulled the sides of the tarp down over the sides and attached them to 1x2s and then to the tops of the wing windows. We spray painted 1x4s black and screwed them down across the top of the tarp to hold it down. As tight as it was, the wind was still able to blow in through the open run and lift the tarp.
Fast forward to the next day. We had 6 inches of snow coming, to be preceded by half an inch of ice. I decided to make a plastic covered frame for the open screen run door to keep more moisture out.
So there you have it. Still TONS of fresh air, but none blowing on the birds.
It's an open coop, uninsulated, and unheated. So far they've been down to 5'F with no ill effects.
This weekend, 2nd weekend in January, we'll be down to 0' at night all weekend.
NO PROBLEM!
Addition to the run! October of 2016
Because you have so much work to do before winter brings its icy chill that you work yourself neigh on to falling over every day!

The past four weeks have been a blur of activity thanks to some seriously FABULOUS weather. September into October can either be stunning (which it has been), or go to Hell in a Handbasket (which it hasn't). The days have been getting alarmingly short rather quickly, but the daylight we have had has brought us light breezes, dry air, and temperatures in the 70s. I couldn't possibly pass up that combination to work outside and built the addition to the chicken run.
One fine October morning I just started working on it. Plain and simple, out of the house and started digging holes and sizing up walls. I can't tell you how nice it is to have the supply of lumber and concrete and all those other building necessities just sitting in the barn, waiting to be used. Before we settled down, every time we had a project, we had to buy all the materials for that project. We didn't have room to store things. I'm not saying I didn't make my normal million trips to the hardware store or lumber yard, but having the basics just around made things a little easier.
I no sooner walked down the hill with my can of marking spray paint and a 2x4x10 and every fiber of my body instantly remembered how hard construction was. The falling into bed exhausted from a day of construction in the elements, keeping house, volunteer work, and herding a teenager.
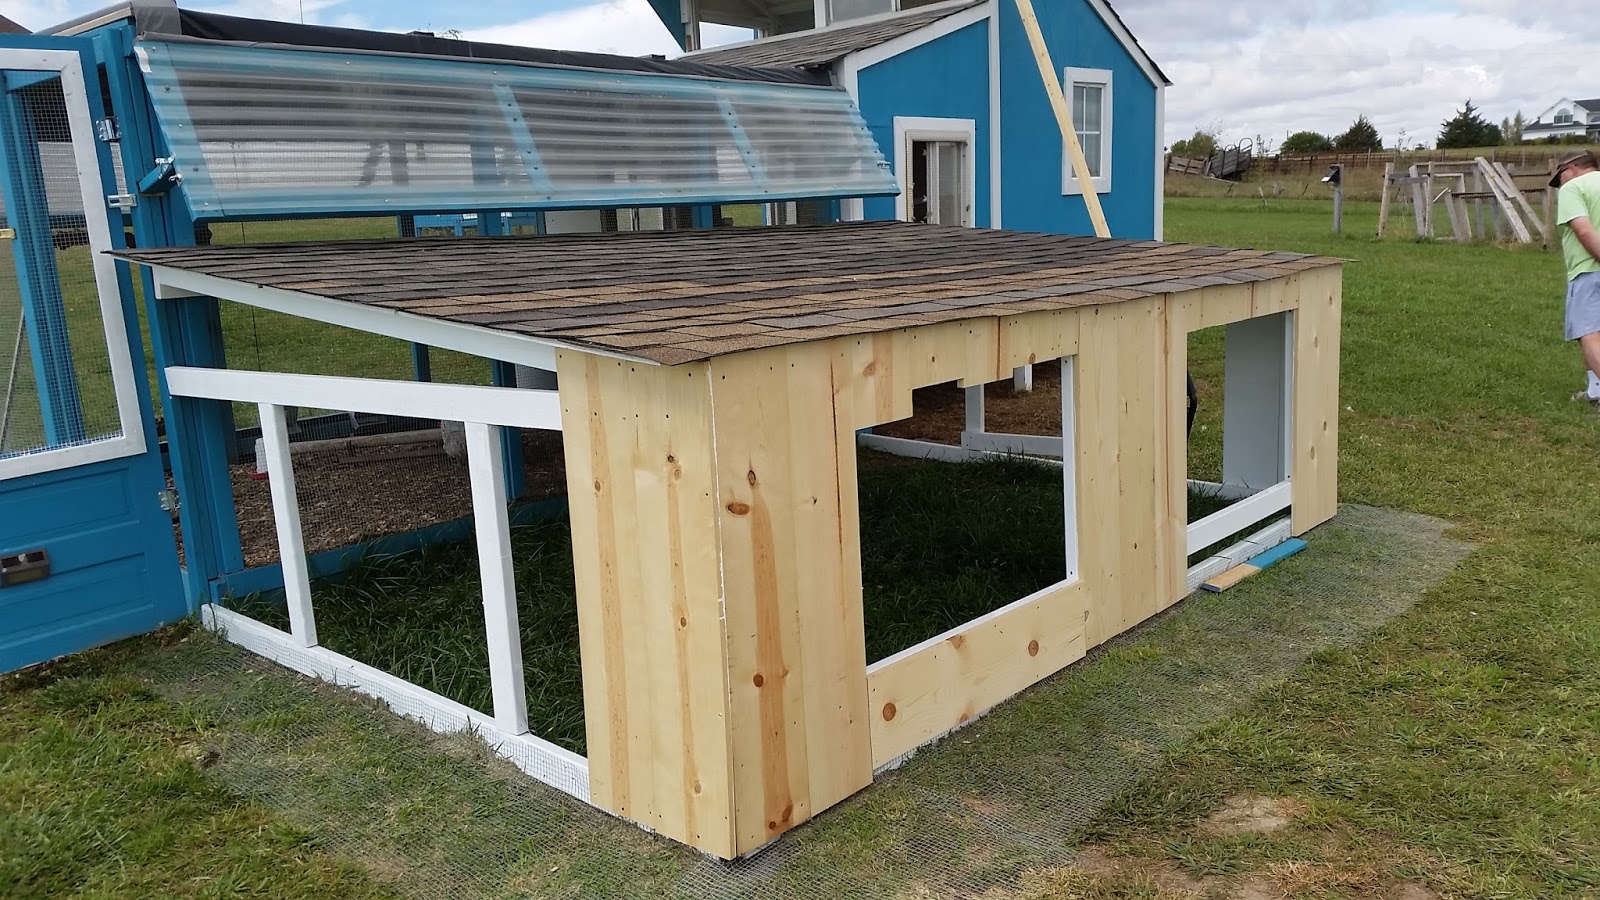
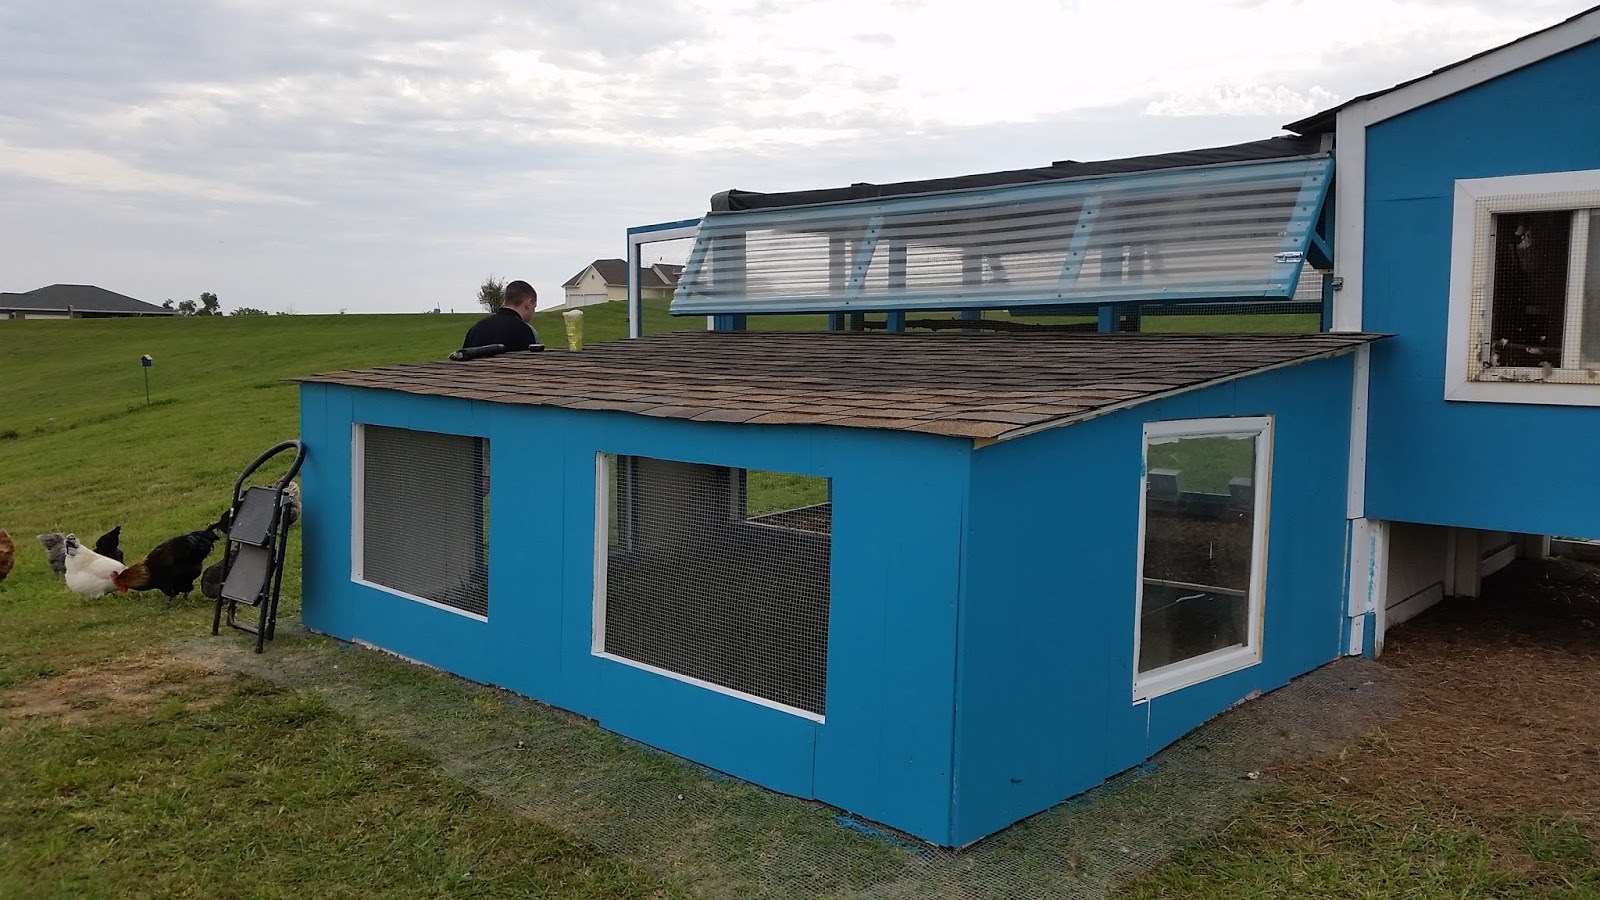
I had an idea of what I wanted. Basically it was a lean-to addition to the main run. The birds needed more space, more shade, and a wind block. Even on a sultry summer day, the howling winds would send them, feathers blown asunder, to seek shelter either under or in the coop. The lean-to design would allow them another 100 square feet, would have windows that would open and close, a real roof, and solid walls. With the windows open, wind would flow freely. With the windows shut, air could exchange through the main run and, by extension, the addition without blowing all the feathers off the birds.
I wanted to continue to use the tipping wing on the east side of the old run to provide winter shelter and a rain shield, so the height on the run was determined by the closed position of the wing. The height of east most end of the new run was determined by how far I was willing to stoop to work in the new run combined with the necessity of making the new roof have a functional slope. I also wanted to be able to make the most of dimensional lumber whenever possible, with as little waste as possible. What I ended up with was a high end of just over 4 feet, a low end of just under 4 feet, a run of 8 feet and a roof slope of 7 degrees.
It sounds all so meticulously planned. It wasn't. I had the whole thing on a napkin and in my head. I just had to rally my body to get with the program. For such a small project, and an easy plan, it was made ridiculously complicated by the speed at which it had to go up. Sure, I was facing an ever collapsing window of amazing weather, but the real trick in timing was the order things HAD to be done in for the security of the chickens. Besides the normal order of things, Job A then B... I couldn't take part "C" before "B", and couldn't install windows before cutting out the hardware cloth wall between the new and old sections or I'd be trapped in the new addition. I couldn't install the windows without the sashes. I needed the hardware cloth from the old walls to use on the interior of the windows. Everything had to be ready and in place for the day I would cut that wall down. Once the security wall came down, there was no going to bed until the addition was a fully secured Ft.Knox as well.
See how that would add stress?
That said, should we start?
The location was locked in, so I just needed to finesse the size. 8 foot wide would allow me to use 8 foot lumber. Handily enough, I can get 8 foot lumber in my truck. 10 foot boards, I can only fit 4 as they have to sit up on the dash. 12 footers, well, those have to ride diagonally out the passenger window. So I do prefer to keep the world to 8 feet when I can. As for Plywood. Sigh. 4 foot wide pieces will NOT fit in my truck. It drives me BONKERS. So while I was digging post holes, I was pondering what to do about the walls and roof. But I digress.
First things first, the post holes. I literally placed a scrap 2x4x10 on the ground marked at 8 feet, lining it up with the existing run wall and sprayed where I wanted the post to go. I did the same for the other end and used a scrap 12 foot piece to make sure they lined up with each other. I dug out the
holes, with lots of help from our overly friendly construction overseers group, and tossed in 4x4 treated posts. These were leftover from another project. I sunk them about 20- inches deep and set them in concrete. When they were fully dry a few days later I cut them to the length I wanted.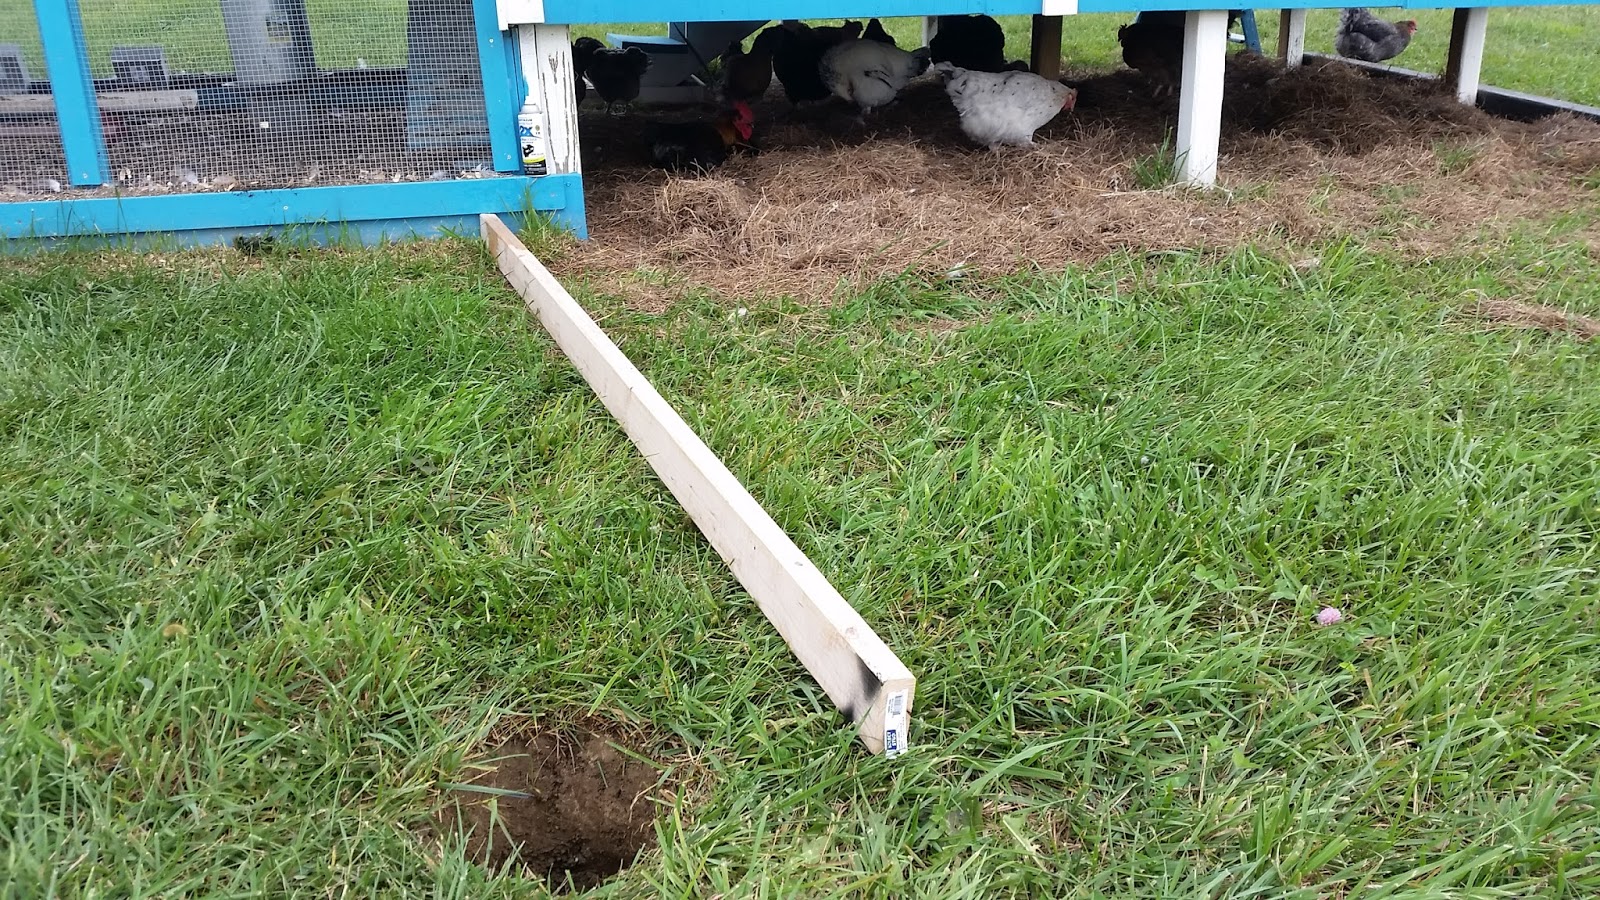
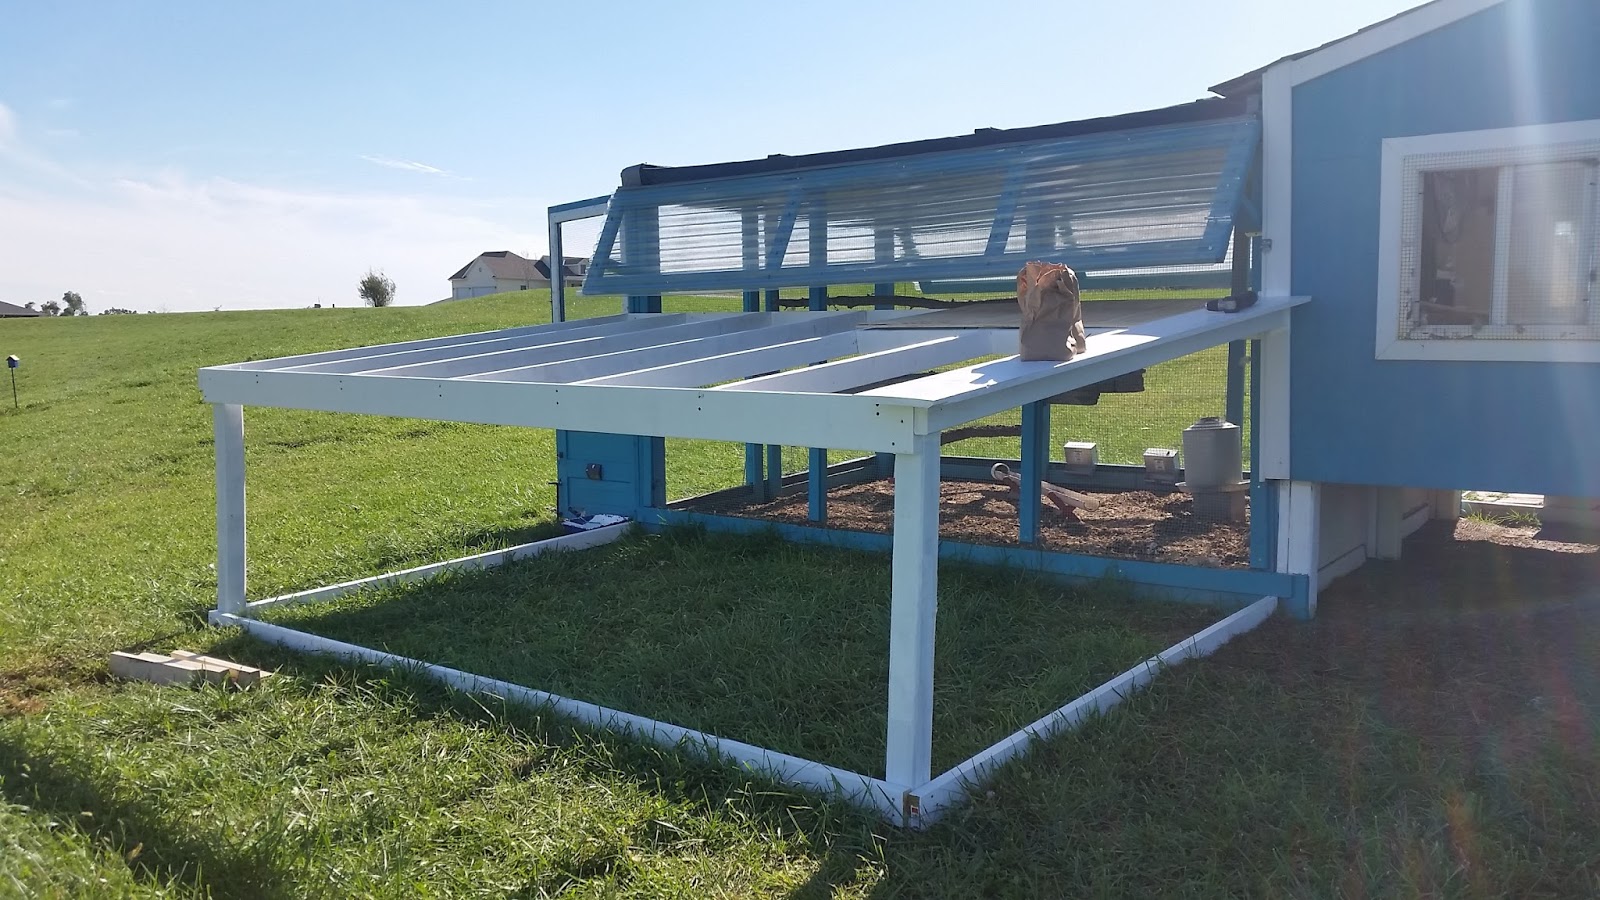
I painted a 2x6 to the coop run to add as a header and support for the roof on the run side of the addition.
I temporarily screwed a 10 foot piece of 1x2 to the old run and ran it out to the post to determine the slope of the roof. From there, I was able to attach my 12 foot header from post to post and make it level, cut and attach the 2x4 end roof supports on both ends and trim the 4x4 posts. Treated and painted 2x4s were laid on the ground and a 2 foot wide piece of hardware cloth was attached to the wood. It was then tacked down with landscaping staples. The hardware cloth will simply vanish as the grass grows up through it.

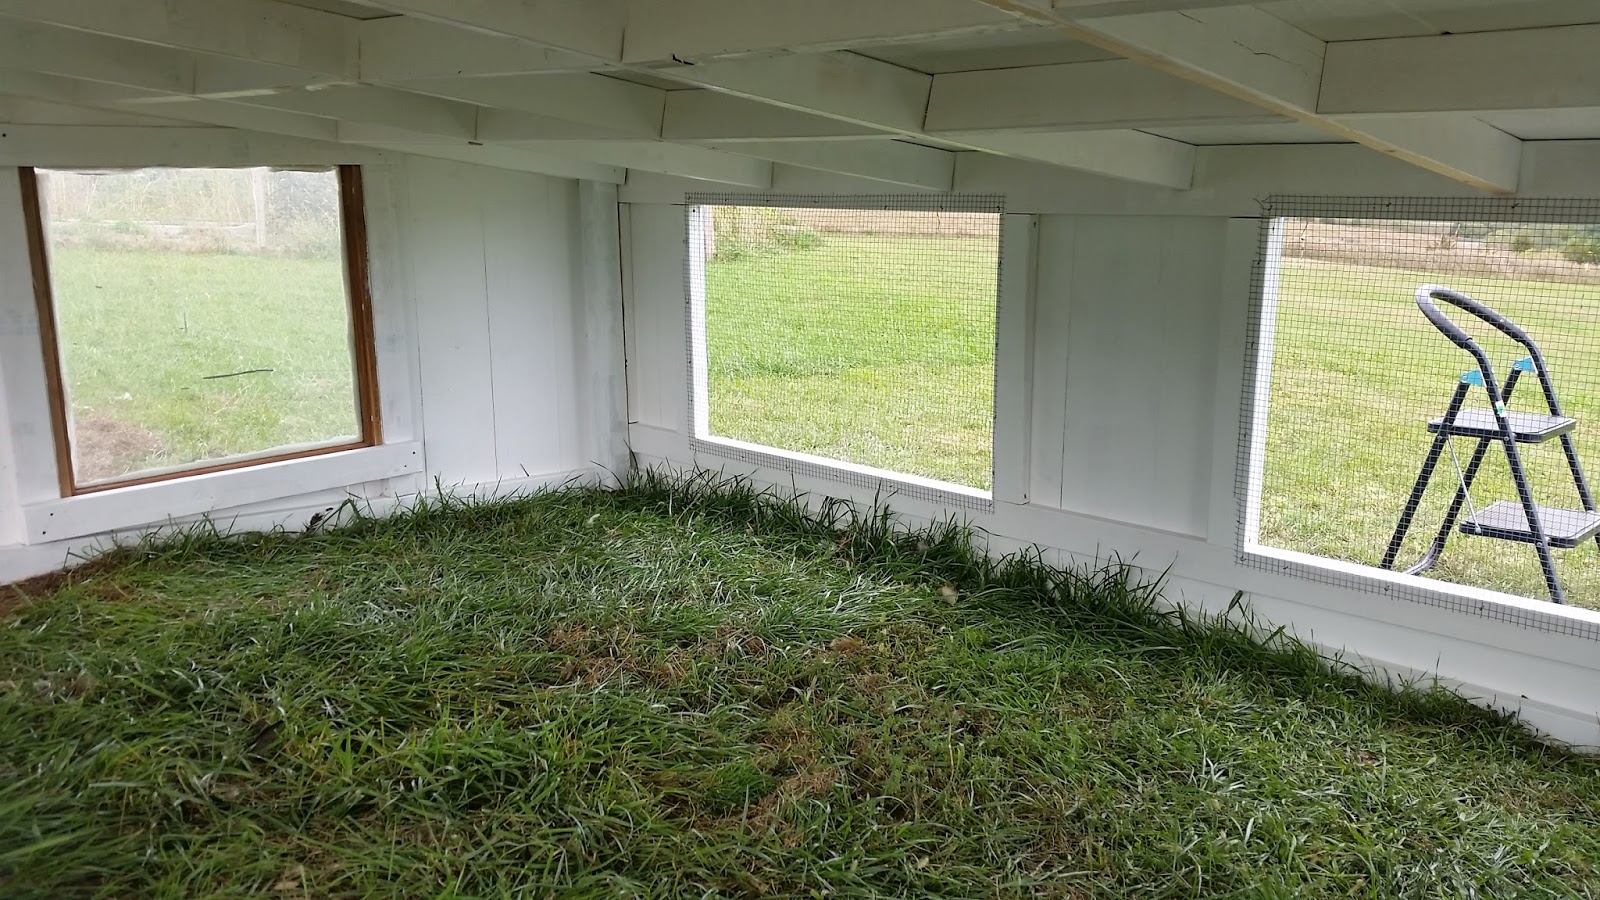
The windows are all salvaged from the local Habitat for Humanity Re-Store. They all needed a good scrape down, sanding and filling, and several coats of white paint.
Here's were it got tricky again. I needed the windows to be flush mounted with the walls. The opening had to be smaller than the windows, so that when closed, rain wouldn't find its way in. My east end windows seemed HUGE! I didn't remember them being so big and swore I had purchased similar, but smaller windows. After tearing the barn apart, and not finding them, I figured I had just remembered incorrectly and pressed on with fitting the addition to the new windows.


To make the opening for the windows, I measured the interior dimension of the windows. This is where the 2x4 stud in the wall would be, and where the siding of the wall would be. I centered my openings and put up the studs. Once the siding was on, I would make frames to overset the windows and hinges. The north end window is simply a permanently closed picture window, but the framing was the same. The window on the south end is a flush mount window, so the studs needed to be right up to the edge of that window. Once the studs for the window were in place, it was time for the roof.
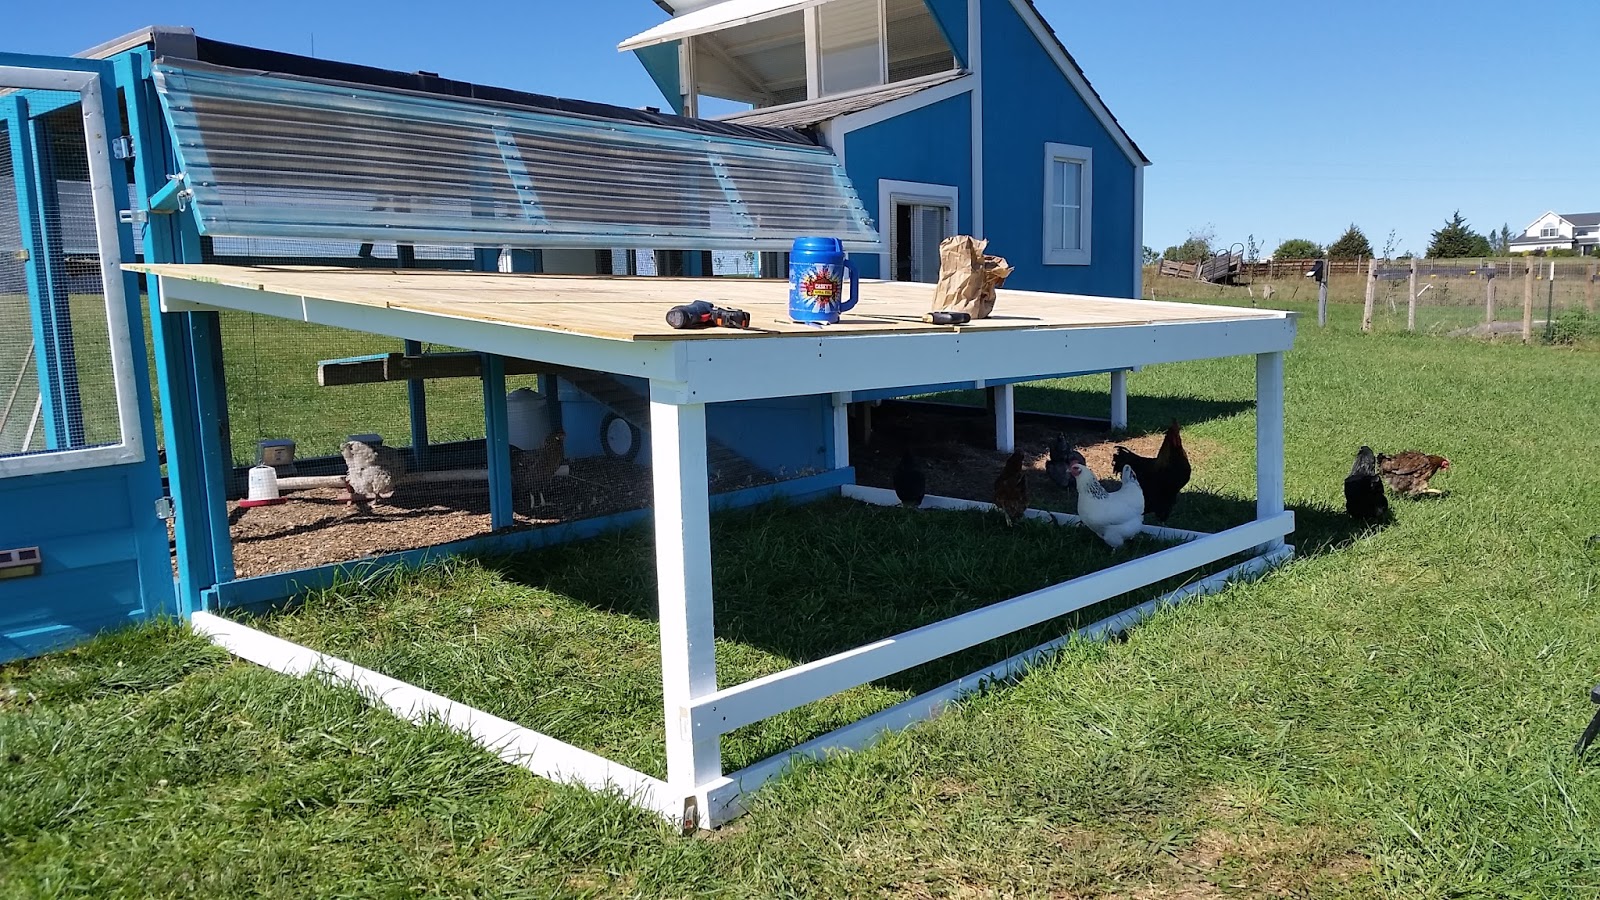
Since it was almost, but not quite flat, I decided to treat it as a deck and framed it as such. The rafters are every two feet on center and there are plenty of cross supports. As for the plywood. I decided to have them cut it into 2-3x4 foot pieces and 1-2x4 foot piece. All of which fits easily into my truck. I decided I wanted a slight overhang on the ends, so 12 feet of plywood left me short, so a scrap piece of 1x10 from the barn allowed me a little wiggle room. The small difference in thickness is lost once the shingles went on. The shingles were also from HfH and only cost me 3$ a bundle instead of $40 a bundle.
While this roof didn't need a second hand to put on, it sure did help and was appreciated. Doc and I managed it in 4 hours with him cutting and me nailing. I am sure at this point the neighbors thought I was nut again. Here was this big roofed monstrosity, attached to a giant BLUE monstrosity, and this one was WHITE! What must they have thought?! I know I must provide great entertainment
I took a one day break at this point. So far (not including concrete dry time) I was up to 4 days. Saying I was sore was an understatement. I decided to clean the garage from its summer of making piles and dripping mud. This is when I found the two windows I KNEW I had purchased earlier. They were smaller, but the window openings were frames and I was NOT going back! While I cleaned I pondered the additions walls. I COULD use plywood, like I had on the main coop. Placing large pieces up on the walls, tracing the openings and then cutting them out, but I wasn't sure I was up for figuring out the piecing since I had areas that were over 4 foot and many openings. It just seemed a waste of time and energy. I decided on board and batten.
The number of 1x10s I needed were about the same cost as the same sq footage of plywood, and was thicker and of better quality. I could certainly get it into my truck a lot easier. I could also cut it to the exact length I needed on the chop saw (note to self, the chop saw only cuts to 8 inches- nothing a quick flip and second cut cannot fix.)
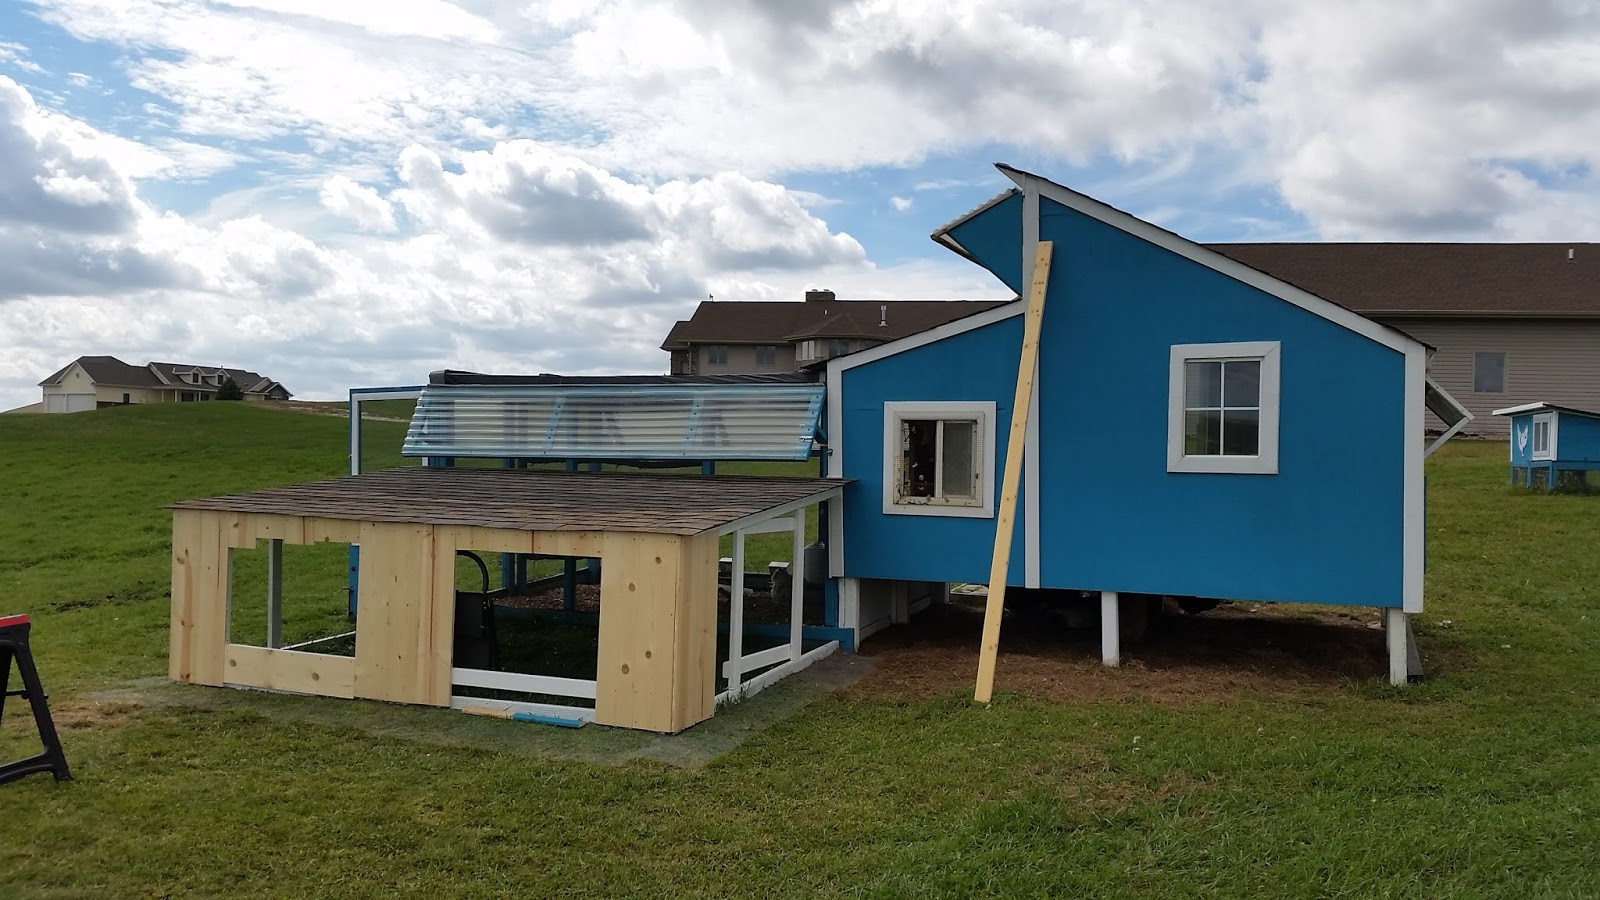
Once the walls were up, it started to feel like I could see the light at the end of the tunnel. Sadly it was just an oncoming train. There was no going in for the day when the last board went up. I had to get at least two coats of paint on it before the rain came the next morning.
Two glorious days of clouds and gentle rain forced me to think about the next step; the elephant in the room step. The addition had a roof and walls, and window openings, but no safety wires IN the windows. Once I snipped the wire walls between the two halves, it would have to be a full steam ahead day. NO stopping until the unit was secure again. I stood in the old run with the wire cutters in my hand, chickens at my feet. As soon as they figured out wire cutters aren't for them, they left me and my deep thoughts for the grasshopper infested pasture. This was it, no going back.
snip, crack....the bolt cutter made short work of the first panel of the wall.
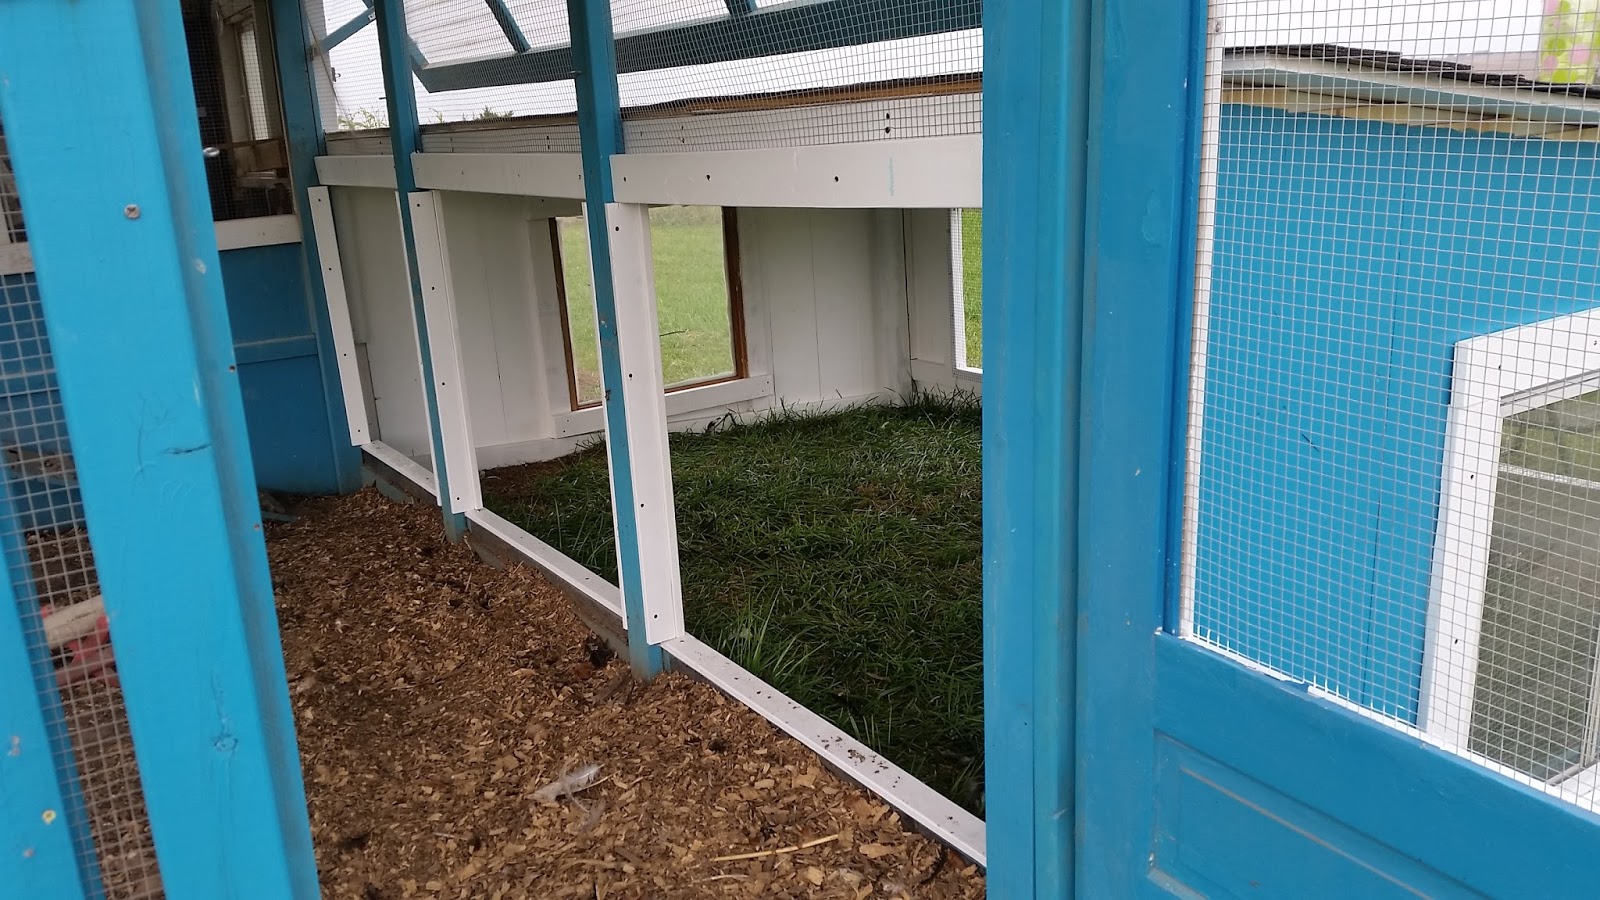
I had the header board ready and prepainted. This board sandwiched the remaining top of the hardware cloth by the wing to the header board on the addition. I also had the smaller 1x3 boards that were to cover the raw cut edges of the new opening between the runs. I did one opening at a time, so I could protect the birds from those sharp edges of the demon wire. You really have to watch this stuff. It's amazingly sharp. At one point I pushed the wire into the new addition, out of my way to make cutting easier. JUST as I thought to myself, "watch out that it doesn't kick back and smack you", it did. Right across the end of my nose. Mercy it bled and bled and bled! Two wires punctured and scraped. I looked like I had had a fight with a snake! Dealing with that took almost half an hour!
With the panels between the two halves open and safe, I needed to move on to the window openings. I used the large pieces of hardware cloth for the openings. I had JUST enough. The wire was attached with large nail in staples and then covered with wood trim, which further secured the wire to the structure and also covered up those raw edges.

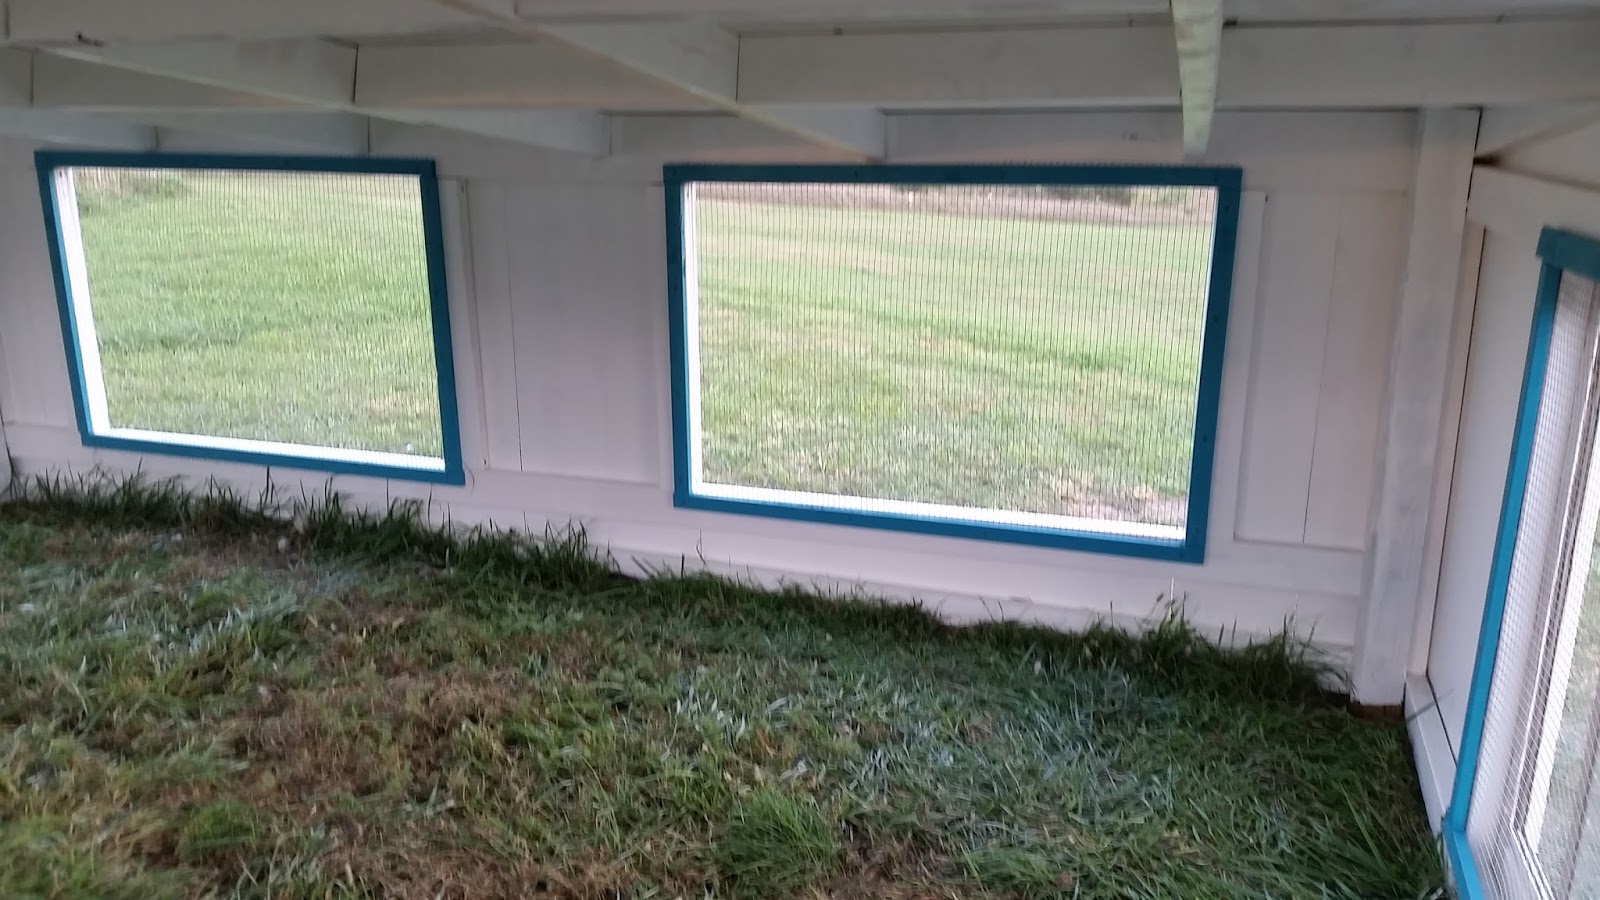
It was now time to move on to the large windows themselves. The North window simply screwed in place and was eventually trimmed and painted.
The South window simply screwed into the opening and then the raw window opening was trimmed out.

The East Windows were just a tad more work. But not much. Remember the windows themselves are larger than the opening. To install the windows, I measured and cut a 2x4 to the length of the top of the window, PLUS 7 inches. I attached this header trim to the top of the window using heavy duty hinges. I screwed this to the run so that the window was centered on the opening. I then attached the left, right, and bottom trim - all 2x4s, leaving a gap around the window so it would not be hindered in its swing.
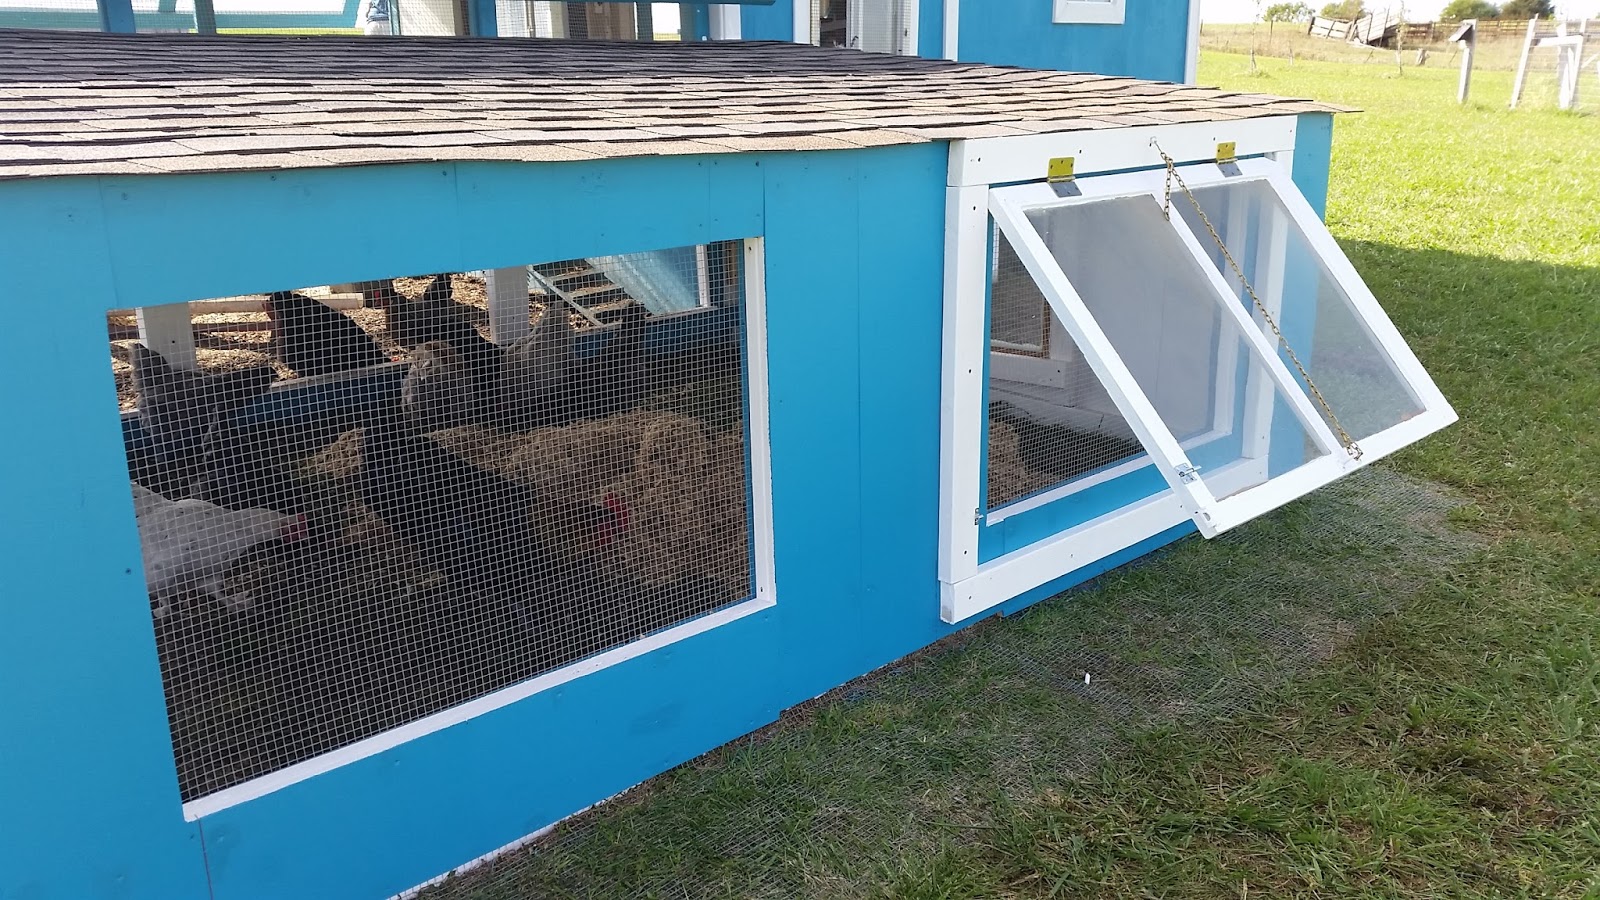
The original plan was to use a hook and chain to lift and hold the windows open at various degrees of open, but the windows were just too heavy. I have found that a simply scrap of 2x4 is not only easy, but very sturdy as a prop. I can still get many degrees of open.
I also added barrel latches to secure the windows.
The only remaining thing was to add the battens. For those I used 6 foot lengths of lap attached with tack nails. Three coats of paint later and the whole thing was done.
I went back in to add PVC feeders to the joists, not for feed, but for calcium and grit. (Using them for feed has NEVER worked for us.)

I also have hung a mirror and added their mini ladder to play on.
I also had to build them a new outdoor play roost ladder as I had to move the old one to open the walls.

As long as I was dirty, I decided to finish off the nest box in the coop. What started off as a 3 over 3 nest box, evolved into a two plus a basket over 6. The basket was such a huge hit, that I removed the hard two boxes and added two more baskets. I remembered that occasionally rain DOES come in the window above, which used to drip on to the nest box roof, which was now gone. I rebuilt the roof and simply used pieces of 2x4 as front supports. It's more popular than ever.
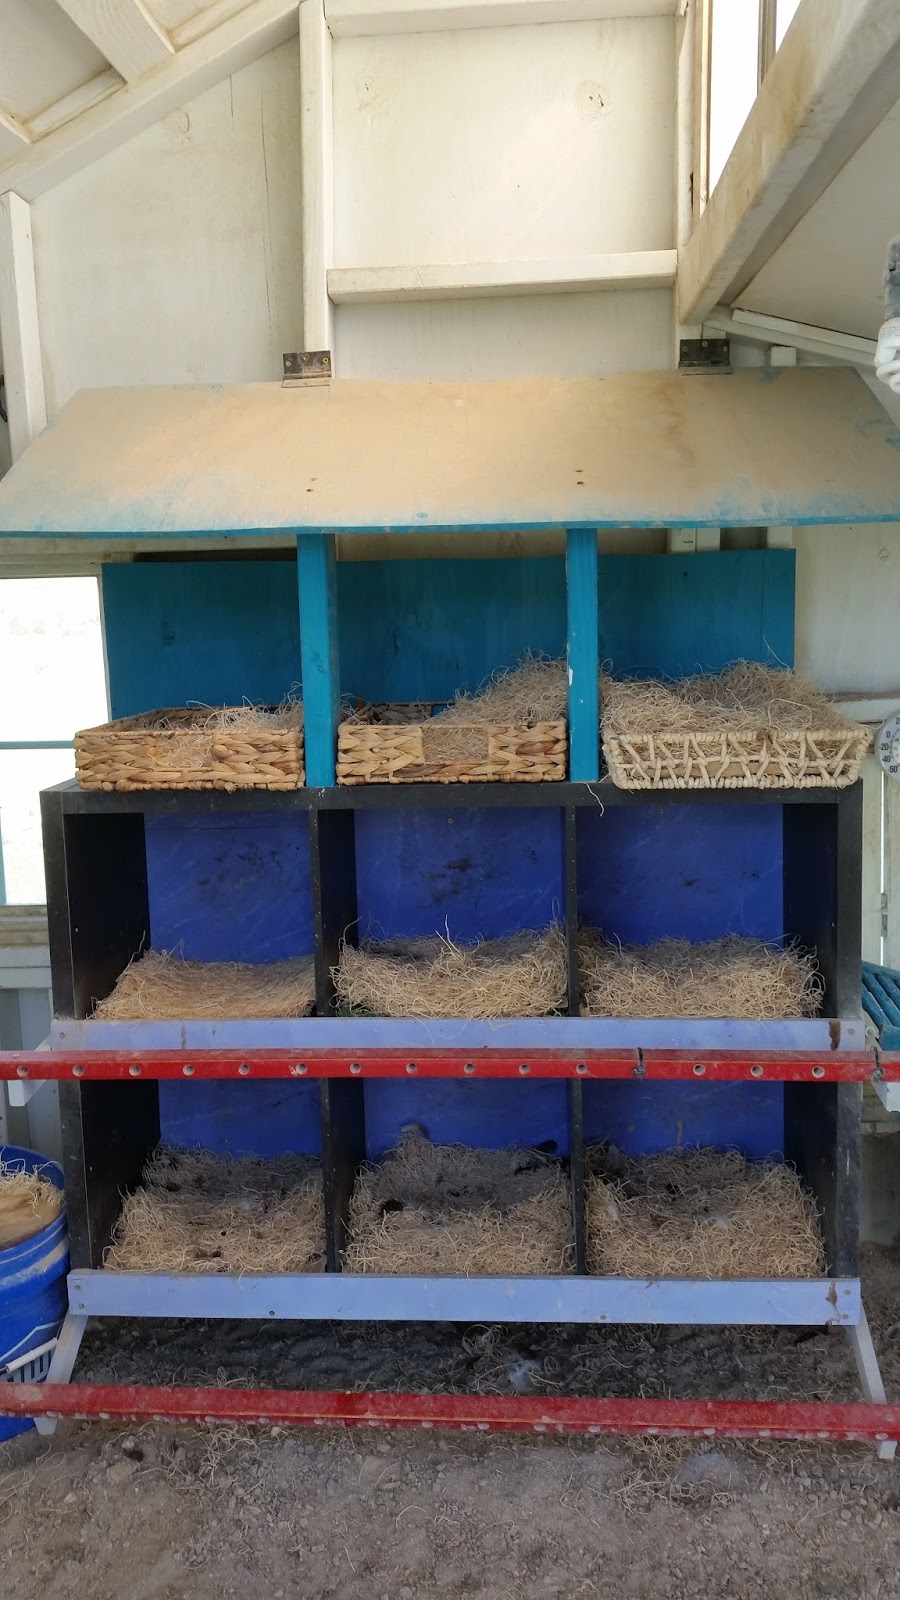
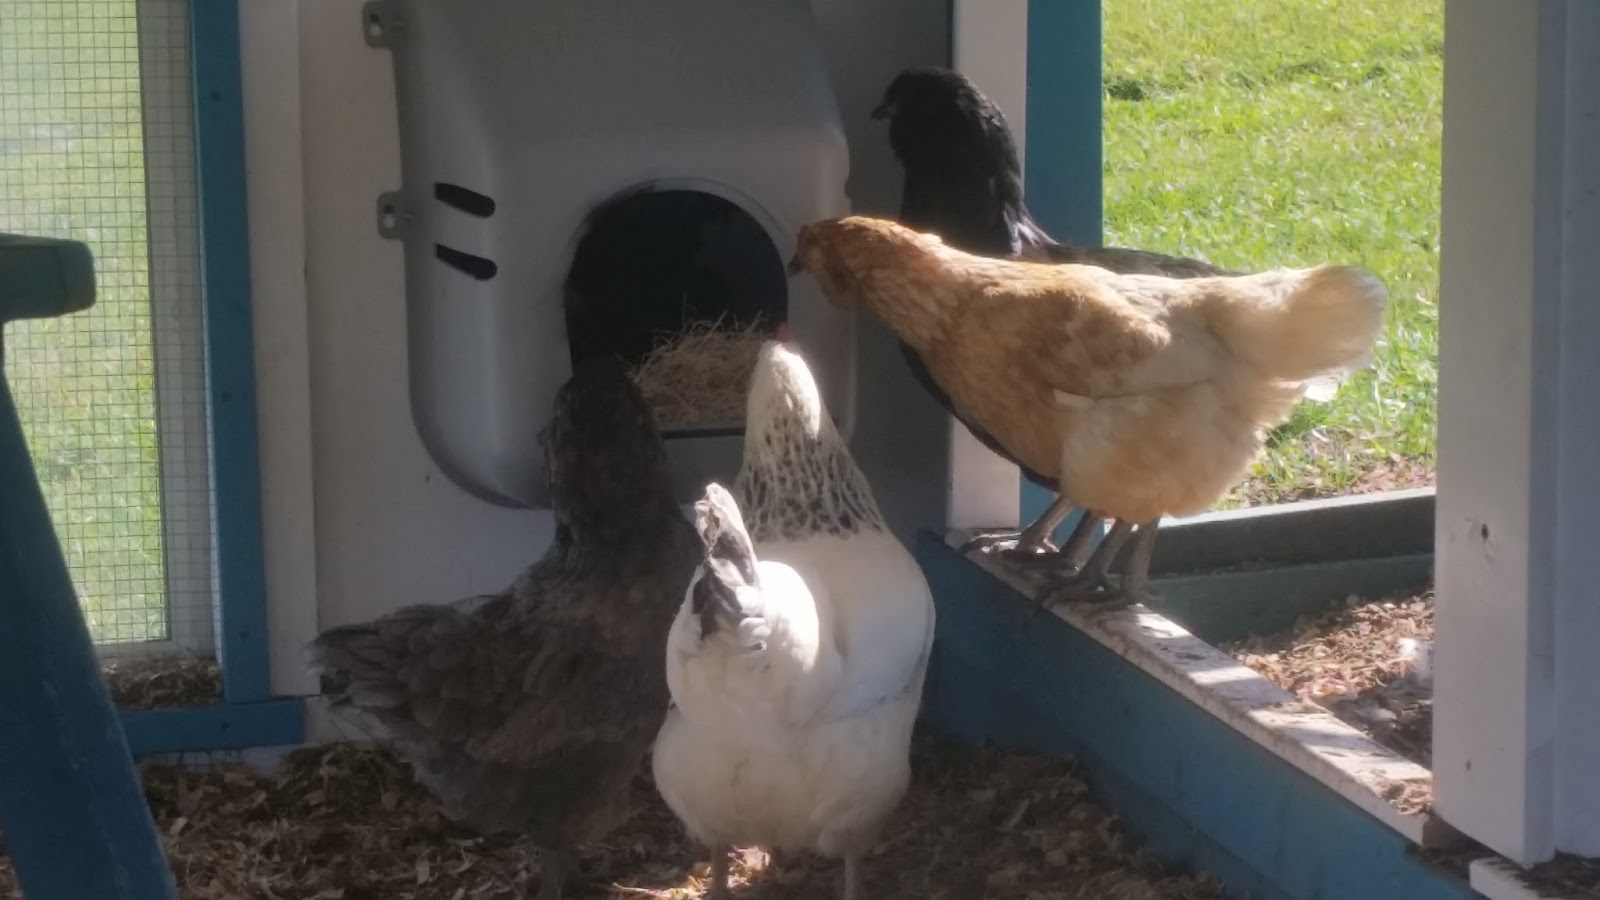
I then remembered that I had two plastic wall mount nest boxes and added those for the girls that just decide to lay al fresco on any given day. They are a huge hit. Even the rooster got in on it. However this was NOT appreciated by the girls waiting in line.
|
Yes, HE is in there. |
When the girls had pretty much denuded the grass in the addition, I added a whole bag of pine shavings. Since I cannot stand up in the new addition, I will not be practicing deep mulch composting in this portion. The old portion I add hard mulch and pine shavings to balance food scraps and chicken poo. When it composts down, I can easily shovel out 10 wheel barrels of fabulous black earth!
The girls are loving their extra space and are crazy happy. They now have 300 sq feet, which still gives me plenty of room when I let one go broody in the Spring. It was a super project, but I am sure glad to be done!
2018 - Fall. A new Color! We have switched to Behrs Tropical Skies ! A deep, rich, dark teal blue.


