Hi folks, and welcome to our page!
A brief background is in order. I raised Rhode Island Reds all through high school for my FFA project and was lucky enough to win a $500 scholarship doing something I loved. Now I am trying to teach my five year old son the joys of tending his own flock....and we're dragging Mom along for the ride!
We have 3 acres here in rural Chester County, Pennsylvania. There are 3 boys in our family-ages 19, 14, and 5. We share the property with my mother who lives in a detached apartment. There are 4 dogs too!
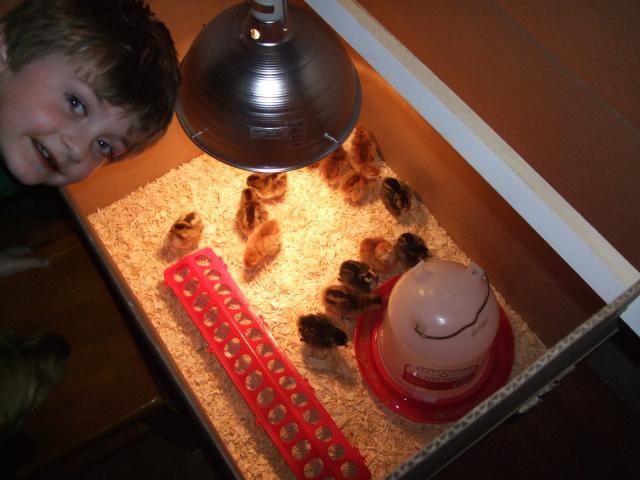
Here is my son Dylan with his brand new peeps!
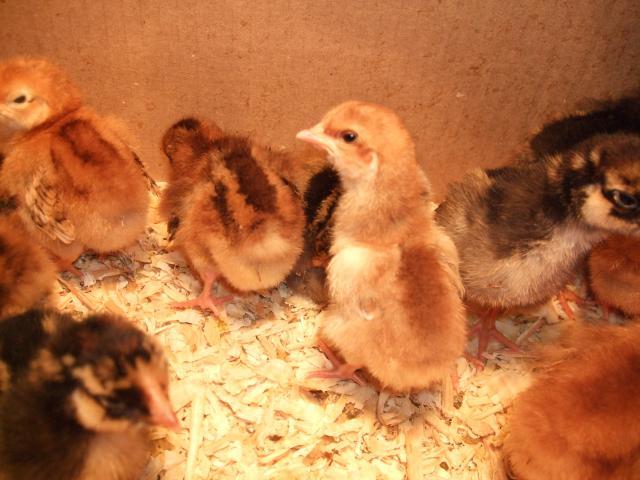
Here's a close up of our flock....8 RIR's, 5 GLW's and 5 Speckled Sussex. Supposed to be 1 SS roo in the bunch but I haven't found him yet!
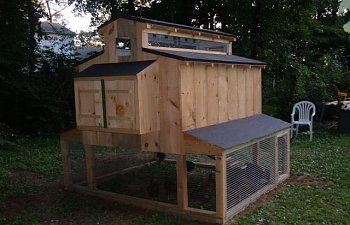
We had to get started on our new coop right away! It will be raised with a shaded run underneath. Although we plan on letting them free range most of the time.
Our coop started with a rough sketch on scrap paper. I have been a builder and house framer for 15+ years and built houses on less sometimes!
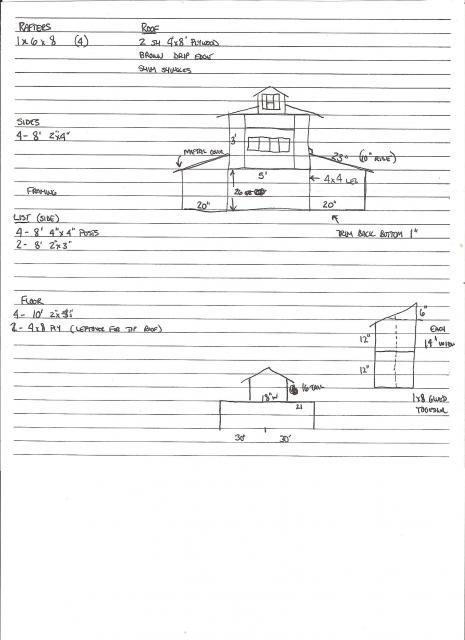
I then took our sketch drawing and laid out a framing drawing for my reference as we build it.
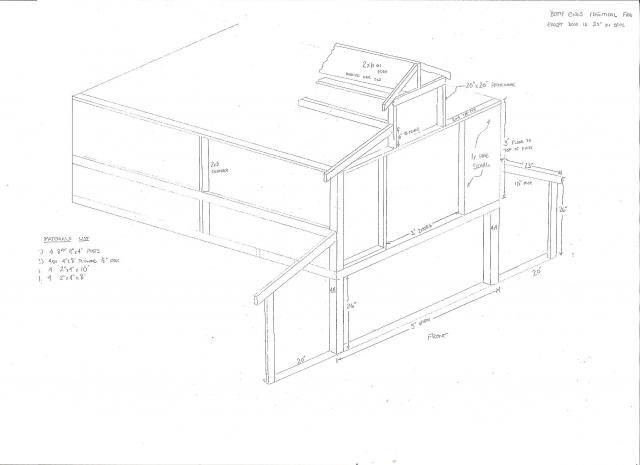
If you compare the drawings to the actual photos you will notice many in progress changes. Sometimes it was because
I had materials on hand or because I could save something(time, money or sanity) by doing it this way!!!
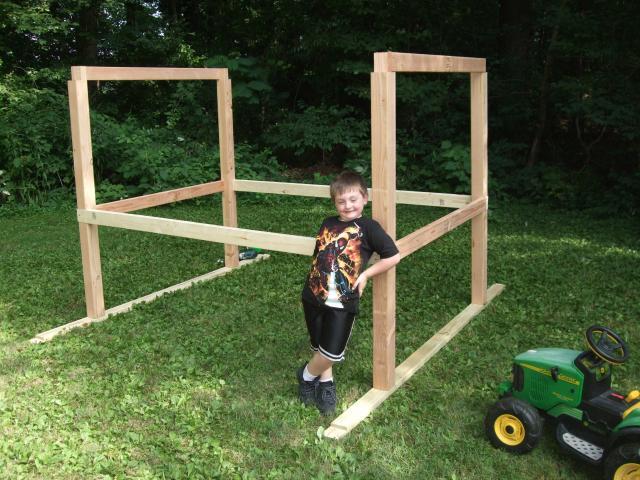
Here is the proud owner of 18 new baby peeps with his new coop in progress. He's a great helper!
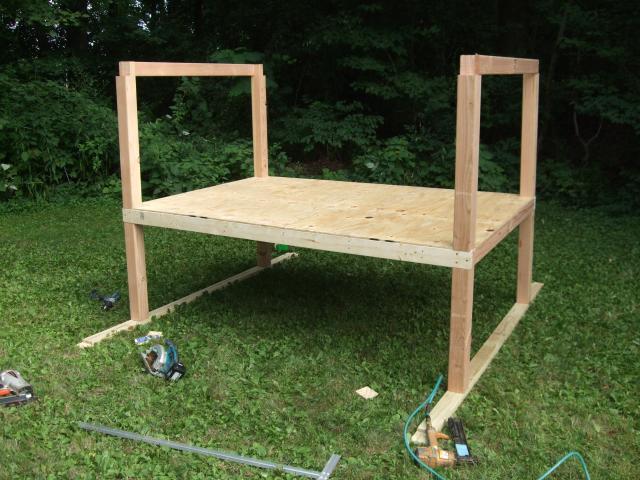
Here is the finished floor...
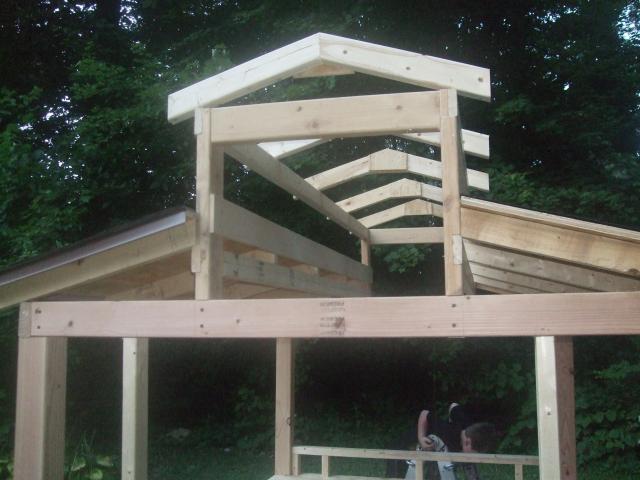
Here the lower roof is complete and you can see the raised cupola that runs the length of the coop.
(The inspector is in the house! Making sure everything is up to code. And we get to climb the ladder.)
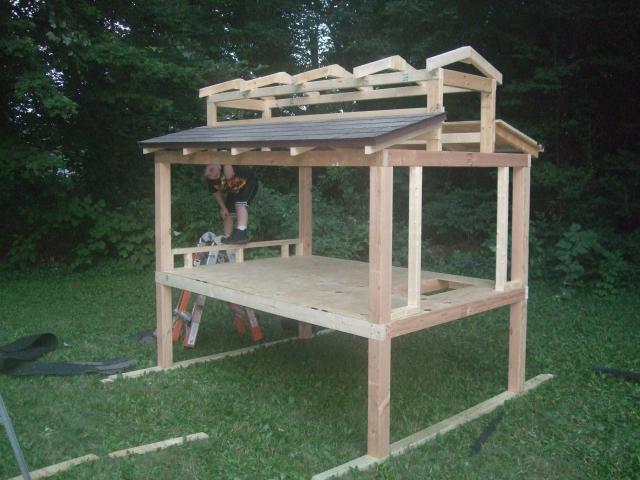
This shows the roof framing details...
Now it's time for some siding...in rough cut pine w/ battens to match the house.
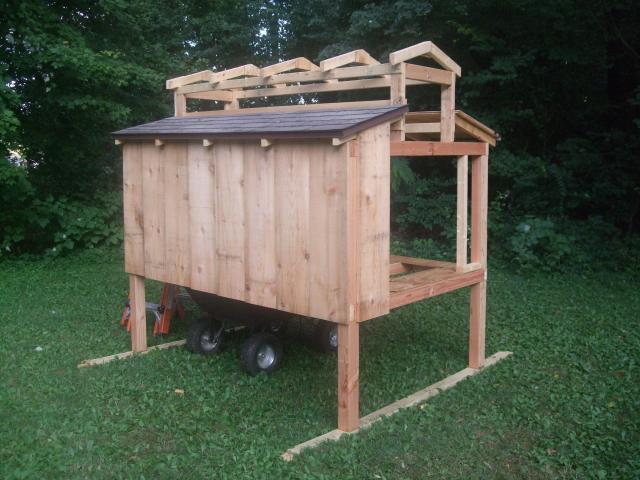
This view shows the area left open for the exterior nest boxes which will swing out as a unit to facilitate cleaning.
They will also have access doors for Dylan to get his eggs each day.
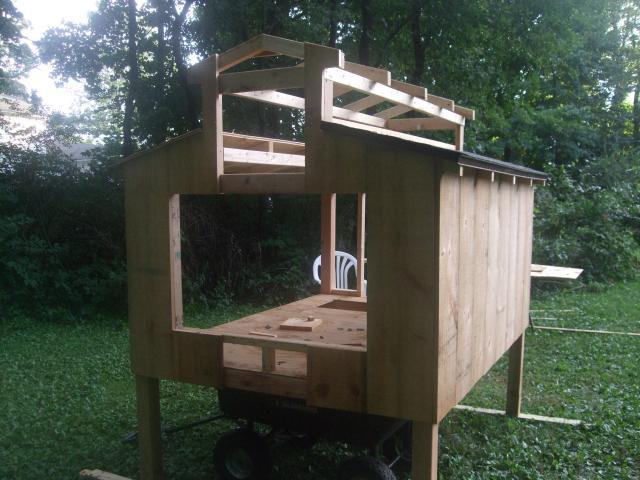
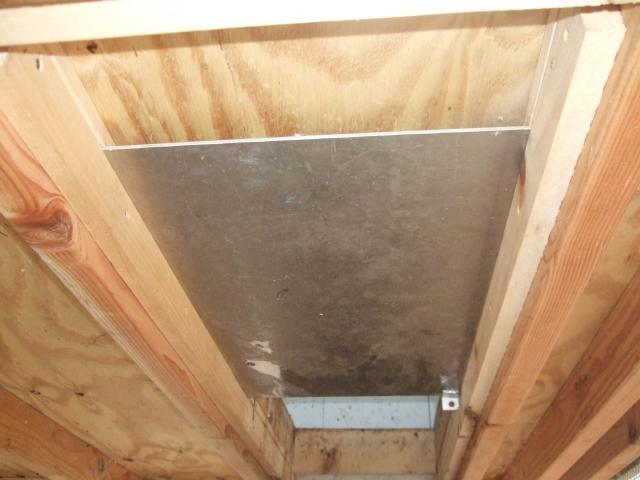
This image shows the areas left to be sided and the access door cut in the floor that will lead to the enclosed run for his chicks. You can see it is just tall enough to get the wagon under for cleaning.
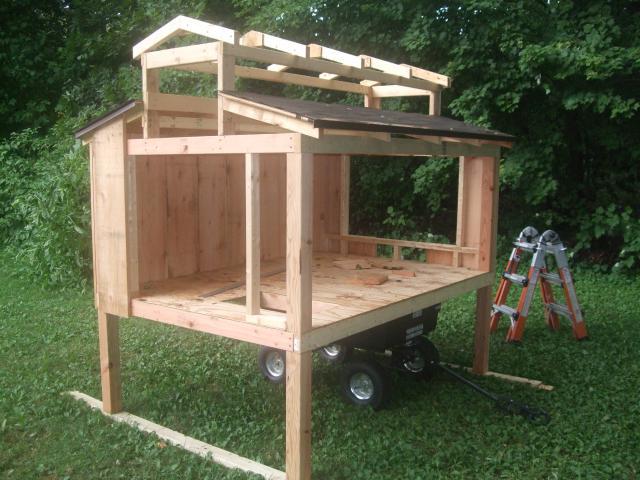
Well that's as far as we've gotten on the coop so far. I'm not sure if we'll be done in time for the coop contest but we'll try! More to come....
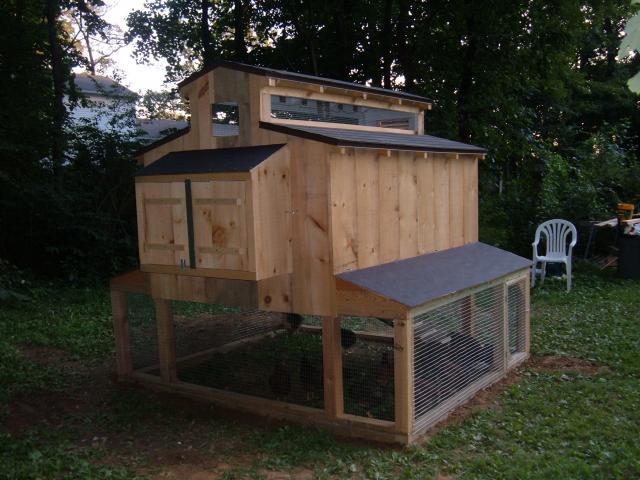
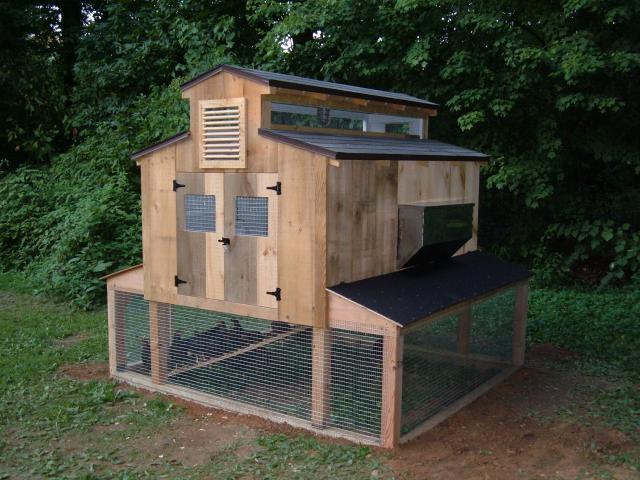
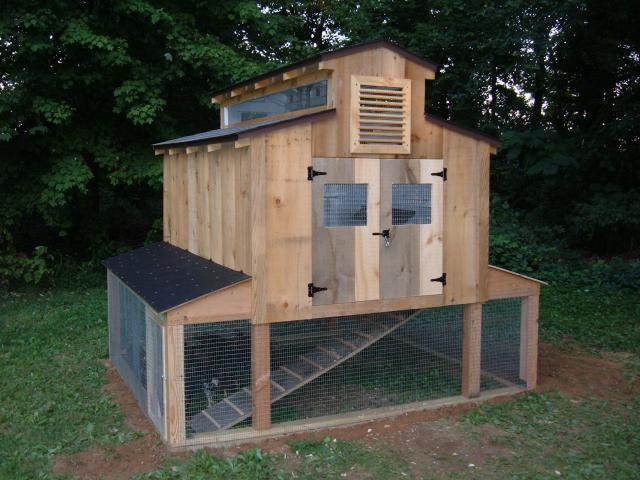
OK, Here is the finished coop! (For now anyway!) We plan on adding windows on this side. and the temporary tar paper gets covered with
brown aluminum.

Here is the rear showing the nest boxes.
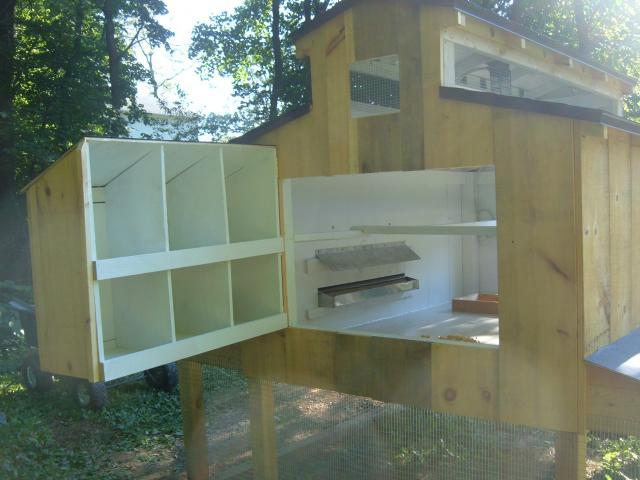
The nest boxes open to get eggs...
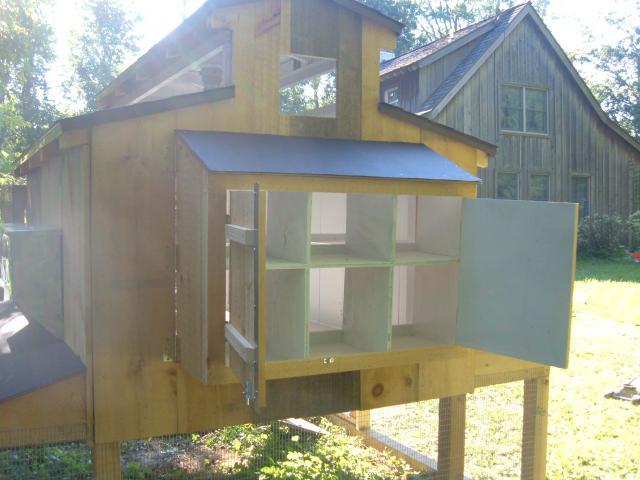
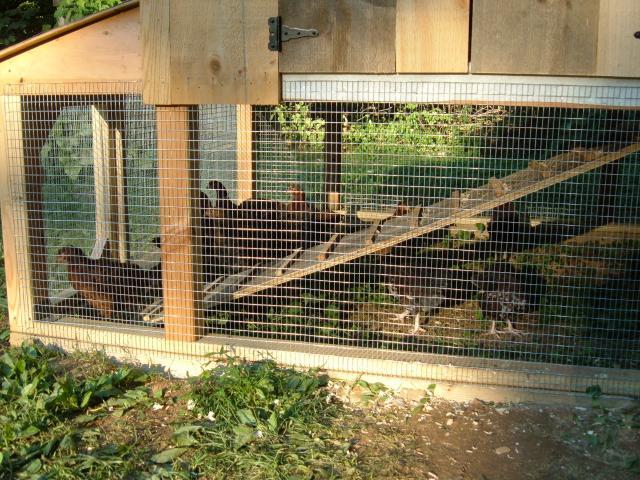
And the whole thing swings open for cleaning access...You can also see the exterior feeder and shield with the installed roosts.
The chicks are moving in!!!! Dylan and his friend Abigal are putting them in for their first time.

Here is the final side shot of the feeder side and the front with the birds inside...
They're not to sure about this yet but they sure do like the room!
The front view from the yard.
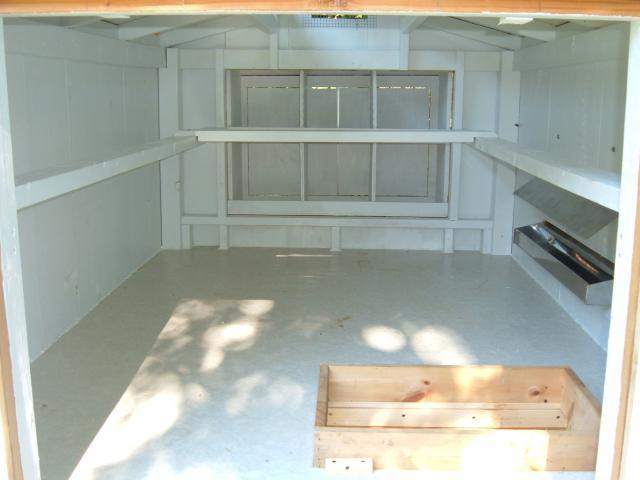
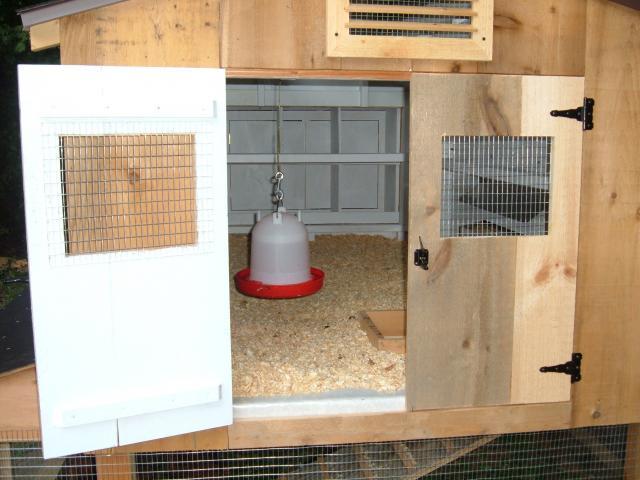
Here are a couple inside shots.
Here is the pop door from the underneath.
And from above...

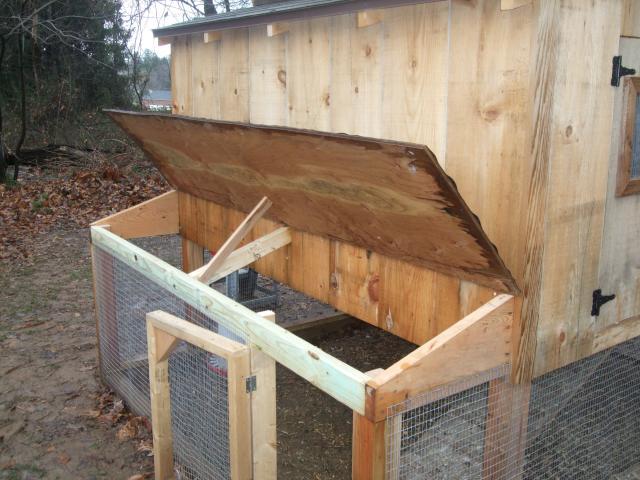
The run roof opens for cleaning...
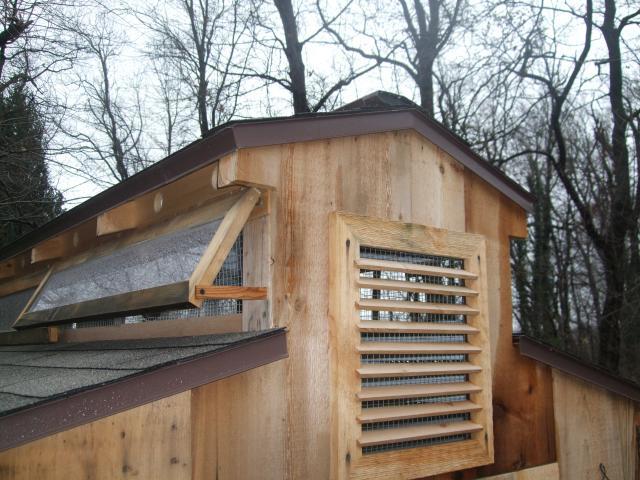
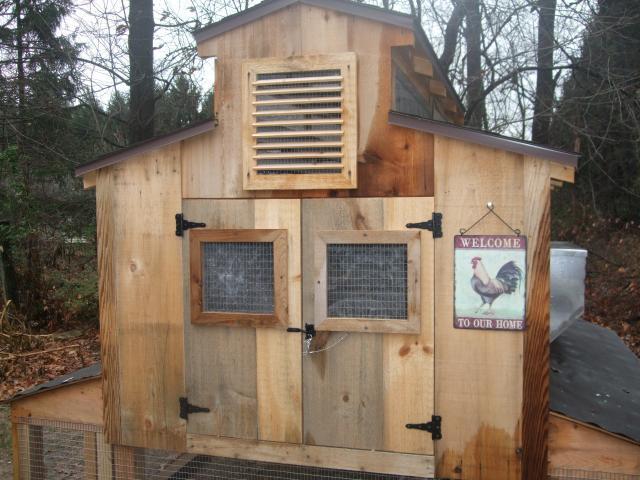
Here are the upper vent windows.
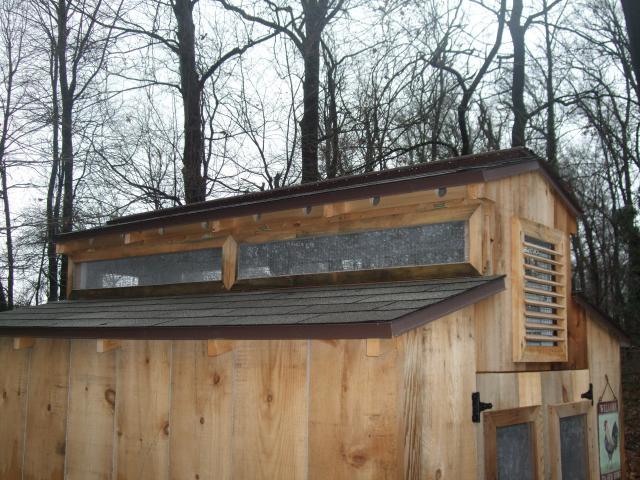
Here are the windows open with the built in props and the metal ridge vent is visible.
The storm windows on the doors and a little final touch...
Some happy chooks eating some scratch....

We hope you like our coop! We are currently researching nipple waterers for possible install but I'm
concerned about winter freezing.
Brief Materials list
4- 4x4x8 posts cut to 66" tall (save cutoffs for outside corners)
2- 2x4's treated for footer boards to stand the 4x4s on.
5-2x4x10 for floor joists
4-2x4x8 for bottom and top band boards
2- 4x8x 1/2" CDX plywood flooring
10- 2x3x8 for other framing as needed
First round of material was $117.68
Second round was roofing, siding and such.
Most siding was leftover from house and garage construction in 2000.
We had to buy 3- 1x12" rough cut pine siding boards to finish up doors, nest boxes etc...
2 bundles of shingles at $21 each
Second round total was $124.40
Vinyl flooring 6x8 sheet at HD $21
1/2"x1"x 30" tall welded wire (4 rolls@ $19.99 each) $80 +tax
Grand total of coop= $322.08
Being able to sit in a chair and watch the chickens scratching while you admire your handiwork...PRICELESS!
As far as things I would have done differently, I would have raised the coop and leveled it so I could get a little
more slope away from the run underneath. I would have put the sand in underneath before the coop was finished!
I wish I had the gable end vent fan when I built the coop so I don't have to adapt things now. And as much as I hate to say it but I wish it was about 1 foot taller up top so the roost height and nest boxes were spaced further apart than they are so far the girl like to roost on the edge of the nest boxes....
Thanks for looking!