First, huge thanks to Becky, who presumably lives in Massachusetts (https://www.backyardchickens.com/a/beckyinmas-chicken-coop), for providing a design that I could snatch and modify, and to the folks who built the Recycled Shed Coop (https://www.backyardchickens.com/a/our-recycled-shed-coop) for making such a nice run that I could copy. Nice work!
So here's how it went: We recently moved into a little farmhouse with plenty of outdoor space that just dared us to get some chickens. So we went for it and picked up 10 chicks and put them in a bin with the understanding that we had about 2 weeks to get them a nice place to live. I spent the first week waffling about whether to buy or to build, and in the end the adventurous DIY types at backyardchickens.com inspired me to build. A big factor was that I didn't want to spend as much money as it appeared I would need to in order to buy a coop and run big enough for 10 chickens, but maybe I should have because I spent that much and more. I had a ball building it though, and am really happy with the result.
I started with beckyinma's plans and drew up some of my own with some modifications. I haven't seen them in about a month, but I'll try to post what I have if I can find them and they're still in one piece. Anyway, here's the pictorial:

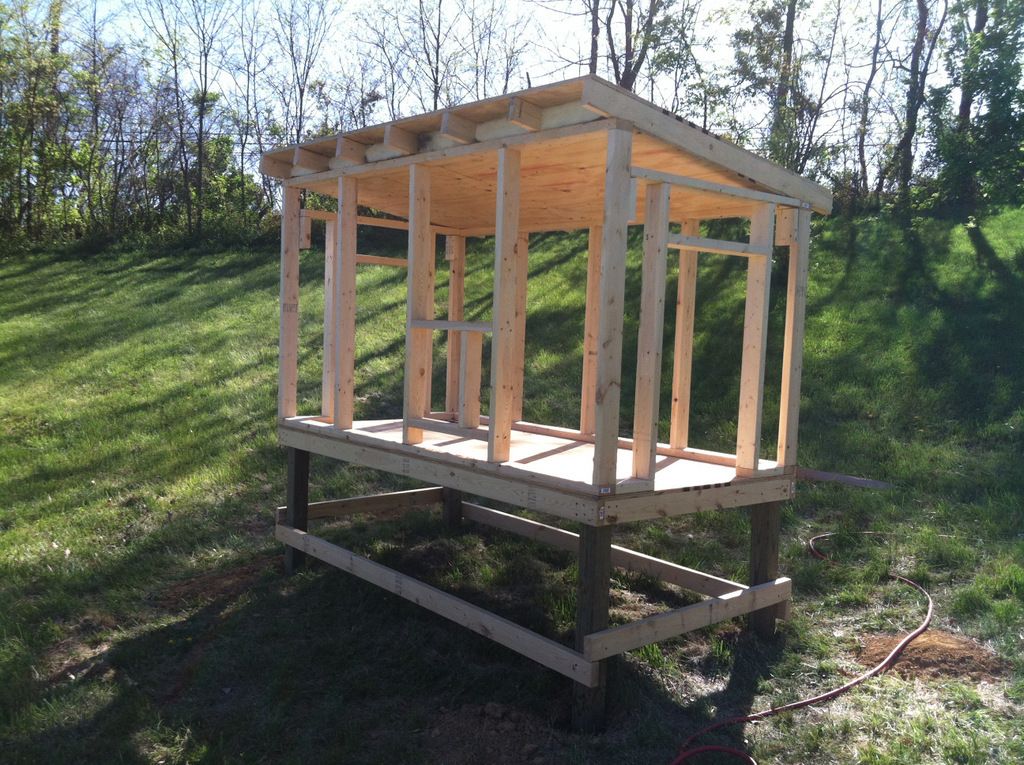
The base is 4' x 8'. So far so good.
I tried to split the difference between making it a permanent structure and making it so that it is possible to move in the future. We are renters, after all, and we'll be moving along at some point (I would think). I was also receiving guidance from my retired-contractor father who spent his whole life building permanent structures, so the thought of not attaching it to the ground fairly well was a bit of a sticking point. In the end I dug some postholes that were maybe 12-18" deep and split one small bag of Quikrete among 3 of the legs. Definitely not going to fall over, but could be dug up with a reasonable amount of effort if needed.
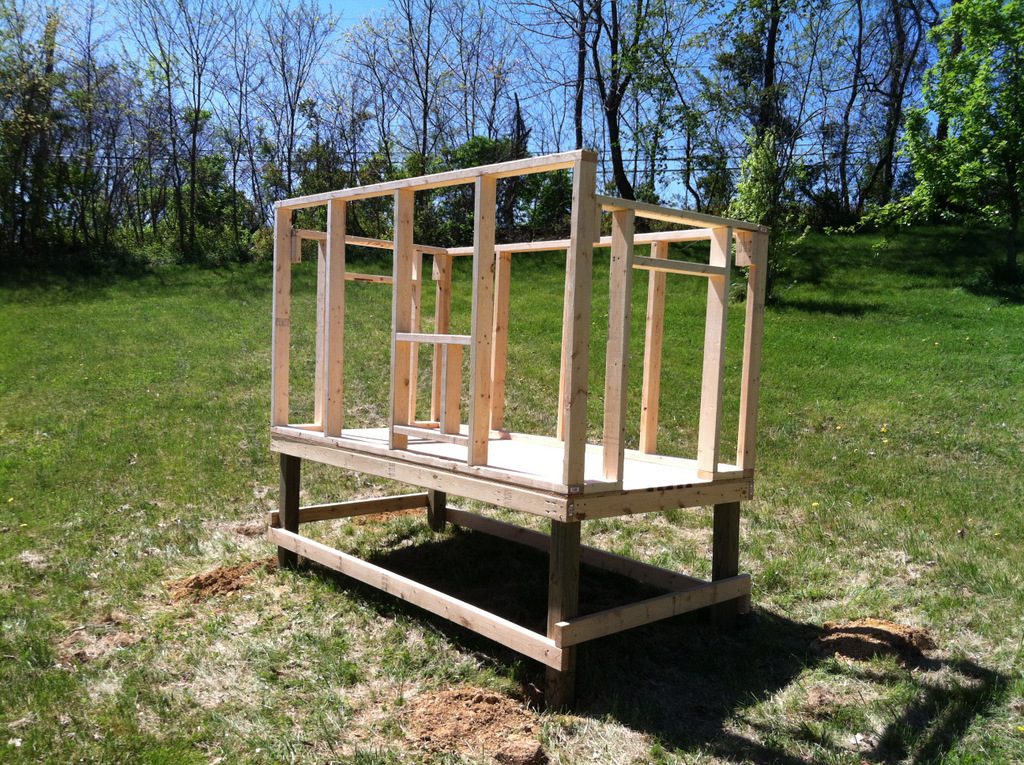
At this point I'm still sticking with Becky's dimensions fairly well, but I decided to put people doors on both ends instead of just one on the front. I wanted to be able to access everything without having to enter the run, and to be able to reach everything inside without having to climb in. Because that's just nasty. And I'd like to be able to clean it easily. So there you have it.
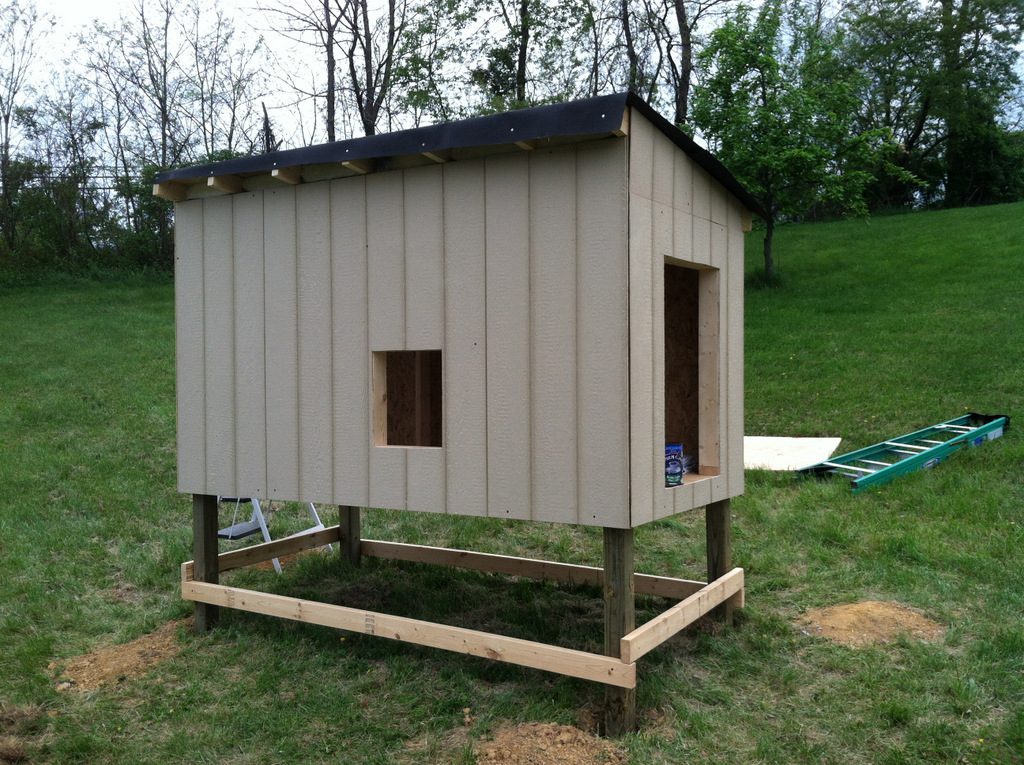
Our coop location is devoid of trees for shade during the heat of the day, so we thought we'd add a layer of insulation to the roof in order to capture some of the rays. Not sure how much it helps, but insulation is cheap so we went for it. So after adding the rafters, I screwed some thin plywood to the underside of them, then laid the insulation on top, then covered it with the roof plywood.
Next we added the siding and black-papered the roof.
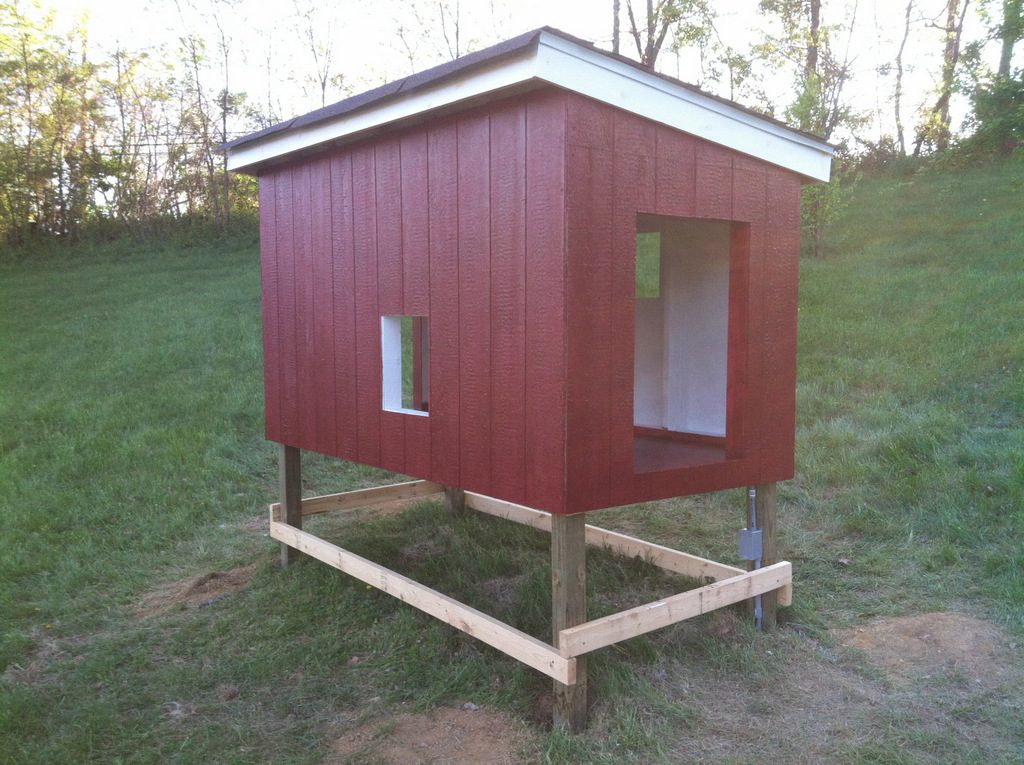
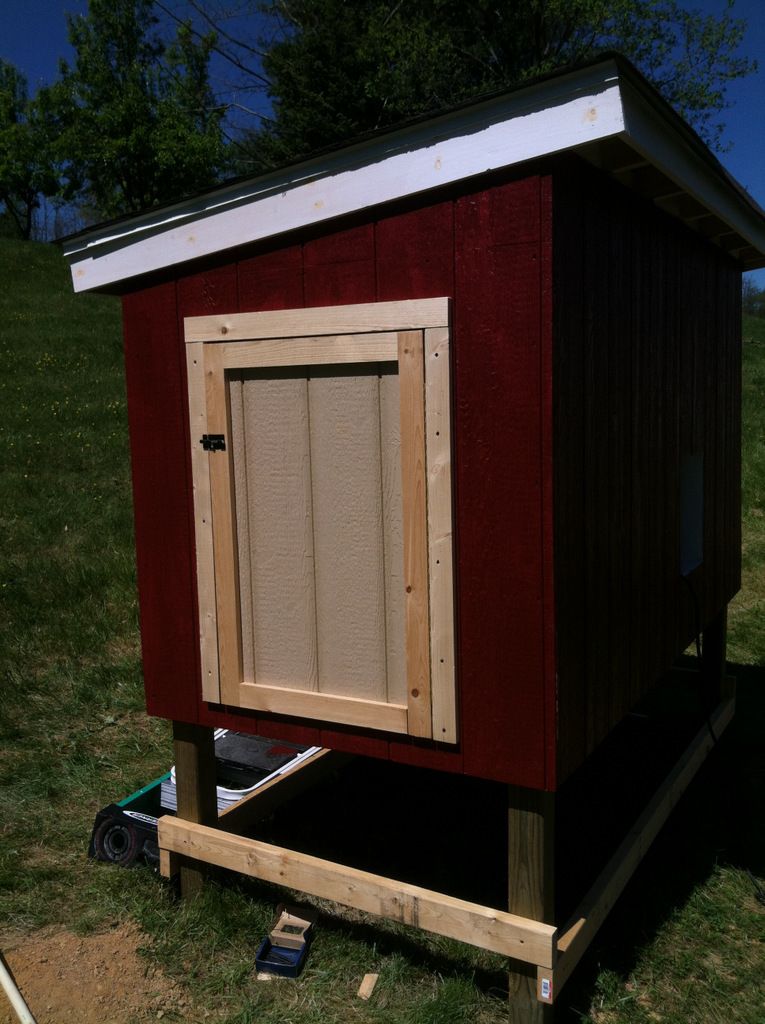
OK, a lot has happened since the last picture. Basically, we trimmed the roof, got it papered, shingled, and drip-edged, and thoroughly painted it inside and out. I went with the particleboard siding which was a little cheaper, but more subject to the elements. So I primed the entire inside of the structure (except the ceiling), then used the red exterior paint to add another layer of protection to the floor. Yeah, that took a while. I was up in there for several hours. Phew.
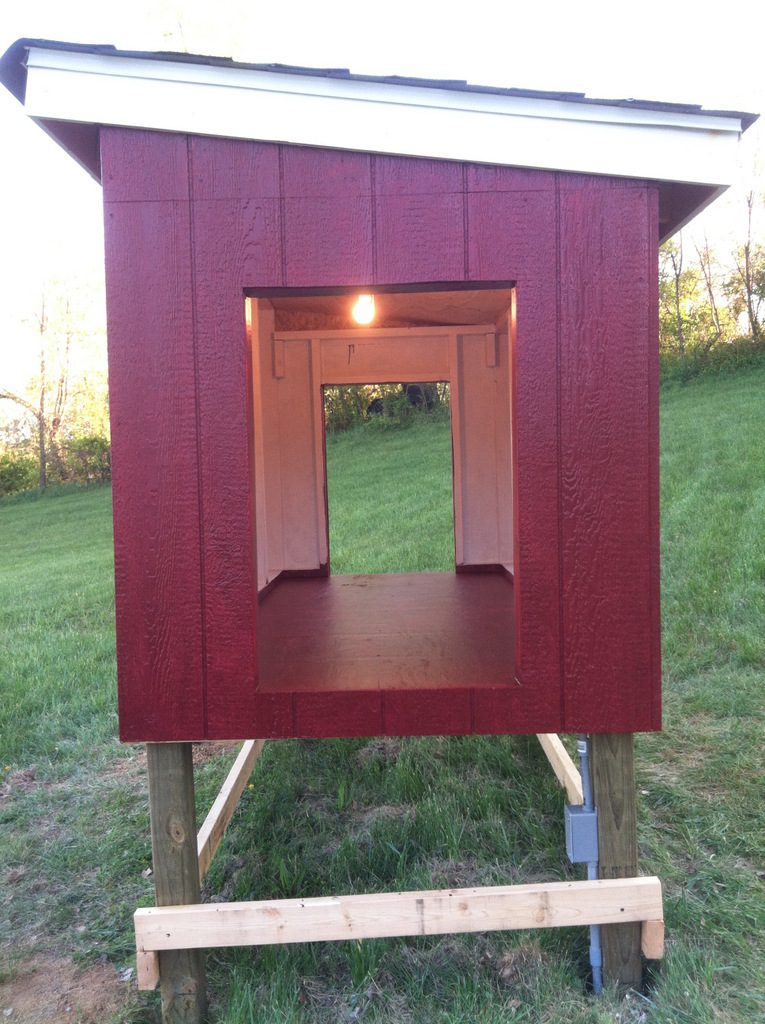
We also ran electricity to it from the house so I could have a light, outlets, and a heat lamp.
All the wires are entirely inside conduit so my girls can't mess with them.
By this time the girls were seriously outgrowing the bin we had them in. Let's get some doors on this thing and get them in it!
Ah, now my girls have some room to move! We're using the deep litter method and hardwood pellets. We read that somewhere and thought it sounded like a good idea. So far, so good!
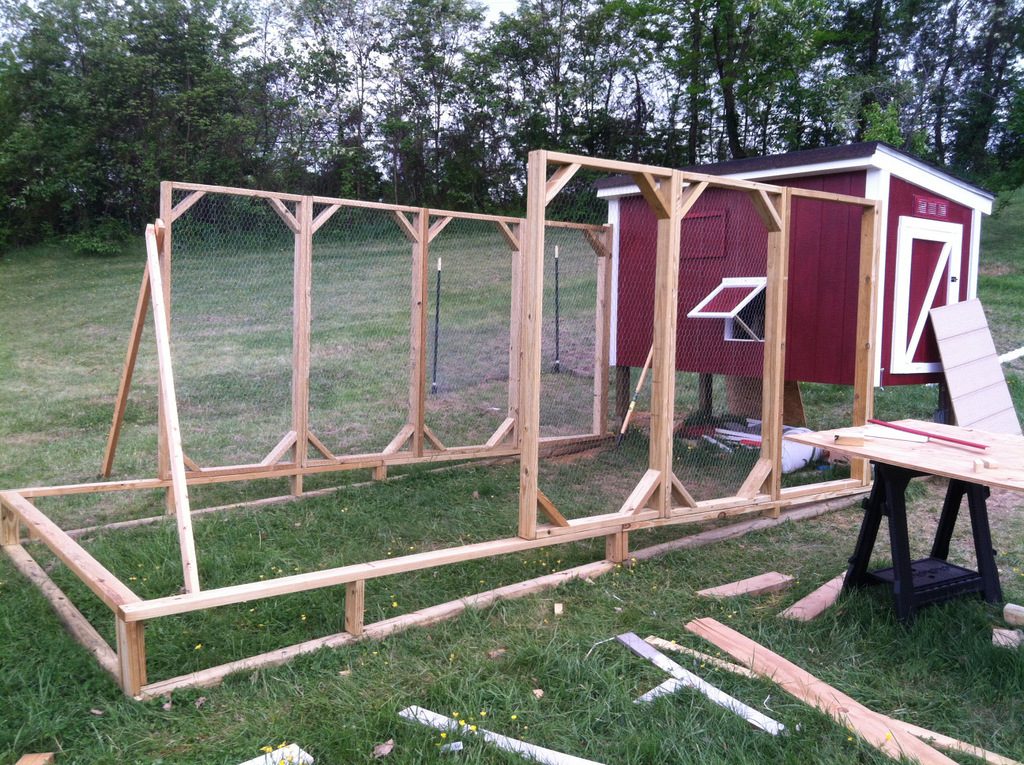
So after a lot more trimming, venting, caulking, and painting, it was now time to focus on a run for my girls. After what seemed like a lifetime (though it was really only a few days) of thinking, planning, researching, scrapping it all and starting over again a bunch of times, I decided to use a base of landscape timbers to get started. The walls were to be made of 3' x 6' panels, so I extended the base 15' from the front of the coop, giving the chickens a total of 19' x 8' including the space under the coop, and nailed the timbers down with 12" spikes.
Of course, the coop is built on a slope, both from front to back and from left to right, so my big problem was how to get the run to match up with the coop and not look awful. In the end, I decided to build a level platform that would hold the wall. The math worked out, well, er, fairly well, and I was able to build the 10 side panels without any serious issues. I did have to make dimensional adjustments to two of the panels to get them to fit, but I'm OK with that. As I kept telling myself: It's just a chicken coop!
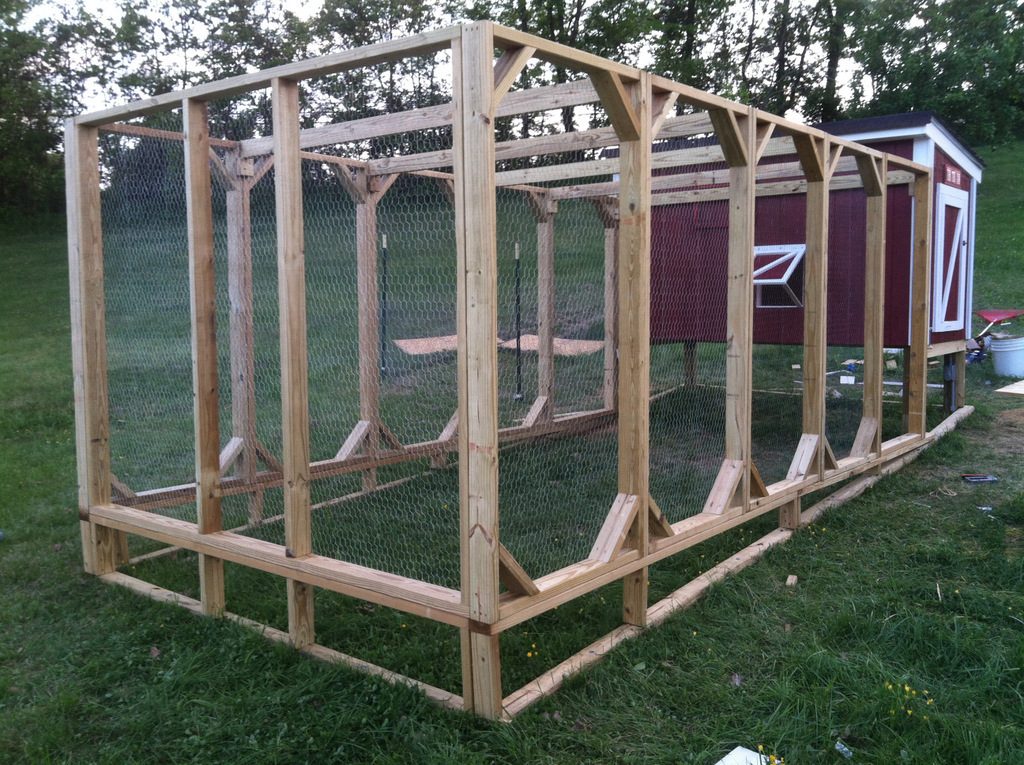
I love the look of the panels, and they provide a lot of structural stability. I could actually get on top and work if I needed to. Nice. On the down side, there is an awful lot of wood there. If you can somehow produce your own boards or just have a bunch of them laying around, no problem. If you're buying them at Lowe's, it can run up the bucks. Second, they were more labor-intensive than I was anticipating. They were easy enough to build, but it did take a long time. You'll notice that the end wall is much simpler than the sides. I was worn out on panels, so I just built a simple frame and threw it in there. Still took a while to get all that chicken wire on there. Tedious, that. Really happy with how it came out, though.
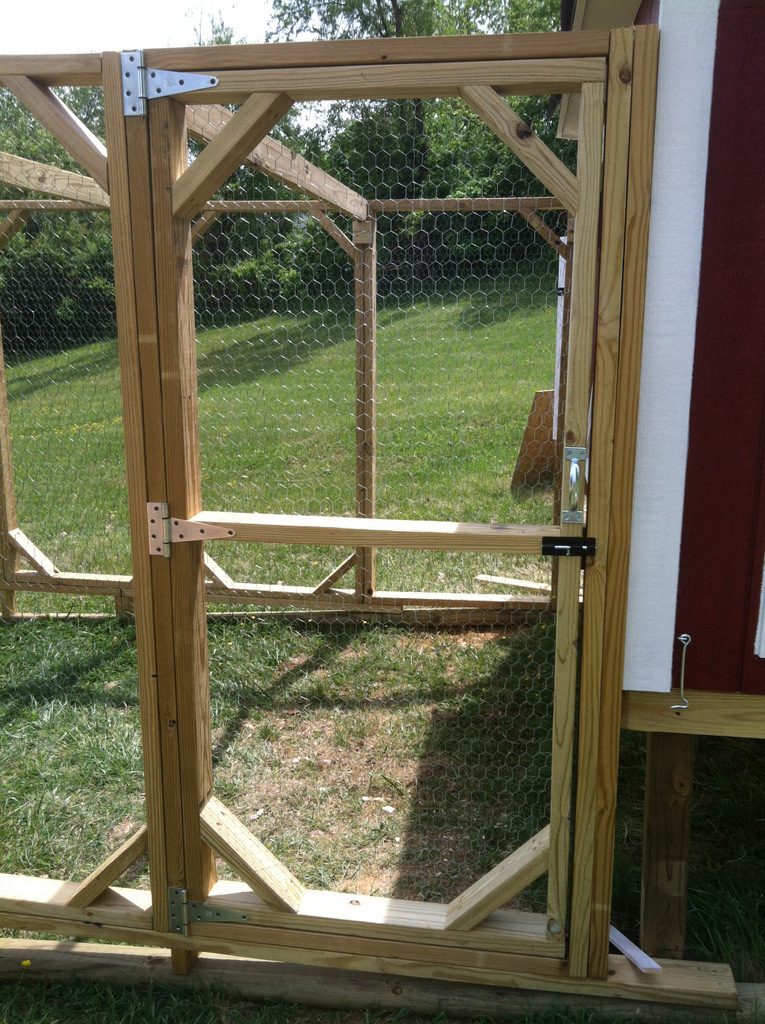
Got a nice door built. I thought this would be harder than it was.
After getting the door in place, I went around the bottom of the run and put chicken wire everywhere that wasn't already covered, including under the coop. So tedious. Totally could have been done more simply, but the perfectionist in me wouldn't hear of it.
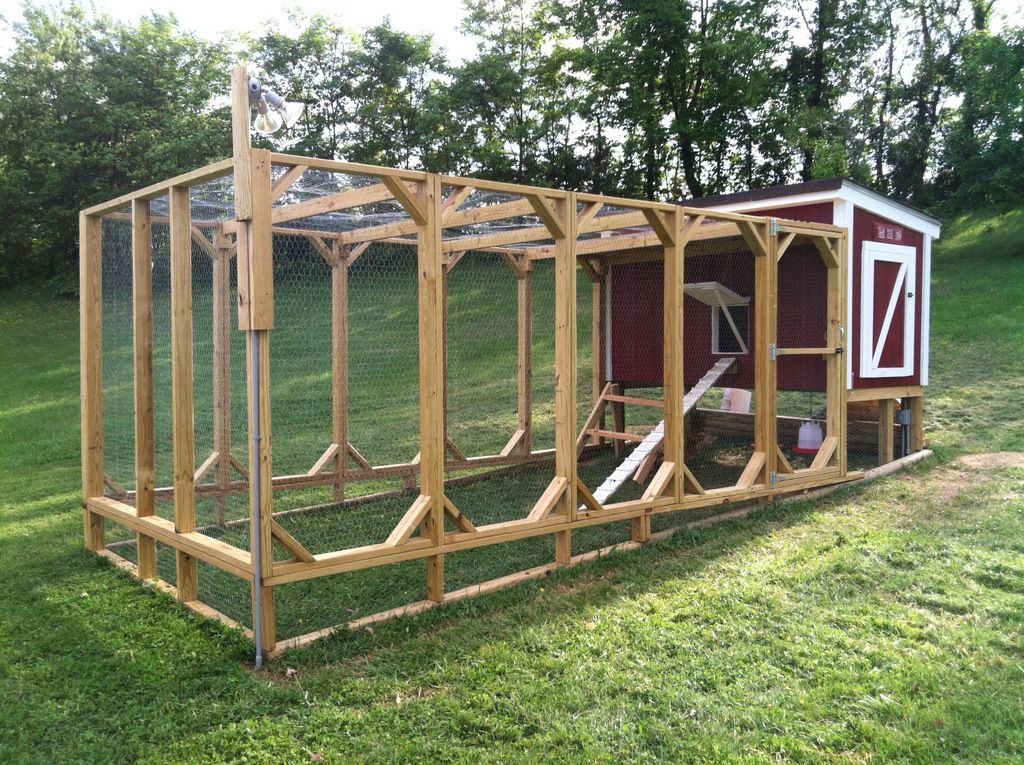
The last big addition was a flood light at the top of the end of the run. The coop is about 120' from the house, and I want to be able to see what's going on out there a night if I want. So when we originally ran the wires from the house, we ran a second hot that is controlled from a switch inside the house, so I can turn it on from here. And if anything messes with my ladies I can potentially catch them in the act and, er, rain justice down from on high.
Here's a night pic:
Here are some of the girly girls enjoying the shade on a hot afternoon.
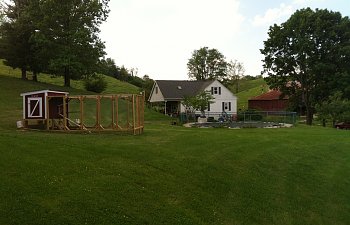
Here's The Big Picture from our little slice of Virginia heaven!
So here's how it went: We recently moved into a little farmhouse with plenty of outdoor space that just dared us to get some chickens. So we went for it and picked up 10 chicks and put them in a bin with the understanding that we had about 2 weeks to get them a nice place to live. I spent the first week waffling about whether to buy or to build, and in the end the adventurous DIY types at backyardchickens.com inspired me to build. A big factor was that I didn't want to spend as much money as it appeared I would need to in order to buy a coop and run big enough for 10 chickens, but maybe I should have because I spent that much and more. I had a ball building it though, and am really happy with the result.
I started with beckyinma's plans and drew up some of my own with some modifications. I haven't seen them in about a month, but I'll try to post what I have if I can find them and they're still in one piece. Anyway, here's the pictorial:
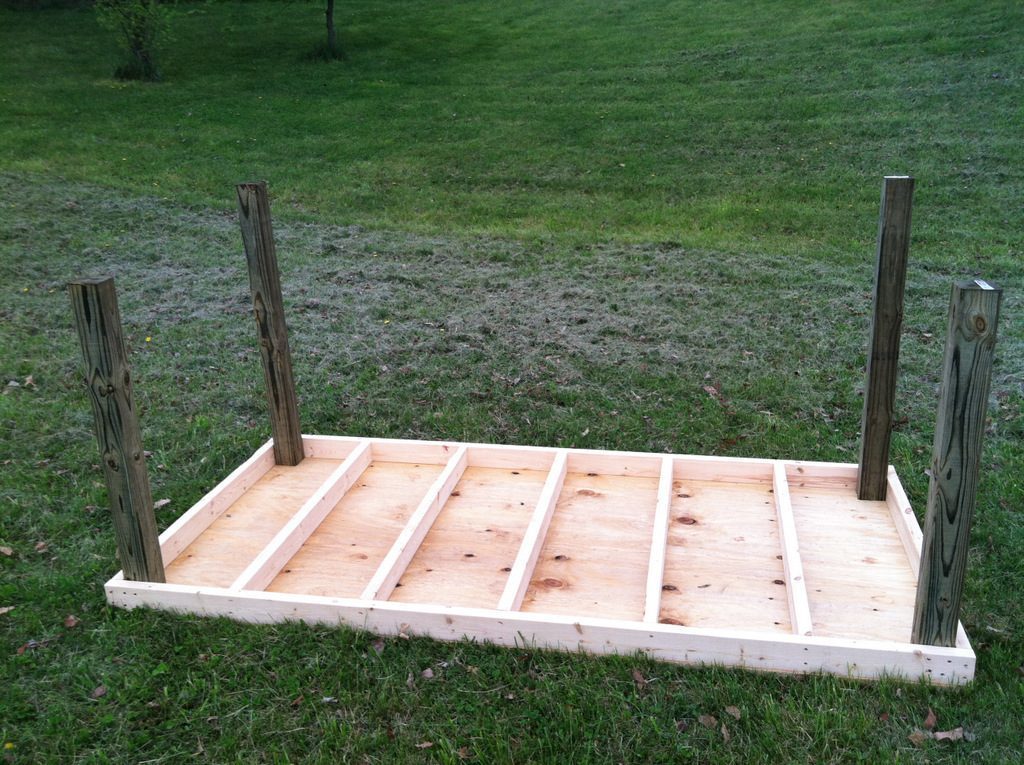
The base is 4' x 8'. So far so good.

I tried to split the difference between making it a permanent structure and making it so that it is possible to move in the future. We are renters, after all, and we'll be moving along at some point (I would think). I was also receiving guidance from my retired-contractor father who spent his whole life building permanent structures, so the thought of not attaching it to the ground fairly well was a bit of a sticking point. In the end I dug some postholes that were maybe 12-18" deep and split one small bag of Quikrete among 3 of the legs. Definitely not going to fall over, but could be dug up with a reasonable amount of effort if needed.
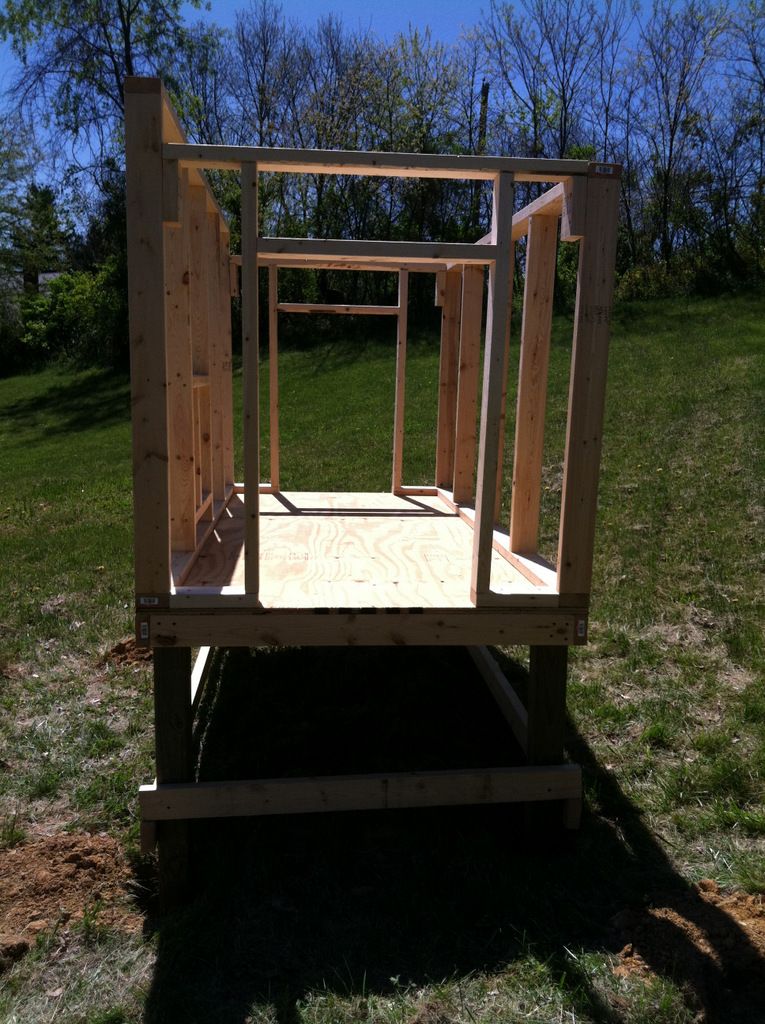
At this point I'm still sticking with Becky's dimensions fairly well, but I decided to put people doors on both ends instead of just one on the front. I wanted to be able to access everything without having to enter the run, and to be able to reach everything inside without having to climb in. Because that's just nasty. And I'd like to be able to clean it easily. So there you have it.
Our coop location is devoid of trees for shade during the heat of the day, so we thought we'd add a layer of insulation to the roof in order to capture some of the rays. Not sure how much it helps, but insulation is cheap so we went for it. So after adding the rafters, I screwed some thin plywood to the underside of them, then laid the insulation on top, then covered it with the roof plywood.
Next we added the siding and black-papered the roof.
OK, a lot has happened since the last picture. Basically, we trimmed the roof, got it papered, shingled, and drip-edged, and thoroughly painted it inside and out. I went with the particleboard siding which was a little cheaper, but more subject to the elements. So I primed the entire inside of the structure (except the ceiling), then used the red exterior paint to add another layer of protection to the floor. Yeah, that took a while. I was up in there for several hours. Phew.
We also ran electricity to it from the house so I could have a light, outlets, and a heat lamp.
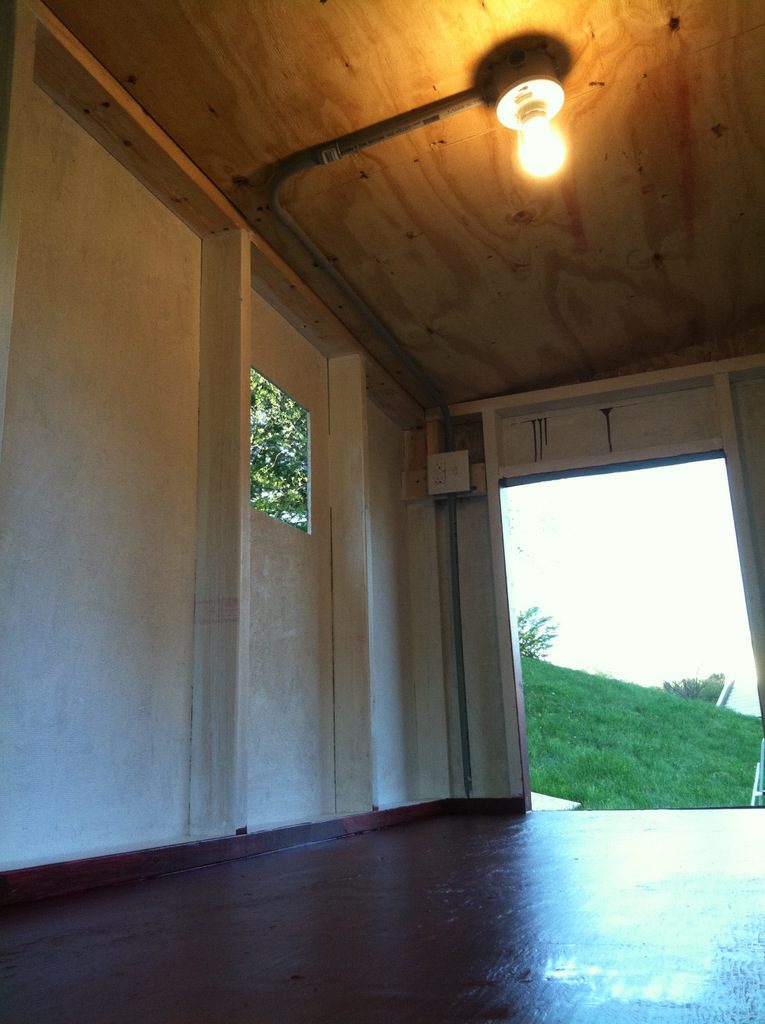
All the wires are entirely inside conduit so my girls can't mess with them.


By this time the girls were seriously outgrowing the bin we had them in. Let's get some doors on this thing and get them in it!
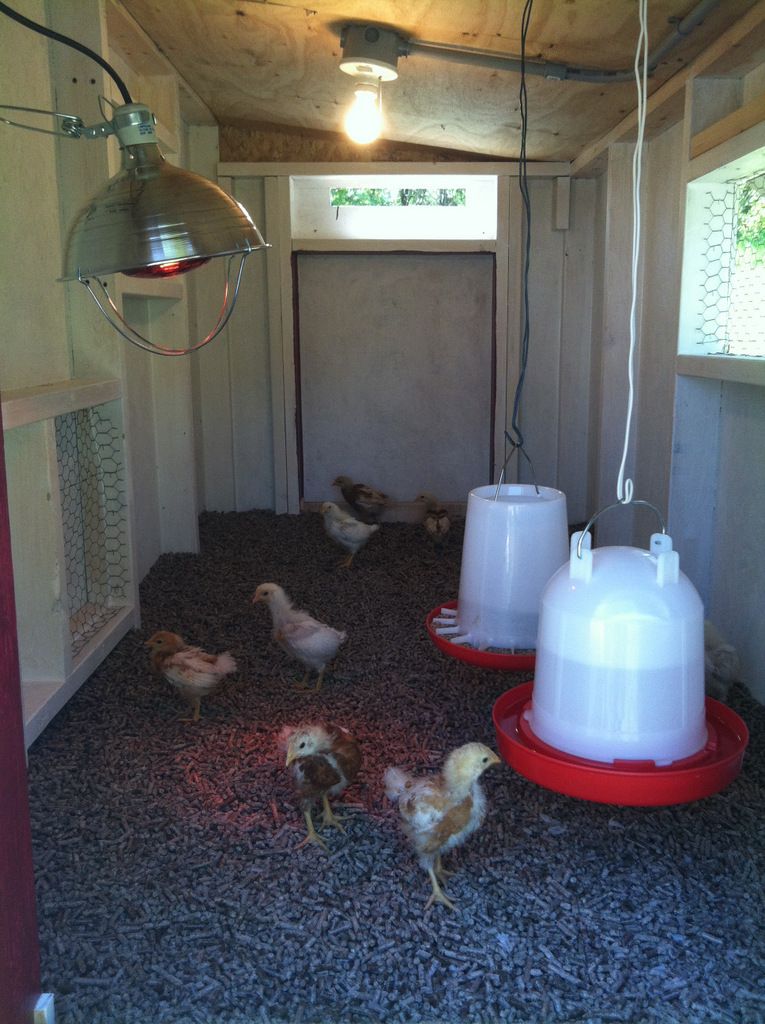
Ah, now my girls have some room to move! We're using the deep litter method and hardwood pellets. We read that somewhere and thought it sounded like a good idea. So far, so good!
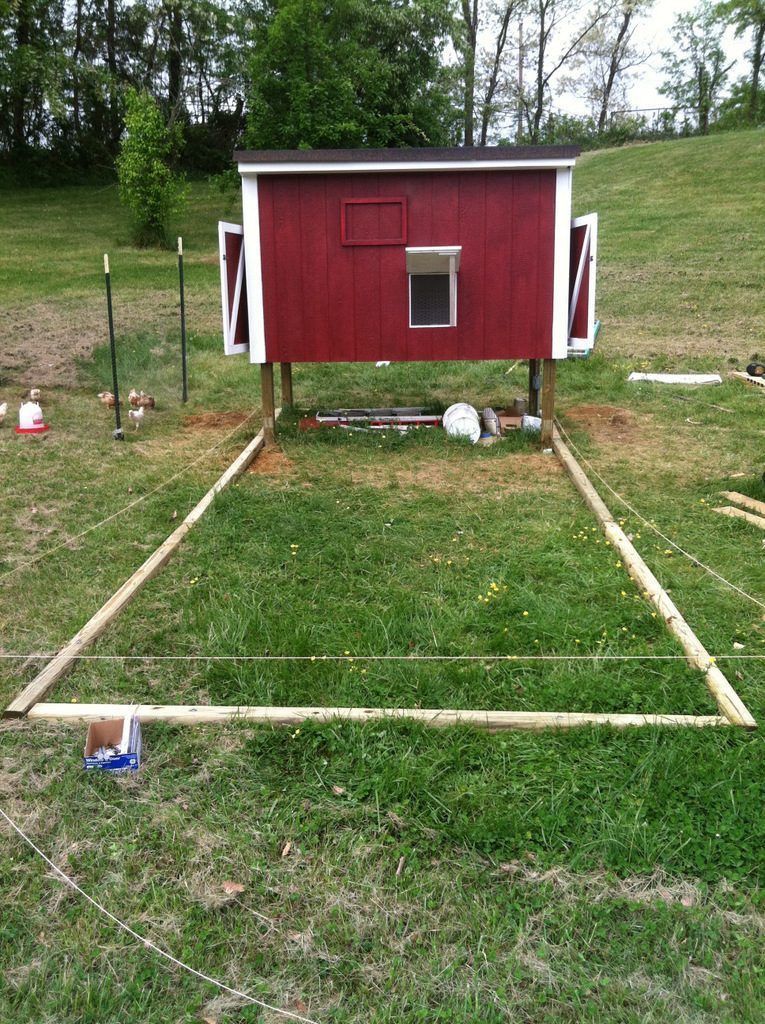
So after a lot more trimming, venting, caulking, and painting, it was now time to focus on a run for my girls. After what seemed like a lifetime (though it was really only a few days) of thinking, planning, researching, scrapping it all and starting over again a bunch of times, I decided to use a base of landscape timbers to get started. The walls were to be made of 3' x 6' panels, so I extended the base 15' from the front of the coop, giving the chickens a total of 19' x 8' including the space under the coop, and nailed the timbers down with 12" spikes.
Of course, the coop is built on a slope, both from front to back and from left to right, so my big problem was how to get the run to match up with the coop and not look awful. In the end, I decided to build a level platform that would hold the wall. The math worked out, well, er, fairly well, and I was able to build the 10 side panels without any serious issues. I did have to make dimensional adjustments to two of the panels to get them to fit, but I'm OK with that. As I kept telling myself: It's just a chicken coop!
I love the look of the panels, and they provide a lot of structural stability. I could actually get on top and work if I needed to. Nice. On the down side, there is an awful lot of wood there. If you can somehow produce your own boards or just have a bunch of them laying around, no problem. If you're buying them at Lowe's, it can run up the bucks. Second, they were more labor-intensive than I was anticipating. They were easy enough to build, but it did take a long time. You'll notice that the end wall is much simpler than the sides. I was worn out on panels, so I just built a simple frame and threw it in there. Still took a while to get all that chicken wire on there. Tedious, that. Really happy with how it came out, though.
Got a nice door built. I thought this would be harder than it was.
After getting the door in place, I went around the bottom of the run and put chicken wire everywhere that wasn't already covered, including under the coop. So tedious. Totally could have been done more simply, but the perfectionist in me wouldn't hear of it.
The last big addition was a flood light at the top of the end of the run. The coop is about 120' from the house, and I want to be able to see what's going on out there a night if I want. So when we originally ran the wires from the house, we ran a second hot that is controlled from a switch inside the house, so I can turn it on from here. And if anything messes with my ladies I can potentially catch them in the act and, er, rain justice down from on high.


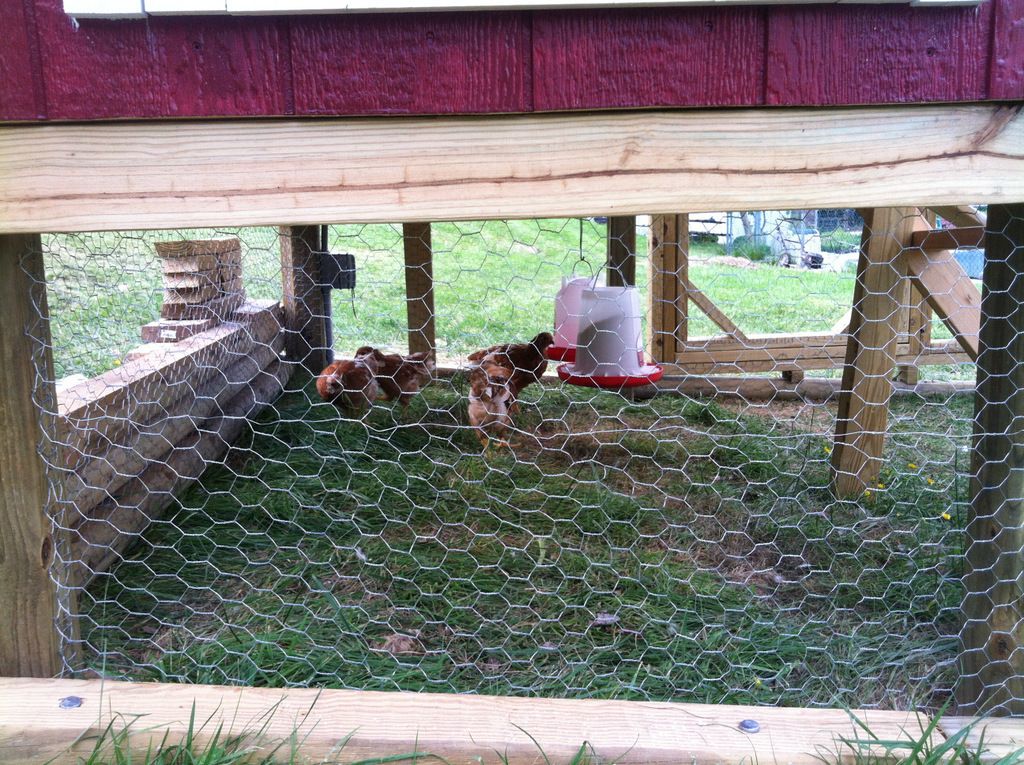
Here are some of the girly girls enjoying the shade on a hot afternoon.
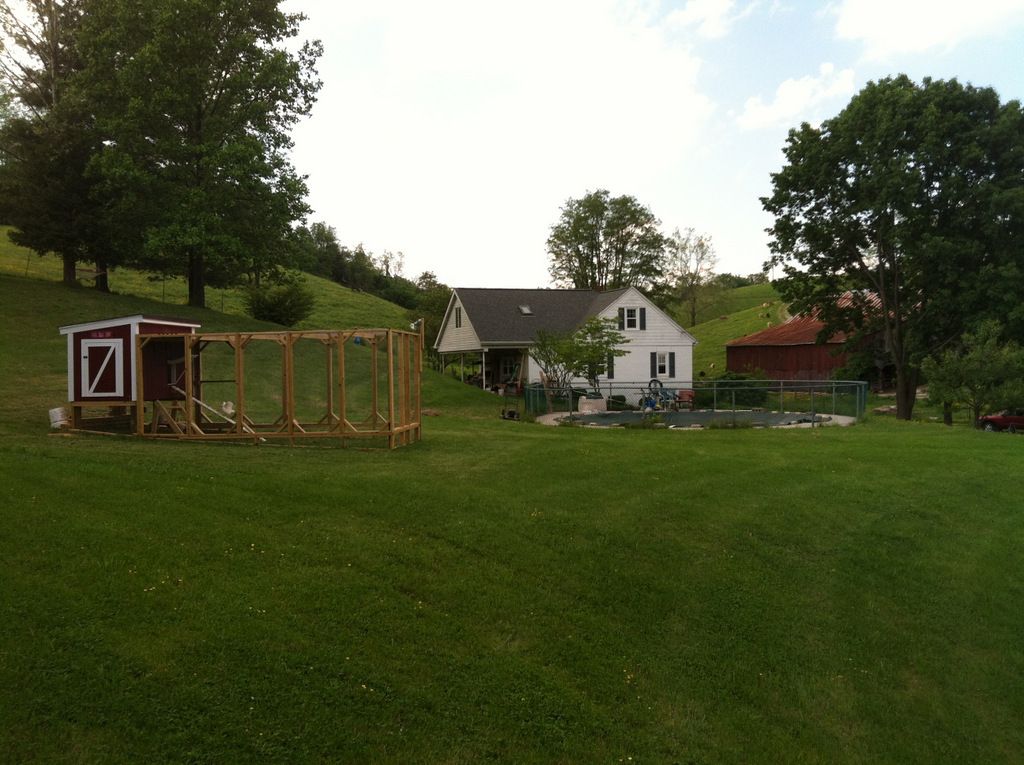
Here's The Big Picture from our little slice of Virginia heaven!