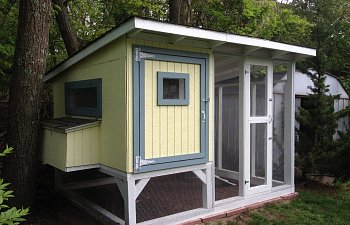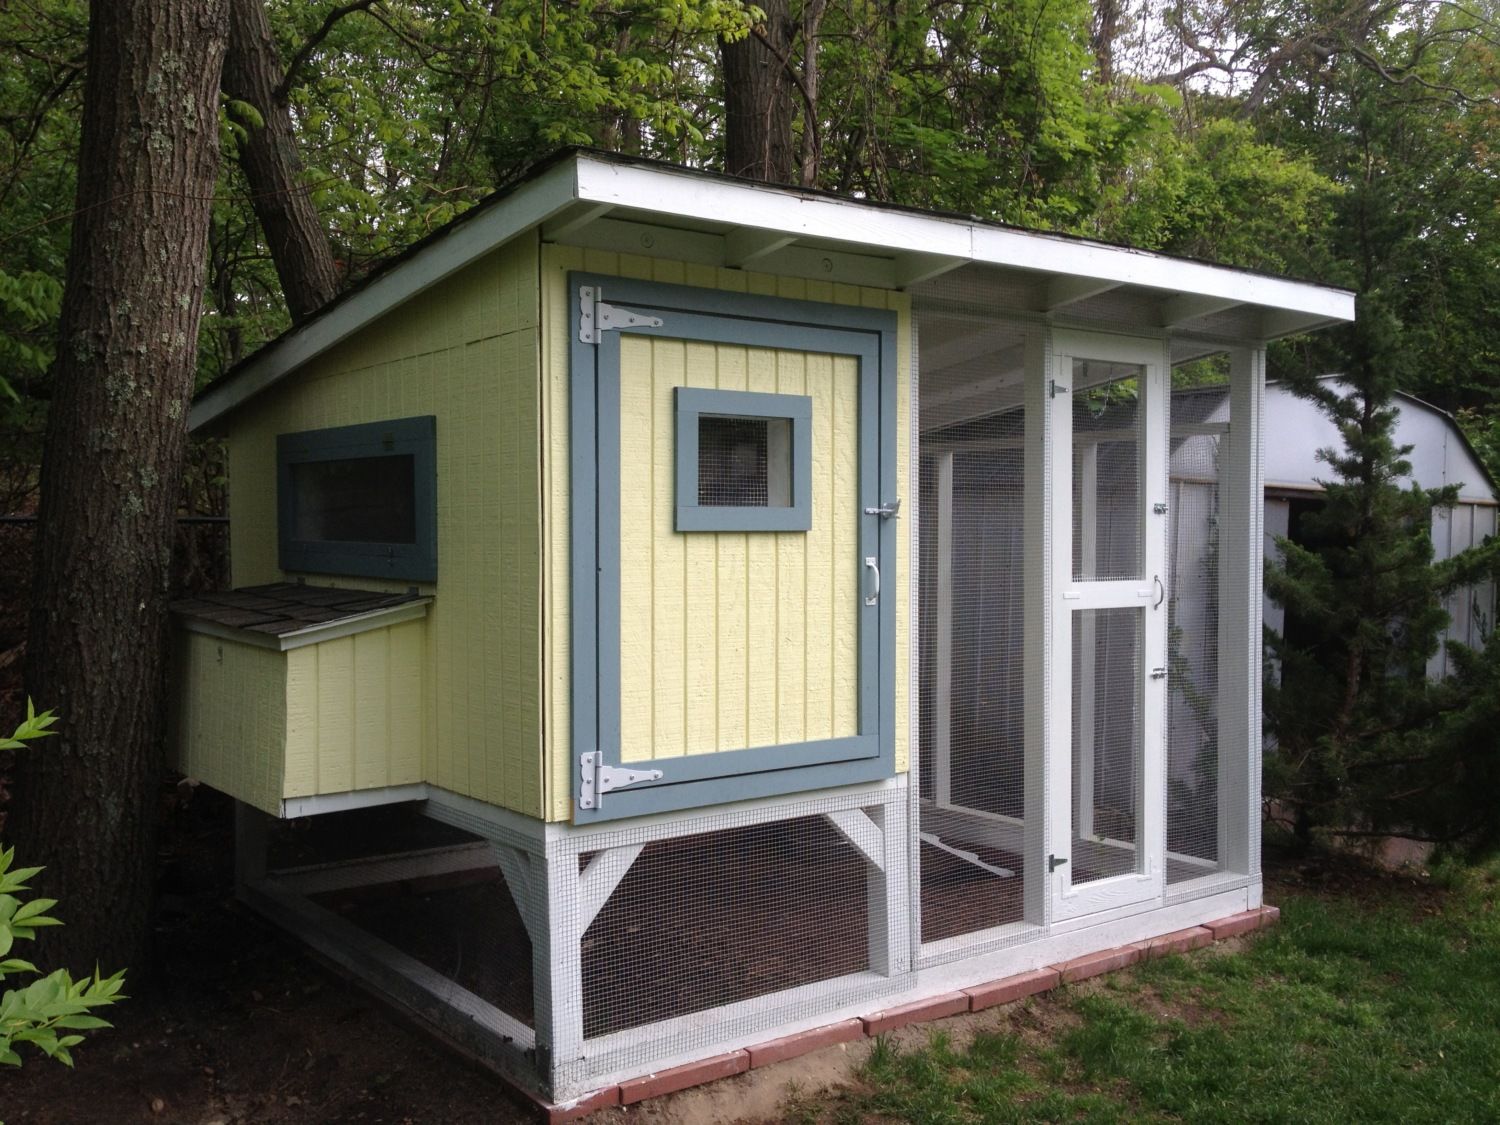
This coop measures at 8x12 including nesting box and will be the home of our six new chicks once they are ready to go outside...
I would like to thank the following coops posted on this site for inspiration...
*Boisemarker's Chicken Coop, *Coop Build, *Wichita Cabin Coop, Bluie's Coop And Run
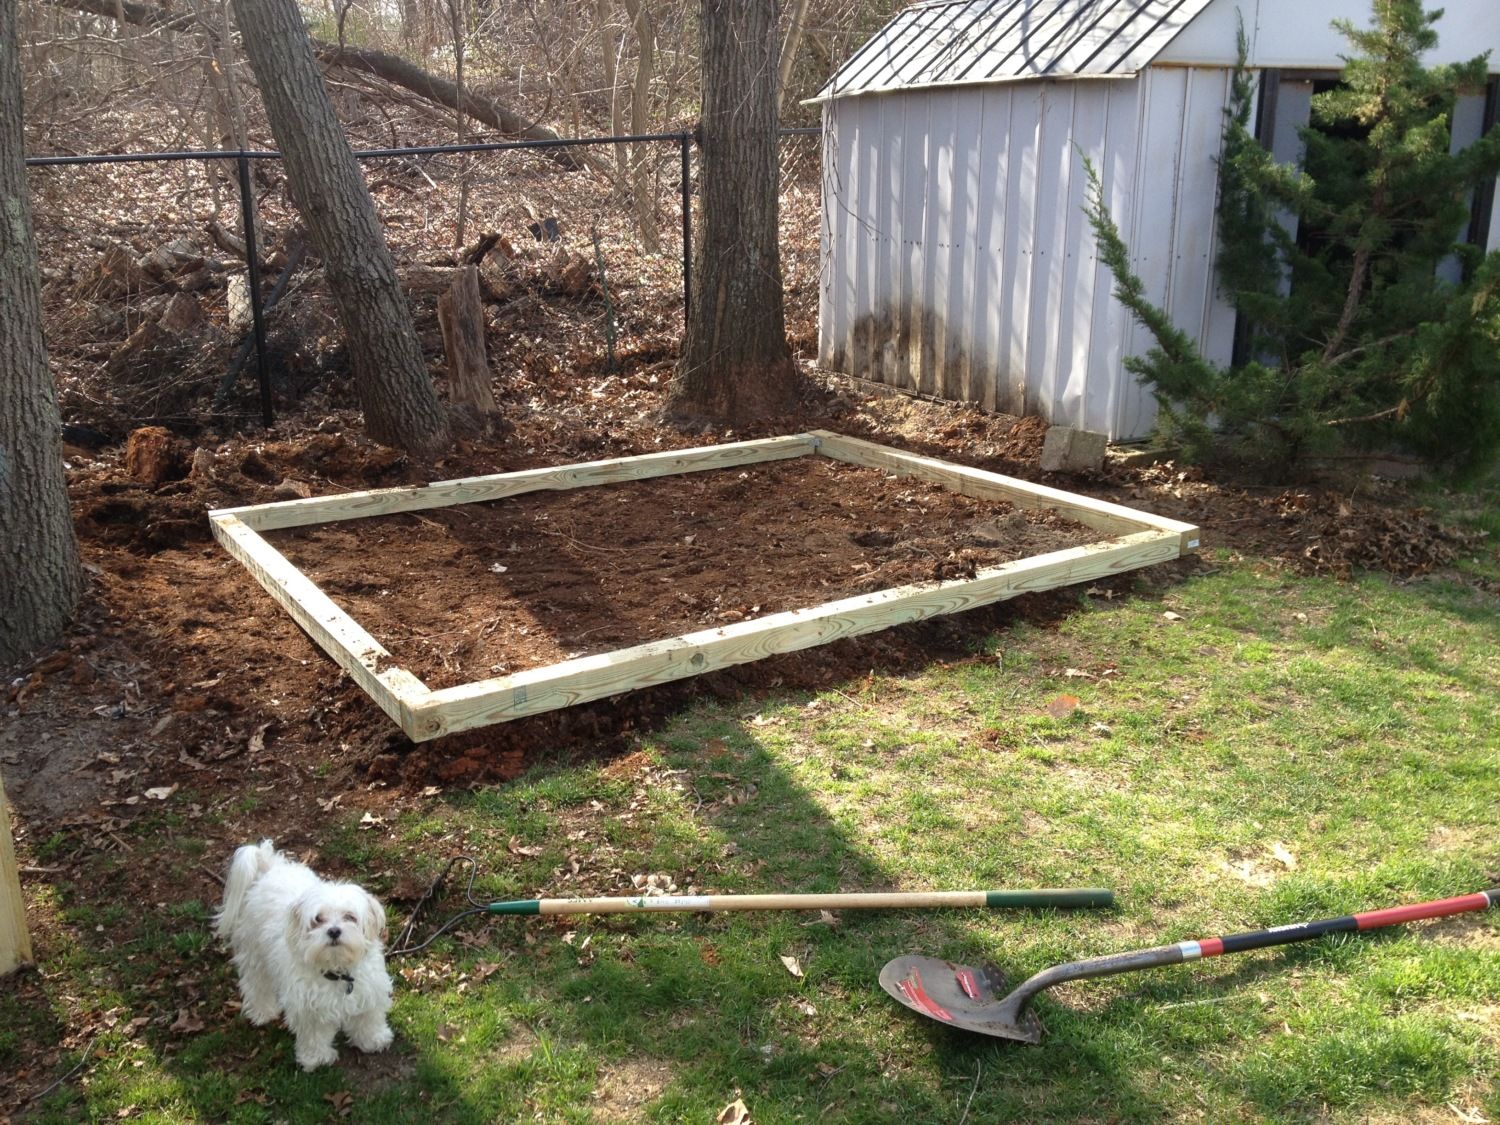
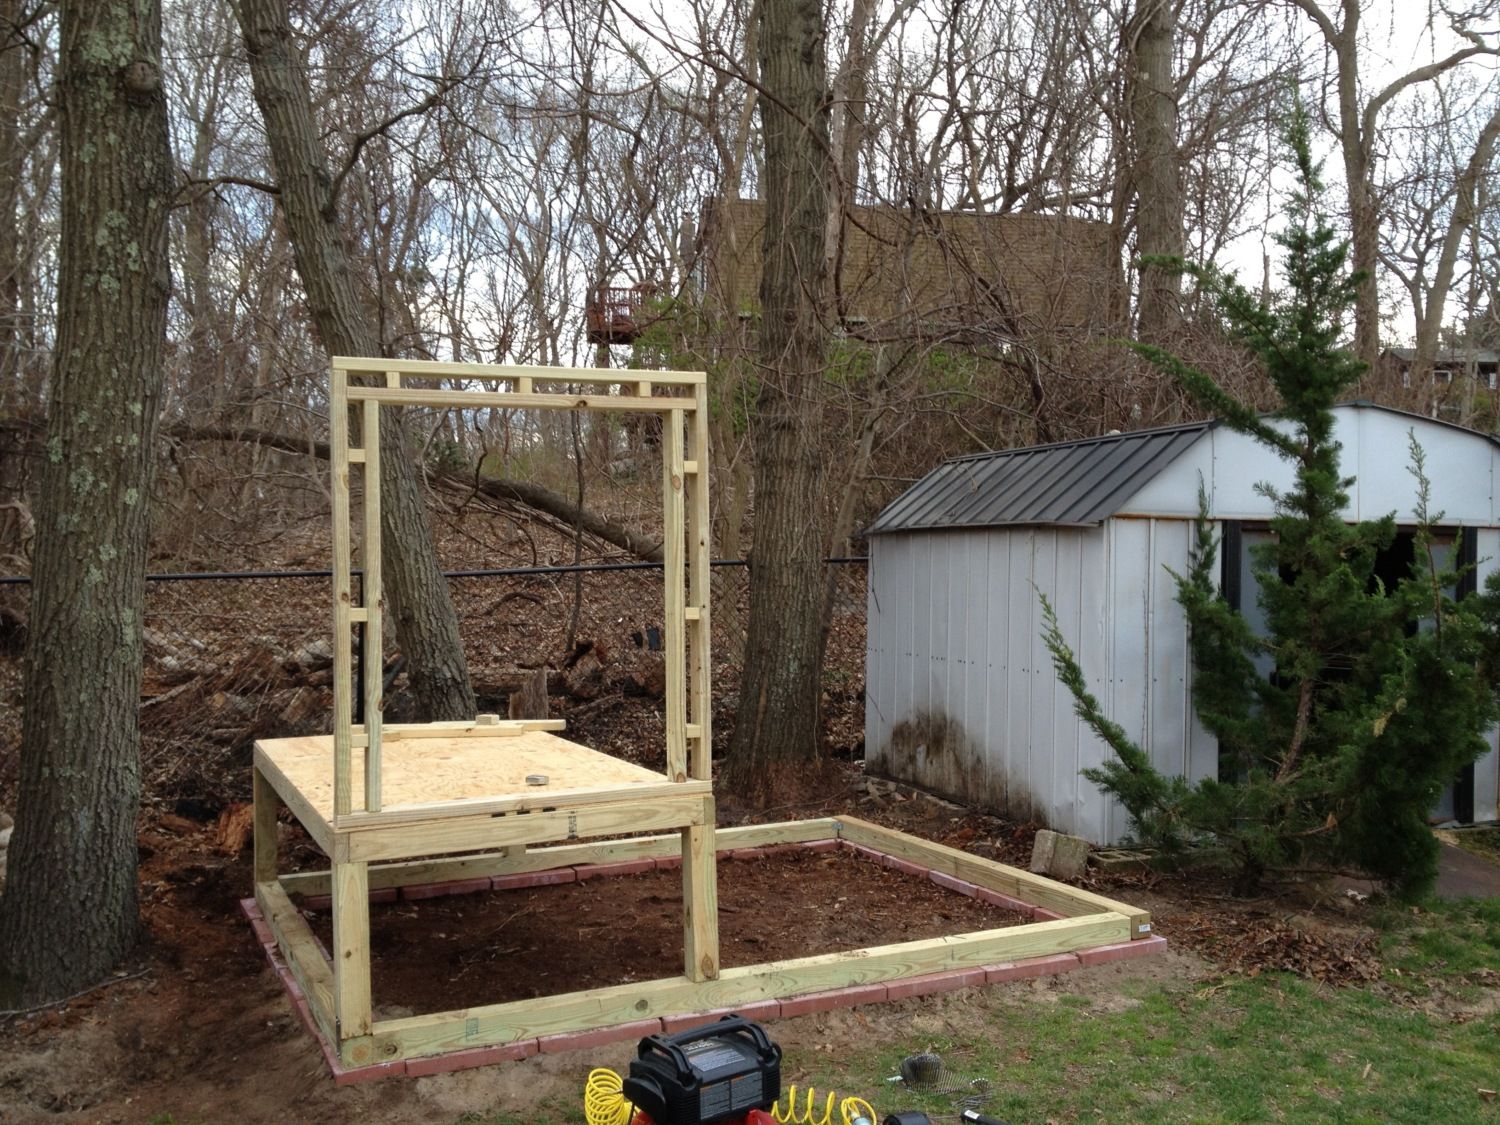
We started out by laying out 4x4s to map out the general area so se can level it. My dog Ace decided to help but mostly laid in the dirt..
I used 4x4x8s and 4x4x10s
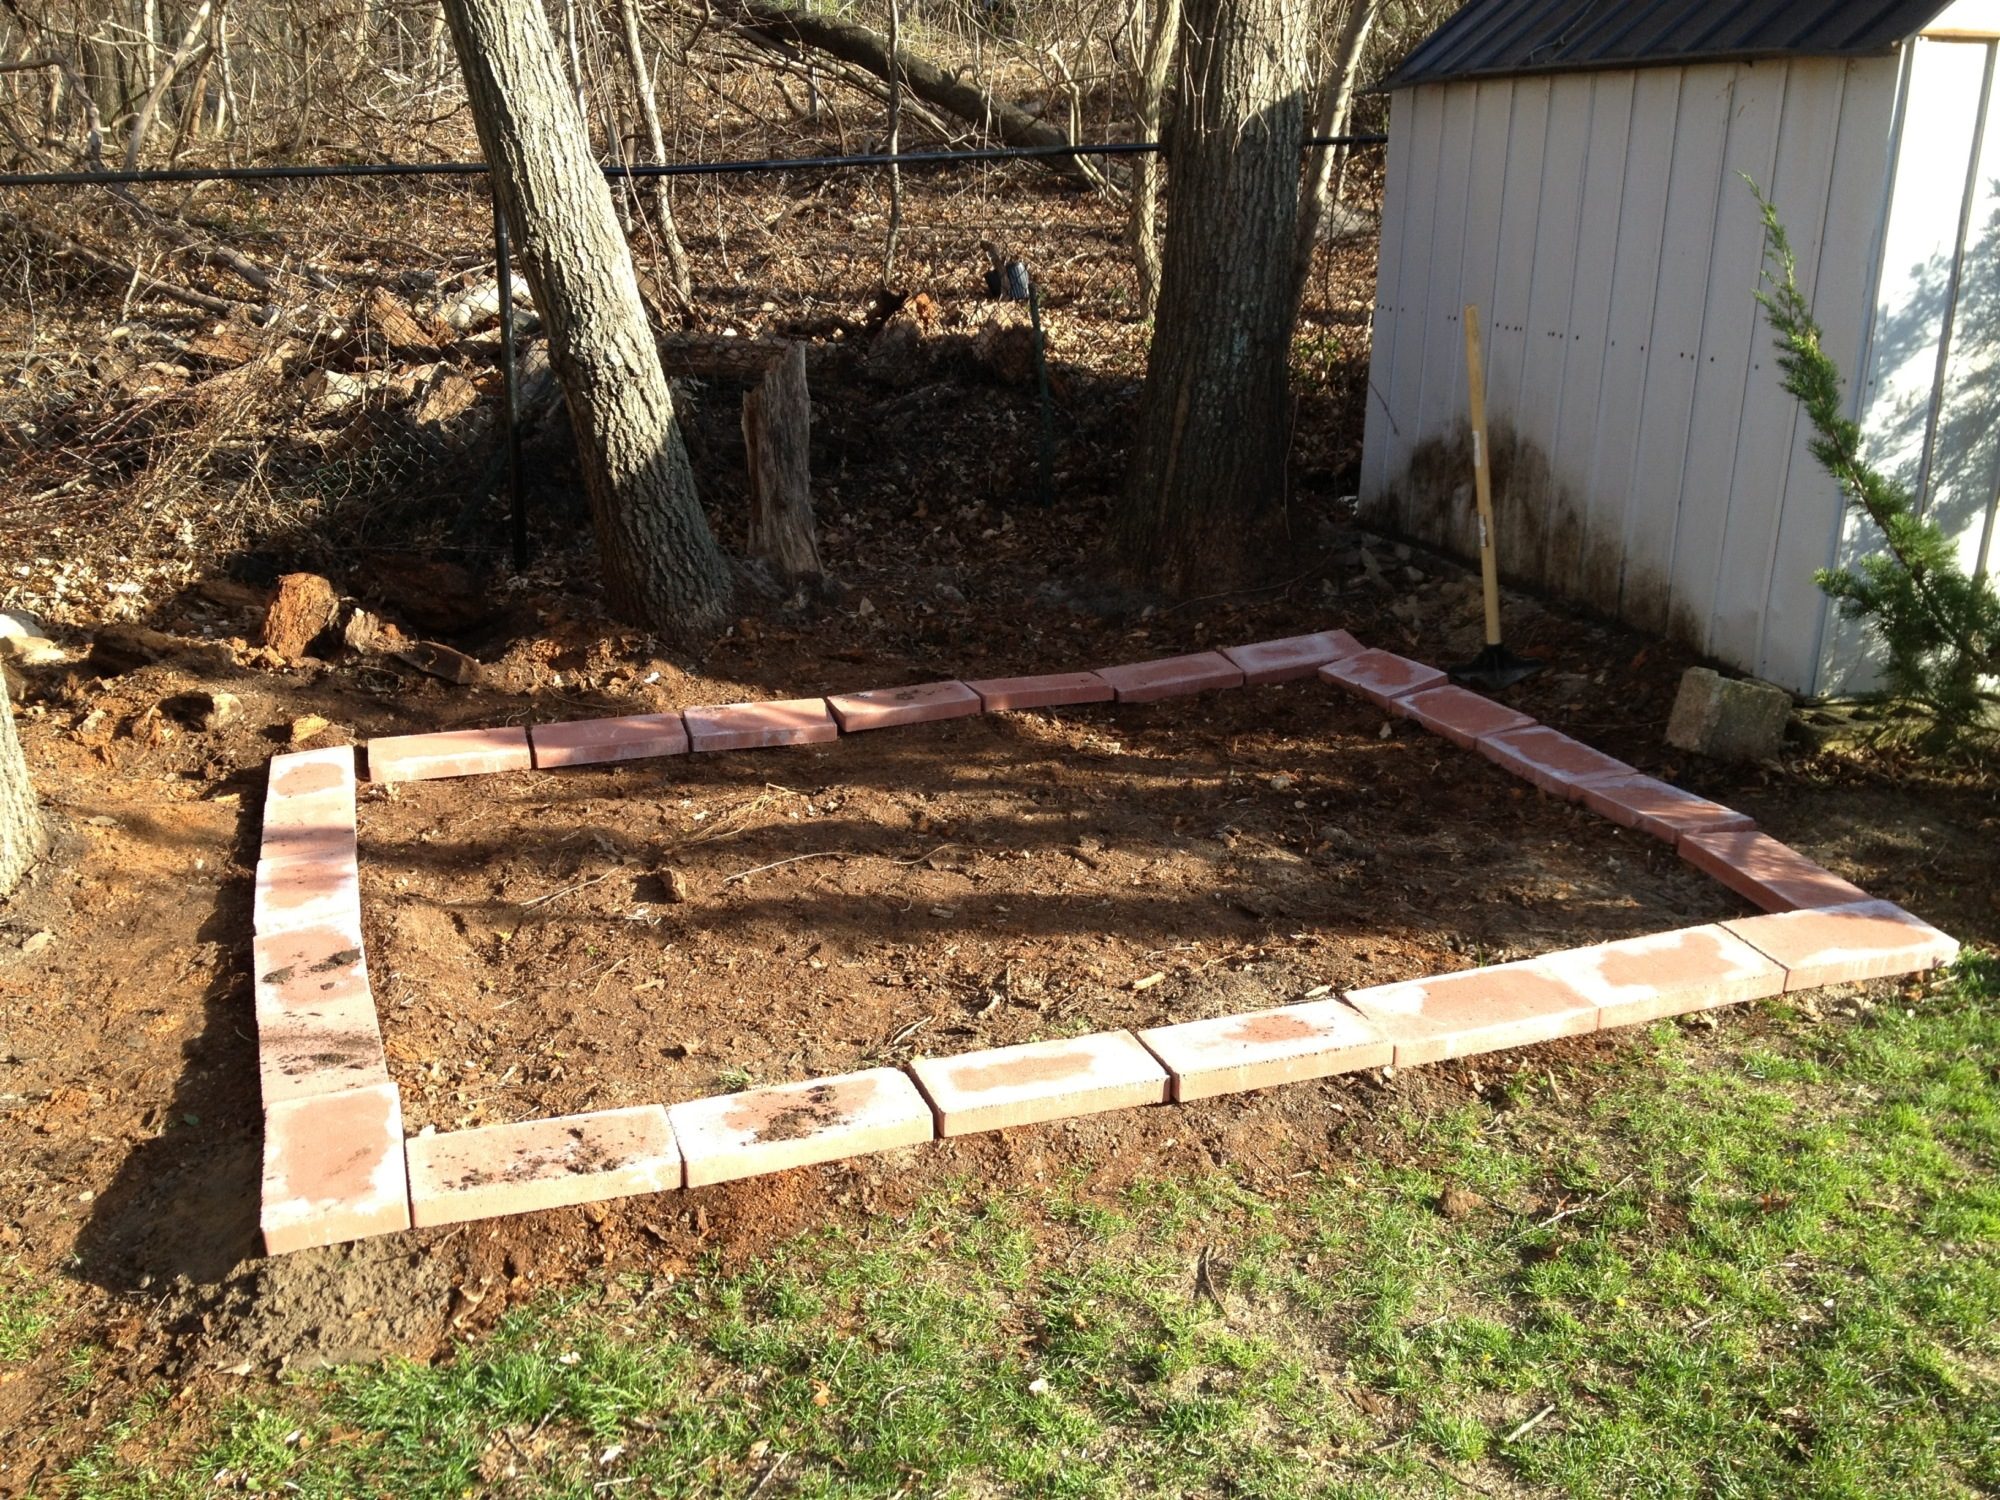
We then laid out concrete blocks that we are going to use so the wood wouldn't sit on the dirt and rot.
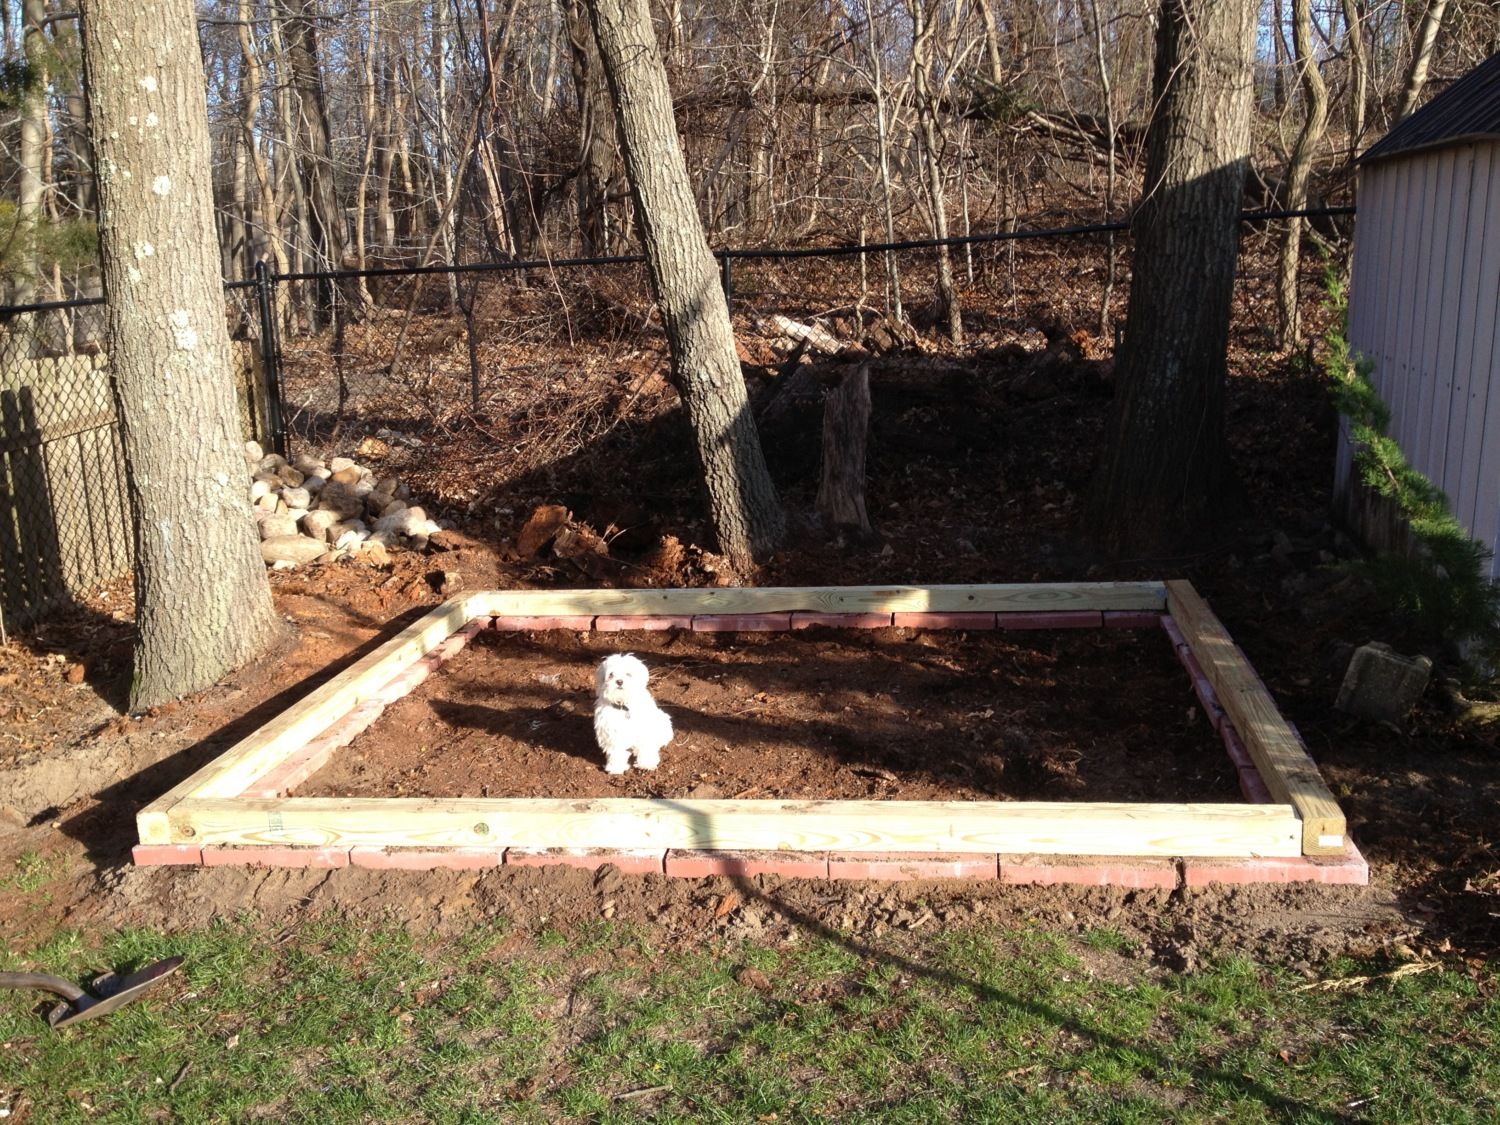
I then relaid the 4x4s on the blocks and use screws and plate to keep everything together.
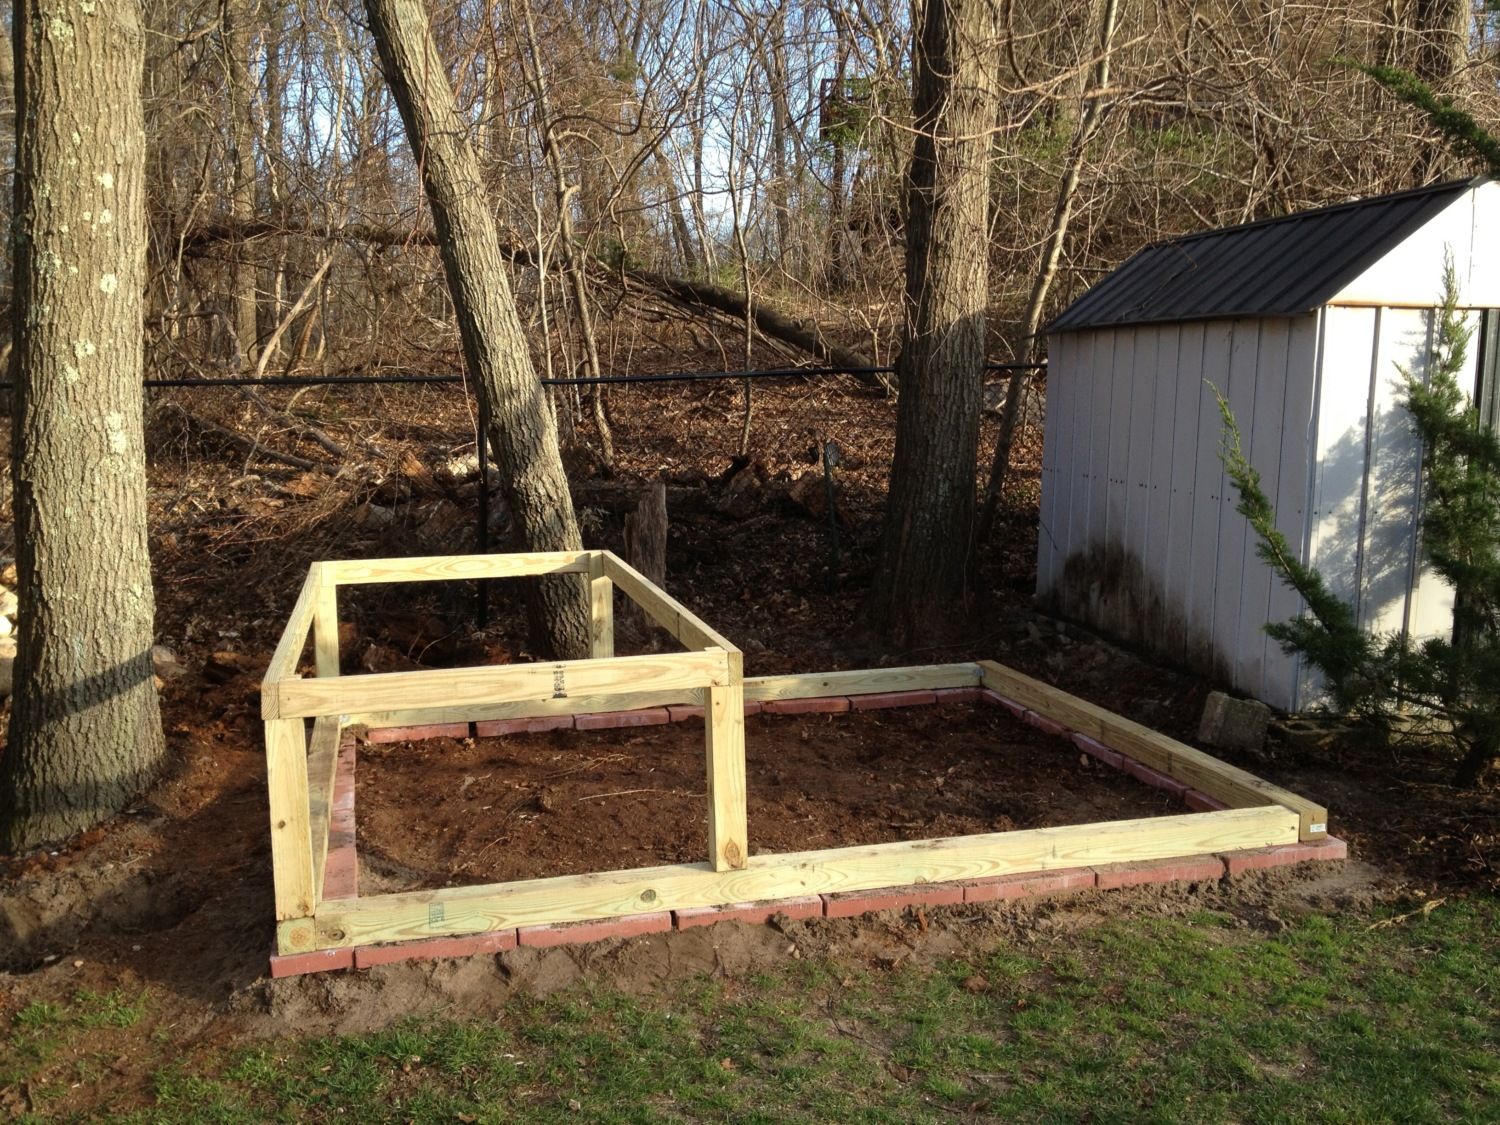
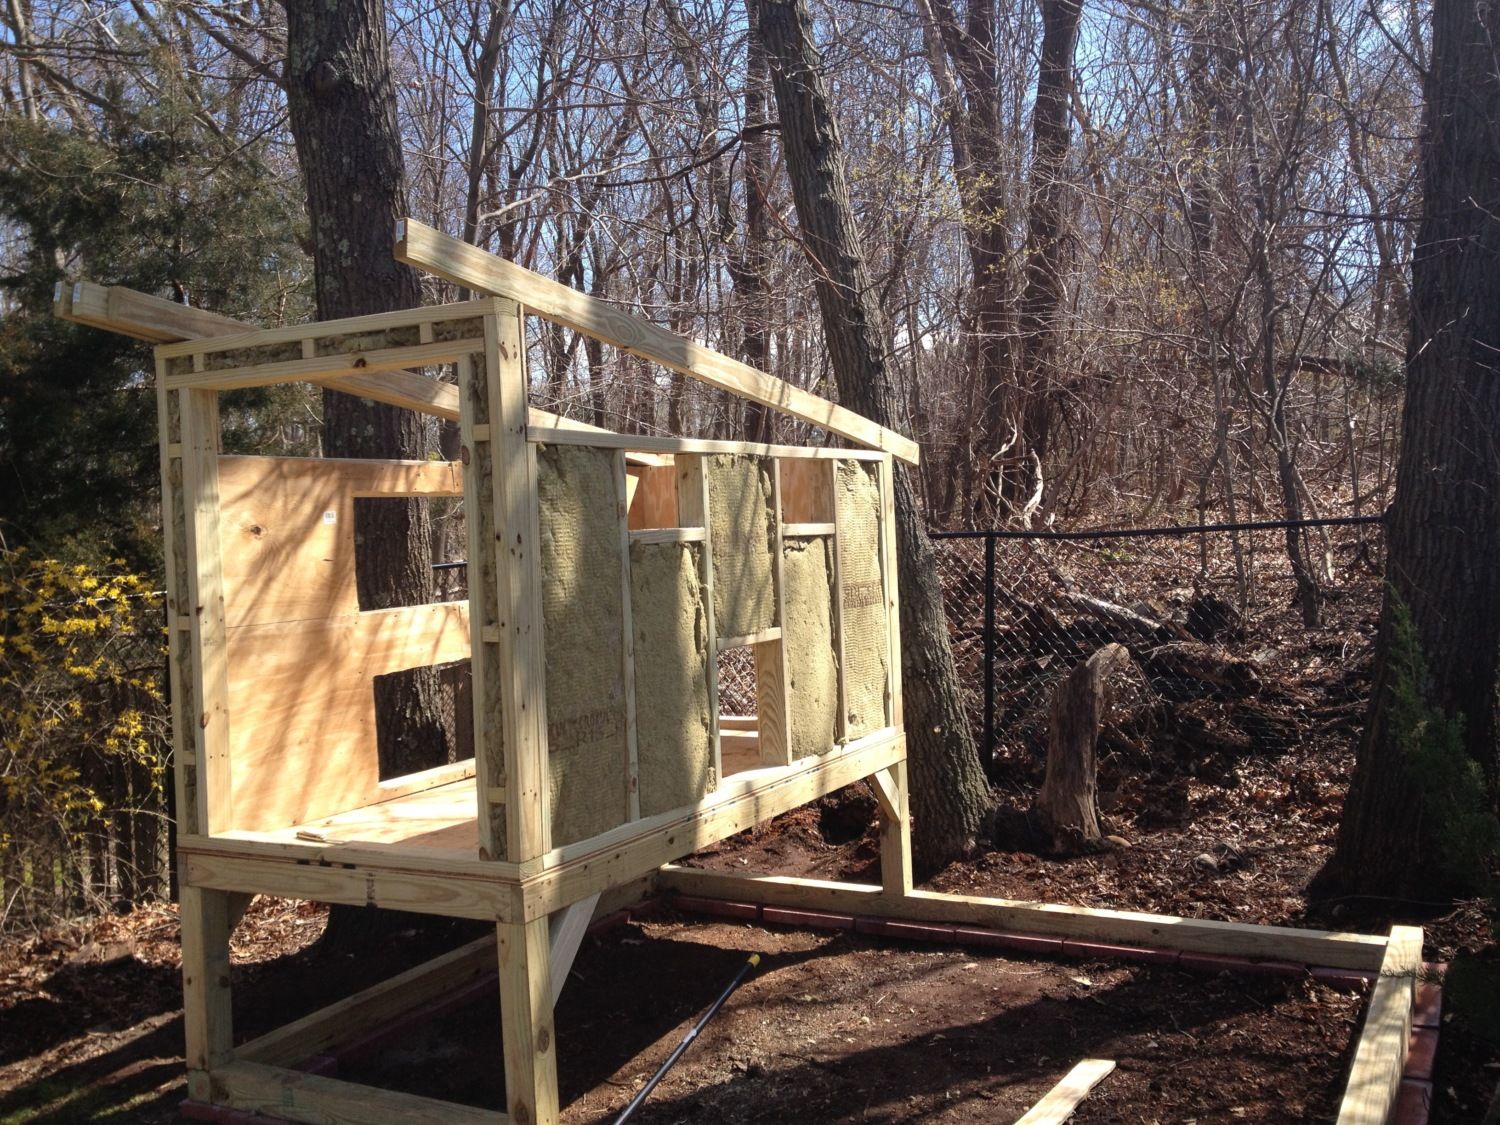
Next comes the legs for the coop. I used 4x4s and notched them out with a circular saw to fit 2x4s on top of them. The base of the coop is 2ft from the wooded foundation. I secured the legs using brackets and screws. The 2x4s span 8 feet by 4 feet (this will be the layout for the coop).
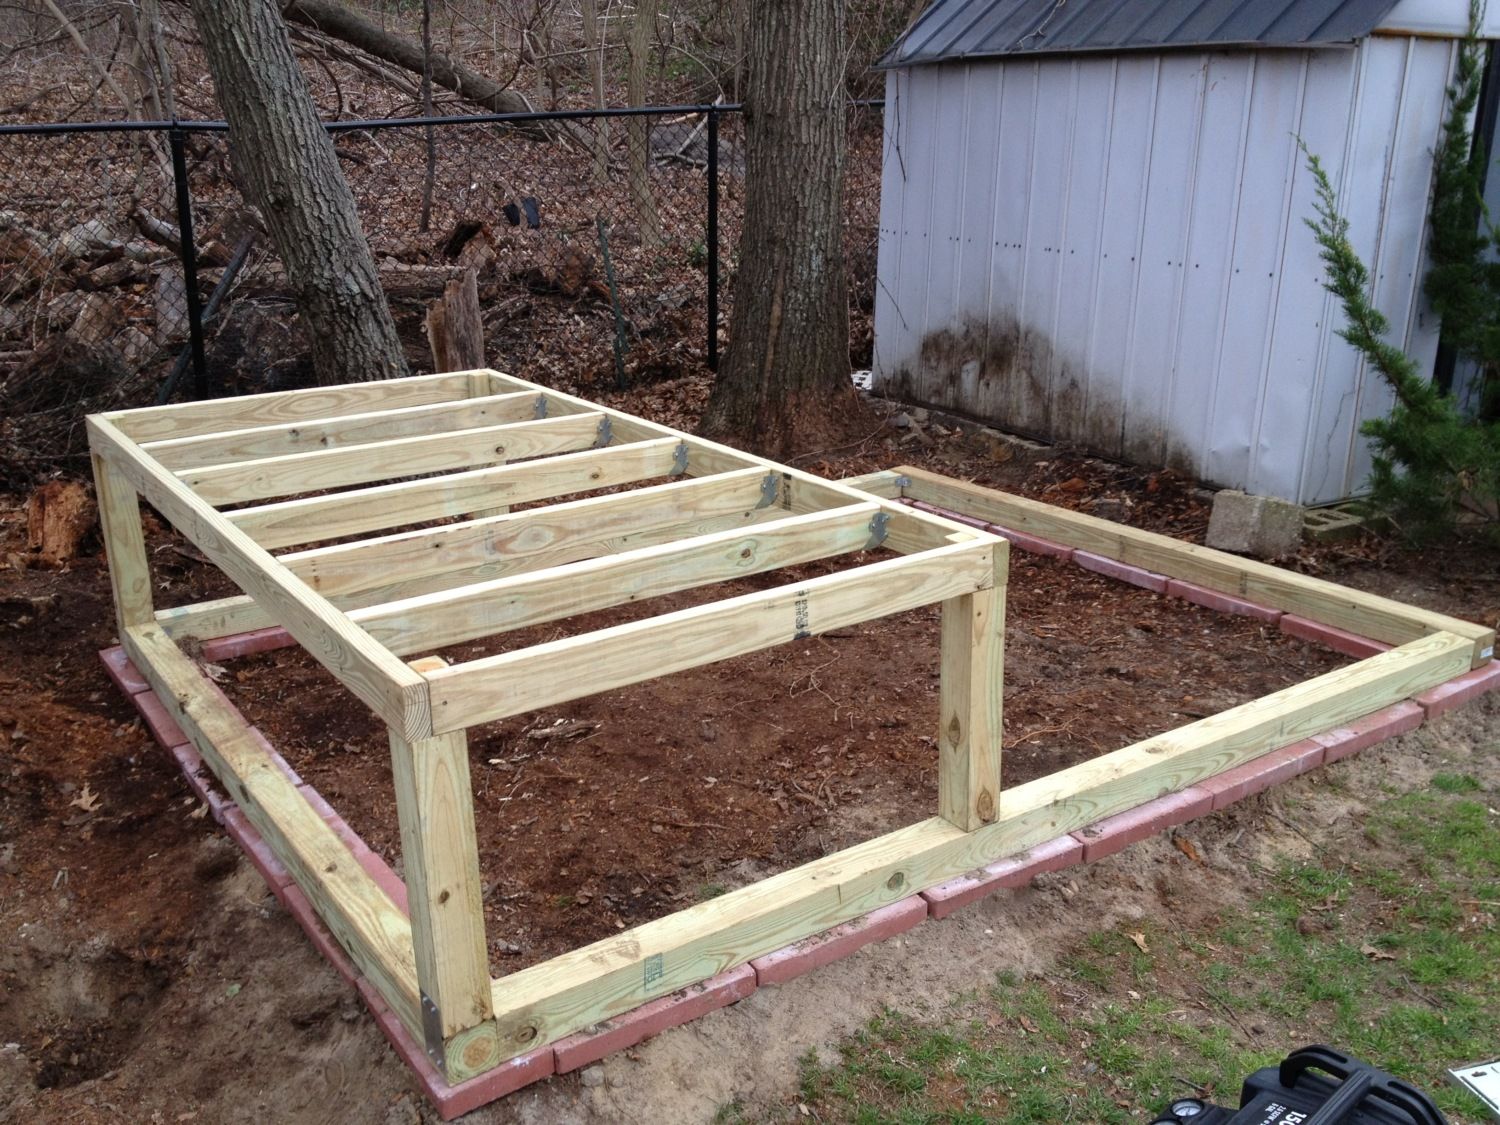
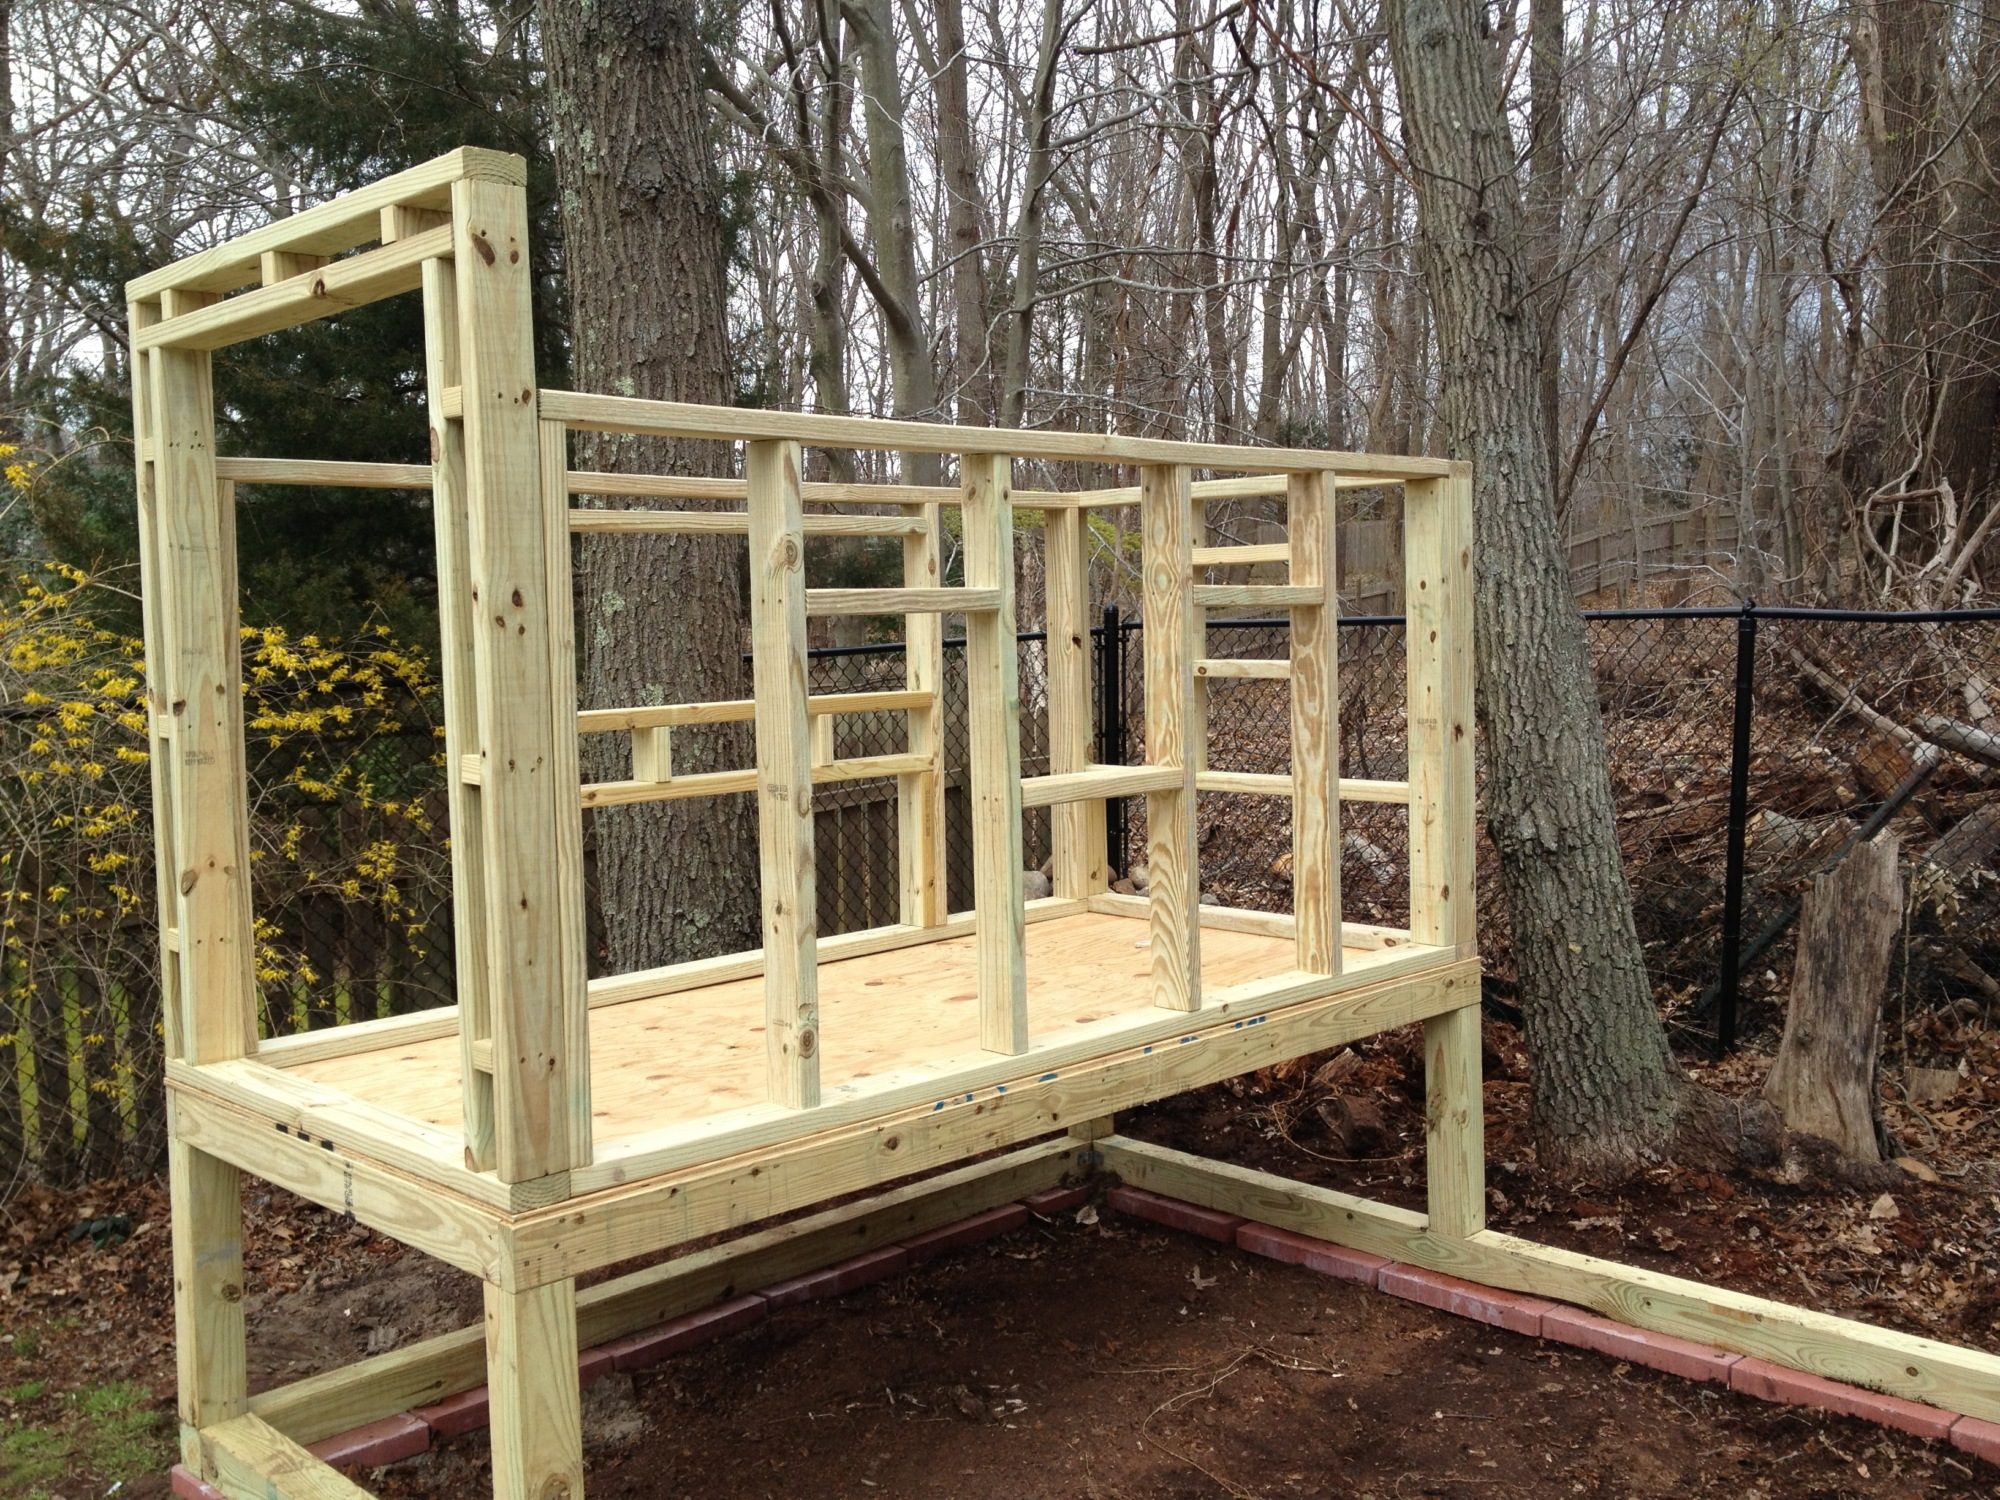
Next I installed 5 joists using 2x4s and joist hangers which I tried to to spread out as evenly as possible.
The floor was then laid with 1/2'' plywood.
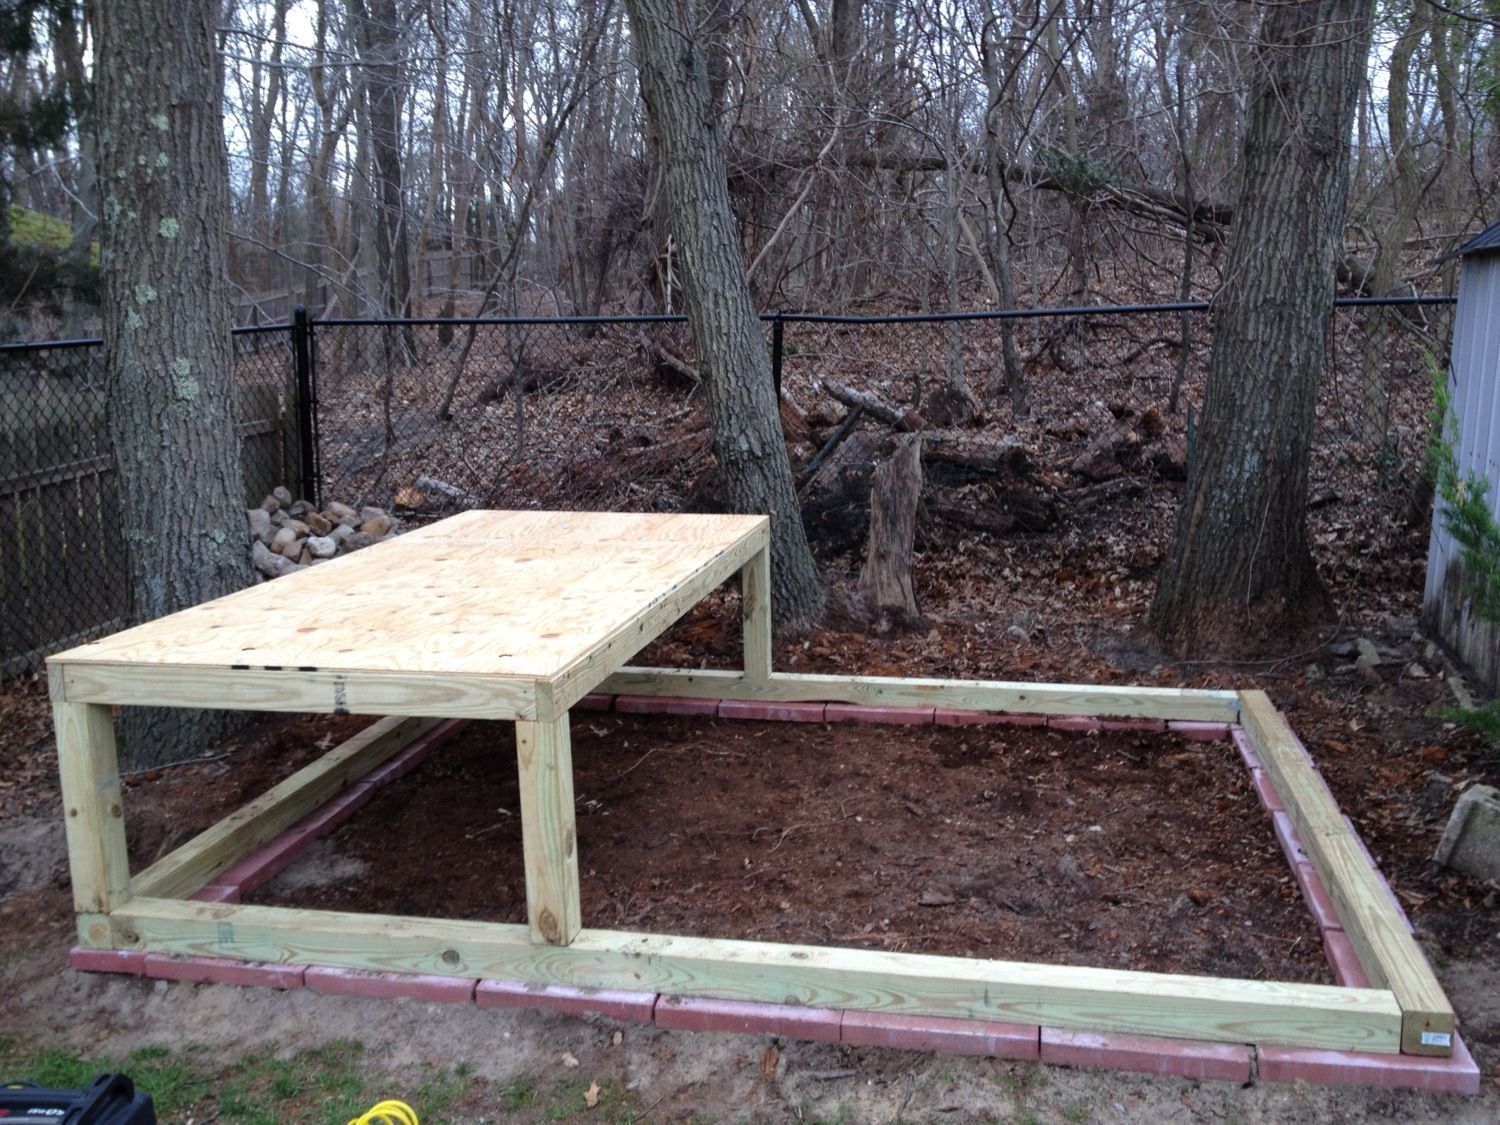
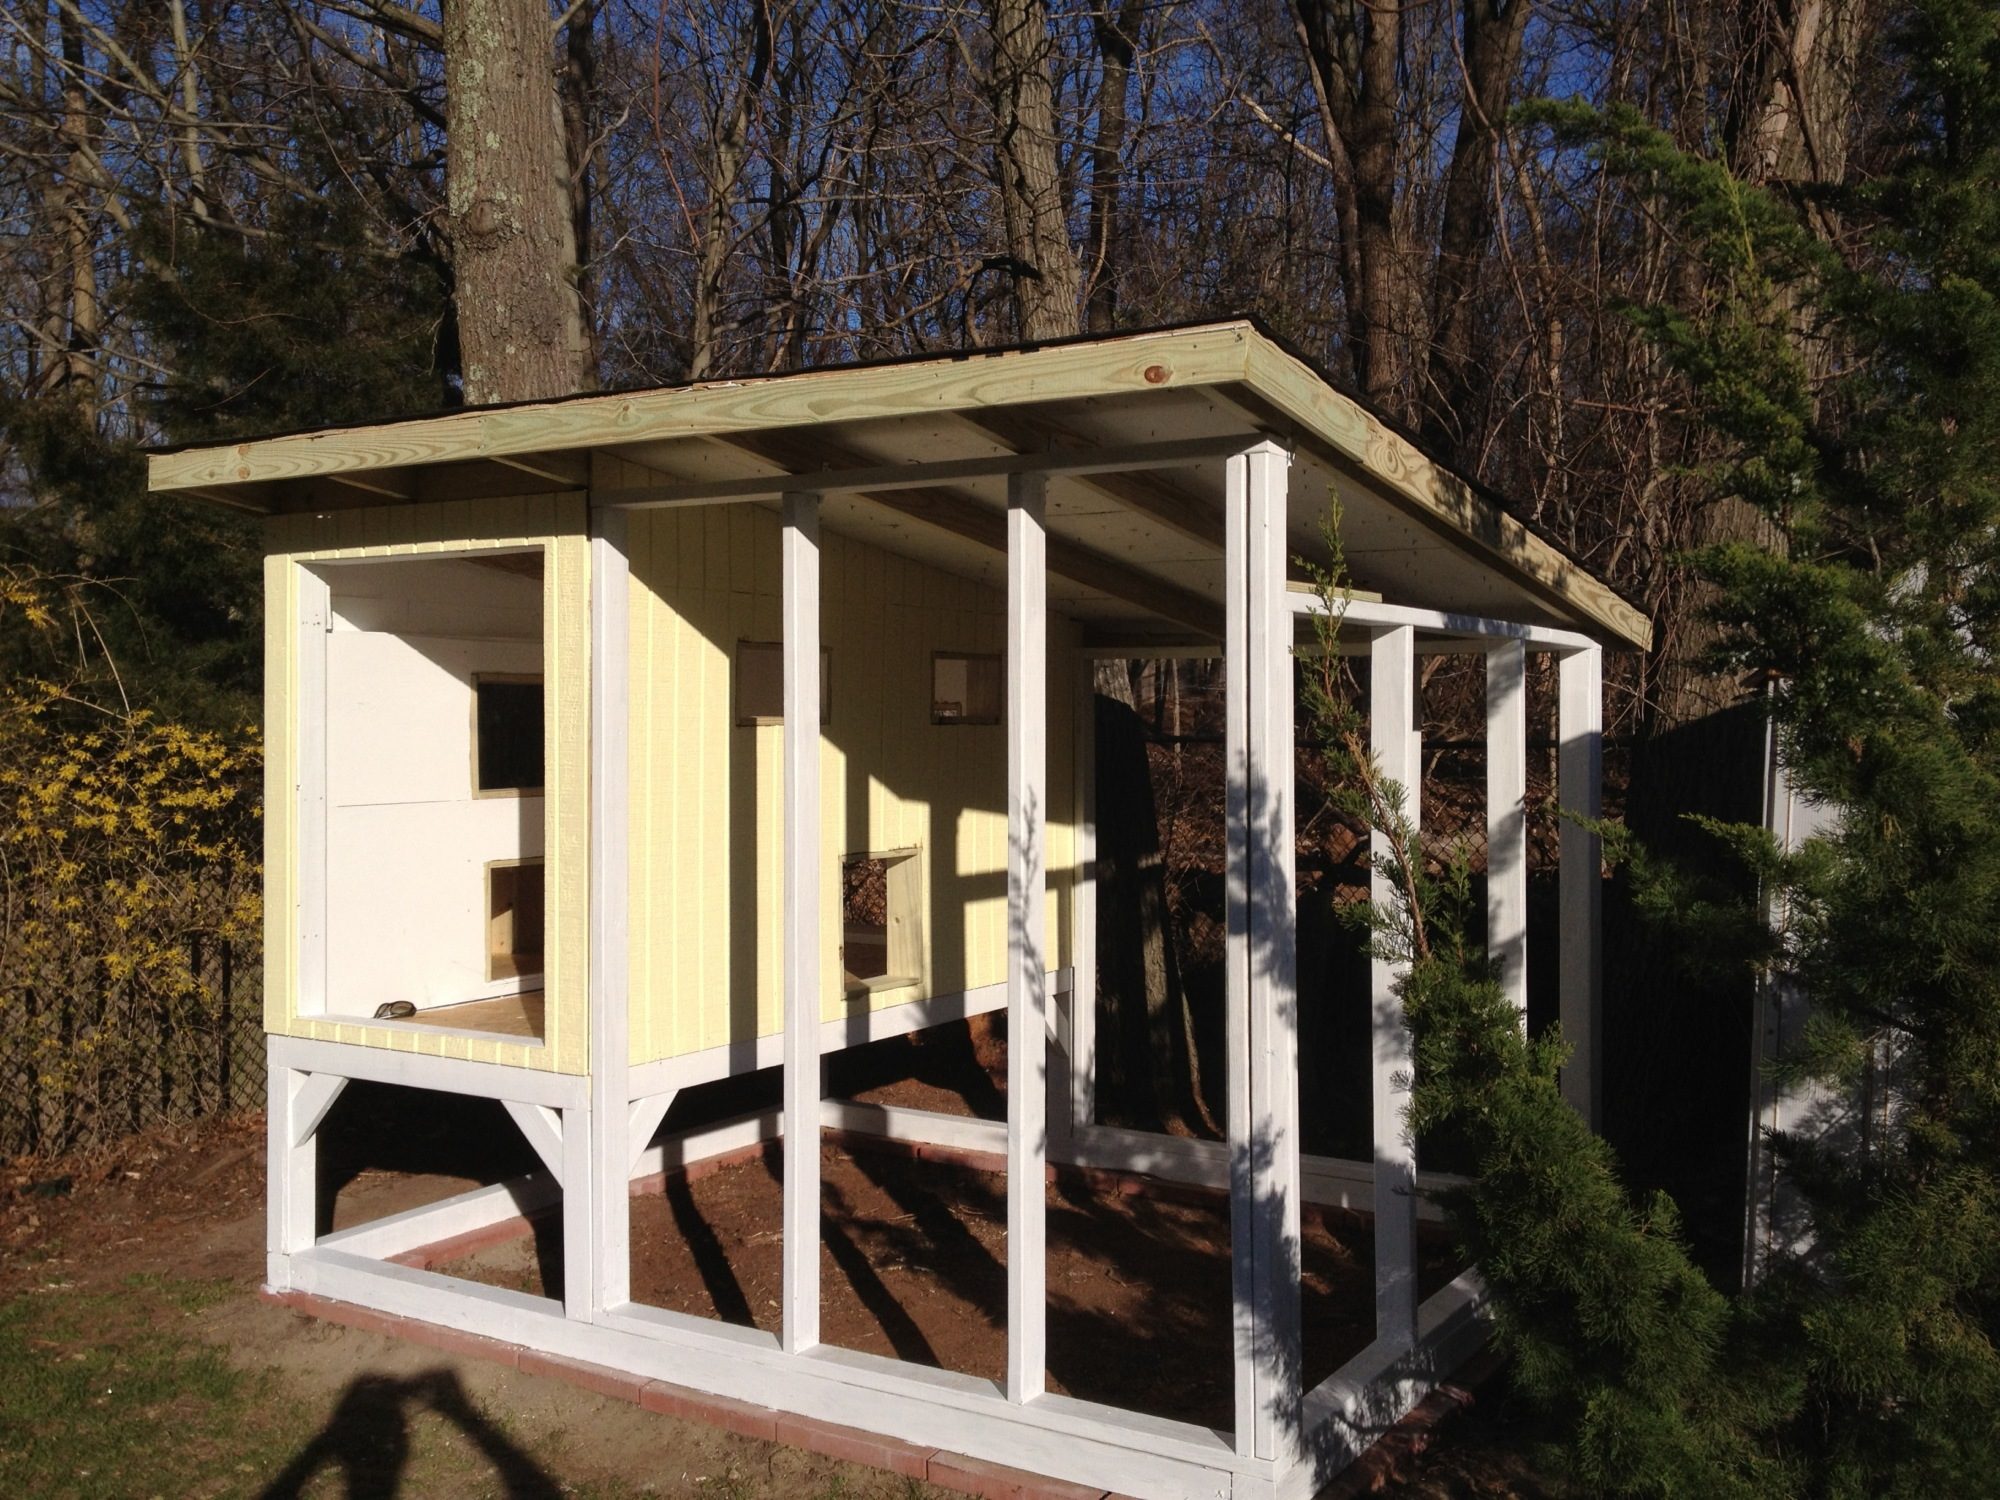
The next step was framing out the coop. I built all the sides separately then nailed the all together. This first picture is the front. I measured it out so that it is 7ft tall from the base (bottom of legs) to the top. The other three sides are measured to be 6ft tall for the base to the top. This will allow a nice sloped roof.
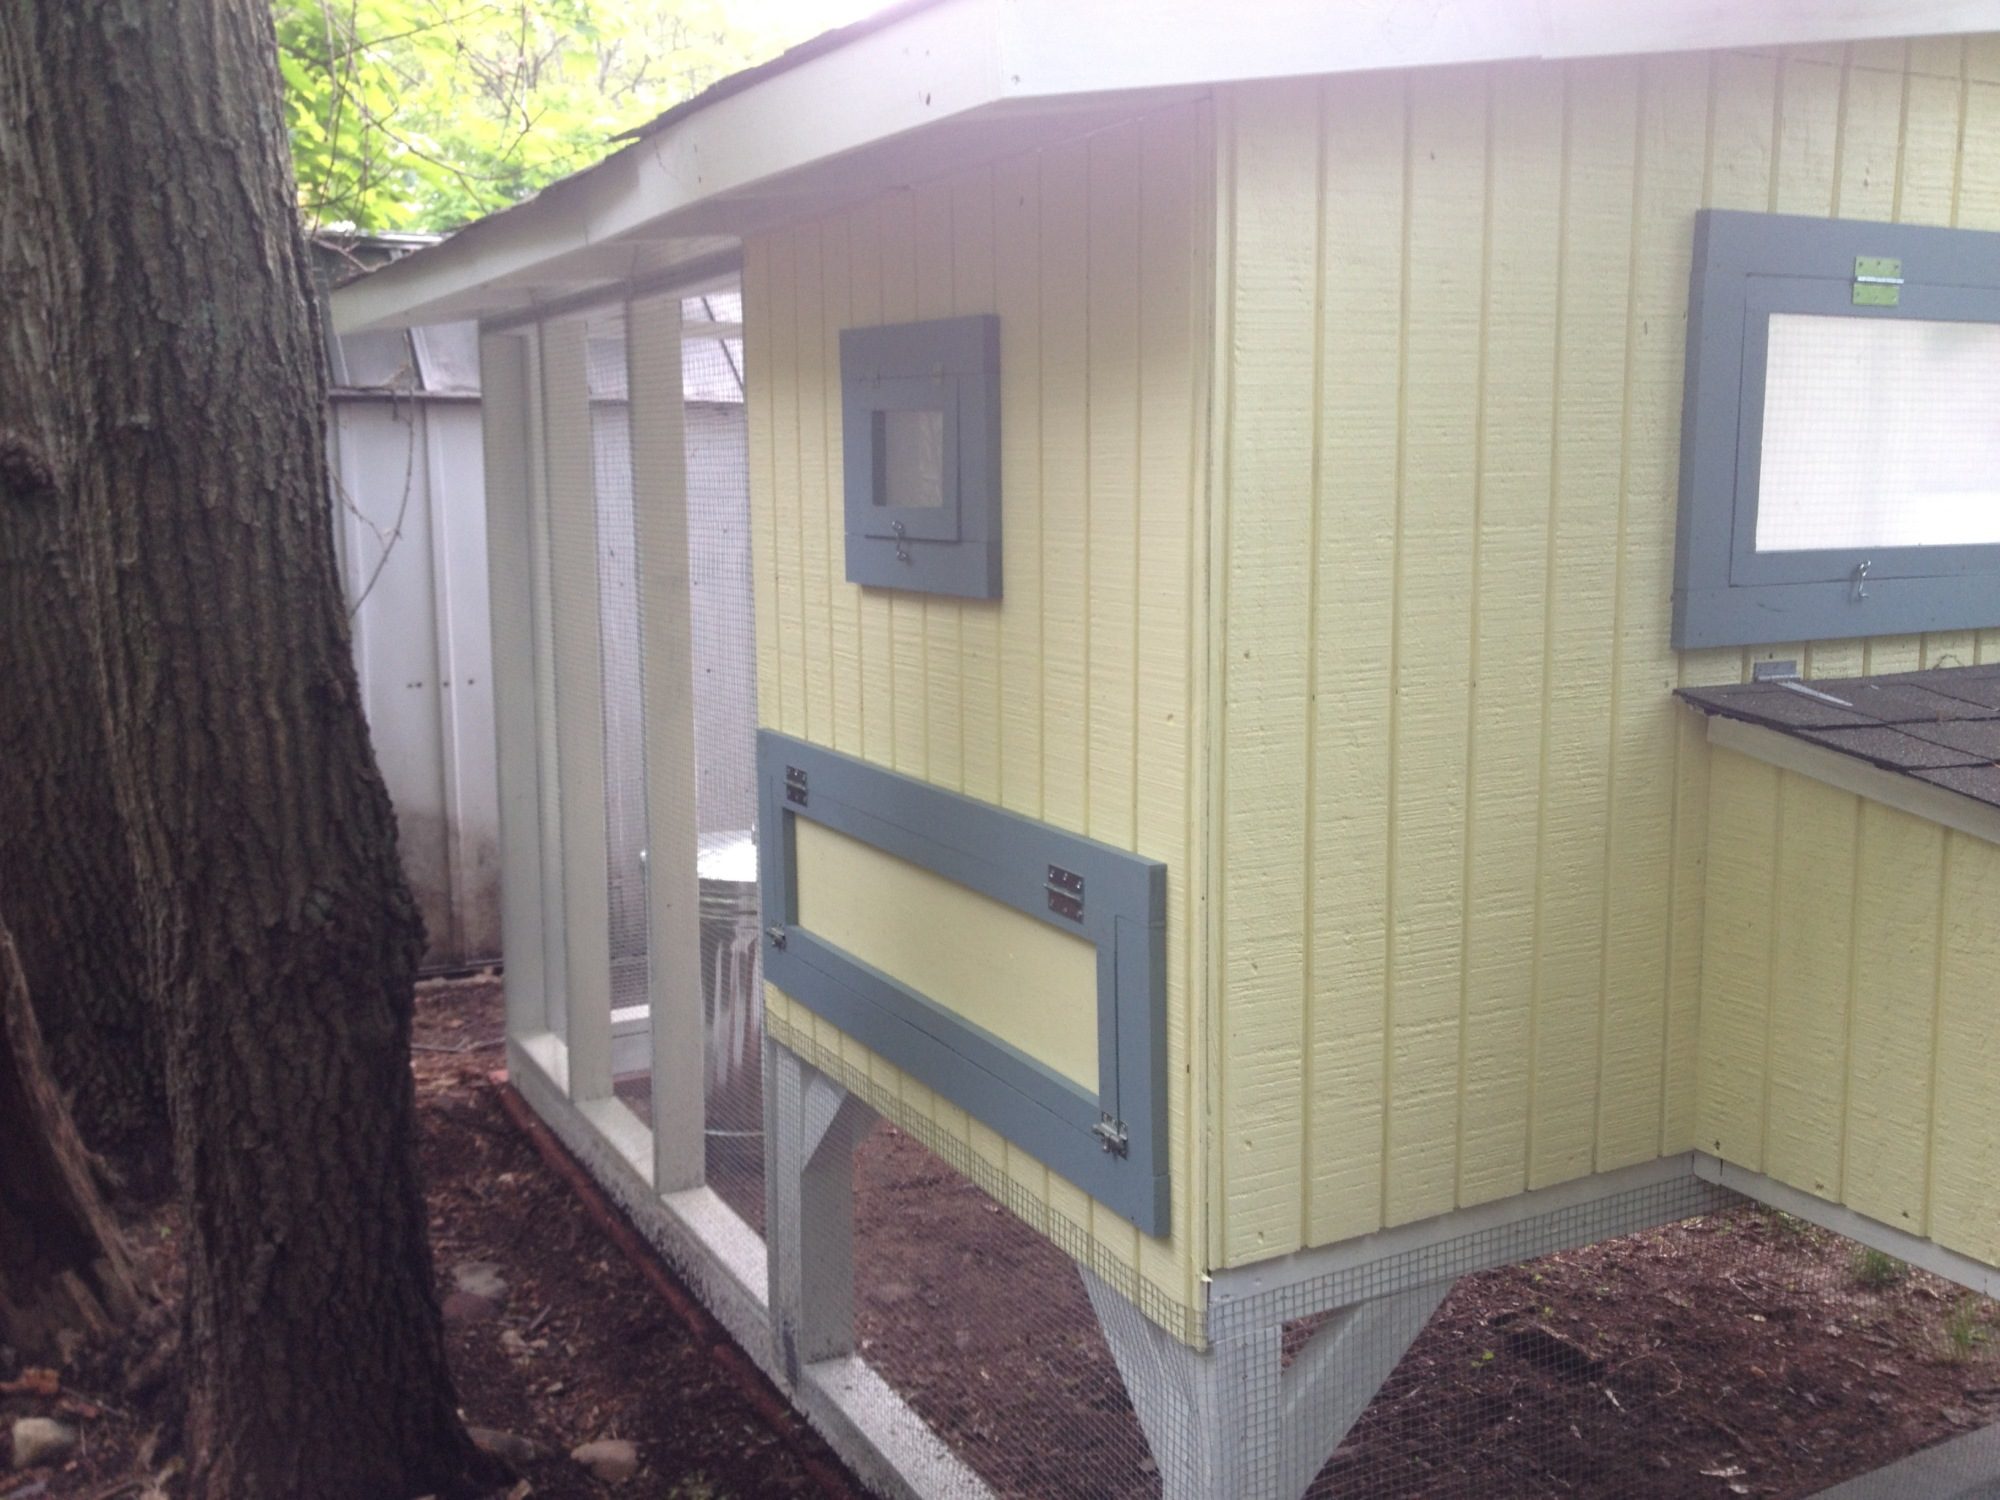
The wall that faces the run has 3 spaces, one is the entrance for the chickens measuring 15"x15" and then I have two windows that will aid with ventilation.
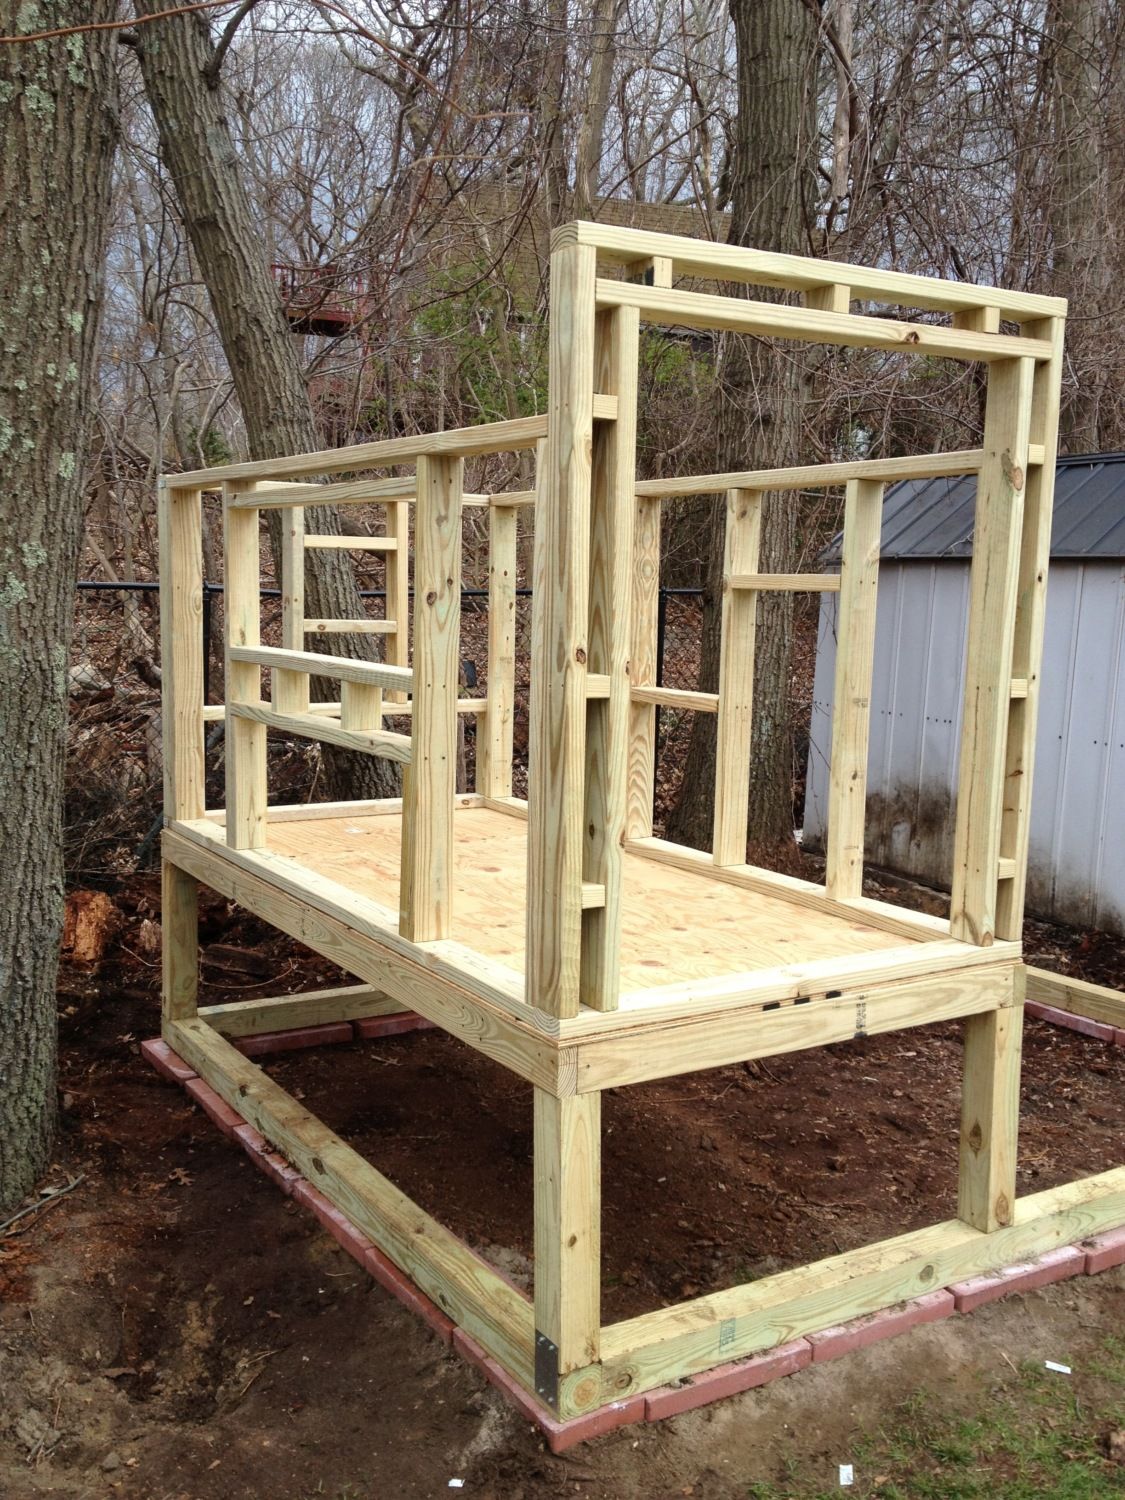
The adjacent side has two openings, the lower one will be the nesting box. This opening is 45" long to allow for three spaces. The upper opening will be a window.
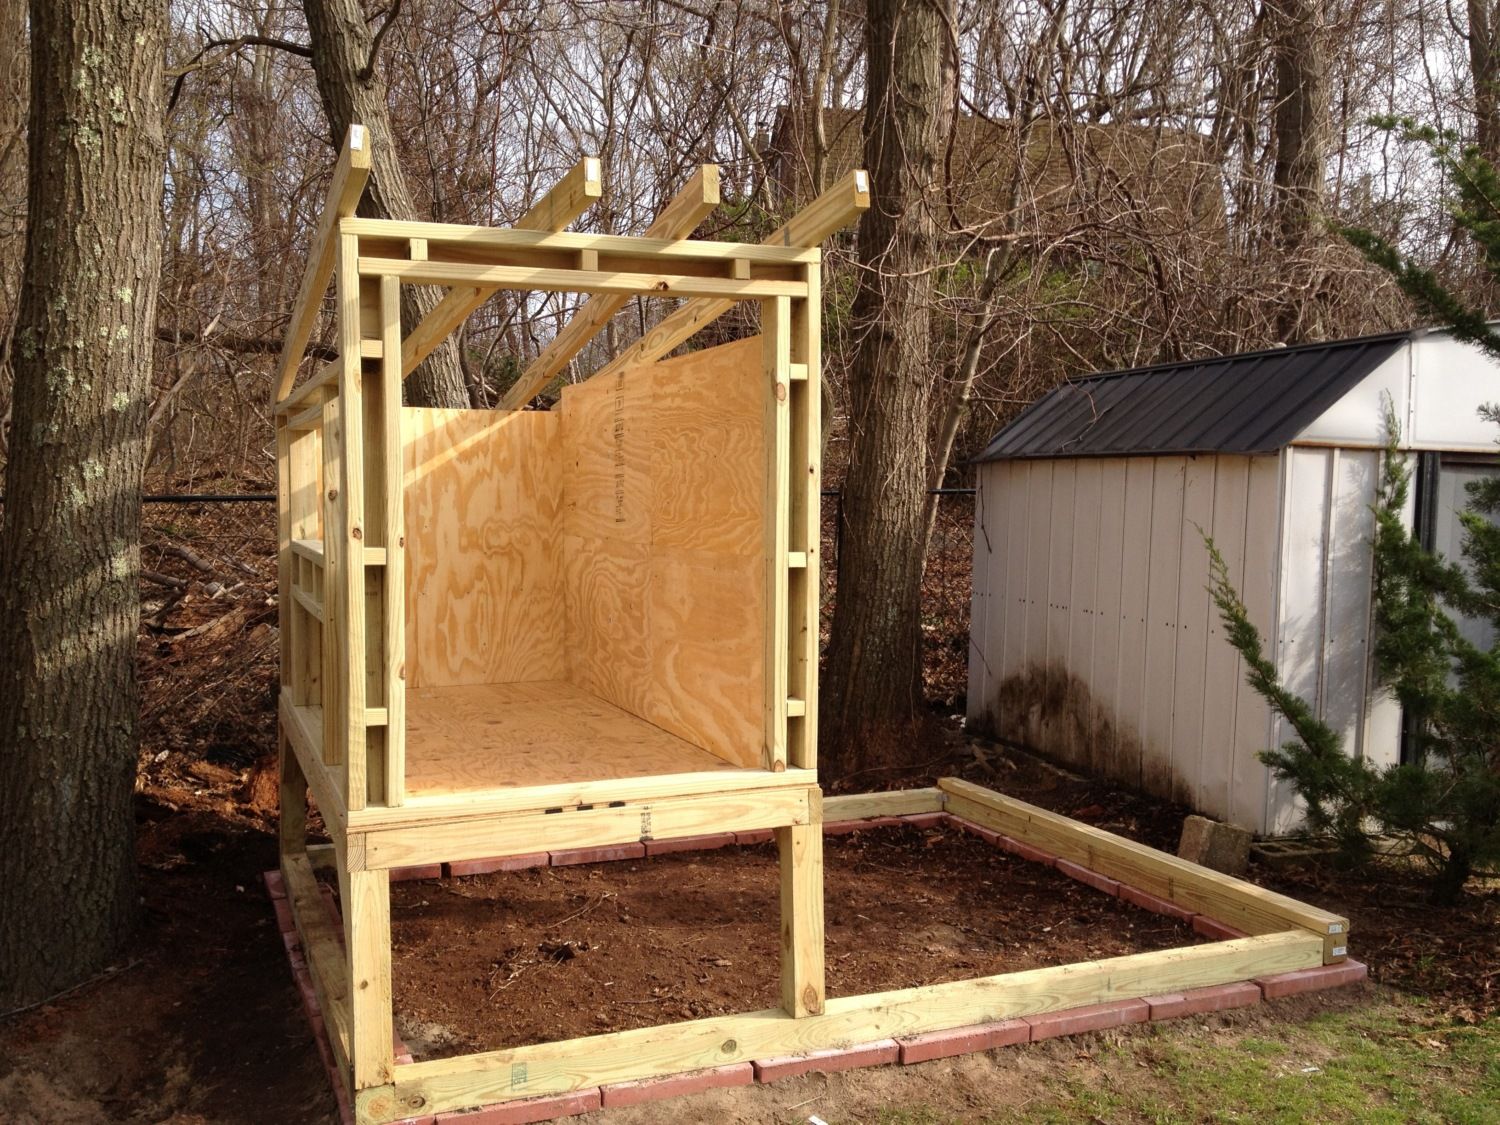
Once everything is framed out I installed 1/2" plywood all over the inside then cut out the openings.
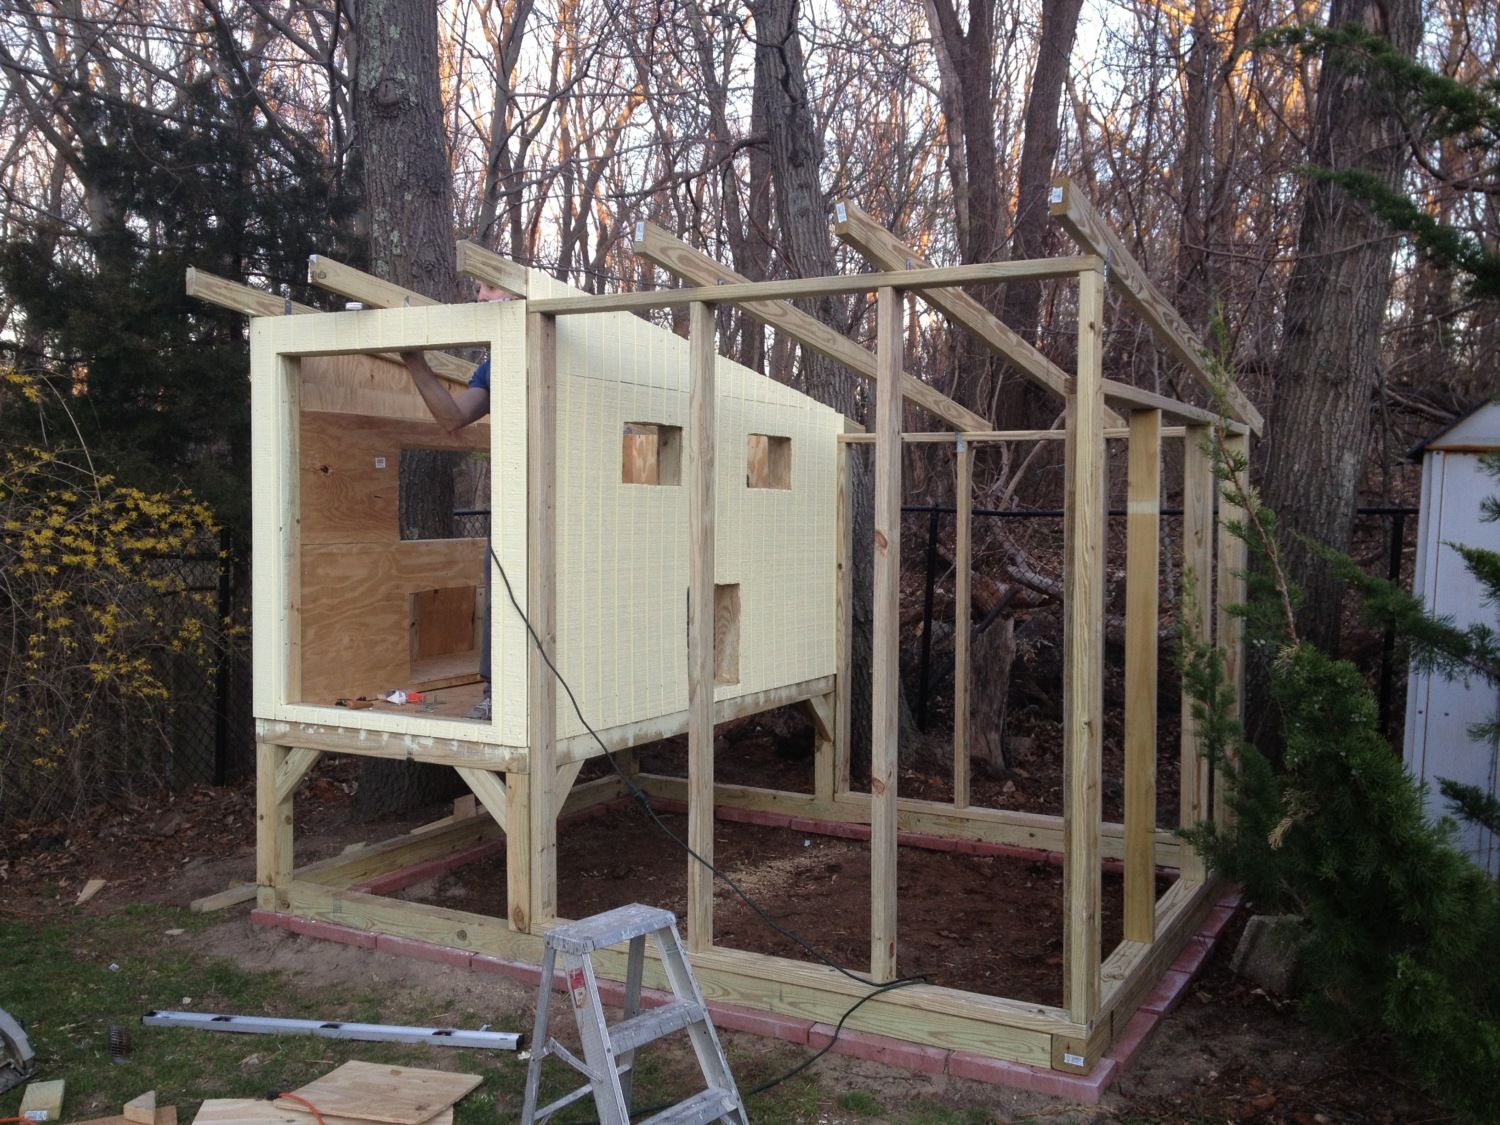
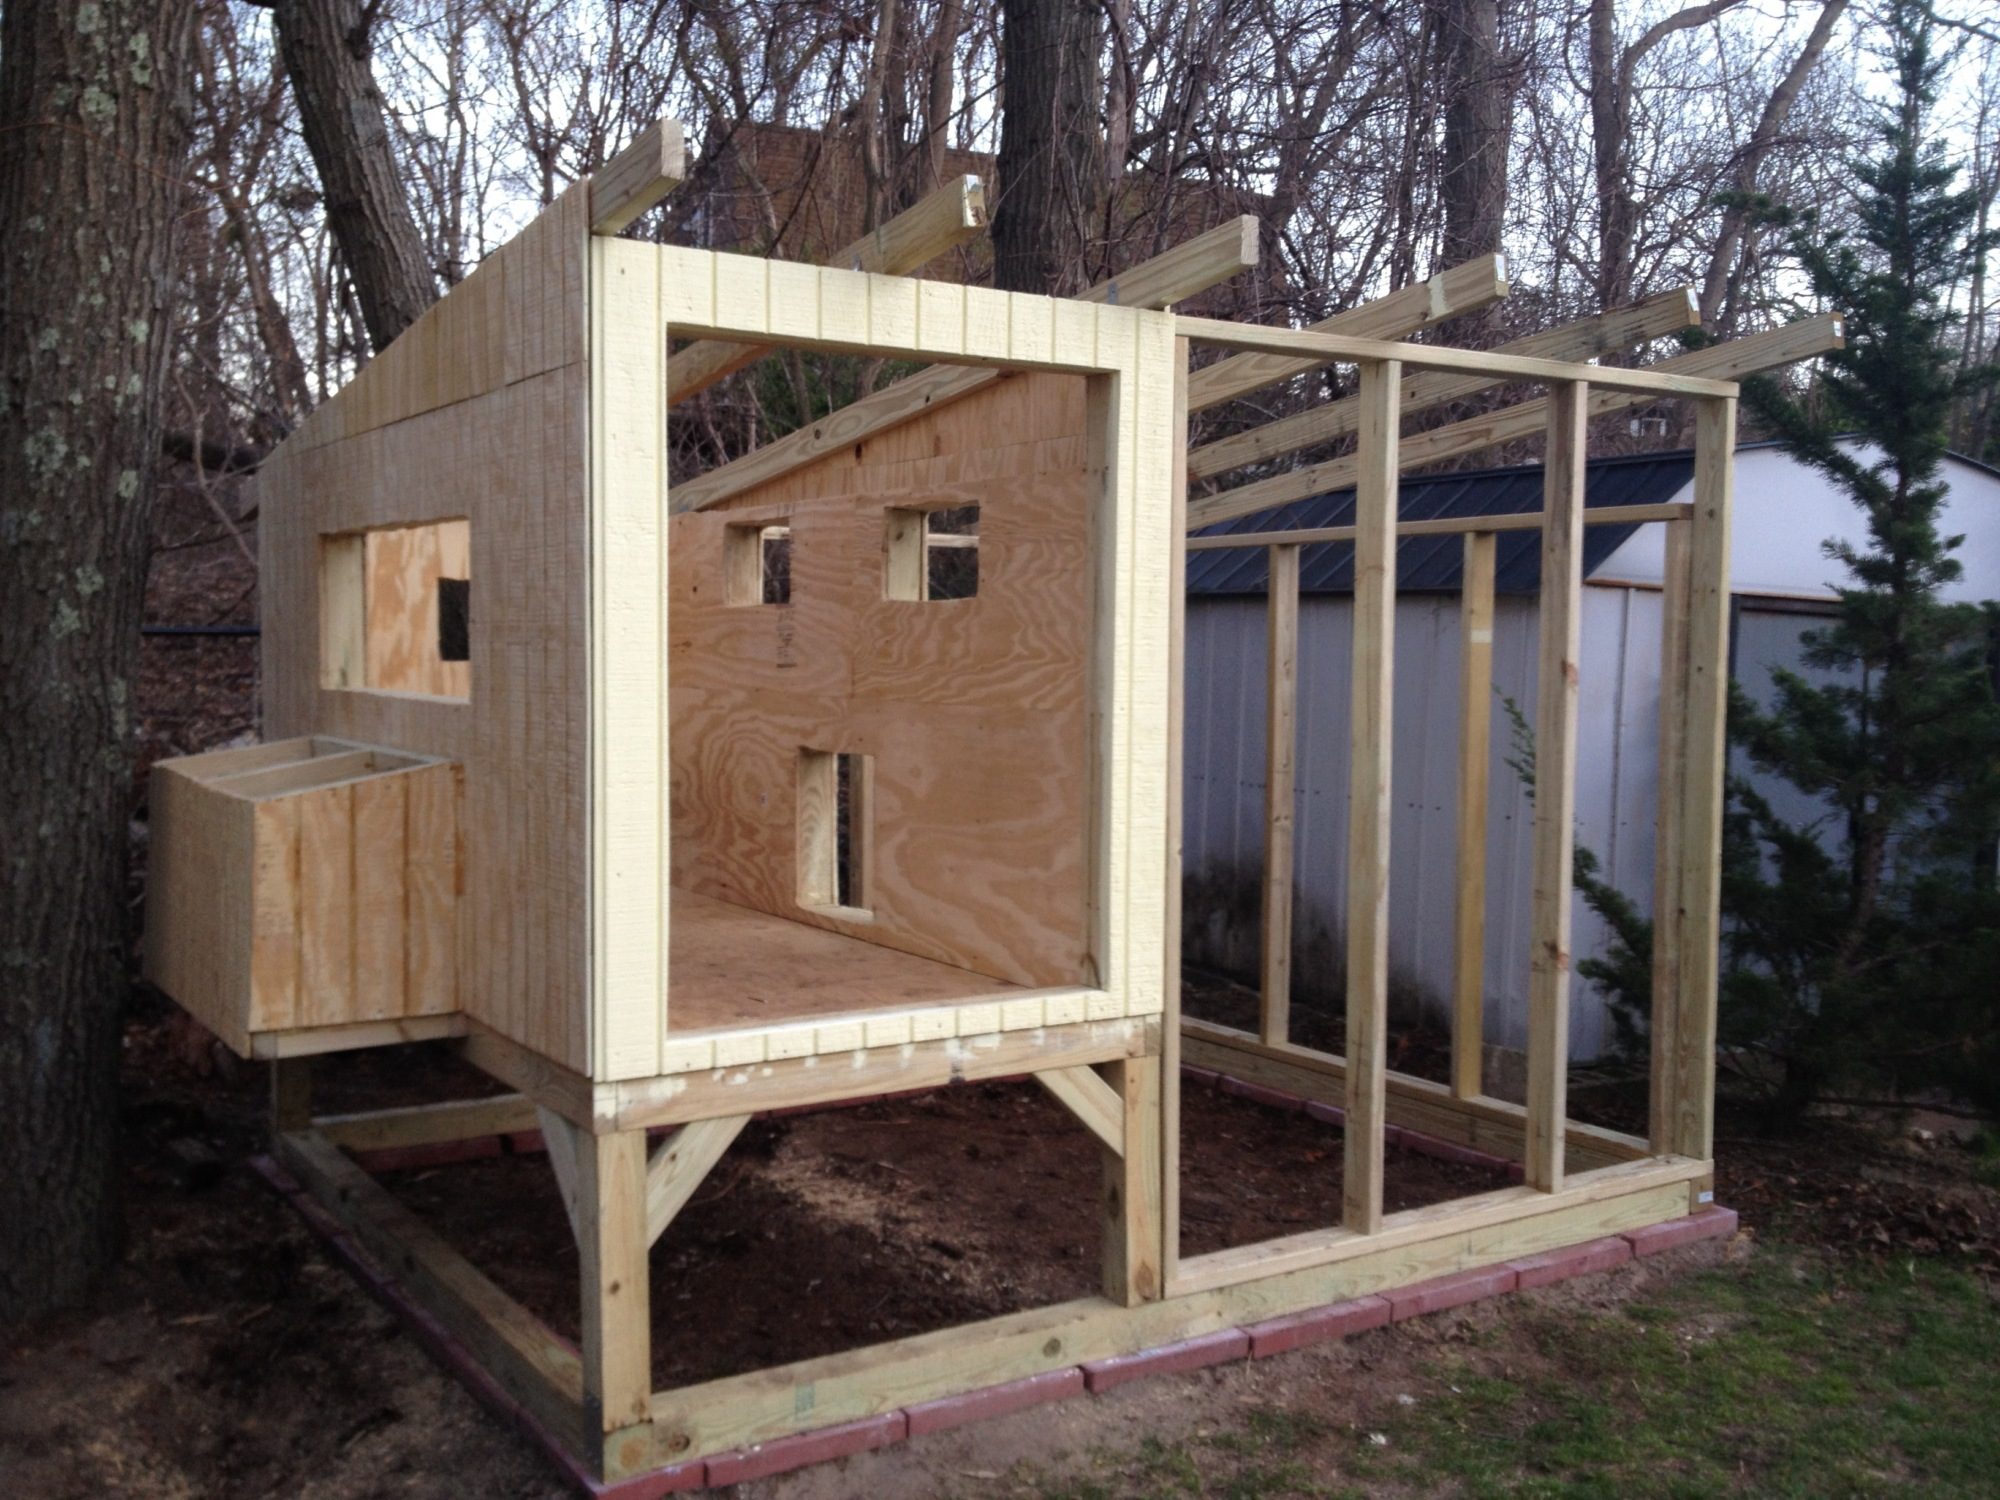
Before covering the outside I installed insulation into all the gaps.
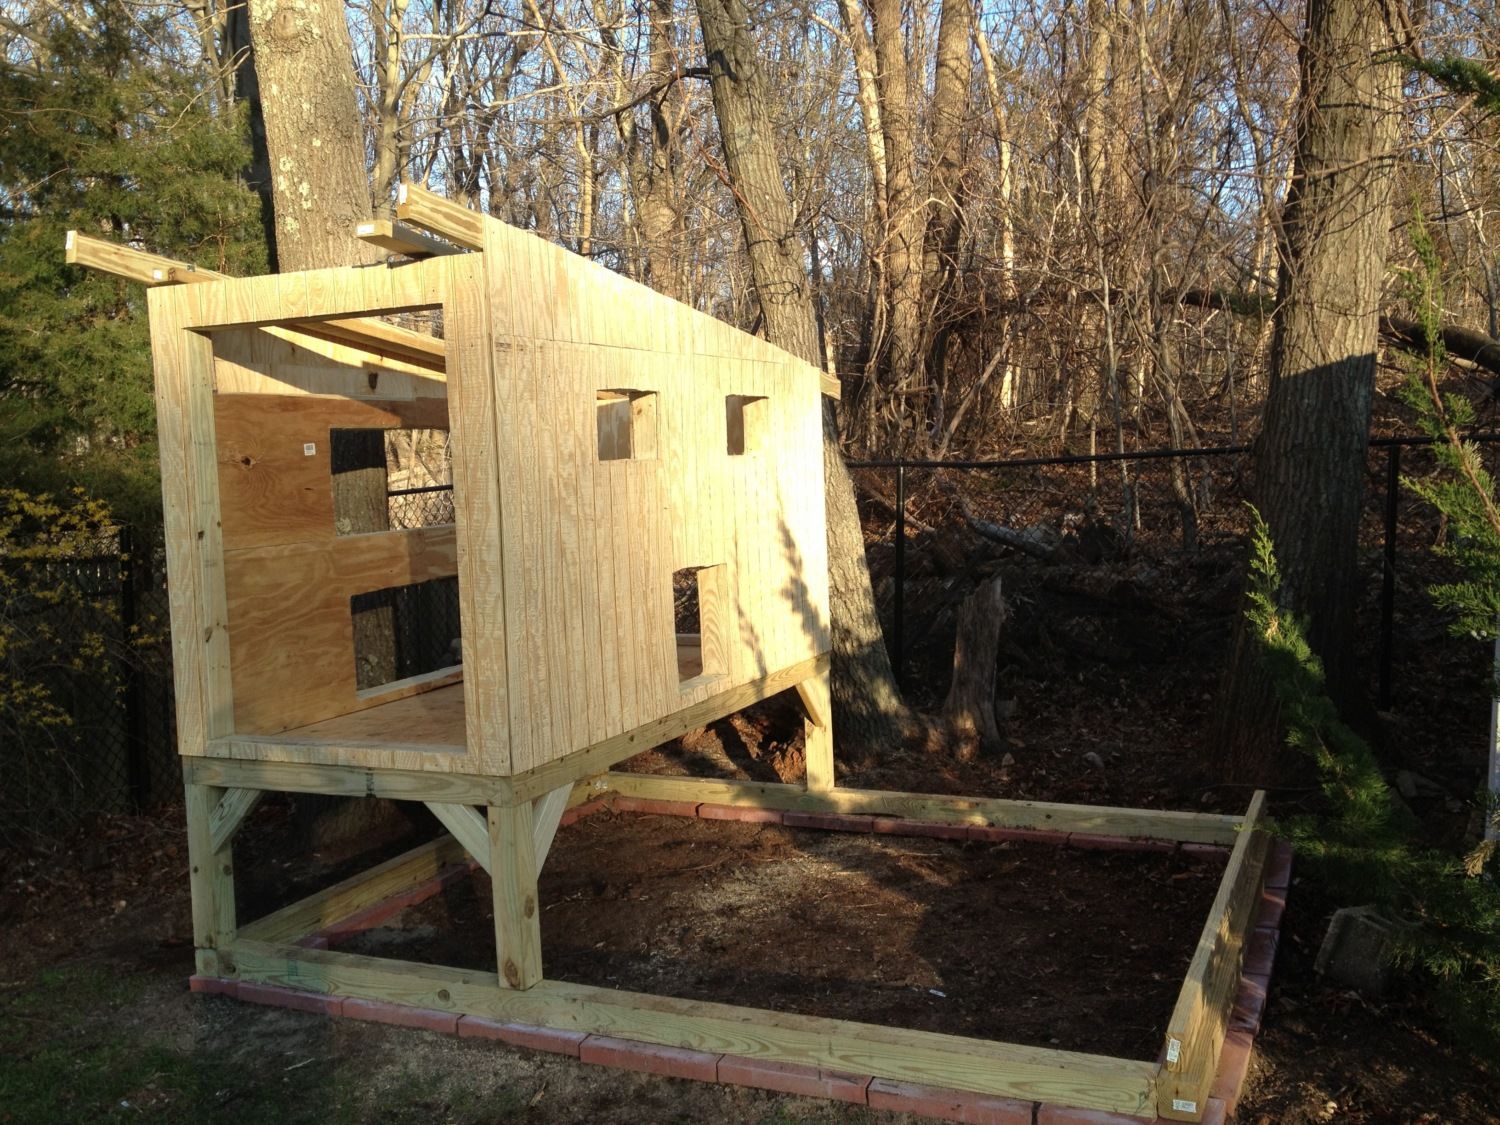
When the insulation was complete I covered the outside with 1/2" wood siding that was designed. Also if you noticed I added wooding supports the legs. This made the coop really sturdy.
My wife painted the coop. We went with a yellow color. Once the paint dried I framed out the run. The run was made up of three walls all nailed together. I tried to spread the 2x4 supports but left the middle a little wider to make a frame for a door.
When the framing of the run was complete I add rafters. The were 2x4x10 and I tried to place them so it overhangs each end about 12''. The are mounted using hurricane rafters.
The nesting box was the hardest to make. I framed a box out then nailed it to the outside nesting box opening. then floored it with plywood and covered the outside with the siding.
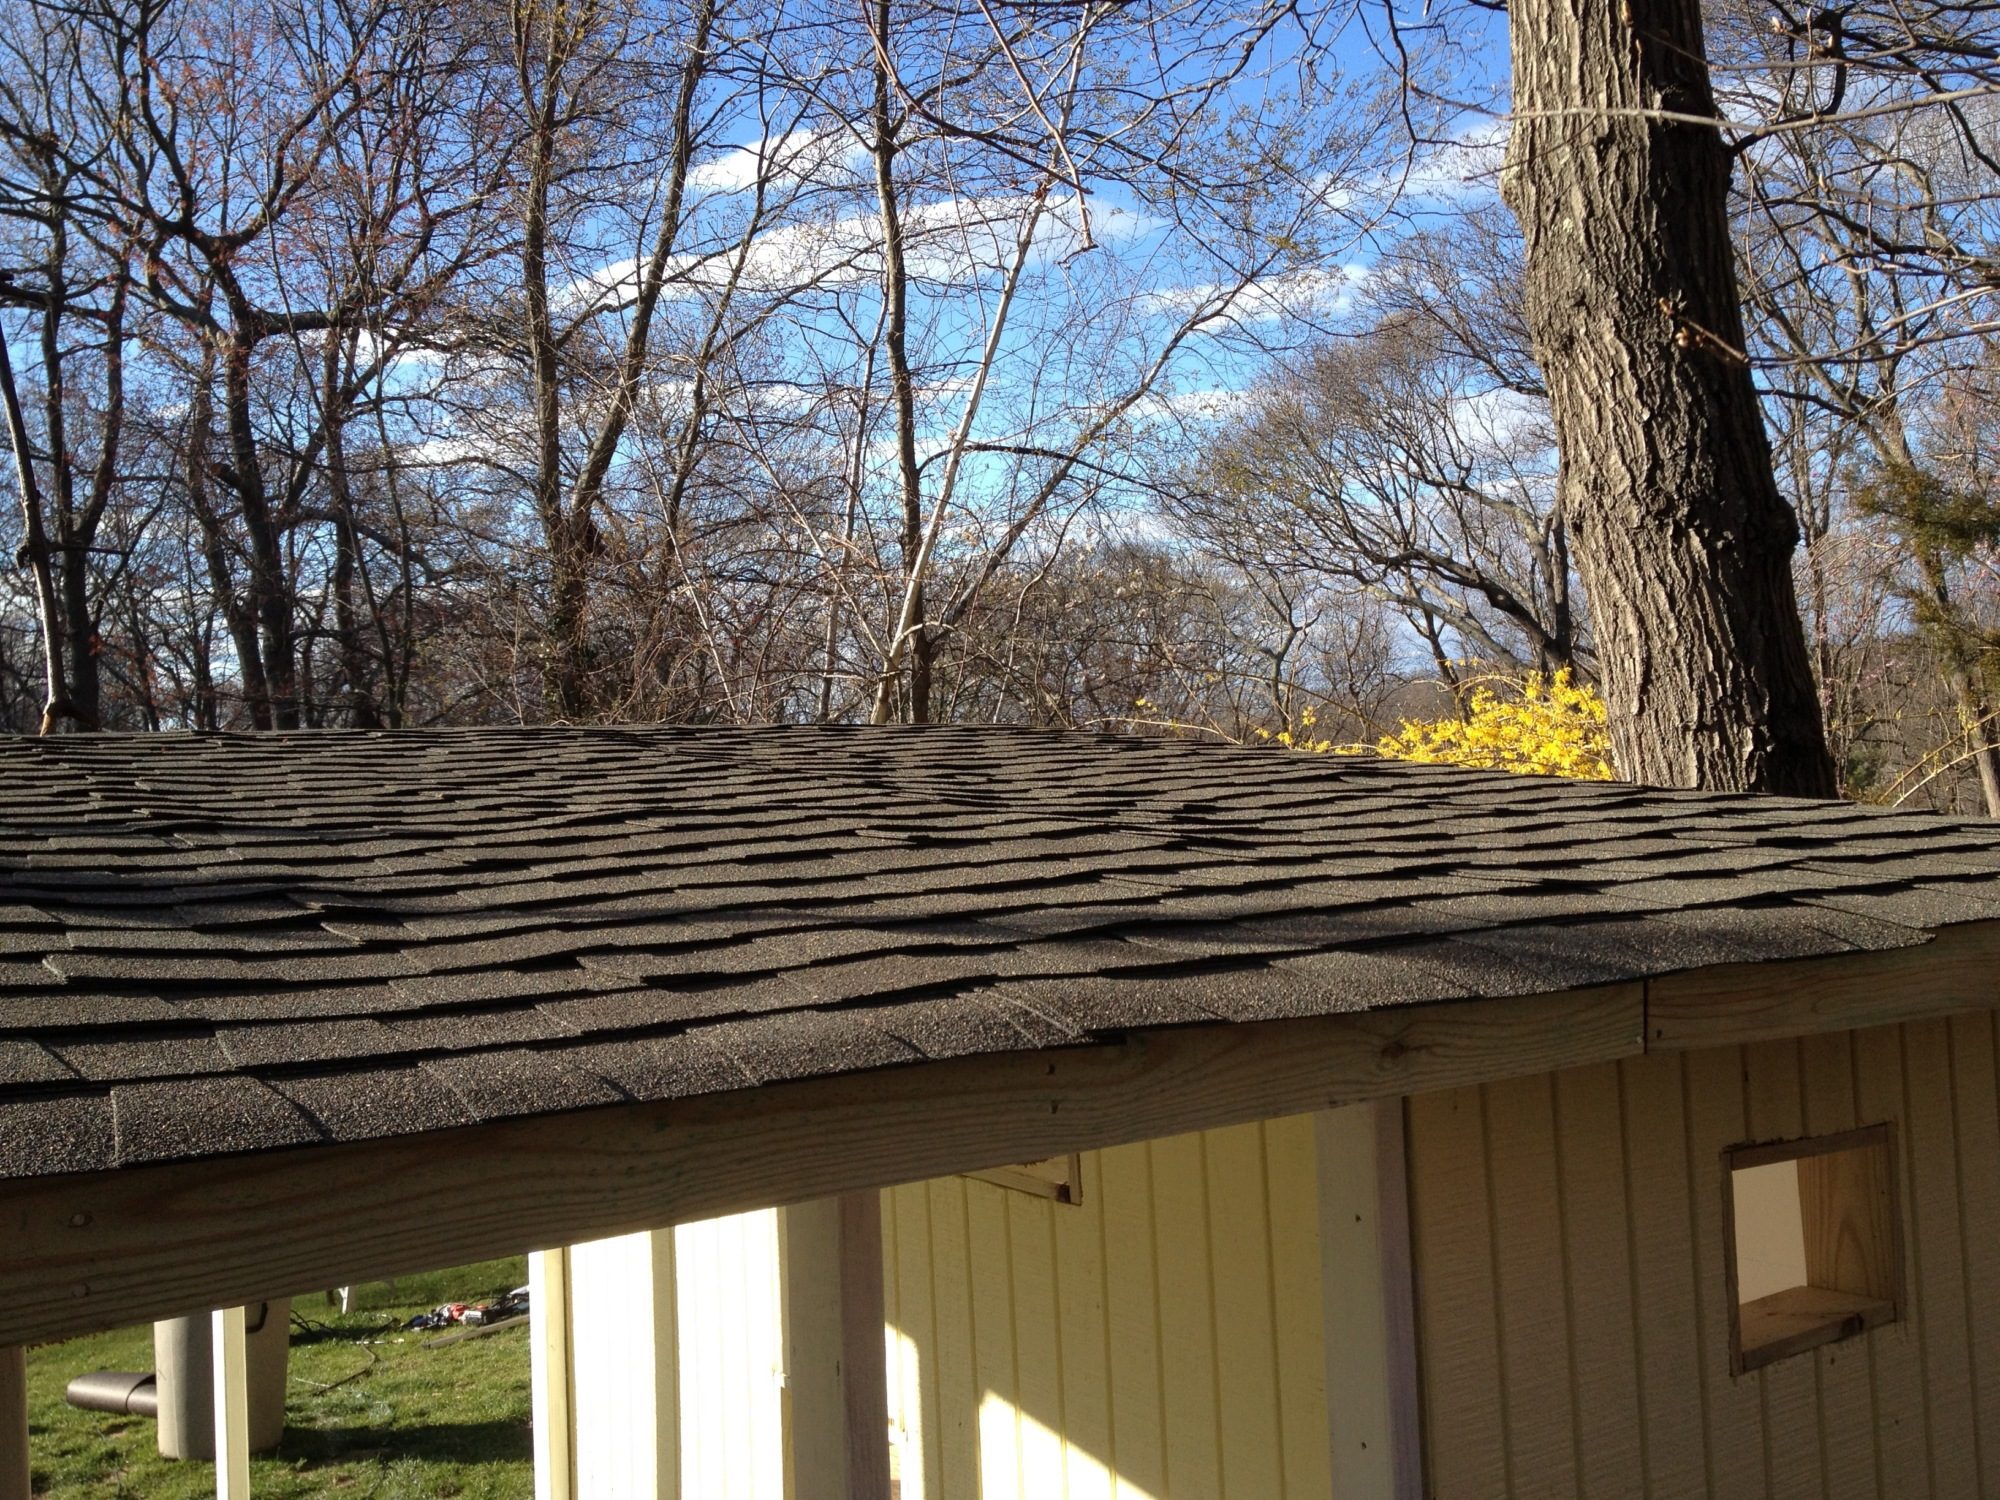
The roof was laid with 1/2' plywood. I think I should have used 3/4" due to the spacing of the rafters but it held pretty good when I was stapling the tar paper and nailing the shingles to it.
Used 1x4x10 to cover the outside of the rafters and my wife started painting the rest of the framing.
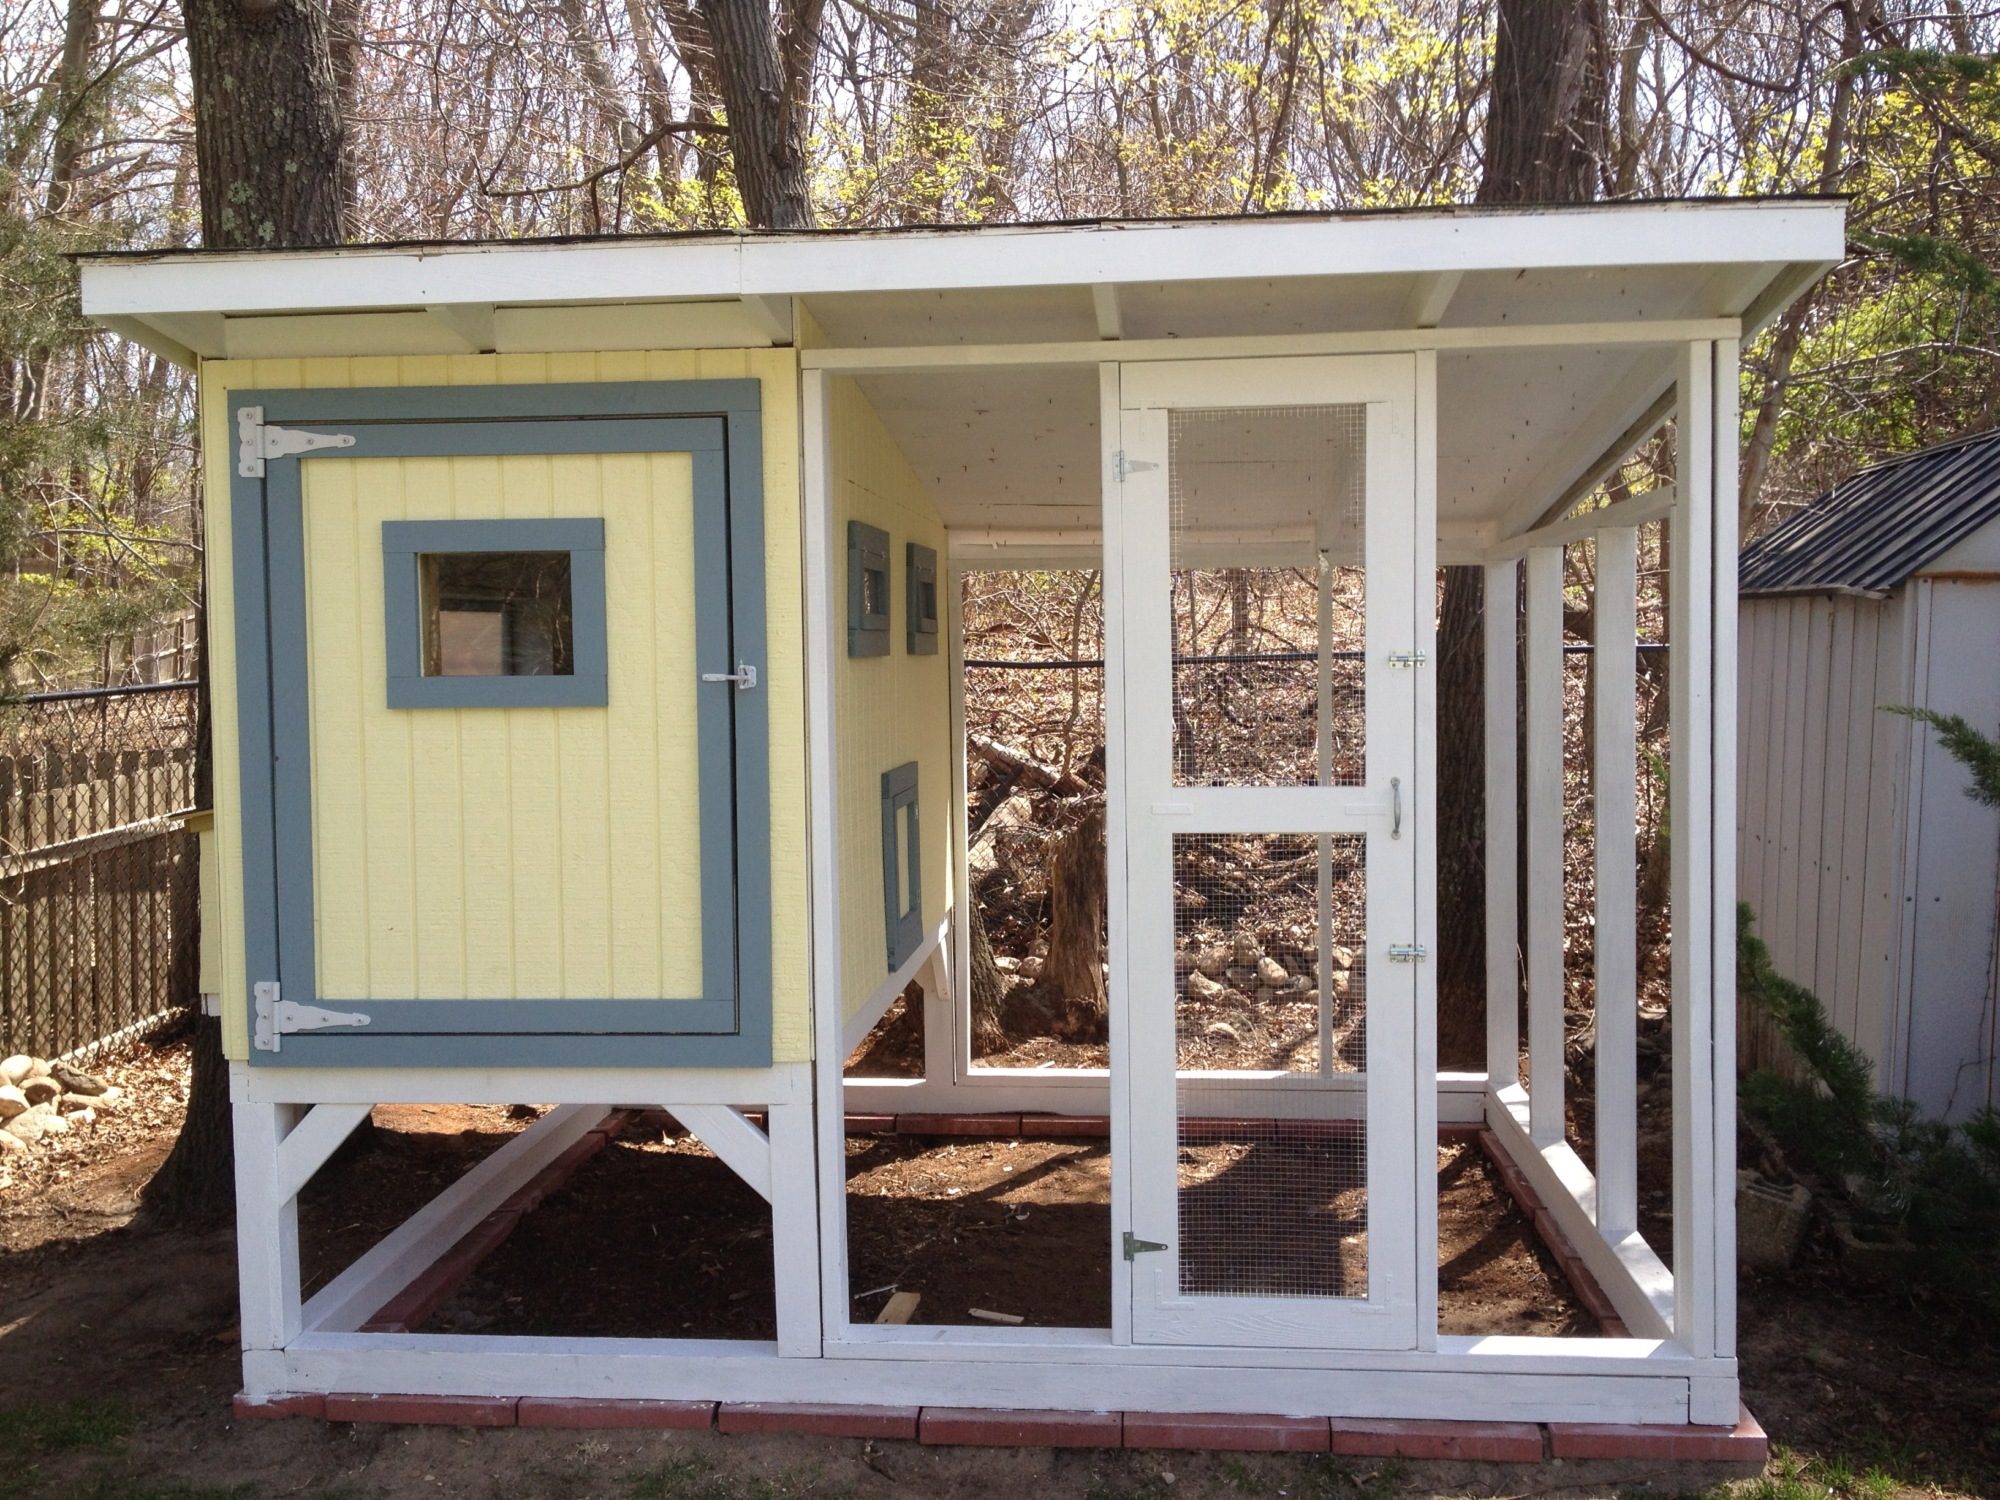
Made all the doors and windows. I used acrylic for the windows and used trim to frame it together. For the door to the run I sandwiched hardware cloth between 4x1s and nailed them together. I bought wind chains and installed them on the doors to prevent to doors from opening to far.
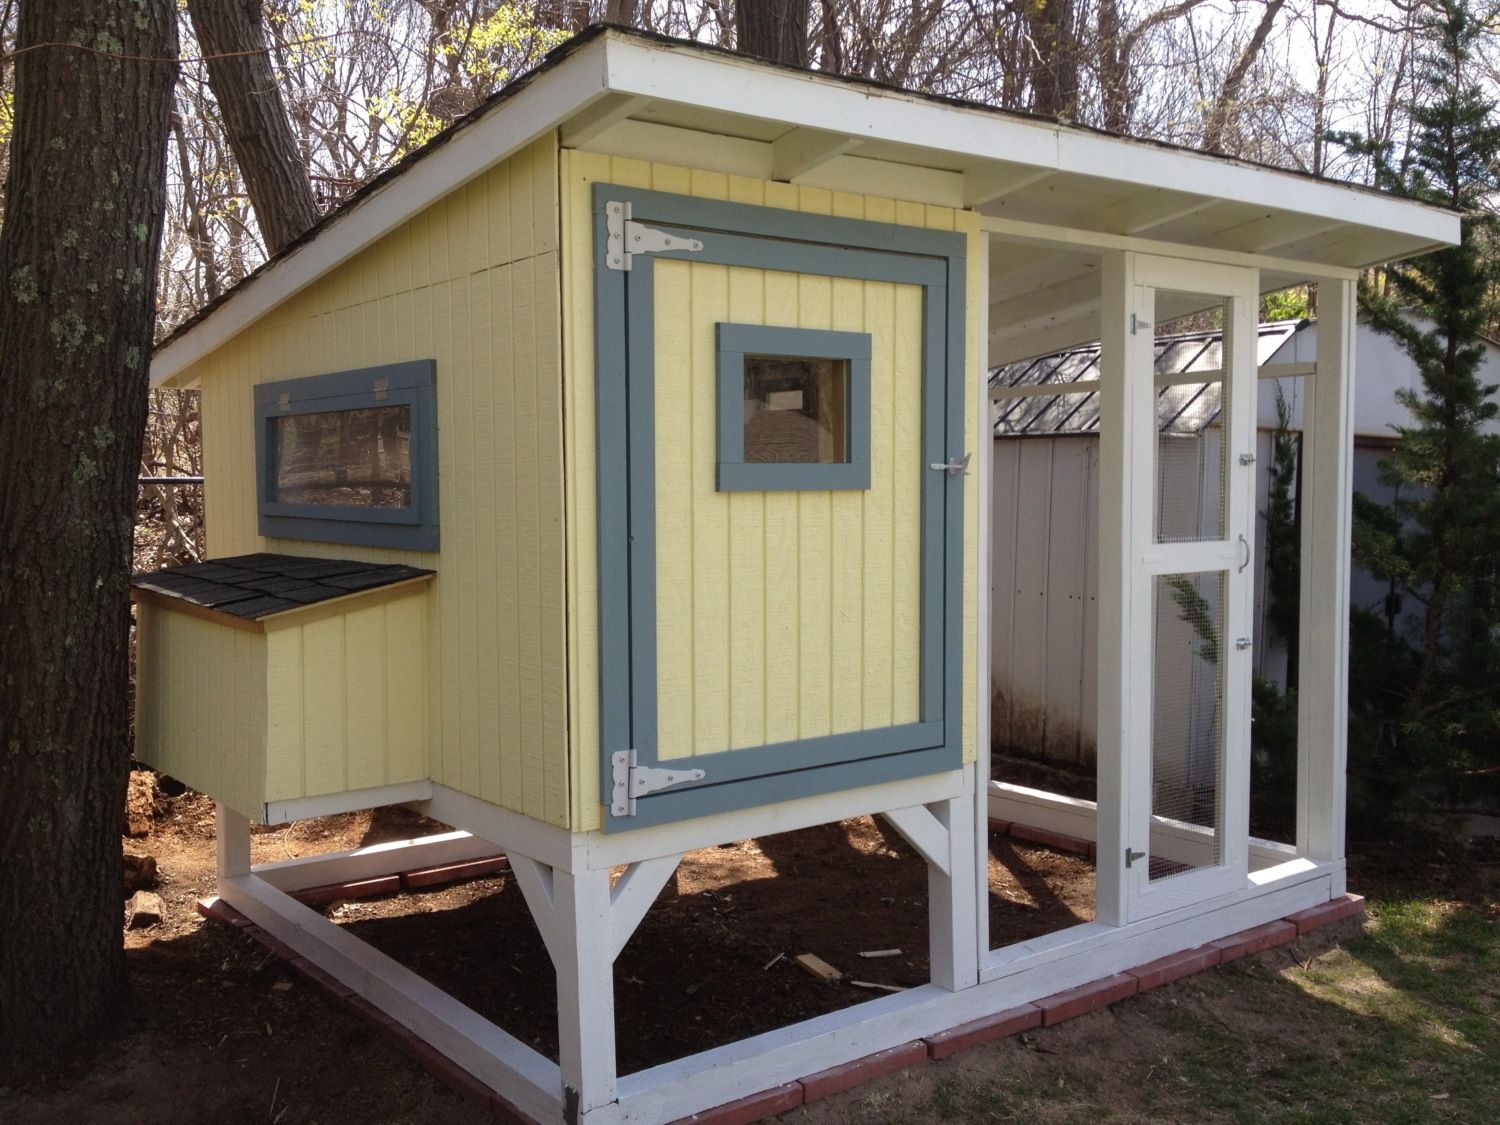
Made a mini roof for the nesting box.
The back has a rear access to make cleaning up a little easier
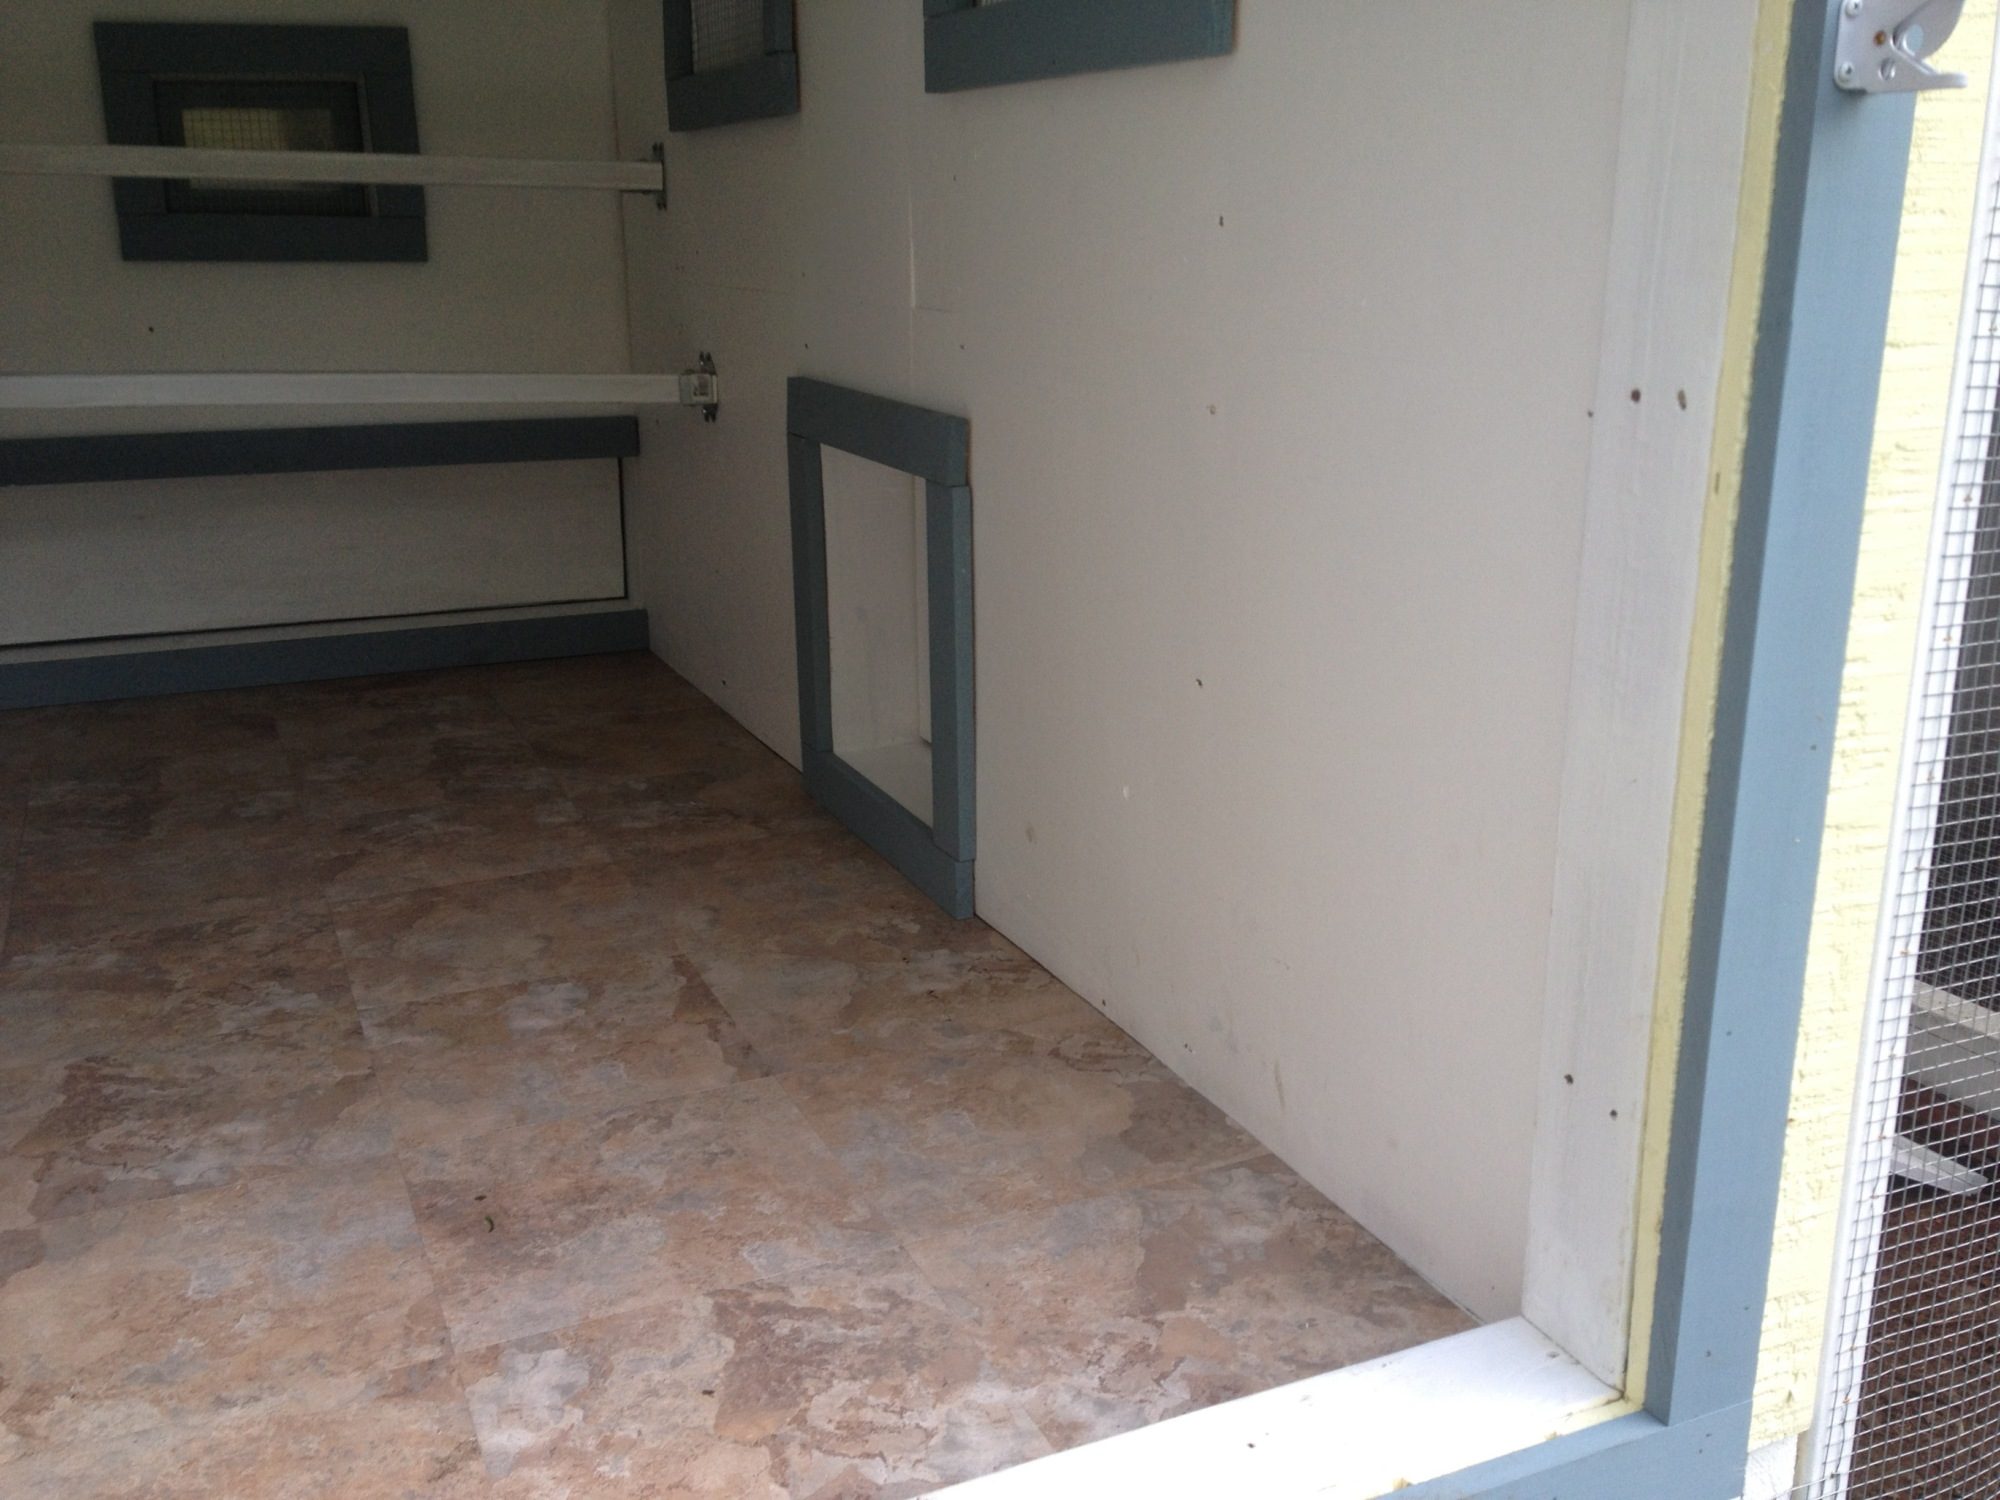
Bought laminated tiled and laid those down. it was the easiest out of this whole project. Cleaning will be a breeze.
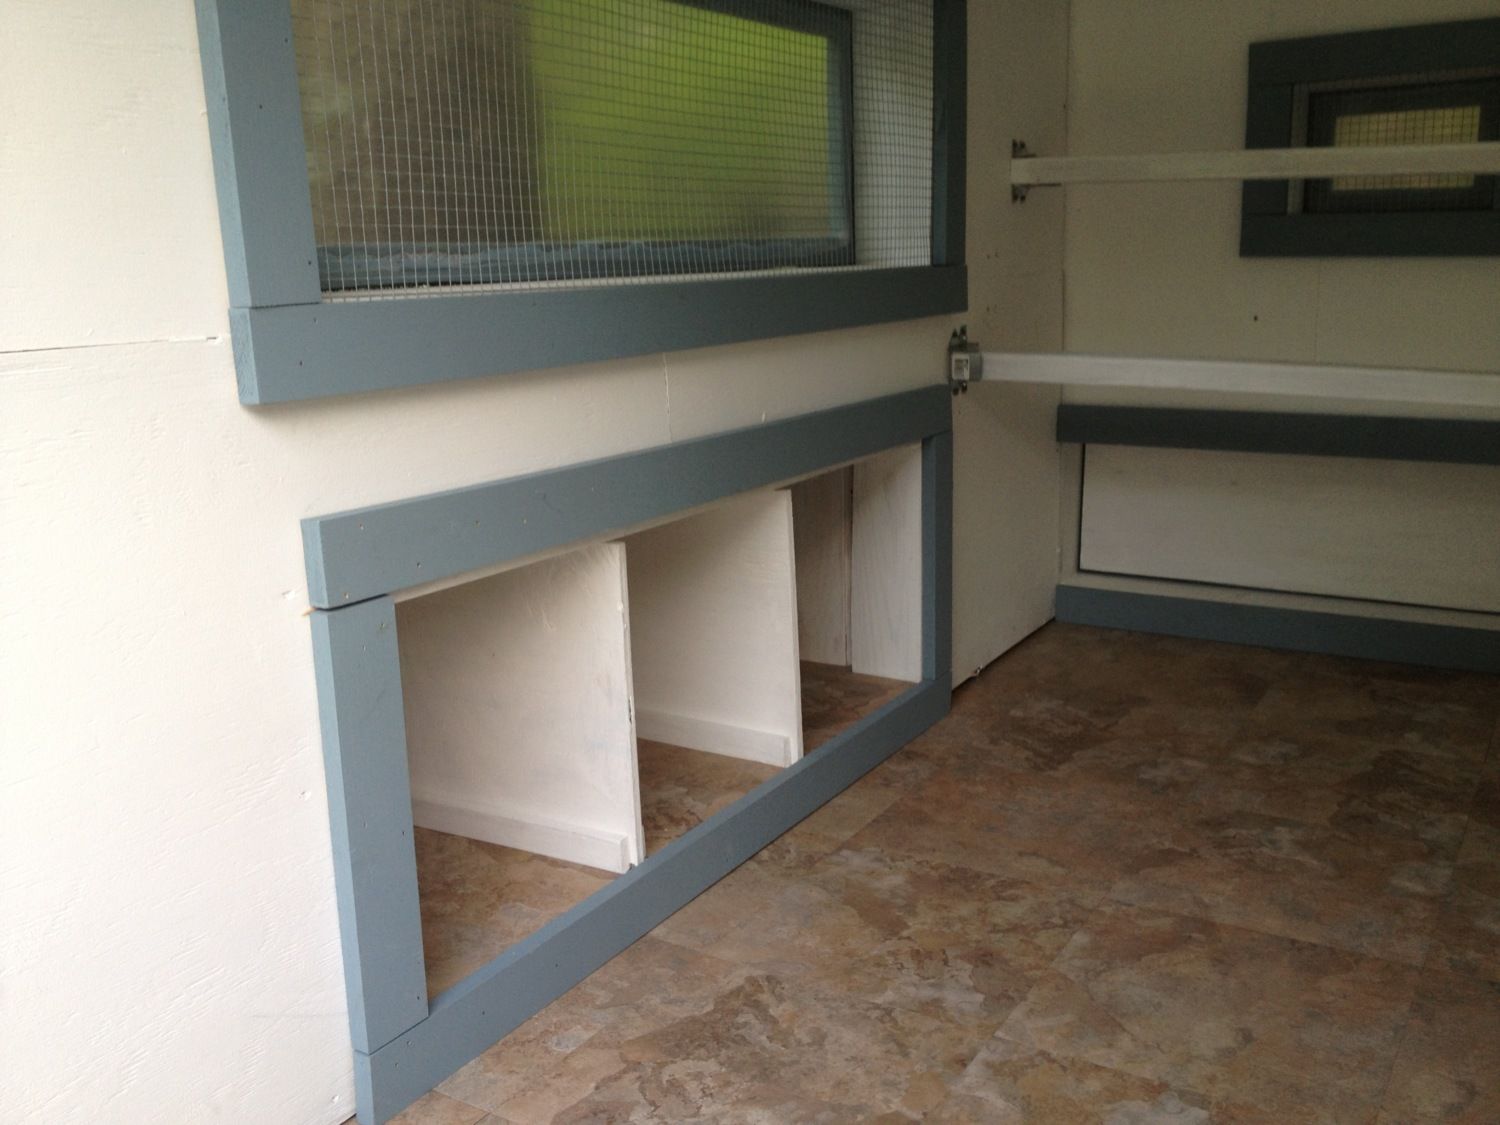
A lot of things going on in this picture. I made roosts and hung them with joist hangers. The wood can slide out nice for cleaning.
Also all the windows are covered with hardware cloth in case any critters figure out how to open windows.
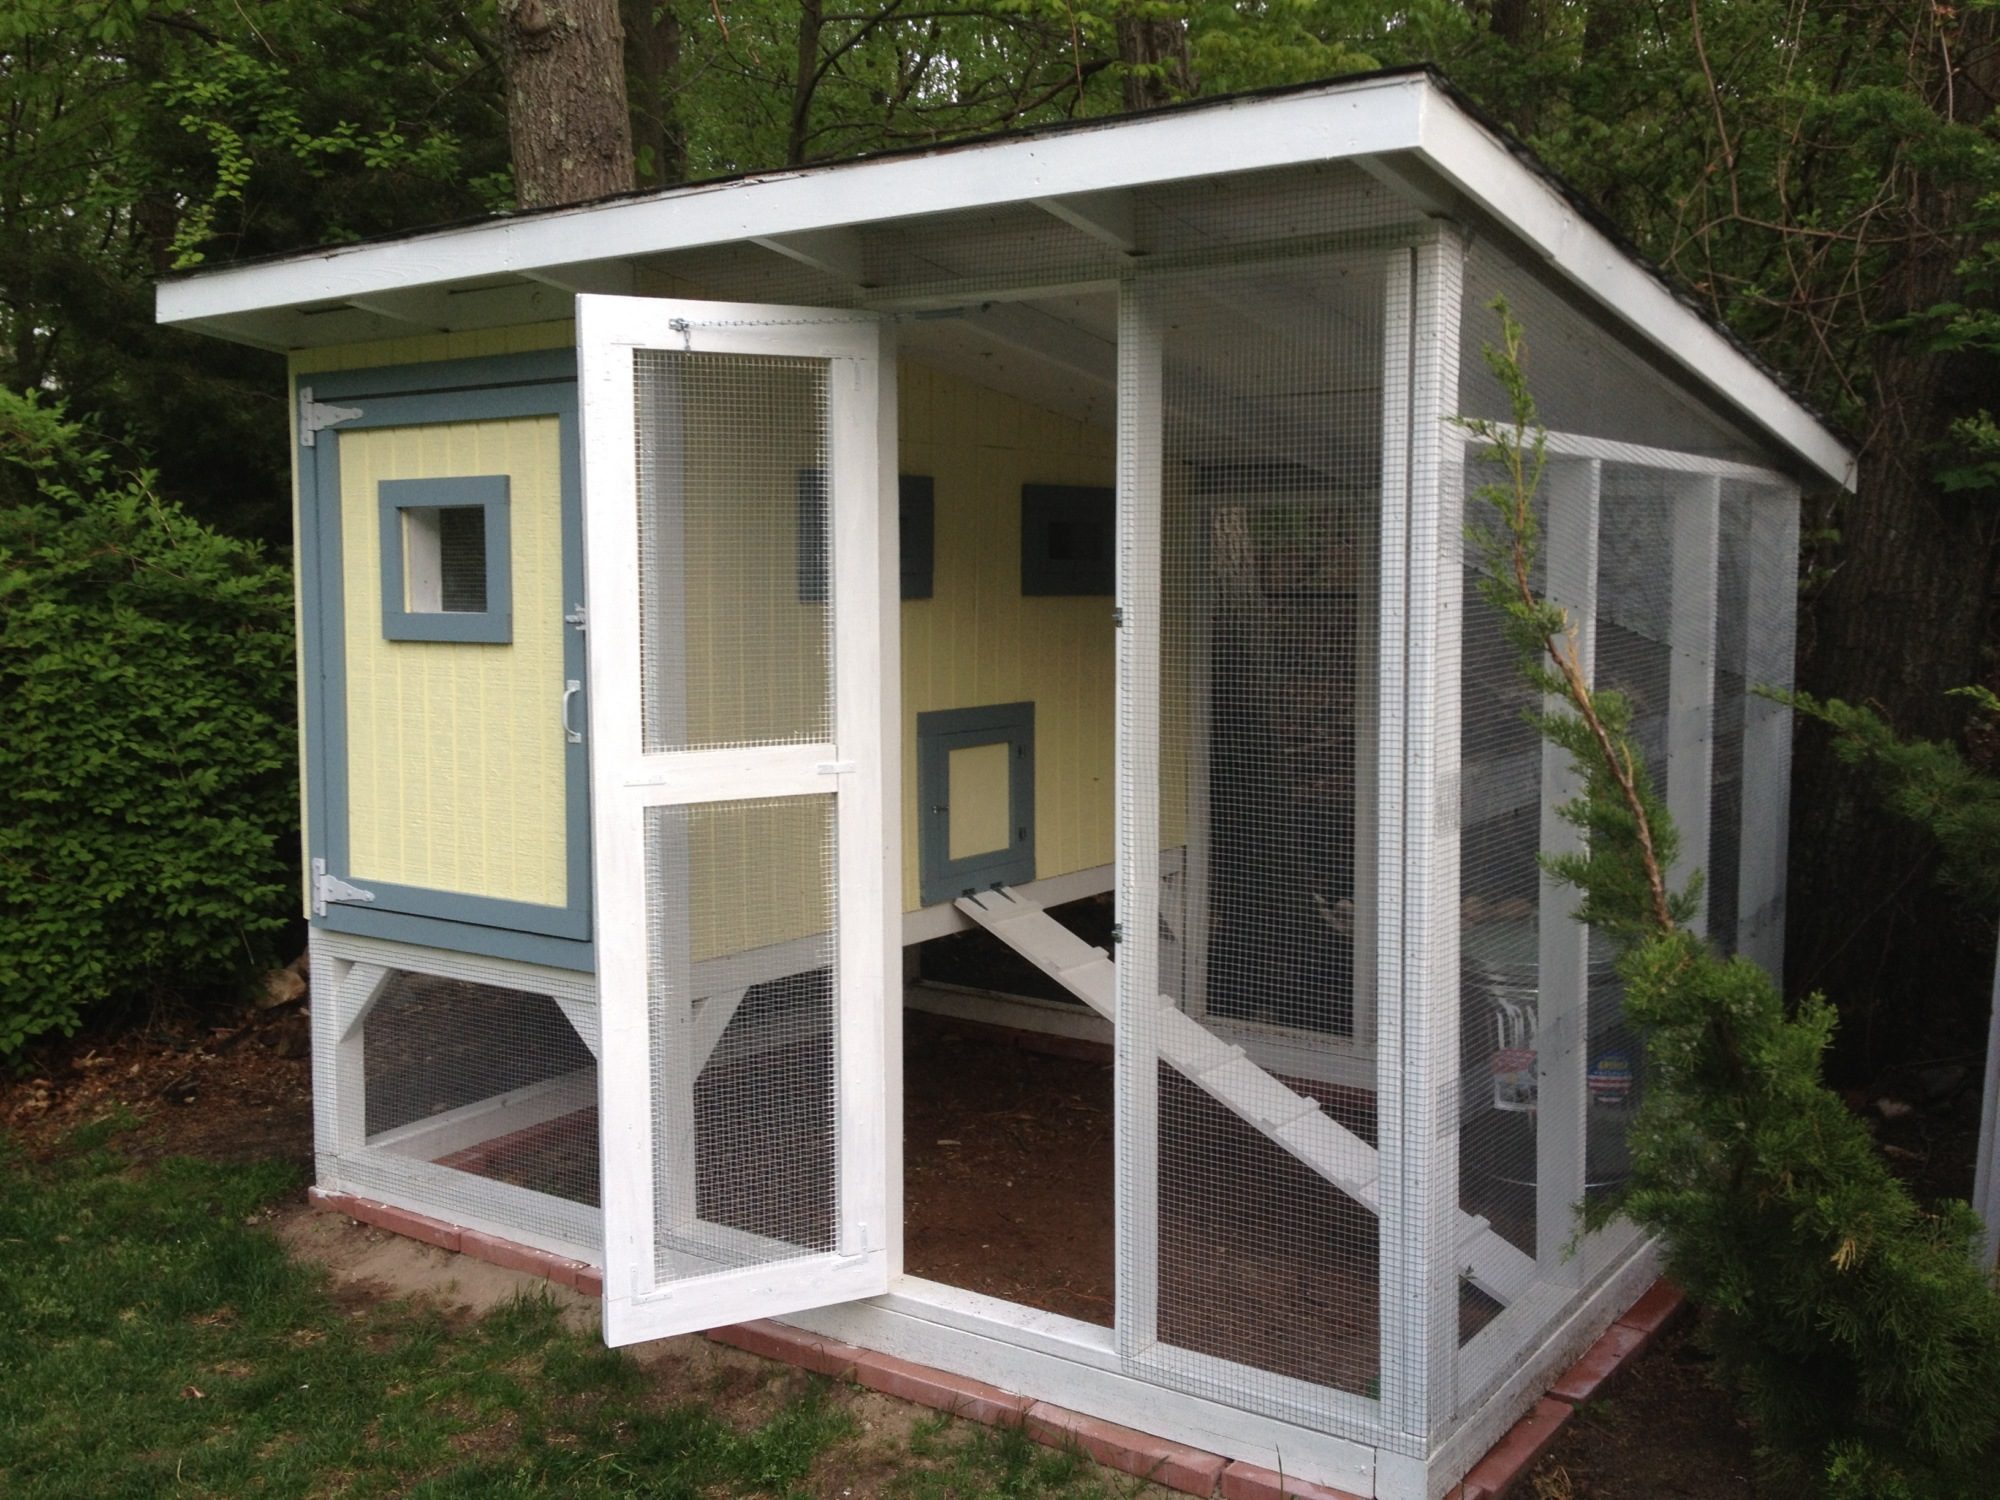
Lastly everything covered in hardware cloth and made a ramp for the chickens to enter their home.
I still plan on digging around the coop and burying some hardware cloth for further protection.
Will update when the coop gets occupied.....