The Maserati Chicken Coupe


From Chicken Coop

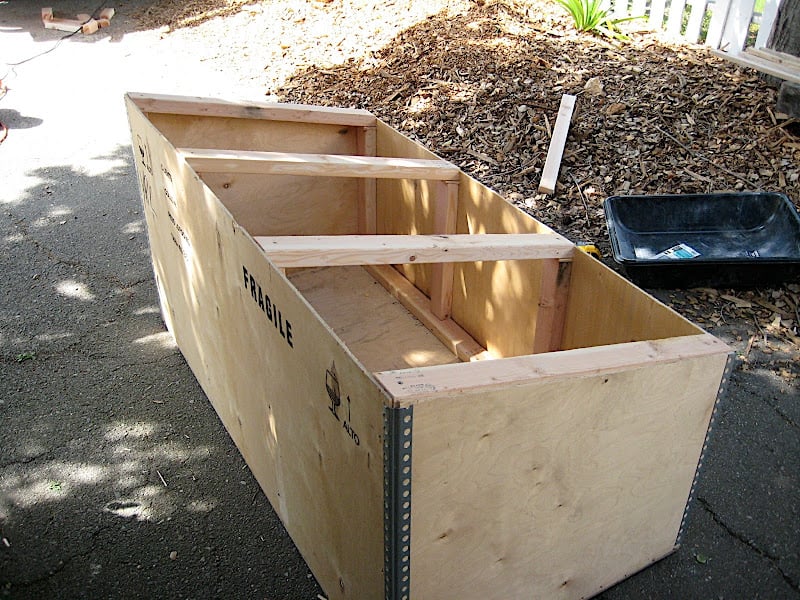
My yard is small, so I needed to make a small, functional coop that with space for 3-4 hens. I was going to build from scratch, but I love reusing other people's junk in my projects, so when cruising the 'Free' section of Craigslist I saw the following advertisement.... Free crates available at the Ferrari Maserati dealership in Redwood City.... I had to make my coop out of an old Ferrari or Maserati crate. And so off I went to grab one!
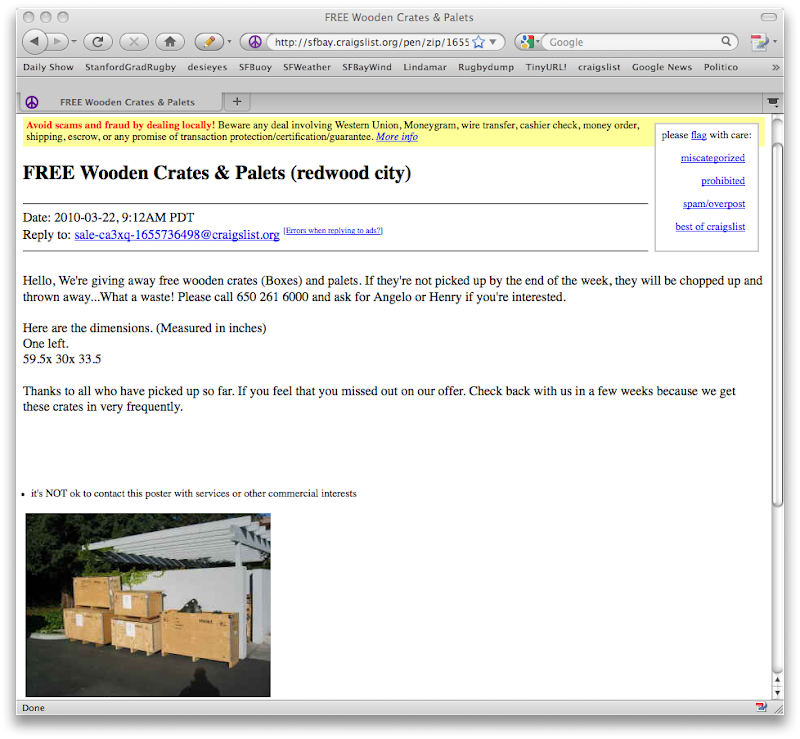
From Chicken Coop

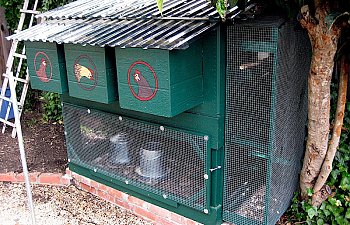
Now I went into this project with absolutely no plans. I had cruised the BYC site for ideas, but that's it. I knew that I'd need a level, rodent-proof foundation, so that was the first thing I made. Here's a photo of the ugly but level and correctly sized finished foundation. As you guessed, I am not a mason.

Our free crate, newly arrived and ready for ripping down.

The crate is cut down for a slant roof and reinforced.

Three nesting boxes are made.

The coop with nesting boxes attached, sitting on the newly painted green frame.

A close-up of the nesting boxes as attached. Holes I cut after tracing a dinner plate. Note the vents added to the back wall.

All painted green, like the trim on my old house.

I used tinted polycarbonate roofing, at ~$50 the only major expense during the project. This stuff is tough as nails and will allow some light into the coop during the day.

The (almost) finished product, primed and painted in some places, weatherproofed in others, with nesting boxes attached. Added a big front door to shovel out the deep litter every month or two, and a nice gray transparent polycarbonate roof to let in some light.

Fuzzy chicken butts, getting ready for some new digs.

The coop in it's home in the back yard..

The girls -- Red, Shoebottom, and Forsberg -- in their new home for the first time. Ultimately, I decided to skip the plastic tubs and use the deep litter method; I'll just clear out all the pine shavings every month or so.

They're getting big! Notice the white (soon to be green) stairwell on the side of the coop in teh background. Made from old door hinges and parts of a wooden crib my brother's girfriend found on the street.

Here's a view of the inside of the upper level. I'm using the deep litter method, obviously. A few old pieces of 1" bamboo from the yard work great as roosts for the girls..

This is a view of the upper door to the external staircase, the staircase itself, and a third roost I put outside after discovering that the girls really love roosting out here in the stairwell. At this point, the coop is pretty much totally modular. That is, the enclosed stairwell separates from the upper level of the coop which separates from the base. To make the external modular staircase removable, I used pairs of eye hooks, bending the eye of one sideways to make a sort of heavy-duty hanger; one pair can be seen in the top left corner of the photo. Works like a charm.

I also made a sort of storm window for the base front so that I can easily detach to access the inside of the lower level of the coop. Here is the detached storm window, which sits on a wooden lip on the base and clips in with safety hooks.

My friend Jamie did some fantastic chicken portraits on the fronts of each nesting box.