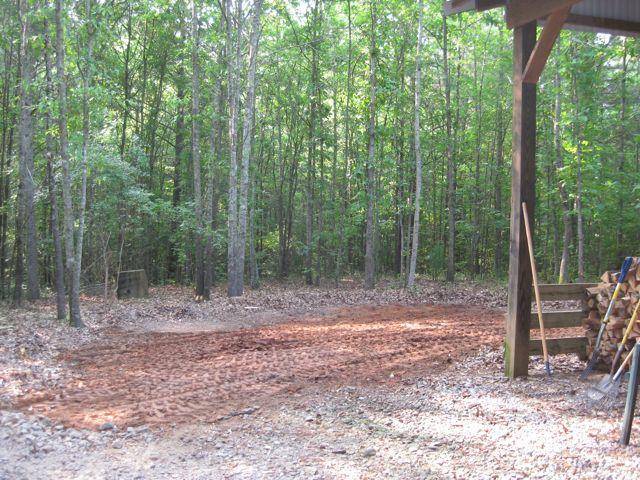
Over a year before we started construction on the coop I had been talking about wanting chickens on a ski vacation with my husband, dad, aunts and uncles. When I returned home from vacation my aunt sent me a book on raising chickens and an egg collecting basket. I read the book and kept mentioning it to my husband wondering if he would ever take me seriously. I'm a complete and total animal lover and I wanted more "pets". I guess after hearing me for so long he finally decided to begin construction behind our barn so we would have easy access to electricity and water. The majority of our 16 acres are wooded so the first step was tree removal. You can see here were we cleared a few trees and leveled the ground. We began in May of 2010.

The inside of the coop will be 5' X 4', and the covered outdoor run will be 5' x 12'.
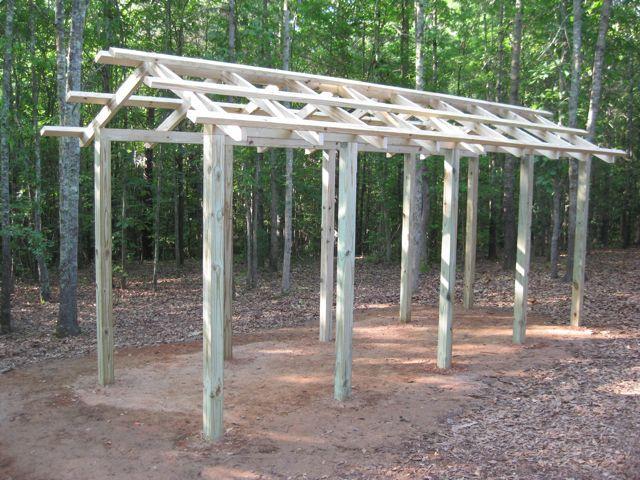
Here we go..slowly but surely. Used batter boards to keep it square.
Doing a 6/12 roof pitch with a 16 inch overhang to try and keep the girls dry. Which has turned out to be a great decision. Very little snow blows in the coop and when it rains the girls can be outside of the coop without getting wet. A blowing rain will get in but we put sand in the run and it dries very quickly.
You can see where the inside coop will go up off the ground.
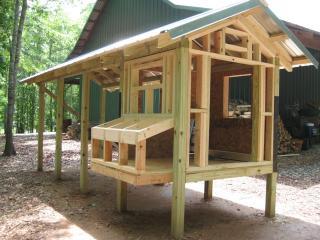
Here we've framed out the human access door, the 3 egg boxes which are roughly 12x12. and some vents.
We added some Cypress siding that we had leftover from building our house. We made sure to nail the hardware cloth under the siding for extra strength and better appearance. The windows were also leftover home building materials that we added hinges on top for additional ventilation.
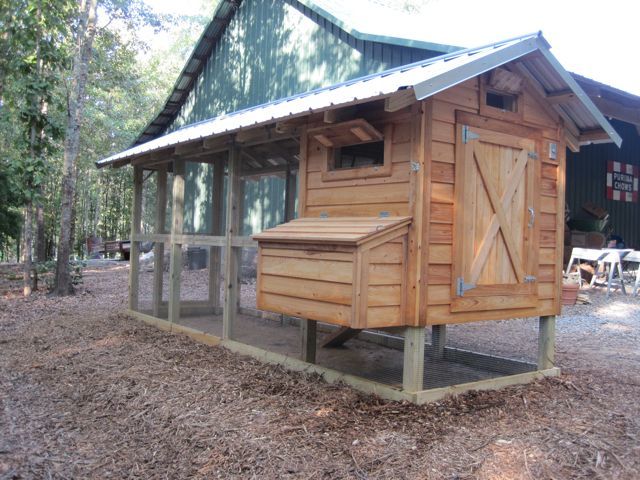
Here is the siding all completed with our custom human door built by my husband. Still have to add a lid on the egg box, but using a piece of plywood to keep it dry inside for the meantime.
Here is what the egg box looks like up close from the outside. This was one of the more interesting parts of this project trying to figure out how to make it functional for both humans and birds.
Chicken door and walk..
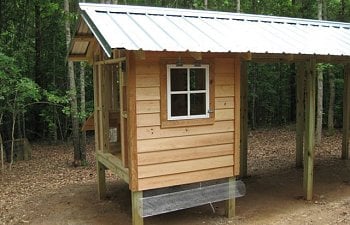
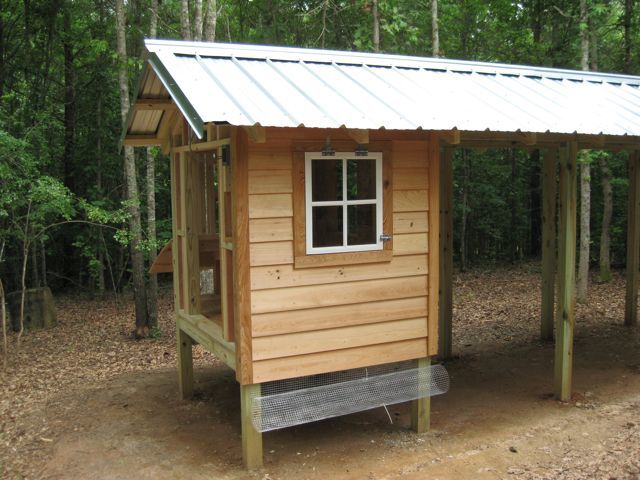
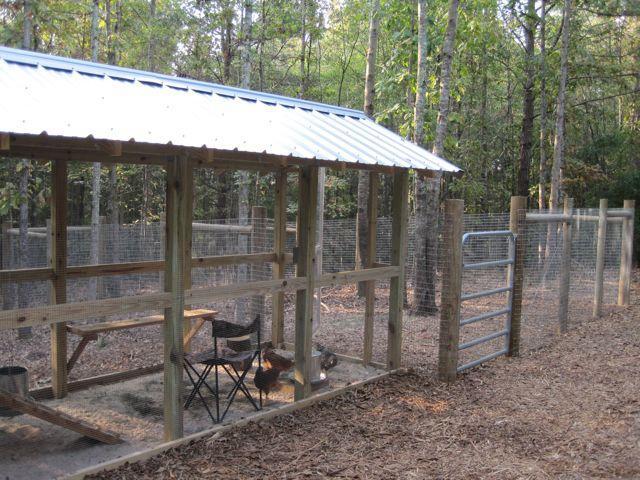
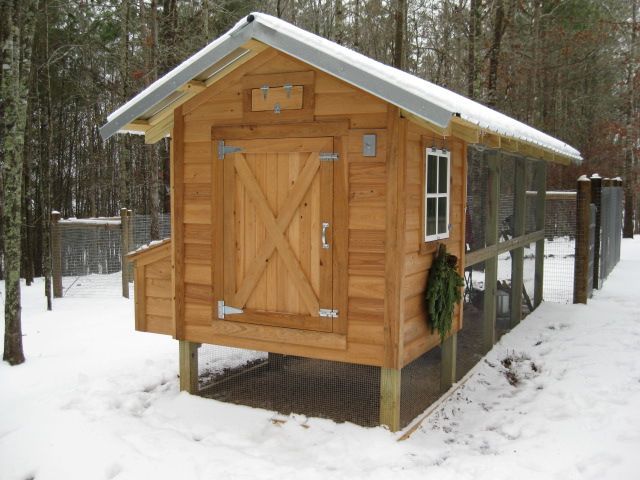
The front view all finished up with hardware 1/4" hardware cloth stapled to boards, and buried 12 inches in the ground.
From the back the vents all have 1/4" hardware cloth so nothing can get in.
What the coop looks like inside. We added power so we could have a light and outlets in the coop and in the run for lights, heat and fans. I highly recommend electricity if you can get it done.
The door has a pulley and a string that I can use to open/close the door from the outside to keep the drafts down at night. Because the coop is soo secure I don't worry about anything getting them. I just use it to control the temperature. Works like a charm!
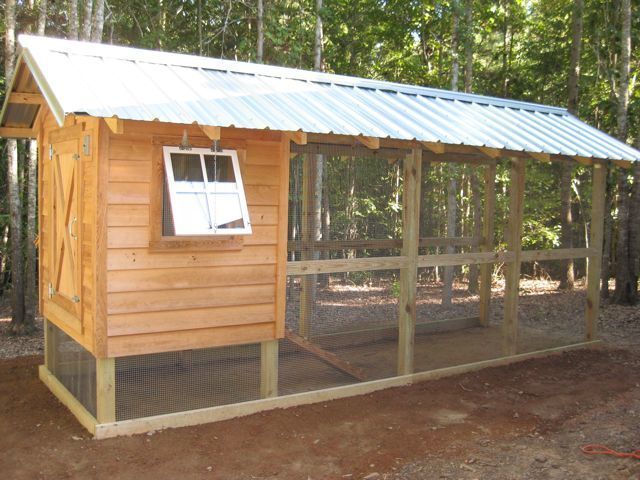
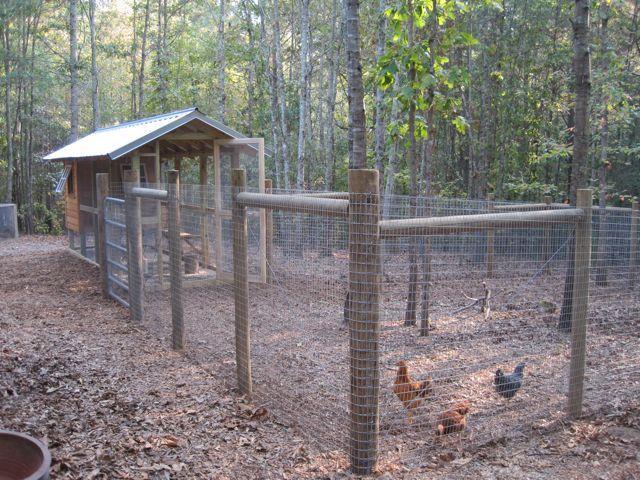
Well, as most chicken people will tell you just when we thought we were finished we ended up adding an additional uncovered outside run. We put sand in the run for easy cleaning (which has been a dream). The uncovered run is just natural ground and we only let them out when supervised.
All that space and only 3 girls! Notice the camp chair in the enclosed run. The girls love to sleep in this chair..We call it the chicken hammock.
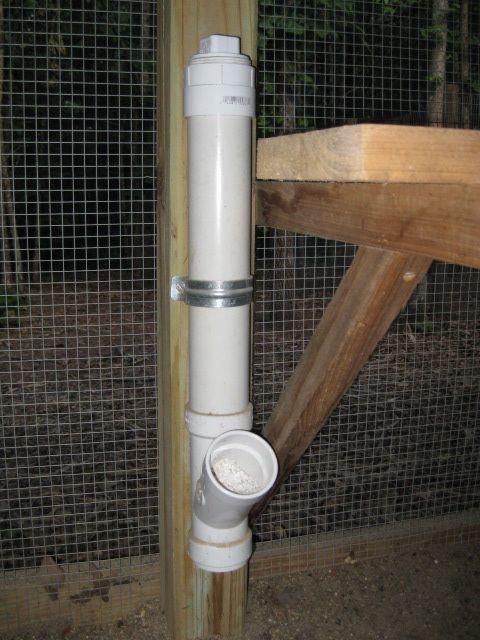
We also built a PVC Oyster Shell Feeder....
They love it out here!!!
Here are the egg boxes... So far one box is the favorite, but they have used all three on occasions.
We added a small feeder inside the coop for cold days and a little water just in case the girls get thirsty..but they honestly don't spend anytime inside unless they are sleeping or laying.
Here is our Eco Heater. Has a thermostat plug in to keep the coop between 38-50 degrees on cold days/nights. We carpeted the roost bar for the winter time to help keep their feet warm.
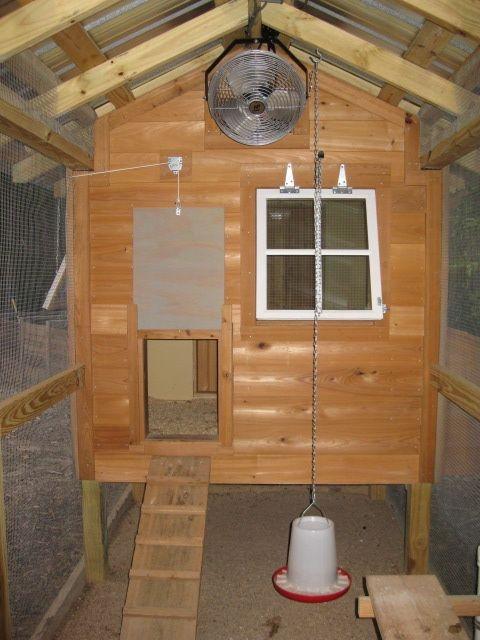
Then summer came and the heater was no longer needed...So we added a fan. This one can tilt either in the run or can be flipped over and will blow into the enclosed coop thru the vents...Not planned originally-but worked out great.
The eggs are here!!!!
A light dusting...
More snow!!
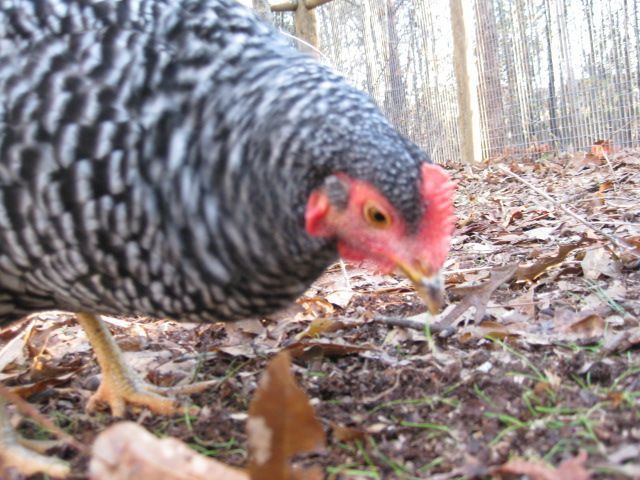
Big Bird!!!
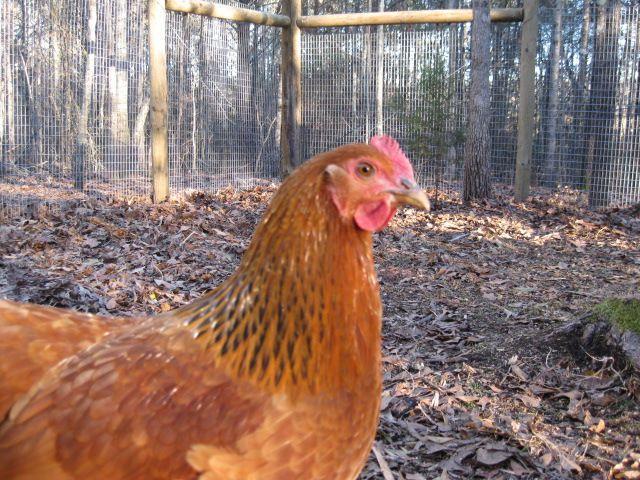
Red!
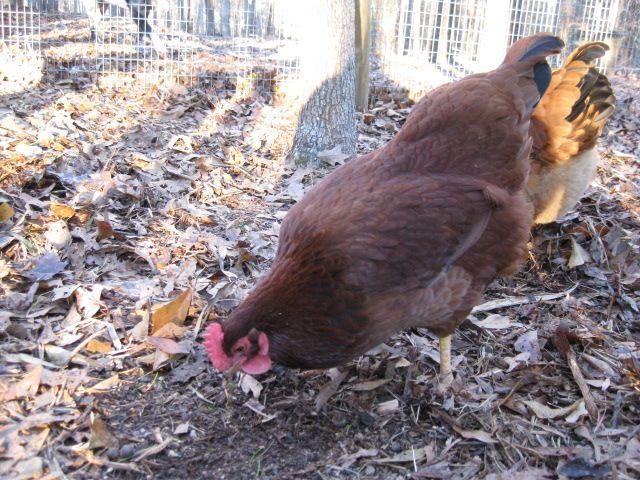
Betty!
That's our coop! Hope you enjoyed the tour!
The inside of the coop will be 5' X 4', and the covered outdoor run will be 5' x 12'.

Here we go..slowly but surely. Used batter boards to keep it square.
Doing a 6/12 roof pitch with a 16 inch overhang to try and keep the girls dry. Which has turned out to be a great decision. Very little snow blows in the coop and when it rains the girls can be outside of the coop without getting wet. A blowing rain will get in but we put sand in the run and it dries very quickly.

You can see where the inside coop will go up off the ground.
Here we've framed out the human access door, the 3 egg boxes which are roughly 12x12. and some vents.
We added some Cypress siding that we had leftover from building our house. We made sure to nail the hardware cloth under the siding for extra strength and better appearance. The windows were also leftover home building materials that we added hinges on top for additional ventilation.
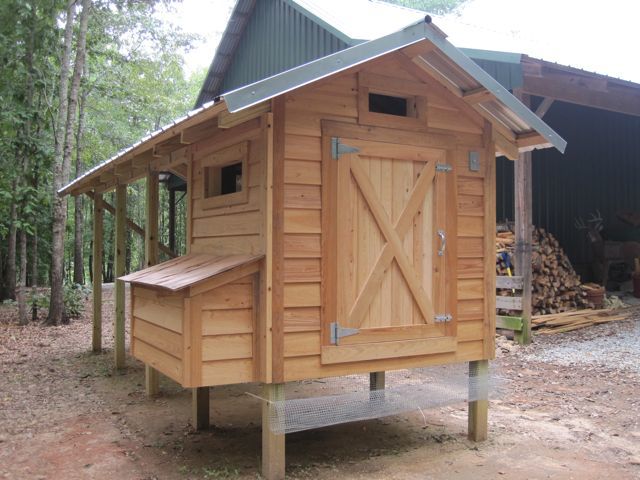
Here is the siding all completed with our custom human door built by my husband. Still have to add a lid on the egg box, but using a piece of plywood to keep it dry inside for the meantime.

Here is what the egg box looks like up close from the outside. This was one of the more interesting parts of this project trying to figure out how to make it functional for both humans and birds.
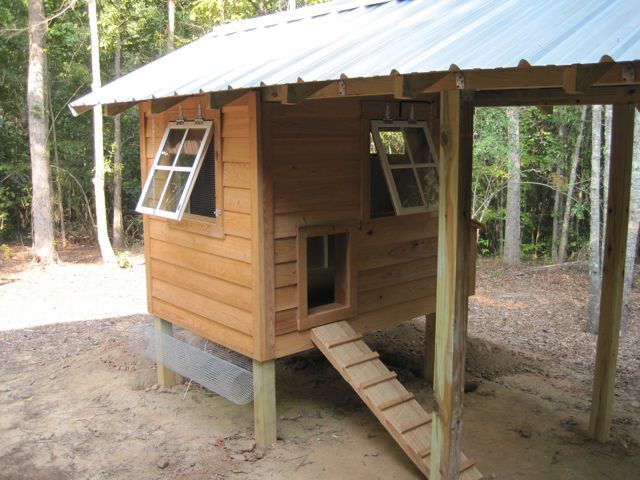
Chicken door and walk..
The front view all finished up with hardware 1/4" hardware cloth stapled to boards, and buried 12 inches in the ground.
From the back the vents all have 1/4" hardware cloth so nothing can get in.
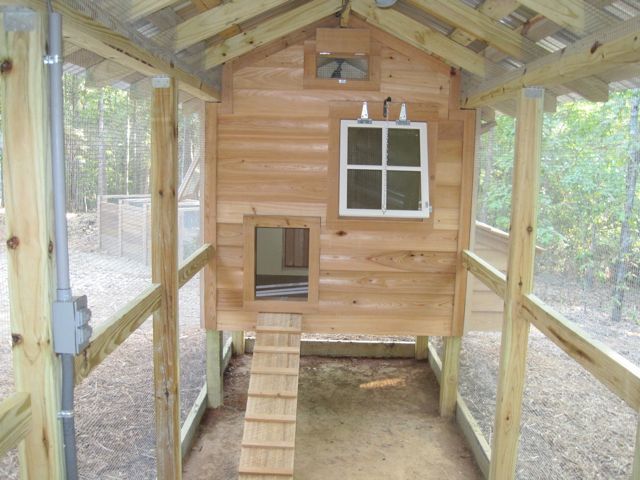
What the coop looks like inside. We added power so we could have a light and outlets in the coop and in the run for lights, heat and fans. I highly recommend electricity if you can get it done.
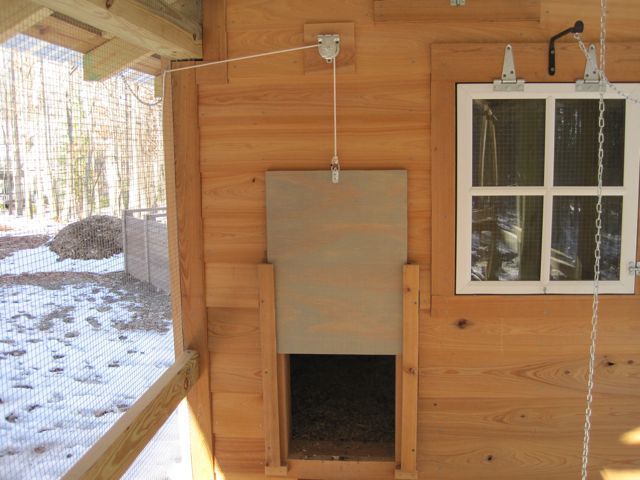
The door has a pulley and a string that I can use to open/close the door from the outside to keep the drafts down at night. Because the coop is soo secure I don't worry about anything getting them. I just use it to control the temperature. Works like a charm!
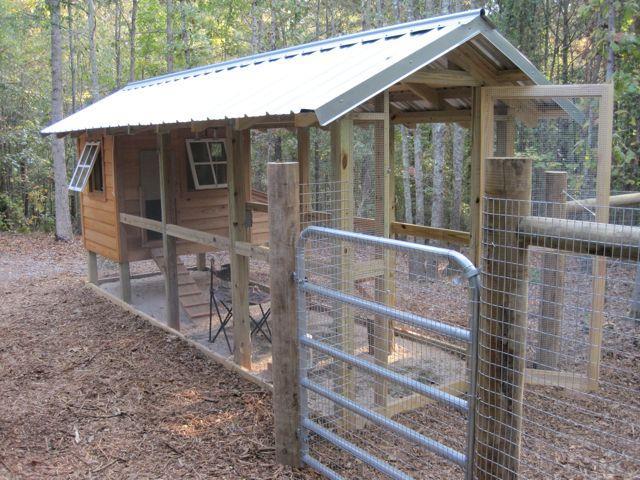
Well, as most chicken people will tell you just when we thought we were finished we ended up adding an additional uncovered outside run. We put sand in the run for easy cleaning (which has been a dream). The uncovered run is just natural ground and we only let them out when supervised.
All that space and only 3 girls! Notice the camp chair in the enclosed run. The girls love to sleep in this chair..We call it the chicken hammock.
We also built a PVC Oyster Shell Feeder....
They love it out here!!!
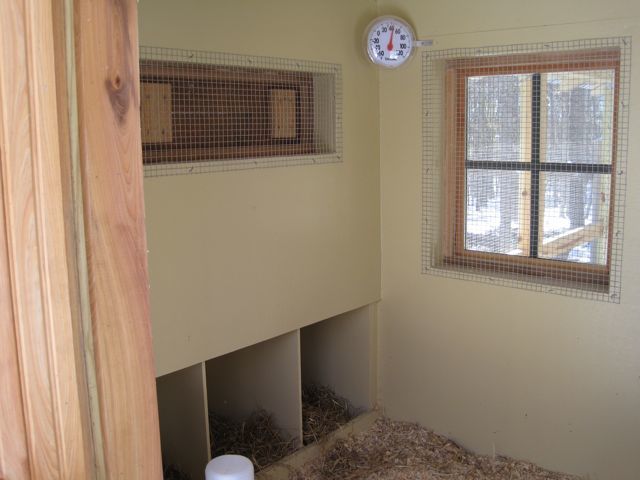
Here are the egg boxes... So far one box is the favorite, but they have used all three on occasions.
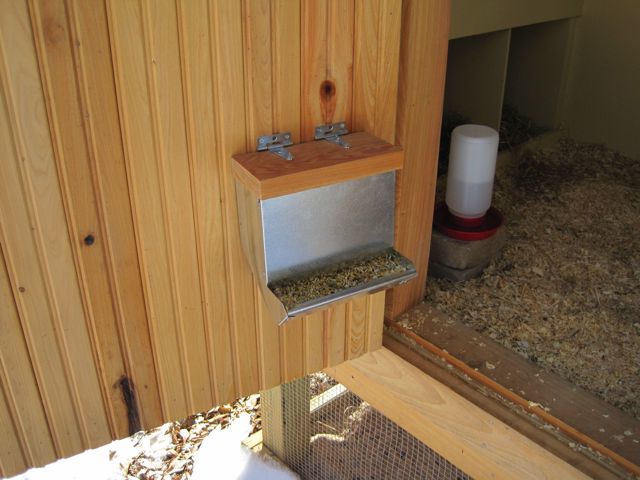
We added a small feeder inside the coop for cold days and a little water just in case the girls get thirsty..but they honestly don't spend anytime inside unless they are sleeping or laying.
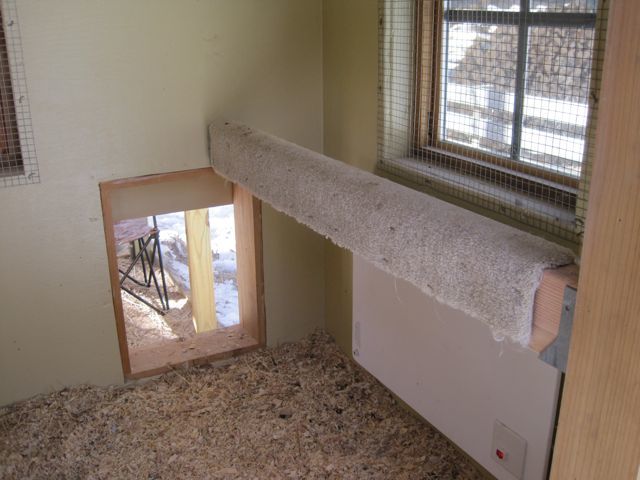
Here is our Eco Heater. Has a thermostat plug in to keep the coop between 38-50 degrees on cold days/nights. We carpeted the roost bar for the winter time to help keep their feet warm.
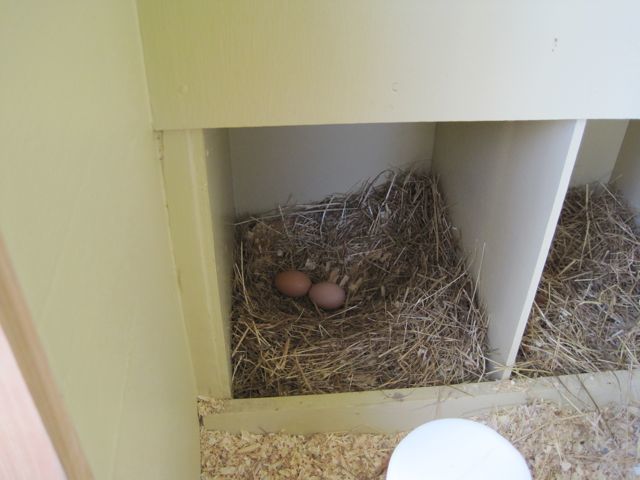
The eggs are here!!!!

A light dusting...
More snow!!
Big Bird!!!
Red!
Betty!
That's our coop! Hope you enjoyed the tour!