Open Air Coop
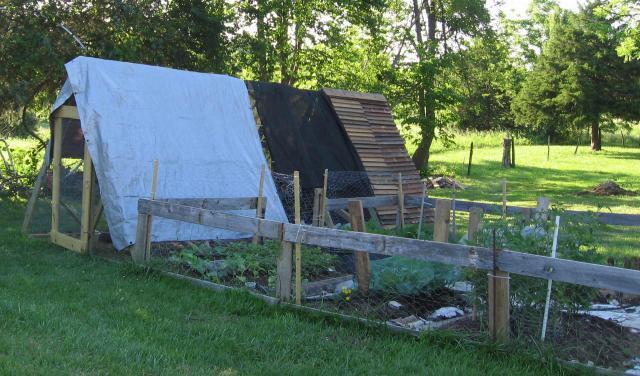
We wanted to build a chicken coop for our 12 chickens (6 Brown Leghorns, 5 White Leghorn and 1 California White) that did not cost a fortune or would not take us a month to build. We had an open air coop when we lived near Tampa, FL, but we were not sure chickens would survive in southwest Missouri without being closed in. After reading success stories of open air coops in Canada, we were sold on the idea. At first, we wanted to surround our garden with a chicken run, but due to the cost of the wire fencing, we decided to build an 18' x 8' A-Frame Coop/Run.

Here's our garden. Our coop will be built against the left of the garden. The ground is not level, but we can compensate for any problems that creates. Water does not pool up here, so it should be an ideal space. The brown shed in the background is not our property. Our property line goes to the tree just beyond the mulch pile.
This is the first coop where the chicks lived after they grew out of their cardboard box. We got this from a friend that had rabbits in it. We kept this inside our garage with plastic on the bottom until the weather warmed. Our dog loves watching the chicks!

[/LEFT]
We then moved them to a temporary run outside. This space is 12'x6' and is only 3' high. We'll keep this one for our next group of chicks!
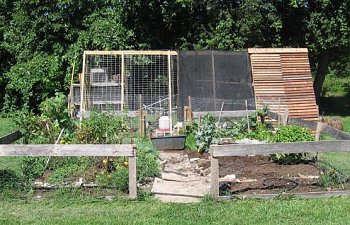
Our Open Air coop is an 18' long A-Frame. Each side of the coop is 8', making the inside height over 6' high. The north end of the coop is enclosed on 3 sides. There will be 9' of roost space under the shelter. Food and water are in the covered section, away from the roosts, for obvious reasons! (Click on the graphic for a larger image.)
First, we laid out the base of the coop. We used 4 8' pressure treated 2x4s and 2 10' pressure treated 2x4's to get a rectangle that is 18'x8'. We used metal nail plates we had from another project to connect the boards.
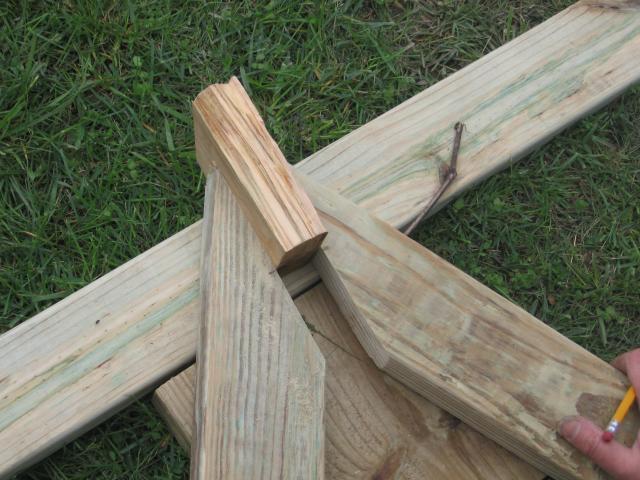
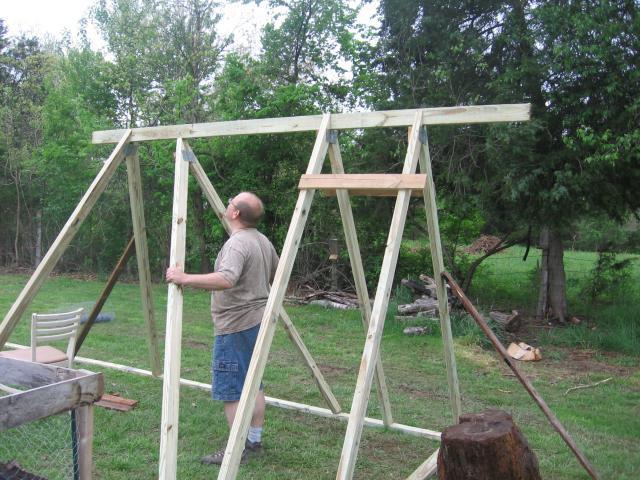
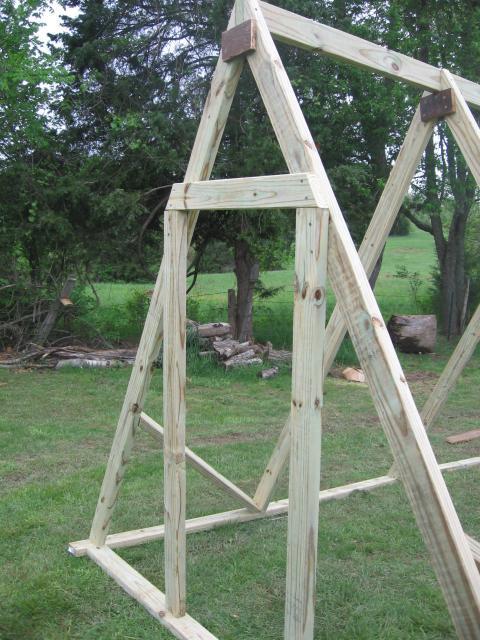
Next, we built the 7 "trusses." We cut the top angle at 60 degrees and the bottom angle at 30 degrees. We used scrap pieces of wood to secure the 2 wall supports together. We screwed the trusses into the base and then added the top frame. (The other boards in this picture are just for support.) As we were adding each truss, we used scrap wood to support the frame.
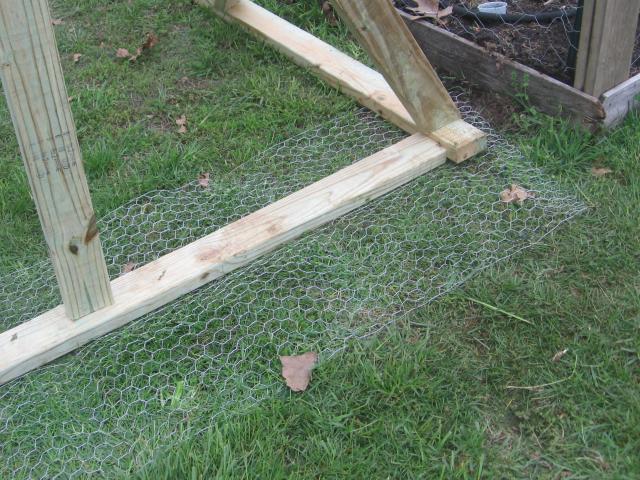
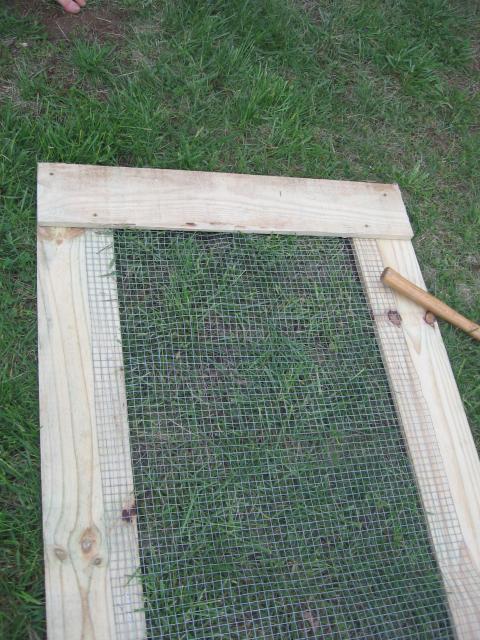
We are not too worried about something digging under the coop as our ground is full of rocks - that's why we have a raised bed garden. We did put 2' wide chicken wire under the frame of the coop to prevent critters from digging under and the chickens from digging out.
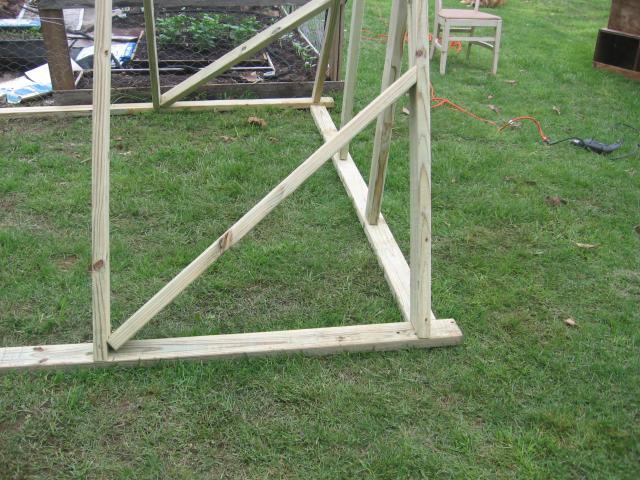
After the framing was complete, the coop was not as sturdy as we wanted it to be, probably because the base is not level. We used left over 2x4s to add diagonal supports to 4 of the trusses.
We framed out the door that will be on the south side of the A-frame. Because the base was not level, this proved to be harder than we expected. The top and sides are level and plum, but the bottom is not level.
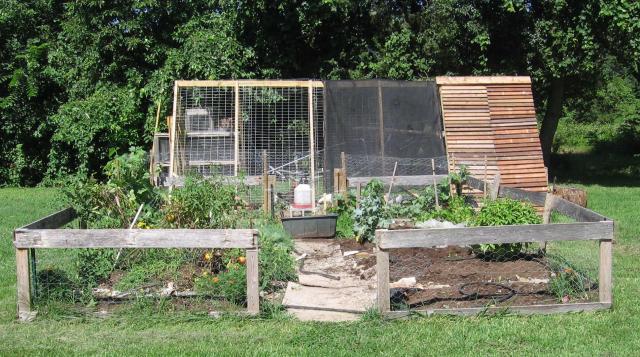
After the wood frame was finished, we used 4' high 1" chicken wire to cover the bottom portion of the run (anything that was not going to be covered in wood). We then added 2x4 wire cattle wire over the frame. We had enough wire for three sections (beginning on the left side). We used a second layer of 1" chicken wire for the last section. This section was later covered with screen we got from a trampoline to add more shade to the area. This is the view from our garden.
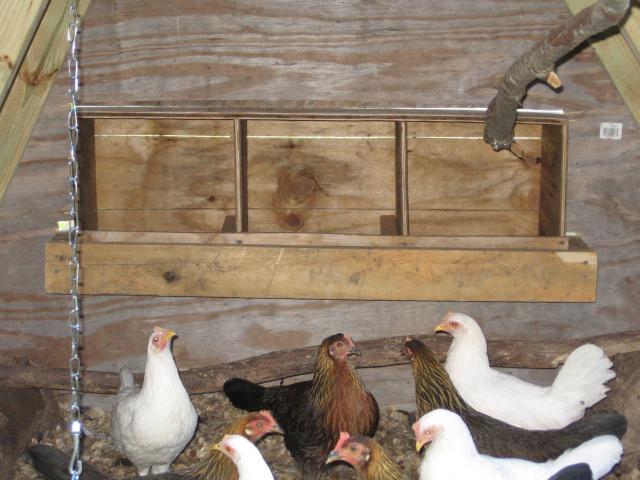
We used plywood to cover the north end of the coop. We'll cut holes in that wall to hang our nesting boxes, but we don't need them for another few months. We want the chickens to get used to their roosts before we add the nesting boxes.
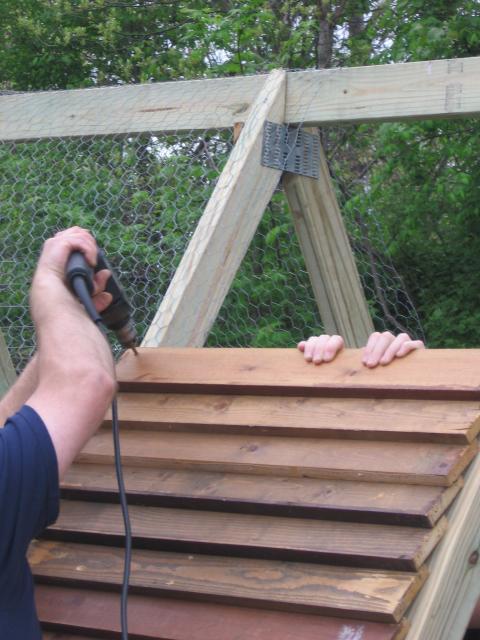
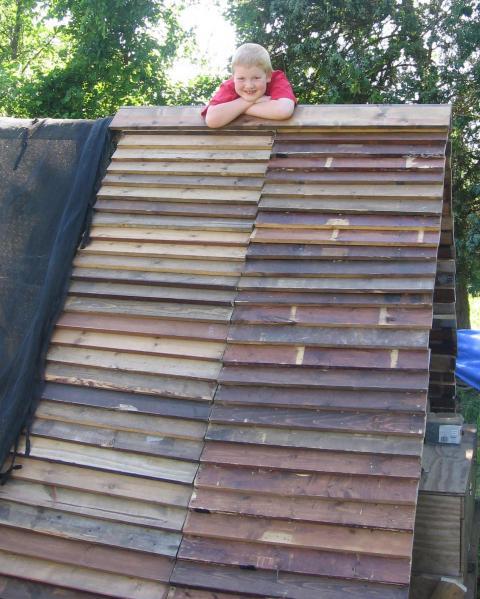
We were given scrap wood from someone that was rebuilding a room full of bookshelves. We used the shelves for the walls of our coop. We pre-drilled the wood and screwed it into the frame. The different colors and types of wood add character. This is not pressure treated wood, so it will probably rot in a few years. We plan to paint it this summer to help it last a little longer. The picture on the right only shows one row of "shingles." We did not attach the first row correctly, so we had to add another 2x4 to give the 2nd row of shingles a place to be attached.
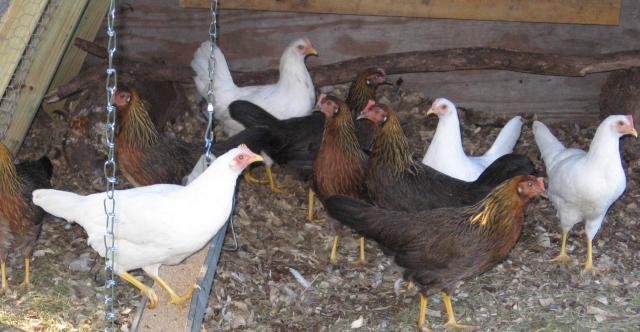
Inside, we screwed 2x4s along the back wall and between the truss that the black netting is attached. Between these, we attached tree branches for their roosts. The roosts are about 8 inches higher than where their nesting boxes will be. The chickens could not get to their roosts the first night, so we lowered the branches and rested them on some old logs inside the coop. We used pine shavings and peat moss for the litter. We'll add some corn silage to the litter to add variety and supplement their feed.
The door did pose more of a problem than we had hoped. We used pressure treated fence planks to frame the door around hardware cloth. The door was attached with some old hinges and secured with bungie cords for now. I wanted the door to open in, but that thought did not come up until after the frame was built, so we're stuck with a door that open out. Because the coop is not level, the door did not hang well. We had to add some scrap pieces of wood to make sure the door closed securely.
We had to leave the coop as-is for a few weeks and the chickens seem to really like it. We spent another day and a half (making it a total of 3 1/2 days) working on the coop this weekend. We finished the shingles on the roof and installed the nesting boxes we got from a friend. We still have to install the black screen on the walls. We thought we'd only put the screen on a 3' section, but the sun is so bright most of the day, the chickens seem to pile up in the shade. We put up a temporary tarp for added shade. We're going to install the screen on a frame and cover a much larger area to make the chickens more comfortable.
We wanted to build a chicken coop for our 12 chickens (6 Brown Leghorns, 5 White Leghorn and 1 California White) that did not cost a fortune or would not take us a month to build. We had an open air coop when we lived near Tampa, FL, but we were not sure chickens would survive in southwest Missouri without being closed in. After reading success stories of open air coops in Canada, we were sold on the idea. At first, we wanted to surround our garden with a chicken run, but due to the cost of the wire fencing, we decided to build an 18' x 8' A-Frame Coop/Run.
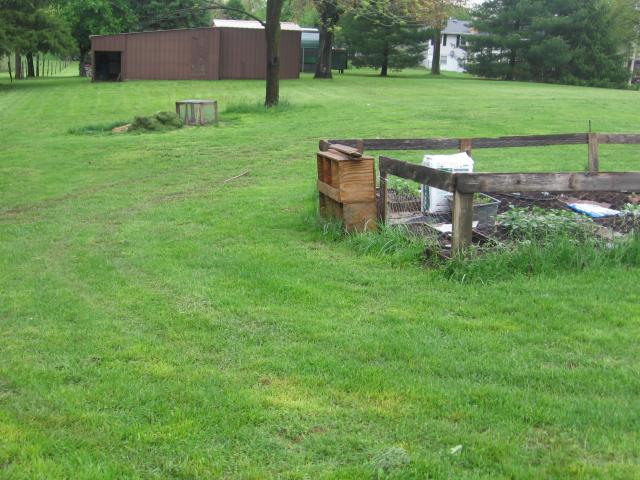
Here's our garden. Our coop will be built against the left of the garden. The ground is not level, but we can compensate for any problems that creates. Water does not pool up here, so it should be an ideal space. The brown shed in the background is not our property. Our property line goes to the tree just beyond the mulch pile.
This is the first coop where the chicks lived after they grew out of their cardboard box. We got this from a friend that had rabbits in it. We kept this inside our garage with plastic on the bottom until the weather warmed. Our dog loves watching the chicks!


Our Open Air coop is an 18' long A-Frame. Each side of the coop is 8', making the inside height over 6' high. The north end of the coop is enclosed on 3 sides. There will be 9' of roost space under the shelter. Food and water are in the covered section, away from the roosts, for obvious reasons! (Click on the graphic for a larger image.)
First, we laid out the base of the coop. We used 4 8' pressure treated 2x4s and 2 10' pressure treated 2x4's to get a rectangle that is 18'x8'. We used metal nail plates we had from another project to connect the boards.
Next, we built the 7 "trusses." We cut the top angle at 60 degrees and the bottom angle at 30 degrees. We used scrap pieces of wood to secure the 2 wall supports together. We screwed the trusses into the base and then added the top frame. (The other boards in this picture are just for support.) As we were adding each truss, we used scrap wood to support the frame.
After the framing was complete, the coop was not as sturdy as we wanted it to be, probably because the base is not level. We used left over 2x4s to add diagonal supports to 4 of the trusses.
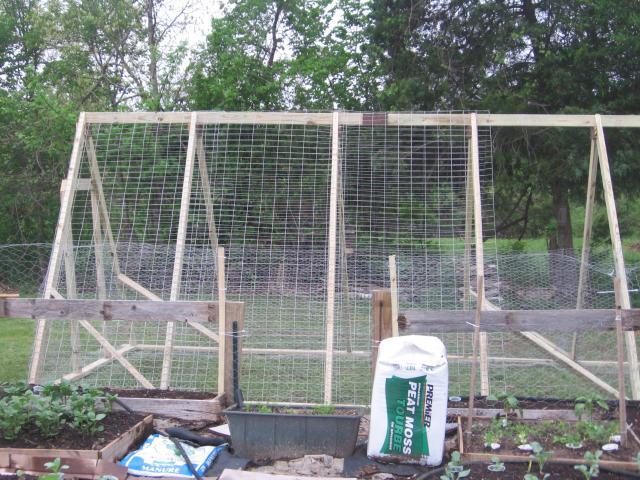
After the wood frame was finished, we used 4' high 1" chicken wire to cover the bottom portion of the run (anything that was not going to be covered in wood). We then added 2x4 wire cattle wire over the frame. We had enough wire for three sections (beginning on the left side). We used a second layer of 1" chicken wire for the last section. This section was later covered with screen we got from a trampoline to add more shade to the area. This is the view from our garden.
We used plywood to cover the north end of the coop. We'll cut holes in that wall to hang our nesting boxes, but we don't need them for another few months. We want the chickens to get used to their roosts before we add the nesting boxes.

Inside, we screwed 2x4s along the back wall and between the truss that the black netting is attached. Between these, we attached tree branches for their roosts. The roosts are about 8 inches higher than where their nesting boxes will be. The chickens could not get to their roosts the first night, so we lowered the branches and rested them on some old logs inside the coop. We used pine shavings and peat moss for the litter. We'll add some corn silage to the litter to add variety and supplement their feed.
We had to leave the coop as-is for a few weeks and the chickens seem to really like it. We spent another day and a half (making it a total of 3 1/2 days) working on the coop this weekend. We finished the shingles on the roof and installed the nesting boxes we got from a friend. We still have to install the black screen on the walls. We thought we'd only put the screen on a 3' section, but the sun is so bright most of the day, the chickens seem to pile up in the shade. We put up a temporary tarp for added shade. We're going to install the screen on a frame and cover a much larger area to make the chickens more comfortable.