Since the kids and I have so much time at home right now, and the demand for locally grown meat and eggs is sky high, we decided to purchase 35 chicks and ducklings. The kids are using it as a homeschooling "project" for math, science and biology. We don't have internet to support online learning, so we have to do "paper packets" and are encouraged to think outside the box and find other ways to keep the kids minds engaged.
Problem #1 was housing 35 little ones once they outgrew their 100-gallon livestock water tank brooders. Compounding that problem was a lack of funds due to parental layoffs.
Solution: Build a hoop coop with minimal purchases, sourcing 99% of the items from around the farm. The only purchases for this coop were three (3) pressure treated 2x4x8s and four (4) pressure treated 4x4x8s. All other items were scavenged from around the property, often destroying other structures to gain useable parts. The boys gained experience handling "destruction" tools they hadn't used in the past!


4x4x8 frame attached at corners using two 6" TimberLoks and one 8" GRK at each corner. Overkill for some, but we will be dragging this around and need the frame to hold together. Cattle panels overlapped in center to give more stability, attached with barbed fence staples. Zip tying the panels together makes it easier to push them into an arch and stay together as you attach them to the frame. We are a bit spoiled because we can set the frame against the neck of our gooseneck trailer and "push" the arch up while on the trailer. We ratchet strap the panels to hold the proper "arch" and then we can walk around the frame to staple it down. We had already assembled the frame and arch and moved it off the trailer when this photo was taken.


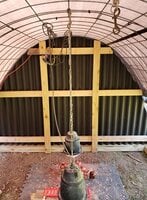
Simple framing with 2x4s to attach Ondura panels we had leftover from another project. We used a skill saw to cut the 2x4 ends to match the angle of the hoop arch. Ondura panels attached with red roofing screws to match and stay watertight.


Framing for the front. This is where I used the three pressure treated 2x4s, as the door "frame" will be fully exposed to the weather. Angle cuts were tricky, lots of trial and error. The structure is overall quite square, but it's not perfection! Next picture series shows why all the "extra" wood is present outside the door frame.


We tore apart several pallets that were laying around to use as the front wall. Summer heat is a bigger issue here than winter cold, so slats were spaced to allow lots of airflow and still provide shade. Skill saw used for angle cuts. Lots of tracing with a Sharpie to get the slat ends to match the arch. I had quite a variety of colored and aged wood from the pallets, so I tried to achieve an "hombre" look to the front. Bonus was the red pallet complimenting the Ondura panels. I am sure the chickens will appreciate it! LOL. Pictures are my helpers with this project!


The door is simply a section of cattle panel. Hinged on the side with the closer spaced wires, situated vertically. Hinges are just conduit straps, offset to hold the door "tighter". It stays perfectly vertical, it doesn't have any wiggle to it.


Door was lined on the outside with 1x1 hardware cloth and then 2x4 welded wire over that. All held by zip ties. I will eventually "sew" the hardware cloth and welded wire on using lightweight wire, but the zip ties are priceless for holding it in place for now. Door is locked shut, top and bottom, with a hinge pin. It is held TIGHT against the frame, no way a predator can pull it out and squeeze behind it. I mounted a caribiner inside the coop to hold the door shut behind me when I am inside. My kids can reach thru and access the drop pins from inside the coop, but my adult hands can't manuever like that!


Sides are lined with 1x1 hardware cloth and 2x4 mesh, in the same manner as the door. I intend to replace zip ties here, too.


I used an 8x10 brown/silver tarp permanently attached over the top as a "roof". It extends over the Ondura panels in the back, and is screwed down to the Ondura framing, making the backside weather proof. I cut a second 8x10 tarp in half to make the roll-up sides. The cut end of the tarp is screwed onto the 2x4 using fender washers thru the roof tarp grommets. My husband cut and bent a wire coat hanger into a crooked S shape to make the hook rests for the tarp roll. I can detach the hooks and reattach them at every horizontal rung of the cattle panel hoop. Infinite settings. When fully down, there is plenty of excess tarp on the ground that I simply lay a 2x10x8 on top of to keep it tensioned so it keeps out drafts and doesn't flap in the wind. The grommet end of the roll down tarp is zip tied to an 8' piece of 2" conduit.


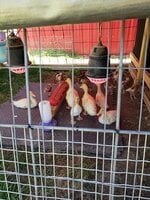
The finished coop with it's new residents. I do have a proper duck waterer in the opposite corner, they just prefer to play in the hanging waterer, hence the black rubber tub to keep them from making a massive mud hole!
Problem #1 was housing 35 little ones once they outgrew their 100-gallon livestock water tank brooders. Compounding that problem was a lack of funds due to parental layoffs.
Solution: Build a hoop coop with minimal purchases, sourcing 99% of the items from around the farm. The only purchases for this coop were three (3) pressure treated 2x4x8s and four (4) pressure treated 4x4x8s. All other items were scavenged from around the property, often destroying other structures to gain useable parts. The boys gained experience handling "destruction" tools they hadn't used in the past!
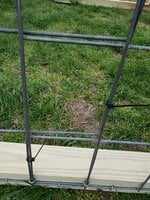
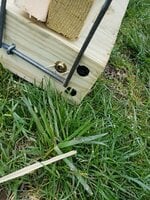
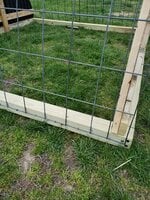
4x4x8 frame attached at corners using two 6" TimberLoks and one 8" GRK at each corner. Overkill for some, but we will be dragging this around and need the frame to hold together. Cattle panels overlapped in center to give more stability, attached with barbed fence staples. Zip tying the panels together makes it easier to push them into an arch and stay together as you attach them to the frame. We are a bit spoiled because we can set the frame against the neck of our gooseneck trailer and "push" the arch up while on the trailer. We ratchet strap the panels to hold the proper "arch" and then we can walk around the frame to staple it down. We had already assembled the frame and arch and moved it off the trailer when this photo was taken.
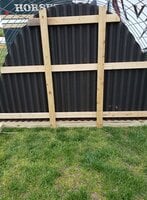
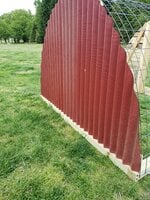
Simple framing with 2x4s to attach Ondura panels we had leftover from another project. We used a skill saw to cut the 2x4 ends to match the angle of the hoop arch. Ondura panels attached with red roofing screws to match and stay watertight.
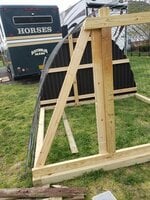
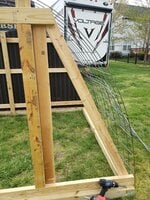
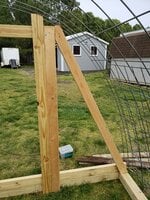
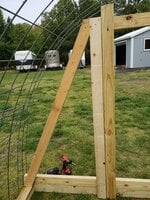
Framing for the front. This is where I used the three pressure treated 2x4s, as the door "frame" will be fully exposed to the weather. Angle cuts were tricky, lots of trial and error. The structure is overall quite square, but it's not perfection! Next picture series shows why all the "extra" wood is present outside the door frame.
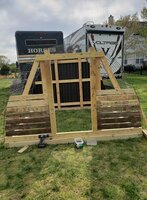
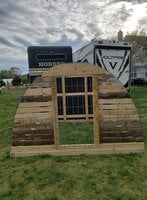
We tore apart several pallets that were laying around to use as the front wall. Summer heat is a bigger issue here than winter cold, so slats were spaced to allow lots of airflow and still provide shade. Skill saw used for angle cuts. Lots of tracing with a Sharpie to get the slat ends to match the arch. I had quite a variety of colored and aged wood from the pallets, so I tried to achieve an "hombre" look to the front. Bonus was the red pallet complimenting the Ondura panels. I am sure the chickens will appreciate it! LOL. Pictures are my helpers with this project!
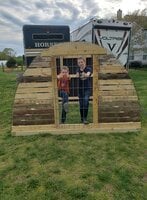
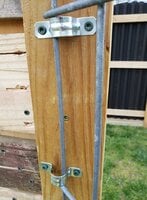
The door is simply a section of cattle panel. Hinged on the side with the closer spaced wires, situated vertically. Hinges are just conduit straps, offset to hold the door "tighter". It stays perfectly vertical, it doesn't have any wiggle to it.
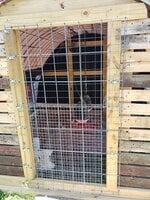
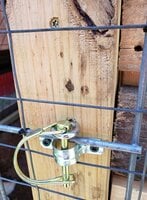
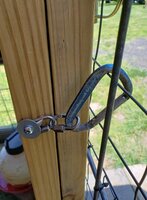
Door was lined on the outside with 1x1 hardware cloth and then 2x4 welded wire over that. All held by zip ties. I will eventually "sew" the hardware cloth and welded wire on using lightweight wire, but the zip ties are priceless for holding it in place for now. Door is locked shut, top and bottom, with a hinge pin. It is held TIGHT against the frame, no way a predator can pull it out and squeeze behind it. I mounted a caribiner inside the coop to hold the door shut behind me when I am inside. My kids can reach thru and access the drop pins from inside the coop, but my adult hands can't manuever like that!
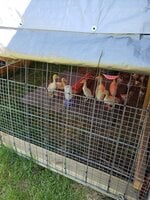
Sides are lined with 1x1 hardware cloth and 2x4 mesh, in the same manner as the door. I intend to replace zip ties here, too.
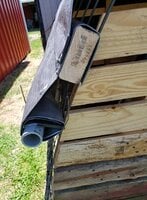
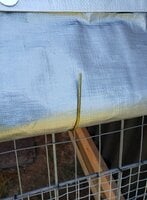
I used an 8x10 brown/silver tarp permanently attached over the top as a "roof". It extends over the Ondura panels in the back, and is screwed down to the Ondura framing, making the backside weather proof. I cut a second 8x10 tarp in half to make the roll-up sides. The cut end of the tarp is screwed onto the 2x4 using fender washers thru the roof tarp grommets. My husband cut and bent a wire coat hanger into a crooked S shape to make the hook rests for the tarp roll. I can detach the hooks and reattach them at every horizontal rung of the cattle panel hoop. Infinite settings. When fully down, there is plenty of excess tarp on the ground that I simply lay a 2x10x8 on top of to keep it tensioned so it keeps out drafts and doesn't flap in the wind. The grommet end of the roll down tarp is zip tied to an 8' piece of 2" conduit.
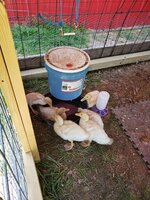
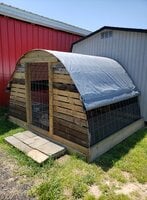
The finished coop with it's new residents. I do have a proper duck waterer in the opposite corner, they just prefer to play in the hanging waterer, hence the black rubber tub to keep them from making a massive mud hole!
