Our custom made coop needed to be modified when chicken math struck! It has been a lot of fun to piece together what has become "La Luna Amarillo". The Yellow Moon coop was so named for the paint color that was used, thank you Sherwin Williams!

We got our girls April 1st and before long they let us know "Time for a coop!"

Our original coop was built by Jeff Jicinsky of Red rooster coops, in Madison WI. Here is Jeff helping my husband load the coop into our pick up truck for the long ride home.
https://www.facebook.com/Red-Rooster-Coops-234116026712616/?ref=br_rs

I'm very happy to be riding and not driving the 5 hours back to our house in MN. Here we are almost home, when we finally got home I asked hubs to back in to the driveway ALLLLLL the way up to the house so no thieves could run off with our beautiful little coop. Although he felt no one could or would run off with it, he obliged

Prepping the location of the coop with a buried wire skirt to keep out the bad guys. I tried for level- it turned out level-ish

The original coop in its location - you can see there was a window, which got changed to hardware cloth. The original coop had no flashing on the front eave, no eave trough or rain barrel, smaller hen house, no exterior roosts... Lots of modifications to come...

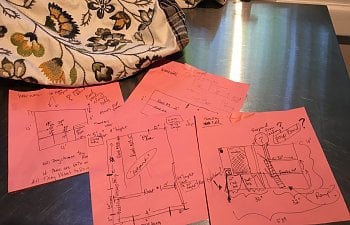
All of my planning was taken very seriously by the seat of my pants, as you can see by my super official drawn up "plans"

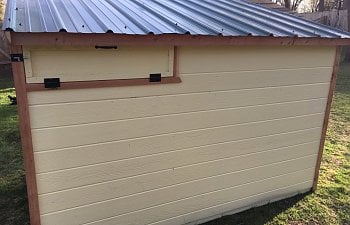
I added a scrap piece of siding and plywood floor to double the size of the hen house, you can also see the flashing is in place and i have scrap linoleum over the wire window to keep out the previous nights rain storm.

North facing side - pre eave trough and rain barrel

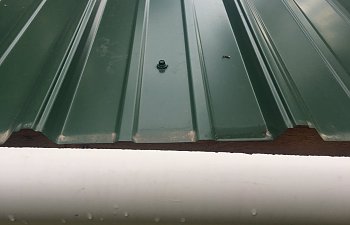
The we attached the eave trough and placed the rain barrel


West facing side has clean out access not may modifications to the exterior here beside a fresh coat of paint.

Scrap linoleum to help with clean out- here you can see the nest boxes blocked off with cardboard and the roost in its original position. This was modified once the curtains were added to the nesting boxes. With out chickens:

With Chickens:

after nesting boxes were modified and roosts added/moved

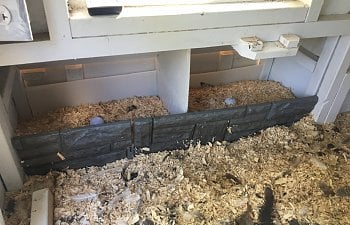
Nesting boxes have garden edging at the front to provide a "lip" and lovely pillow case curtains to provide privacy first pic shows rest for roost which was removed in the pic with the curtains


The droppings "board" in the making, I used an old tarp and some thin rope and duct tape

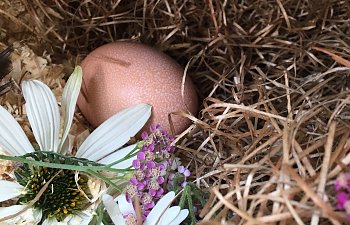
Annnnnnd.... the out side view, with our first egg! my daughter added the flower to entice the birds and it worked!


Once the extra siding and plywood floor were added the entrance ramp had to be rotated so it wasn't too steep. In this pic you can also see the run roosts that were added, the droppings "board" has since been suspended under these roosts.

Posing Pullets


 View attachment 1090384

 View attachment 1090502


We got our girls April 1st and before long they let us know "Time for a coop!"
Our original coop was built by Jeff Jicinsky of Red rooster coops, in Madison WI. Here is Jeff helping my husband load the coop into our pick up truck for the long ride home.
https://www.facebook.com/Red-Rooster-Coops-234116026712616/?ref=br_rs
I'm very happy to be riding and not driving the 5 hours back to our house in MN. Here we are almost home, when we finally got home I asked hubs to back in to the driveway ALLLLLL the way up to the house so no thieves could run off with our beautiful little coop. Although he felt no one could or would run off with it, he obliged

Prepping the location of the coop with a buried wire skirt to keep out the bad guys. I tried for level- it turned out level-ish
The original coop in its location - you can see there was a window, which got changed to hardware cloth. The original coop had no flashing on the front eave, no eave trough or rain barrel, smaller hen house, no exterior roosts... Lots of modifications to come...
All of my planning was taken very seriously by the seat of my pants, as you can see by my super official drawn up "plans"
I added a scrap piece of siding and plywood floor to double the size of the hen house, you can also see the flashing is in place and i have scrap linoleum over the wire window to keep out the previous nights rain storm.
North facing side - pre eave trough and rain barrel
The we attached the eave trough and placed the rain barrel
West facing side has clean out access not may modifications to the exterior here beside a fresh coat of paint.
Scrap linoleum to help with clean out- here you can see the nest boxes blocked off with cardboard and the roost in its original position. This was modified once the curtains were added to the nesting boxes. With out chickens:
With Chickens:
after nesting boxes were modified and roosts added/moved
Nesting boxes have garden edging at the front to provide a "lip" and lovely pillow case curtains to provide privacy
 first pic shows rest for roost which was removed in the pic with the curtains
The droppings "board" in the making, I used an old tarp and some thin rope and duct tape

Annnnnnd.... the out side view, with our first egg! my daughter added the flower to entice the birds and it worked!
Once the extra siding and plywood floor were added the entrance ramp had to be rotated so it wasn't too steep. In this pic you can also see the run roosts that were added, the droppings "board" has since been suspended under these roosts.
Posing Pullets

