Well, having been 'volunteered' to do a hatching project/unit with my son's 2nd grade class, I figured another incubator was needed, since my first cooler model (the Rubber-chicken-a-bator) is busy brooding my silky eggs from Jen.
(read all about that one here: https://www.backyardchickens.com/forum/viewtopic.php?id=19675)
Sooo, out to find more stuff to make a new bator.
Here's the parts list:
Gott 34 Qt cooler - same size and shape as my Rubber maid cooler I used for the first one - $6 at the Salvation Army Store
single pole water heater thermostat: $9
Light kit $6 ($1 at walmart than Lowes!)
12V DC adapter (free - scrounged from set of old PC speakers)
PC Fan (free - stopped by a computer repair shop to pick up a used one cheap, and they gave it to me!)
60 wt light bulb
cheapo metal baking pan ($1 at dollar store)
Water snake (with cute ducks... $1 at dollar store)
Indoor/outdoor thermo $11 at walmart (again, $1 cheapter than Lowes!)
Humidity guage - $6 at pet store.
Hardware cloth - left overs around the house
Glass for viewing window - $2 picture frame at Dollar General
Total so far....
$42.
Now, if it was for my own use, that'd be the total... BUT this is for the school classroom.
I thought about turners for a while - and decided that an auto turner would be best for several reasons - firstly, I didn't want to have to pick up and take the incubator home every night to turn the eggs - not only for inconvience, but for the variation in temps.
Secondly, I thought it probably best if the kids didn't handle the eggs to turn them for several reasons - viruses, breakage potential, lid open too long, etc. So, I broke down and got the $42 little giant egg turner from Tractor Supply.
So, my total cost is more like $80 - comparable to just buying the LG and turner in the first place, but building our own is so much more fun!
Here's what I did...
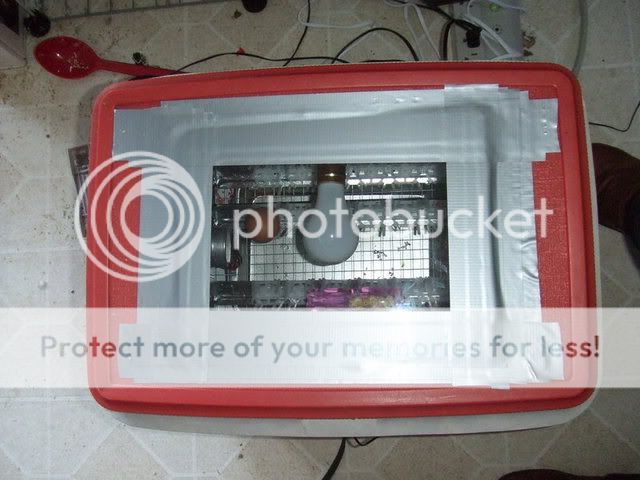
Used a drill and drywall saw to cut a viewing hole in the top. I made this one slightly smaller than 8.5x11" since it is for the school.
Drilled 3/8" holes in the bottom, below the wire grid level for ventilation - 3 on either long side of the cooler.
Drilled 3/4" holes in the front for humidity control.
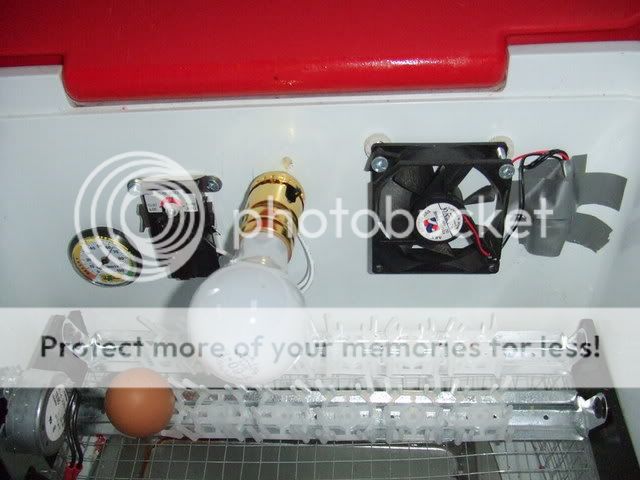
Drilled hole for the light kit through the back wall. Mounted light and wired thermostat.
Got fancy this time - used screws to attach the thermostat to the side wall of the cooler, near the bulb. Also mounted PC fan with screws and drilled small hole to pass the wire through near the fan. I mounted the light higher in the cooler than my first one. Will also put on a light guard when I remove the turner and set the eggs for hatching.
Made a custom fit shelf out of the hardware cloth tall enough to fit over the pan for the water in the bottom.
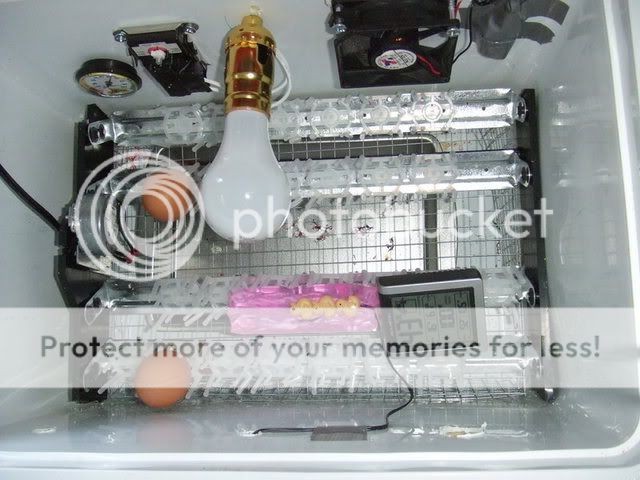
Cut down the egg turner so it will fit. I carefully hacksawed off the last tray on either side of the turner, as close as I could get to the center without disrupting the mechanism of the next tray over.
You can see the turner in the pics. The two eggs in there were for testing to see if the turner would work OK with the eggs in it without tumbling them out or hitting on the side of the cooler. I found that in reality I can't use BOTH of the outside racks - the fit is just too tight. BUT I can use 3 of the 4 trays so I can get 22 eggs in the turner, which is a gracious plenty for me.
So far, so good - I don't know if it is the higher bulb, or the way I have the thermostat and fan screwed into the side wall rather than just resting on the grid but the adjustment took only a couple of tweaks to get it in the right range.
Now for the pics:
A view of the finished 'GOTT EGGS' model from the top:

A view of the back wall with the components attached:
A view of the whole inside setup with the turner:
I'm waiting to hear back from the teacher to find out when she wants to do the unit. I'll keep you all posted on how it goes...
(read all about that one here: https://www.backyardchickens.com/forum/viewtopic.php?id=19675)
Sooo, out to find more stuff to make a new bator.
Here's the parts list:
Gott 34 Qt cooler - same size and shape as my Rubber maid cooler I used for the first one - $6 at the Salvation Army Store
single pole water heater thermostat: $9
Light kit $6 ($1 at walmart than Lowes!)
12V DC adapter (free - scrounged from set of old PC speakers)
PC Fan (free - stopped by a computer repair shop to pick up a used one cheap, and they gave it to me!)
60 wt light bulb
cheapo metal baking pan ($1 at dollar store)
Water snake (with cute ducks... $1 at dollar store)
Indoor/outdoor thermo $11 at walmart (again, $1 cheapter than Lowes!)
Humidity guage - $6 at pet store.
Hardware cloth - left overs around the house
Glass for viewing window - $2 picture frame at Dollar General
Total so far....
$42.
Now, if it was for my own use, that'd be the total... BUT this is for the school classroom.
I thought about turners for a while - and decided that an auto turner would be best for several reasons - firstly, I didn't want to have to pick up and take the incubator home every night to turn the eggs - not only for inconvience, but for the variation in temps.
Secondly, I thought it probably best if the kids didn't handle the eggs to turn them for several reasons - viruses, breakage potential, lid open too long, etc. So, I broke down and got the $42 little giant egg turner from Tractor Supply.
So, my total cost is more like $80 - comparable to just buying the LG and turner in the first place, but building our own is so much more fun!
Here's what I did...
Used a drill and drywall saw to cut a viewing hole in the top. I made this one slightly smaller than 8.5x11" since it is for the school.
Drilled 3/8" holes in the bottom, below the wire grid level for ventilation - 3 on either long side of the cooler.
Drilled 3/4" holes in the front for humidity control.
Drilled hole for the light kit through the back wall. Mounted light and wired thermostat.
Got fancy this time - used screws to attach the thermostat to the side wall of the cooler, near the bulb. Also mounted PC fan with screws and drilled small hole to pass the wire through near the fan. I mounted the light higher in the cooler than my first one. Will also put on a light guard when I remove the turner and set the eggs for hatching.
Made a custom fit shelf out of the hardware cloth tall enough to fit over the pan for the water in the bottom.
Cut down the egg turner so it will fit. I carefully hacksawed off the last tray on either side of the turner, as close as I could get to the center without disrupting the mechanism of the next tray over.
You can see the turner in the pics. The two eggs in there were for testing to see if the turner would work OK with the eggs in it without tumbling them out or hitting on the side of the cooler. I found that in reality I can't use BOTH of the outside racks - the fit is just too tight. BUT I can use 3 of the 4 trays so I can get 22 eggs in the turner, which is a gracious plenty for me.
So far, so good - I don't know if it is the higher bulb, or the way I have the thermostat and fan screwed into the side wall rather than just resting on the grid but the adjustment took only a couple of tweaks to get it in the right range.
Now for the pics:
A view of the finished 'GOTT EGGS' model from the top:
A view of the back wall with the components attached:
A view of the whole inside setup with the turner:
I'm waiting to hear back from the teacher to find out when she wants to do the unit. I'll keep you all posted on how it goes...
Last edited:

